By default, all WHM/cPanel services use a self-signed certificate, and you get a warning while using any secured services like cPanel and webmail access, etc. To vanish the self-signed SSL certificate error, you will have to install a trusted SSL certificate in the WHM/cPanel server.
The following are the steps to do it.
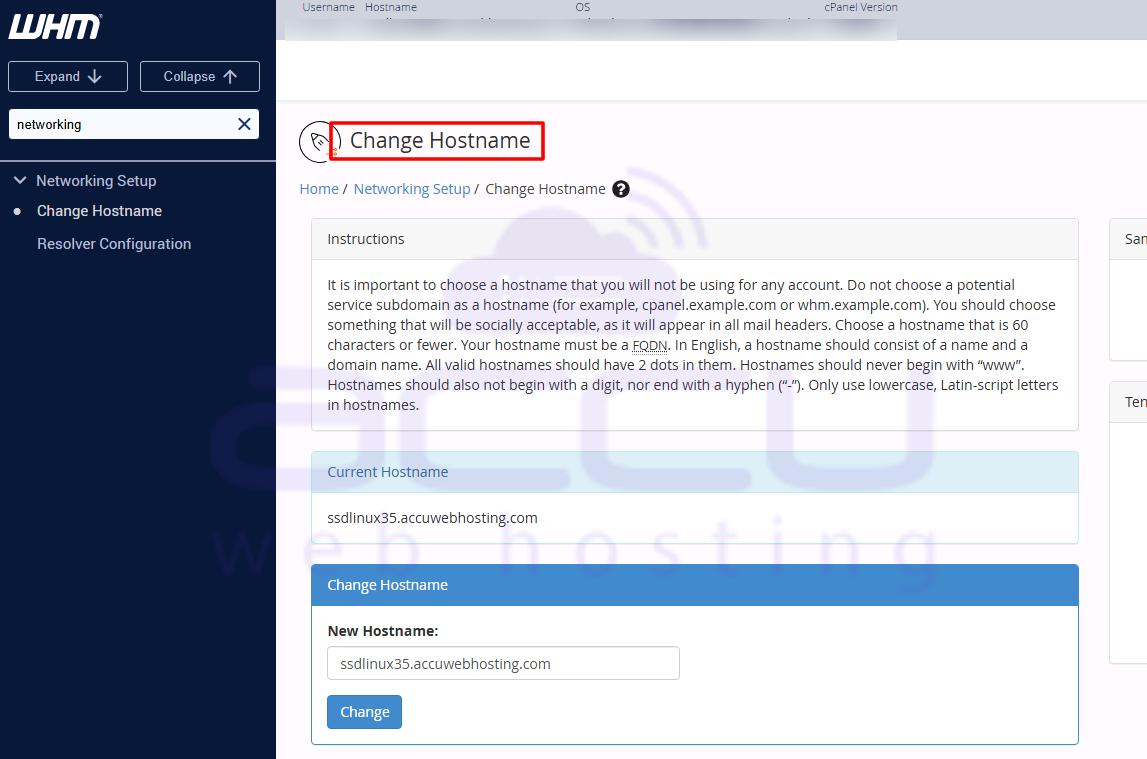
Step 1: Determine System Hostname
First, we will determine the current system hostname upon which we can generate the CSR key. After logging into WHM, navigate to Networking setup >> Change Hostname.

Step 2: Generate CSR (Certificate Signing Request)
To create a CSR key on the hostname of the server, refer to our article here. While you follow the steps to create a CSR key, make sure you use the server’s hostname obtained in the previous step instead of the domain name.
Step 3: Obtain the SSL Certificate
Once you generate the CSR key on the hostname of the server, purchase a trusted certificate from any certificate authority. If you wish, you can also purchase the SSL certificate from AccuWebHosting.
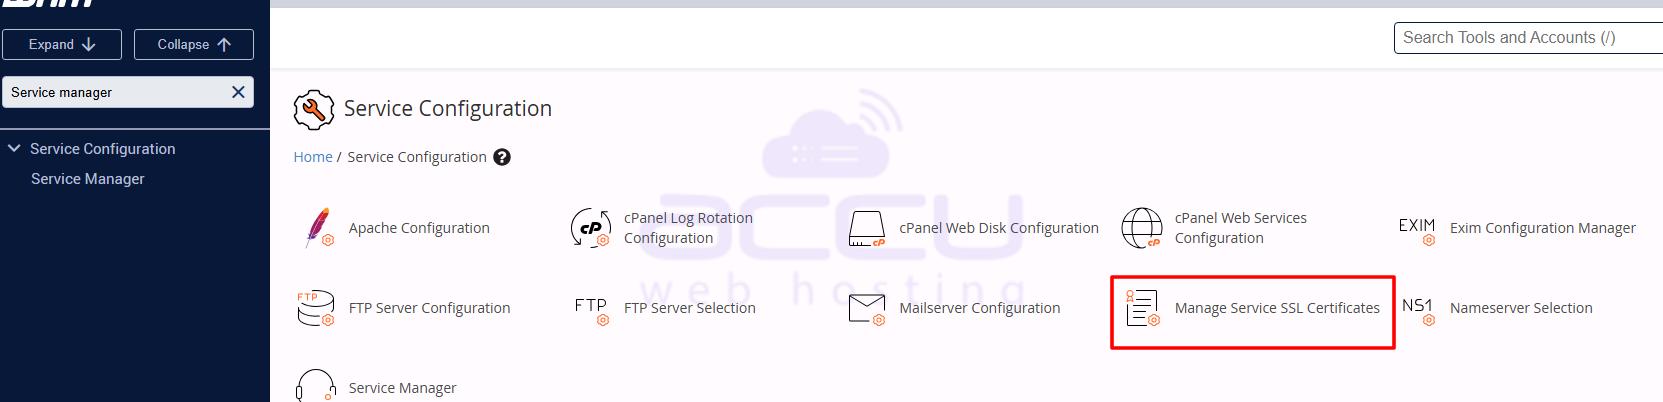
Step 4: Install Certificate in WHM
After receiving a valid certificate, log in to WHM. Navigate to Service Manager >> Manage Service SSL Certificates. On this page, you will see a list of cPanel services, upon which you can install SSL certificates.
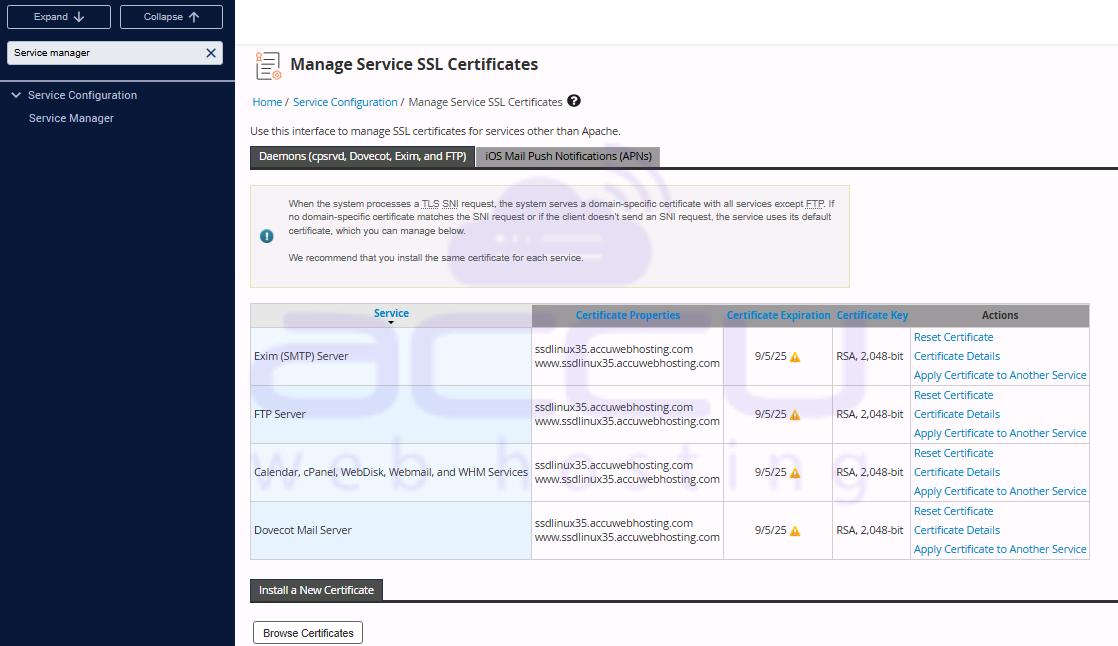
Under Install new Certificate, select all services for which you need to install a certificate, and paste the certificate in the Certificate section. Click on Autofill by Certificate, and WHM will automatically fill up the private key and Certificate Authority Bundle in the corresponding boxes. Click on the Install button.

Once you finish the installation, cPanel will prompt for a restart cPanel service. Just click on the Proceed button. You can follow the above instructions for any service listed on the Manage Service SSL Certificates page.
Looking to set a secure seal on your website? Click on SSL > Secure Seal for more details.
