Overview:
This guide will show how you can create a Plan in the Webuzo admin/reseller panel, which can be assigned to users while adding/editing them. A plan is useful when you want to create multiple users with the same set of resource assignments, like Disk space, Bandwidth, inodes, MySQL database limits, FTP account limits, etc., so you can just select a plan while adding a user to assign the selected resource restrictions.
Procedure:
A Plan can be created when you are logged into the Webuzo panel as root or a reseller user.
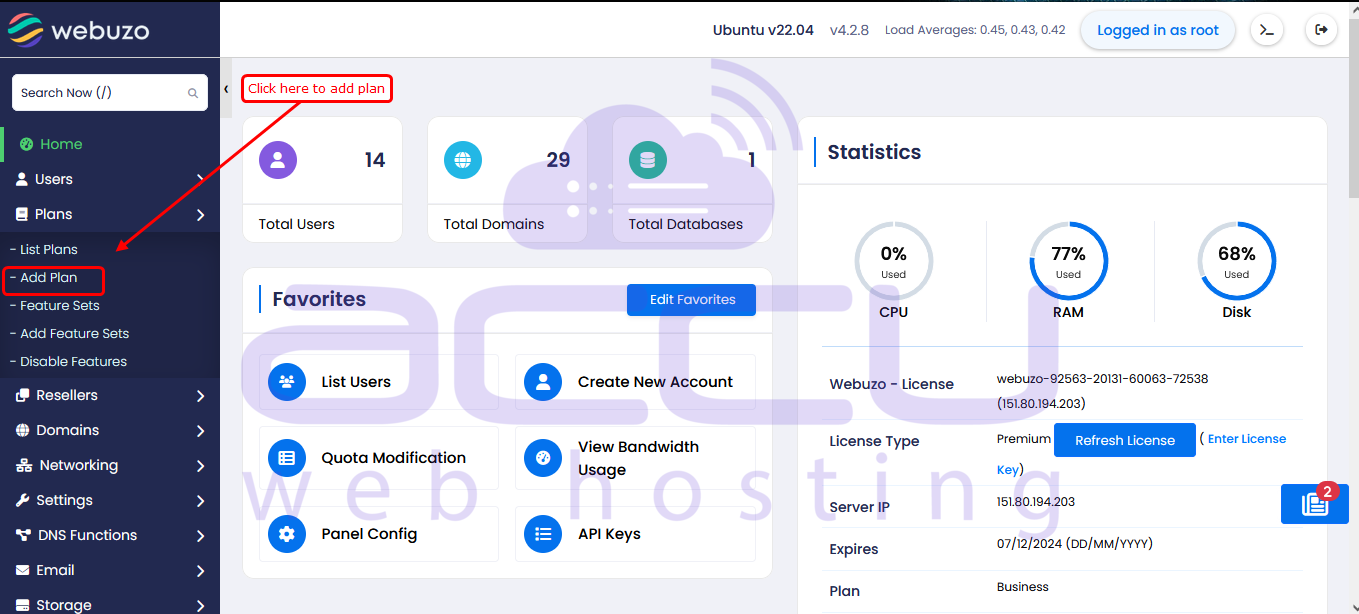
1) Log in to your Webuzo admin panel (e.g. https://hostname.com:2005) and go to the Add Plan page under the Plans section in the left menu, as shown in the screenshot below:
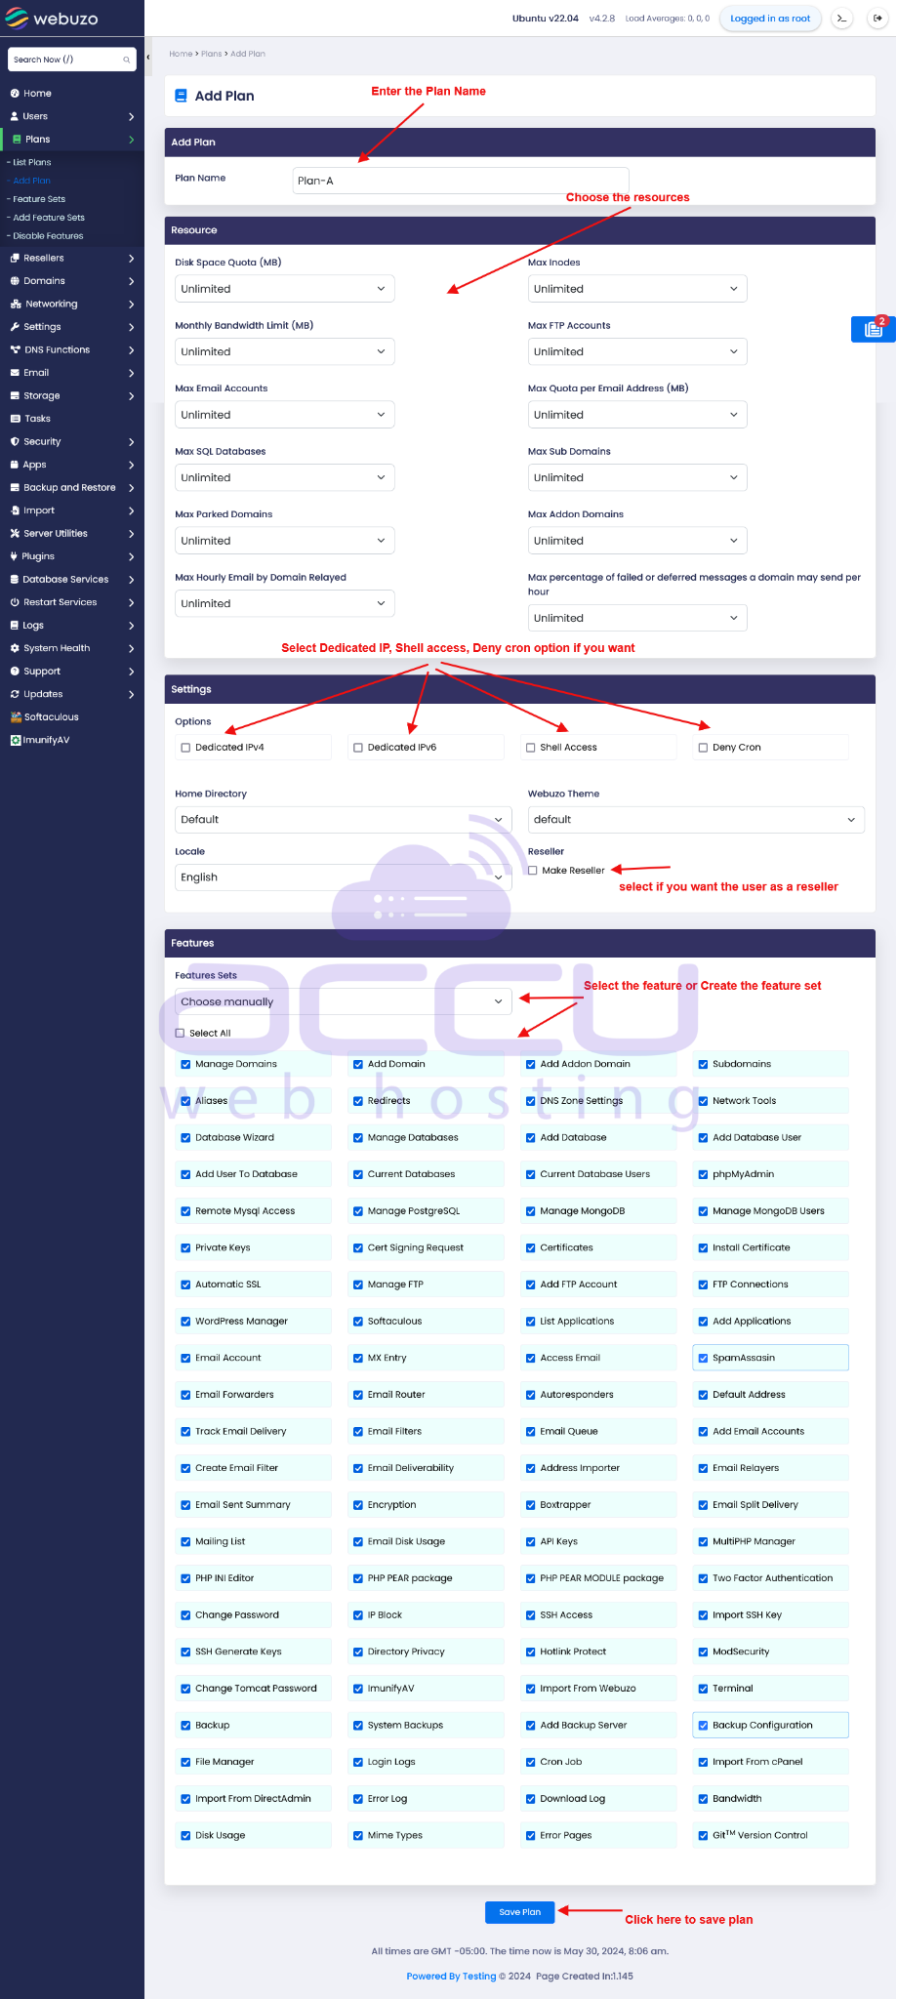
2) This will take you to the Add Plan page, where you can choose the Plan Name, Assign Resources and much more.
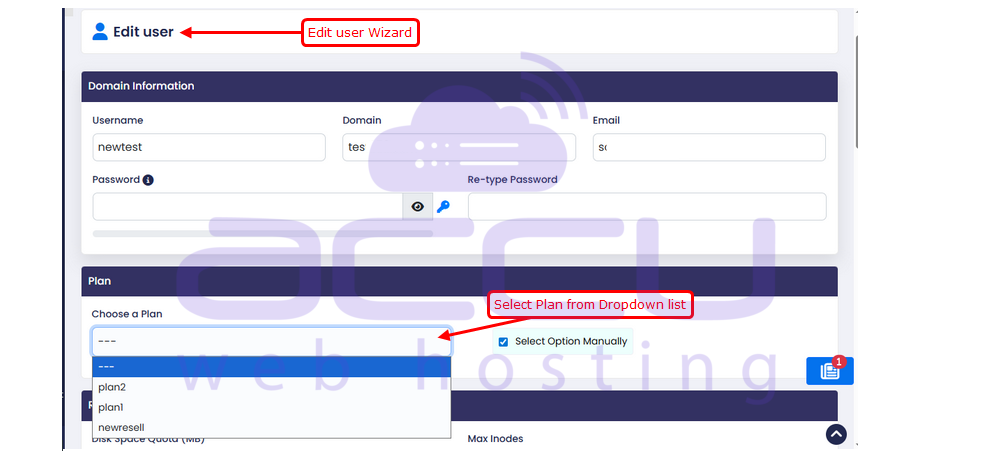
3) Once you have created the plan, you can assign the plan while adding/editing from the list Admin panel >> list user >> edit user as shown in the screenshot below:
Conclusion:
In conclusion, creating and managing plans in Webuzo is a smart way to standardize resource allocation, save time, and scale user management efficiently. By defining clear limits and reusing configurations, you reduce manual work, avoid errors, and keep your hosting environment clean, consistent, and easy to control.


