If you have a dedicated server, VPS, or reseller hosting, you may need to edit disk space for a single Webuzo account without changing the package assigned to the account. Our tutorial will show you how to modify the disk space for a specific Webuzo user account in the Webuzo control panel.
Steps to set disk space limit.
1) Log In to Webuzo Admin Panel.
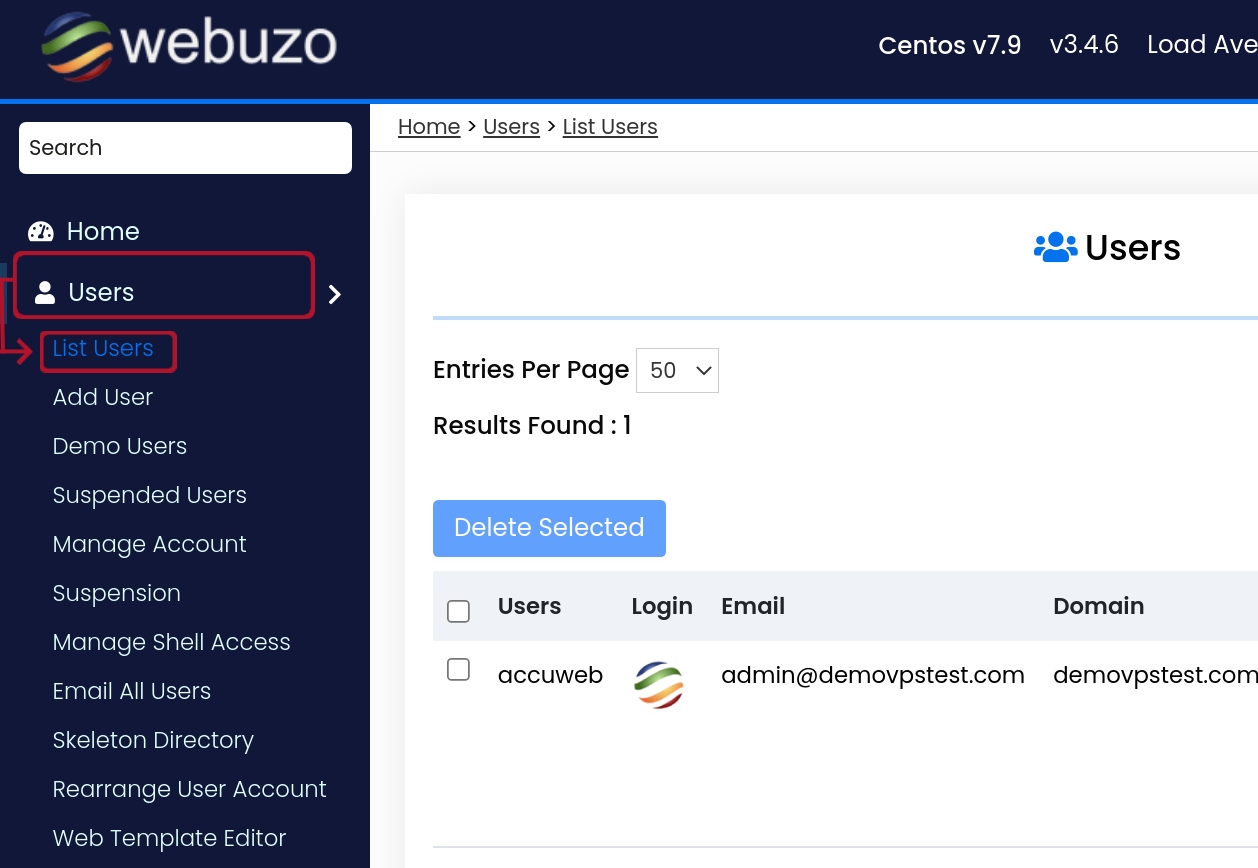
2) Select List Users from the Users section in the navigation menu.
3) To edit a user account's disk space limit, click the pencil icon.

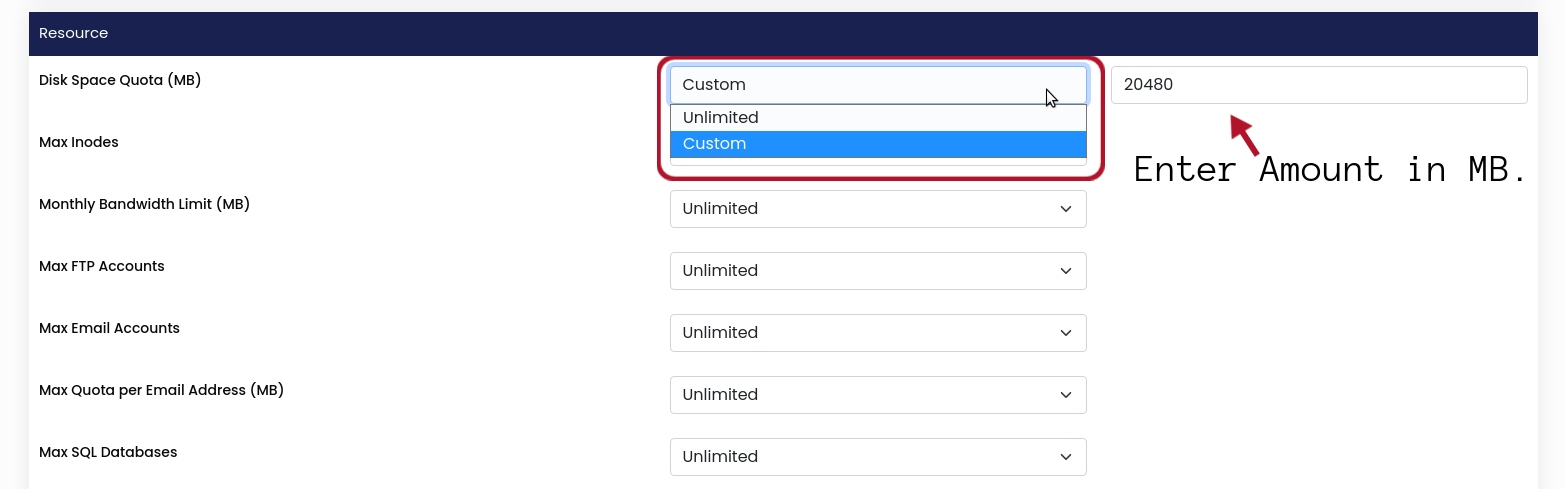
4) To set a disk space quota for your account, scroll down to the Resource section and click on the dropdown of Disk Space Quota.
Two options will be displayed: Unlimited and Custom.
5) Select the Custom option. You will see a text box next to it.
6) Now, you will need to scroll down to the end of the page and click on the Save User button. You will see the message "The User has been saved successfully" once the process is completed.
Your changes should take effect immediately. You can check the allocated disk space from the List user section.
That's it!


