
The DBD::mysql module helps Perl programs talk to MySQL databases. You might sometimes need to install or fix this module if you're using a cPanel server with WHM access.
There are two ways to install the DBD::mysql module on a WHM server:
1. Using the WHM panel, and
2. Using the terminal.
This article explains both methods, so you can pick the one that works best for you.
Method 1: Install Using WHM (Web Interface)
Follow these steps to install the module through WHM:
Step 1: Log in to your WHM panel.
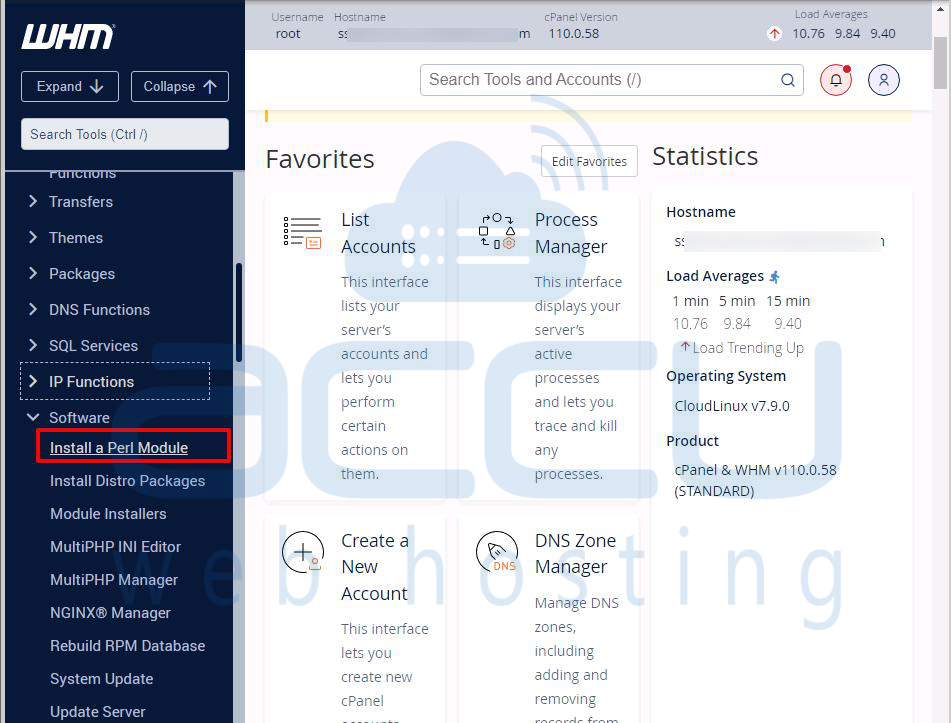
Step 2: Go to the Software section and click "Install a Perl Module."
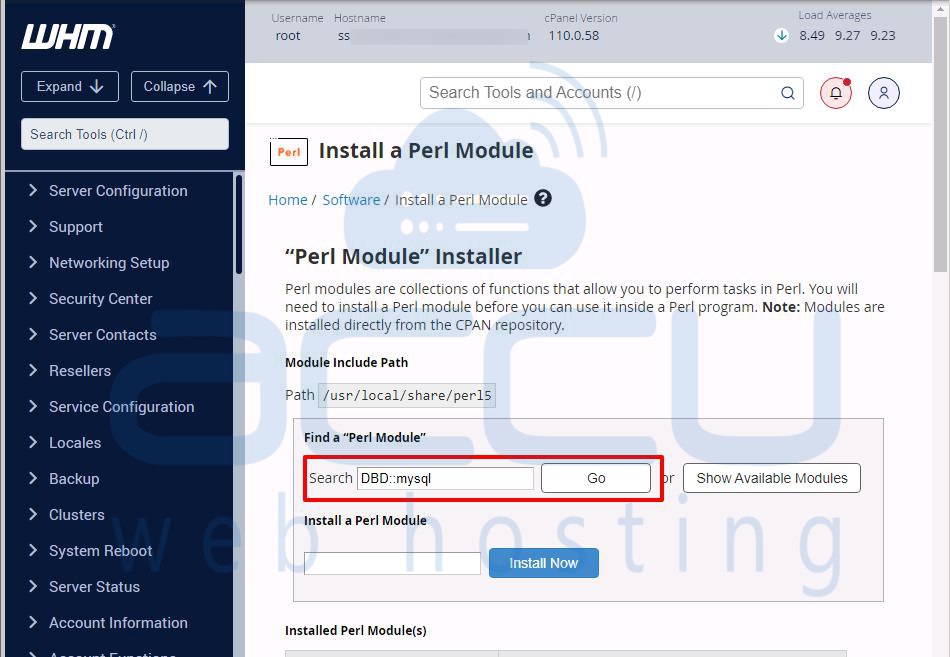
Step 3: In the search box, type DBD::mysql and press Go.
Step 4: When you see it in the list, click Install.
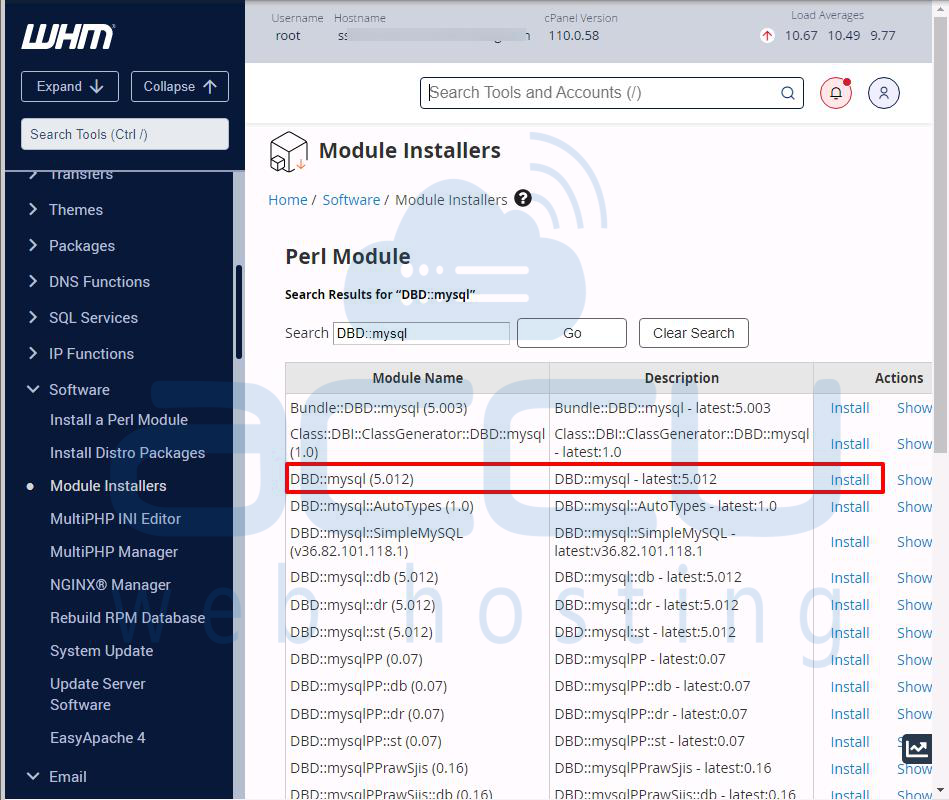
WHM will automatically download and install the module with everything it needs.
After it's done, you’ll see a message confirming the installation.
Method 2: Install Using the Terminal (Command Line)
Sometimes it’s faster or necessary to use the command line, especially if there are problems.
Step 1: Connect to your server using SSH as root:
Step 2: Install needed system packages:
# yum install -y perl-CPAN gcc mysql-devel make
On AlmaLinux or RHEL, use dnf if yum doesn’t work.
Example:
# dnf install -y perl-CPAN gcc mysql-devel make
Step 3: Open the CPAN shell:
Install the module:
Inside the CPAN prompt, type:
# install DBD::mysql
Follow the prompts and press Enter to accept the default options.
Check if It’s Installed
To make sure the module was installed properly, run:
# perl -MDBD::mysql -e1 && echo "DBD::mysql is installed successfully!"
Conclusion:
Installing the DBD::mysql Perl module is simple, whether you use WHM or the terminal. This module is important if your Perl scripts need to work with MySQL databases.