A cloned website is an exact copy of a site hosted on your web hosting server. It includes the same files and an identical database, with the only difference being its location—whether on a different domain or directory.
Cloning websites on your cPanel server can be useful for several reasons. Since the copies mirror the original site, this process is ideal for setting up testing and staging environments. It also provides a quick way to launch a new website using an existing one as a template. Many site owners use cloned sites to allow developers and designers to work in an environment that replicates the live site.
cPanel & WHM streamline the process, making it easier to clone websites without the complexities of manual duplication.
Method 1: Clone a WordPress Site with WP Toolkit
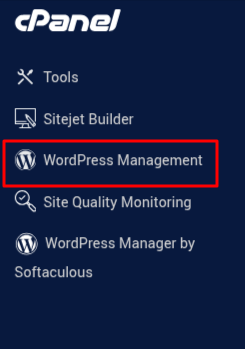
- Log in to your cPanel account provided by your hosting provider.
- Click on WordPress Management in the left sidebar.
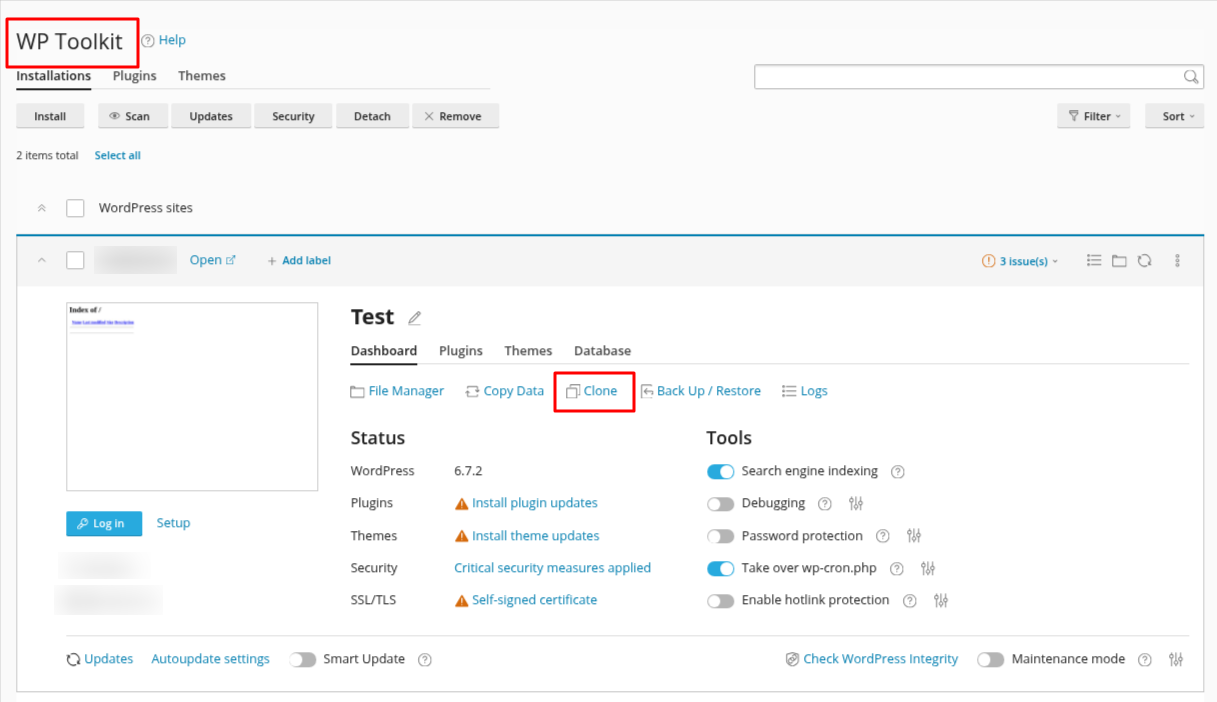
- Now, the WP Toolkit is open. Click on Clone on your website.
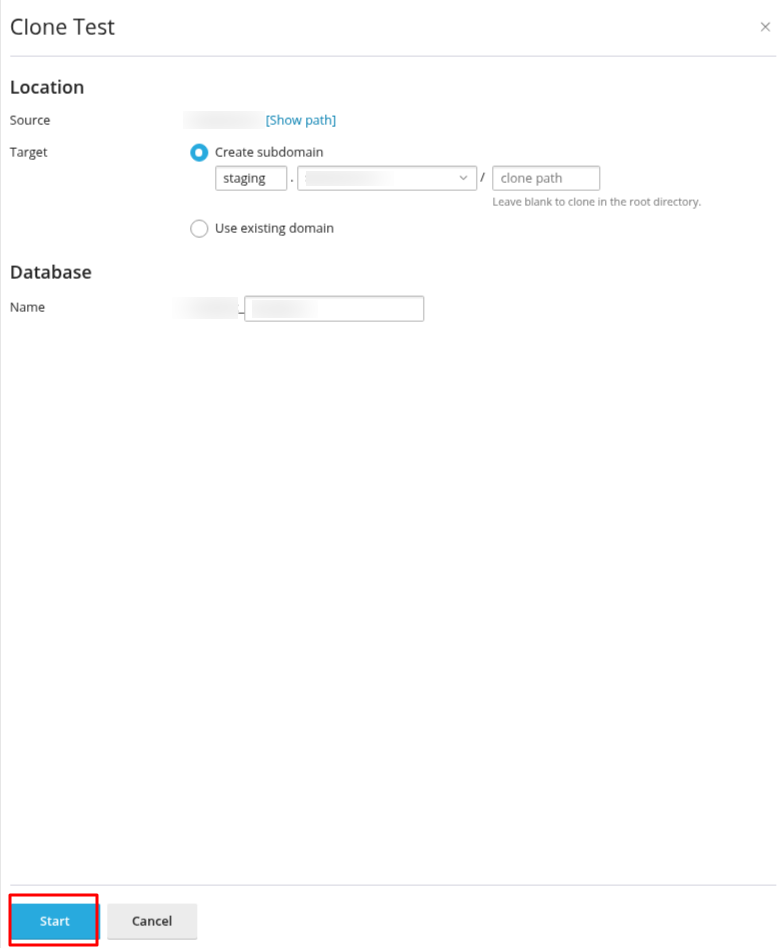
- Once the Clone Tool opens, you'll need to select a subdomain and a path where the cloned site will be stored.
- If the subdomain and path already exist, simply select them from the available options.
- If they don’t exist, WP Toolkit will automatically create them for you based on your selection.
- After making your choices, scroll down and click the Start button to begin the cloning process.
Once done, you can access the cloned site instantly.
Method 2: Manually Clone a Website in cPanel
This method can be used for any type of website, but requires more technical knowledge.
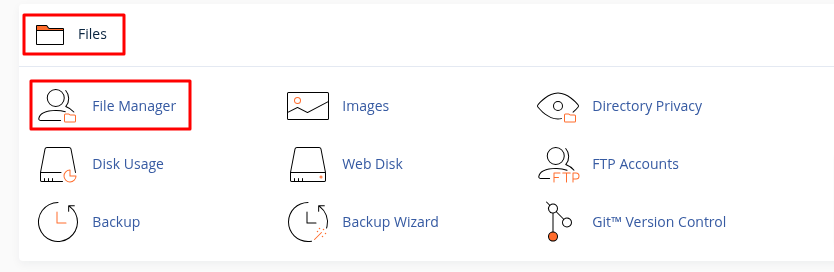
- Open File Manager from the Files section.
- Locate the directory containing the WordPress site you want to clone.
- Click Copy in the toolbar.
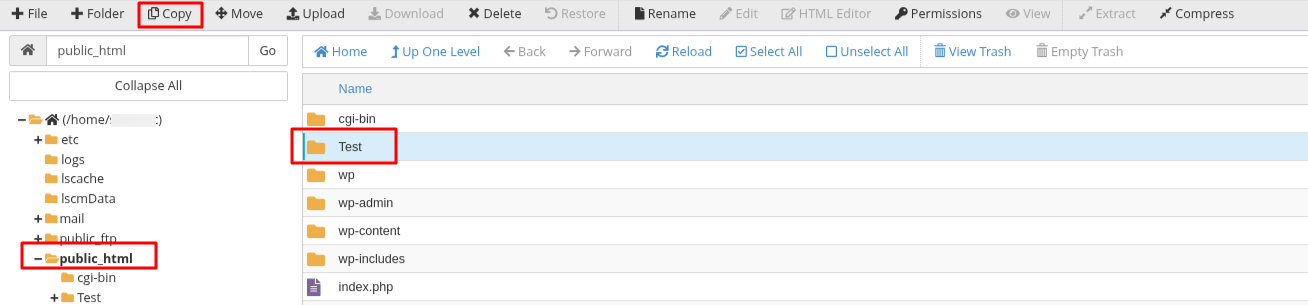
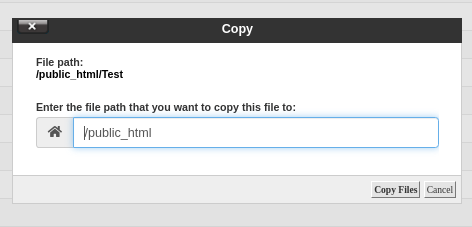
- Enter a name for the new directory.
- Click Copy Files to create an exact duplicate of the original site’s files. (Preserve file permissions during the copy.)
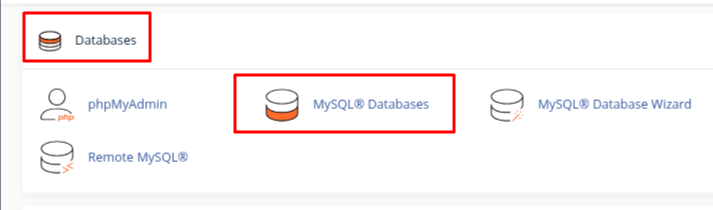
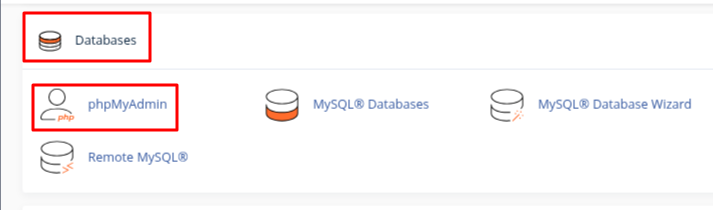
- Now Open MySQL Databases from the Databases section.
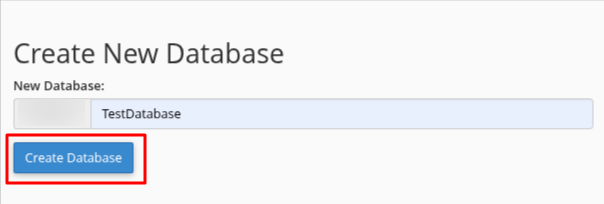
- Under Create New Database, enter a name for the new database.
- Click on Create Database.
- Then, Open phpMyAdmin from the Databases section.
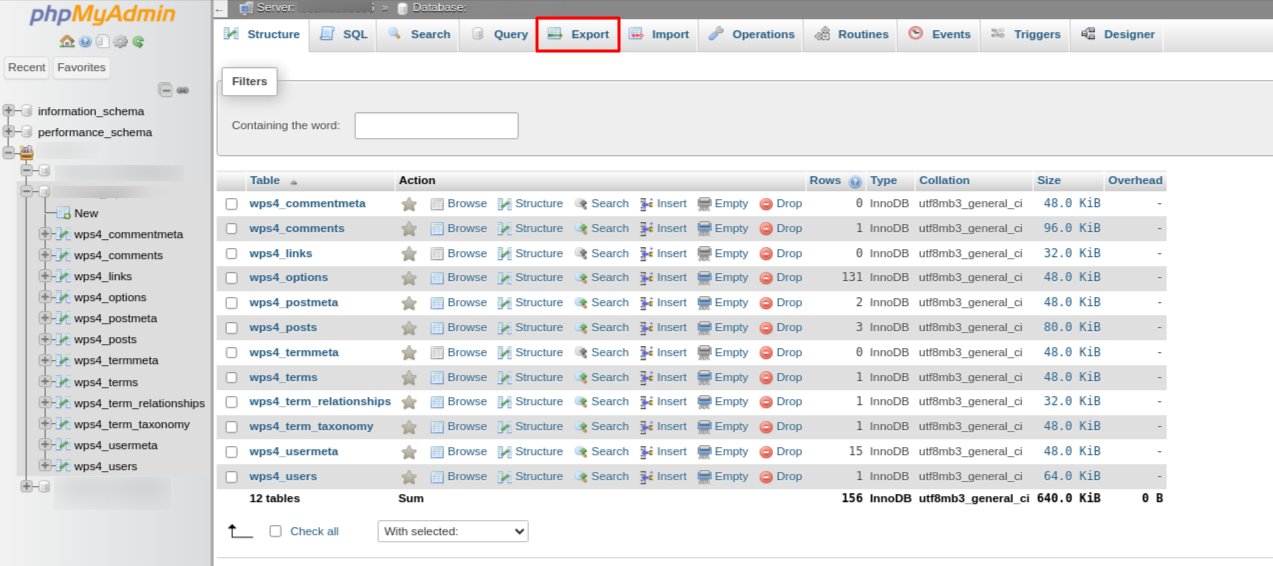
- Select the original database from the sidebar.
- Click the Export tab.
- Choose the Quick export method and click Export.
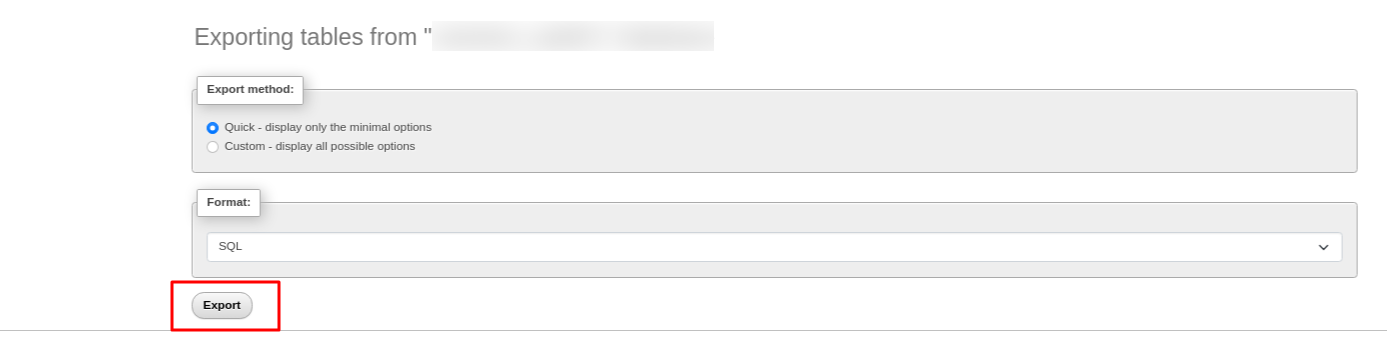
- An SQL file will be downloaded to your computer.
- Now, open phpMyAdmin and select the new database that we created earlier.
- Click the Import tab.

- Under File to import, click Choose File and upload the SQL file.
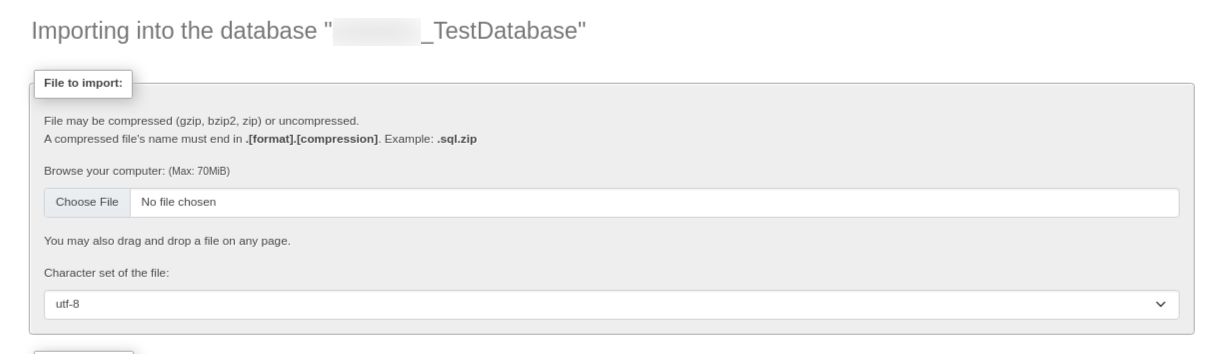
- Click Import to complete the import process.
- Now Open MySQL Databases from the Databases section.
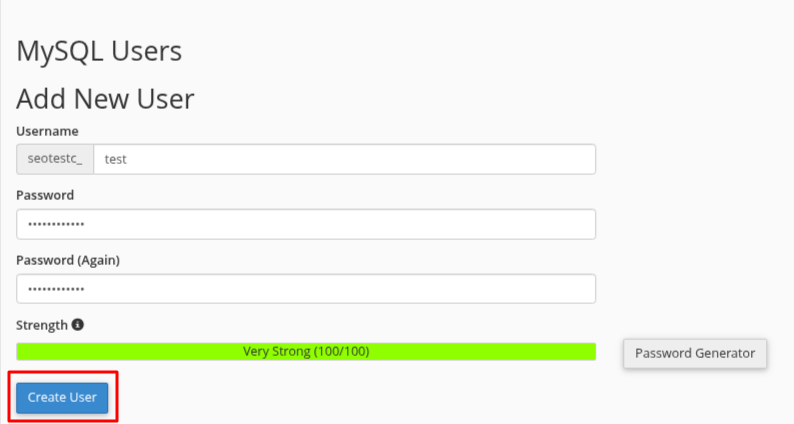
- Scroll to Add New User.
- Enter a username and a strong password.
- Click Create User.
- Under Add User to Database, select the new user and the new database.
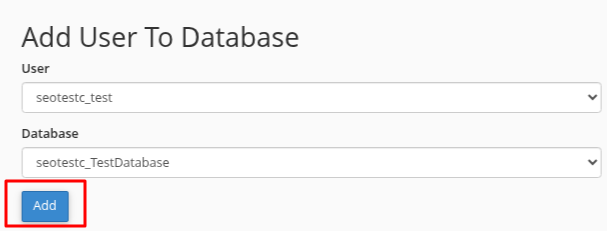
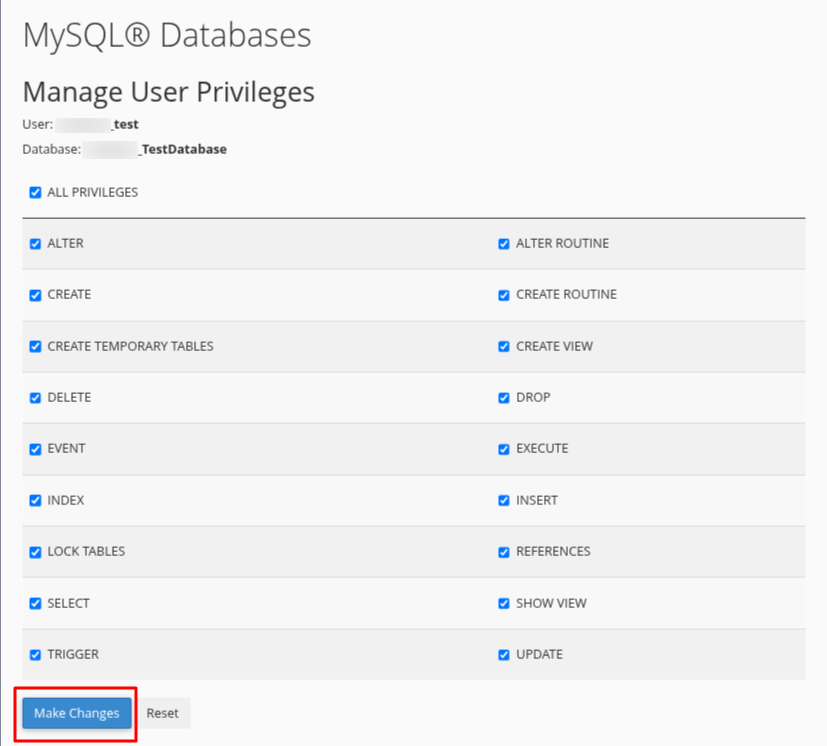
- Click Add, select All Privileges, and confirm the changes.
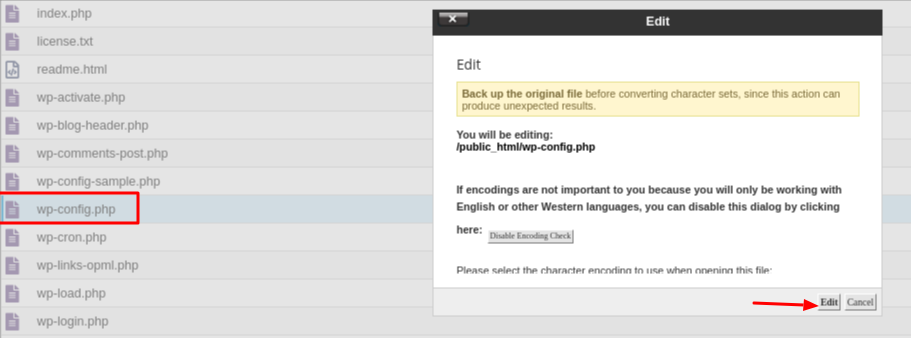
- Open File Manager and go to the new site’s directory.
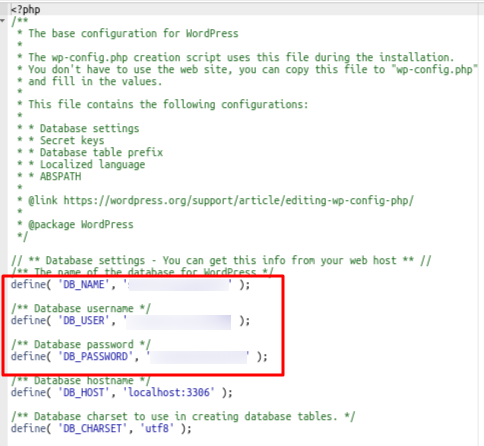
- Select wp-config.php and click Edit.
Update the following fields in the MySQL settings section:
- DB_NAME → Enter the new database name.
- DB_USER → Enter the new database user.
- DB_PASSWORD → Enter the new database password.
- At the bottom of the file, add the following lines to update the site’s URL:
define( 'WP_HOME', 'http://yournewwebsite.com' );
define( 'WP_SITEURL', 'http://yournewwebsite.com' );
- Just replace yournewwebsite.com with your actual new website URL.
Click Save Changes to apply the updates.
Post-Cloning Steps: Essential Fixes
After cloning your site, follow these steps to ensure it functions correctly:
1. Update Database URLs (For WordPress)
- phpMyAdmin: Use "Search and Replace" to update old URLs in wp_options, wp_posts, and wp_postmeta.
- Plugin Option: Install "Search & Replace" to automate this process.
2. Copy .htaccess (If Using Custom Permalinks)
- Copy .htaccess from the original site’s directory to the cloned site’s directory.
3. Install SSL Certificate (If HTTPS is Used)
- Obtain and install an SSL certificate via cPanel → SSL/TLS Manager or through your hosting provider.
4. Update DNS (If Cloning to a New Domain)
- Adjust nameservers or A records to point the domain to the correct server.
5. Test the Cloned Website
- Check all links, pages, images, forms, and the WordPress admin panel to ensure full functionality.
6. Strengthen Security
- Change WordPress admin, database, and FTP passwords.
- Verify file permissions in cPanel → File Manager.
Important Notes
- Backup First: Always back up your site and database before cloning.
- Original Site Stays Unchanged: Cloning creates a separate copy.
- Ask for Help if Needed: Contact your hosting provider or a developer for assistance.
Cloning a website in cPanel provides an efficient way to create an exact copy of an existing site for testing, staging, or launching a new project based on a proven template. Whether using WP Toolkit for a quick, automated process or manually duplicating files and databases, cPanel simplifies the cloning process.
Following these steps allows you to replicate a WordPress site with minimal effort while ensuring that the cloned version operates independently with its own database and configuration. This method allows developers and site owners to test updates, redesigns, and new features without affecting the live website.
