Security is one of the most important parts of a server. WHM (Web Host Manager) takes security seriously, and in this tutorial, we’ll discuss one of its key tools: cPHulk Brute Force Protection. This feature helps protect your server from brute force attacks, where hackers try many passwords automatically to guess the right one and gain access.
cPHulk monitors several services, such as cPanel, WHM, mail (IMAP and Exim), FTP, and SSH, to block such attacks. If cPHulk blocks an IP address, it won’t be able to log in to these services, even with the correct username and password, until the block is removed. Now, let’s see how it works!
Things to Consider Before Enabling cPHulk for Brute-Force Detection
1. Whitelist Your IP Address
- Add your IP address to the whitelist before enabling cPHulk.
- If you don’t, cPHulk could block your IP and prevent root login after too many failed attempts.
- If your IP gets blocked and isn’t whitelisted, you must contact Support to unblock it.
If Root Access Gets Blocked
- If your IP is whitelisted, you can use SSH to log in, disable cPHulk, and restart the service.
- If your IP is not whitelisted, contact AccuWebhosting Support, available 24/7/365, for help.
Accessing the cPHulk Brute Force Protection Feature
First, log into your WHM account on your VPS or Dedicated Server. In the search box, type “cphulk” and click the cPHulk Brute Force Protection link under the Security Center section.
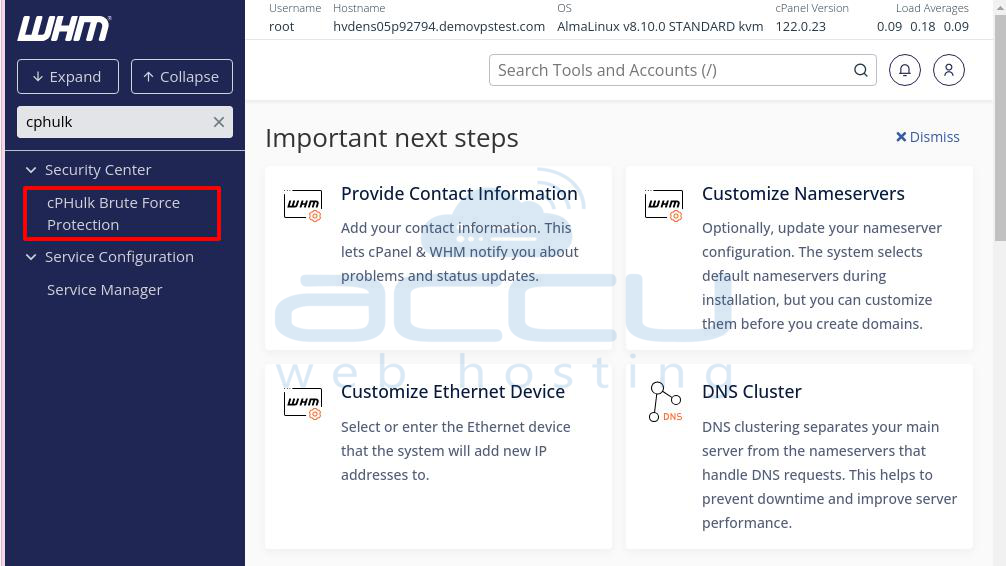
When the option appears below the search bar, click on it to open the cPHulk Brute Force Protection page.
Configuring and Managing the cPHulk Service
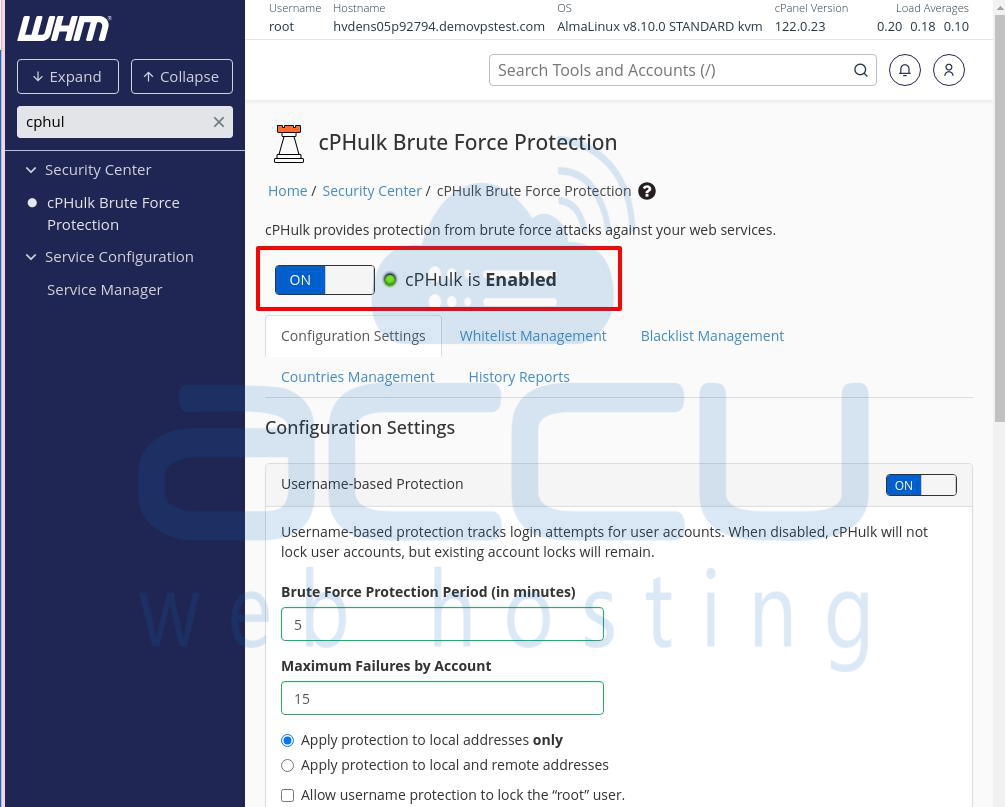
On the cPHulk page, you’ll see a large toggle switch under the message: “cPHulk protects from brute force attacks against your web services.” You can use this switch to turn cPHulk on or off.
Below the switch, there are five tabs:
Configuration Settings
Whitelist Management
Blacklist Management
Countries Management
History Reports
Since the Configuration Settings tab is selected by default, we’ll start with that one.
The Configuration Settings Tab
In this section, you’ll find two main types of protection: Username-based Protection and IP Address-based Protection, along with some other settings. Let’s go through them step by step.
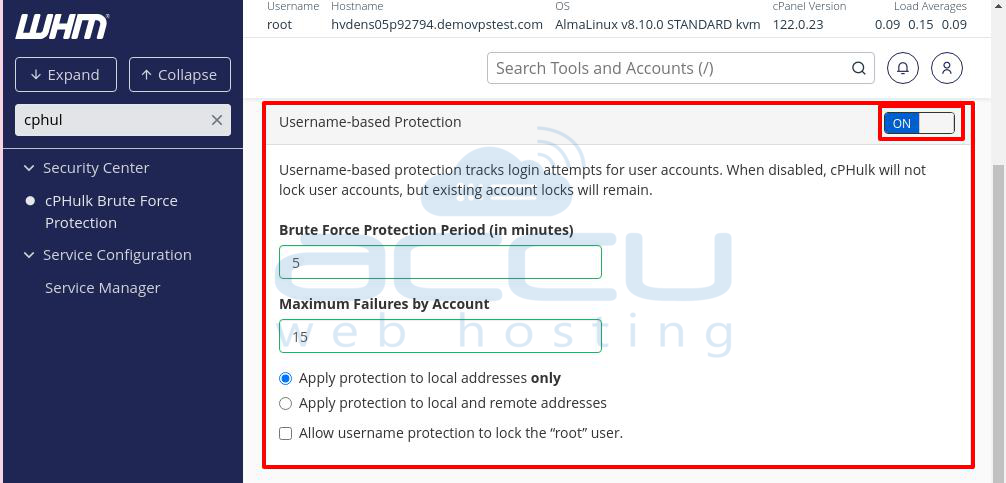
Username-based Protection
This section tracks login attempts for specific user accounts. You’ll see a toggle switch on the top right to enable or disable this feature. If disabled, cPHulk will stop blocking users, but any existing blocks will remain until manually removed.
Here are the key settings:
Brute Force Protection (in minutes): Enter the time period (in minutes) during which cPHulk monitors failed login attempts. If someone keeps failing to log in within this time and reaches the maximum failure limit, their account will be locked, blocking access from all IPs.
Maximum Failures By Account: Enter the number of failed login attempts allowed before the account is locked.
Apply protection to local addresses only: This option limits protection to internal system requests only, preventing users from attacking other accounts on the same server.
Apply protection to local and remote addresses: This option enables protection for both internal and external login attempts.
Allow username protection to lock the “root” user: Select this checkbox to allow the root user to be locked if login attempts fail repeatedly.
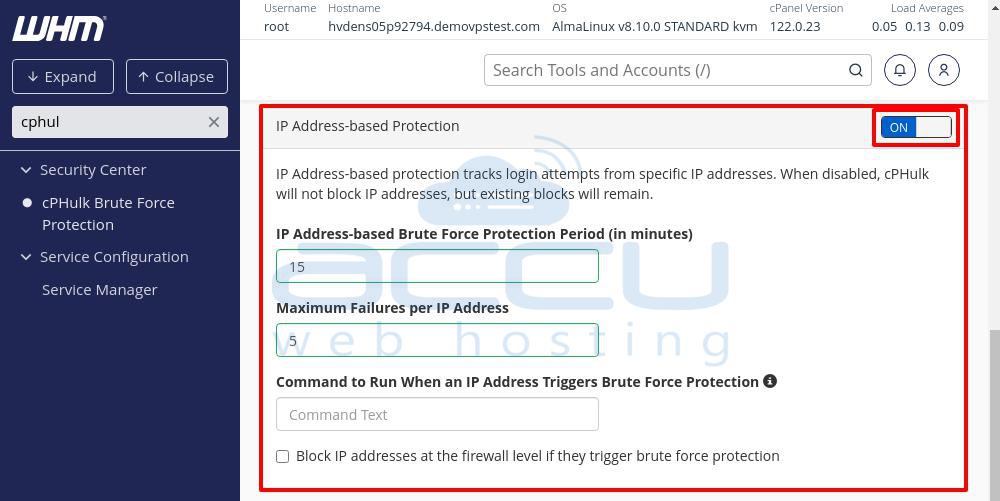
IP Address-based Protection
This section monitors login attempts from specific IPs. You can enable or disable it using the toggle switch in the top right corner. When disabled, cPHulk stops blocking IPs, but existing blocks remain until removed manually.
Key settings:
IP Address-based Brute Force Protection Period (in minutes): Enter the time period during which login attempts from the same IP are tracked. If multiple failed attempts happen within this period, the IP may get blocked.
Maximum Failures Per IP Address: Enter the number of failed attempts allowed before an IP is blocked. Setting this to 0 will block all login attempts (including from the root user), so it’s recommended to whitelist your IP.
Command to Run When an IP Address Triggers Brute Force Protection: You can enter a command here that runs each time an IP is blocked. Click the info icon to see available variables for the command.
Block IP Addresses at the Firewall Level: If you have a firewall, you can select this checkbox to block IPs at the firewall level, preventing them from accessing the server entirely.
One-day Blocks
This section works similarly to IP-based protection but applies a 24-hour block.
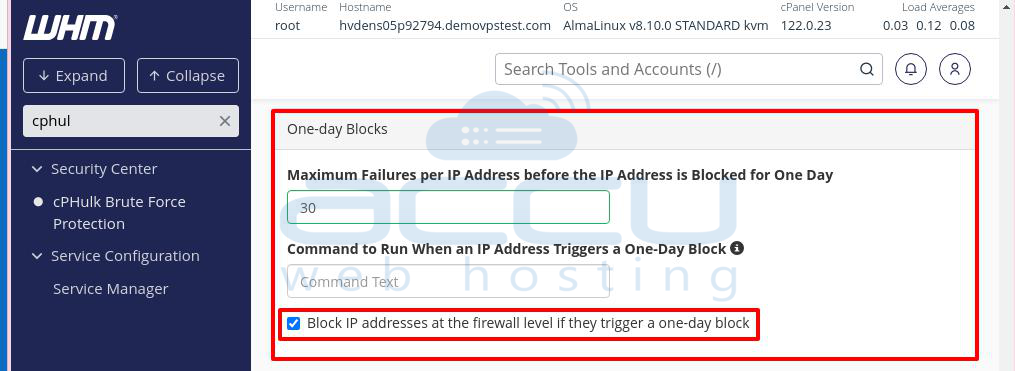
- Maximum Failures Per IP Address before the IP is Blocked for One Day: Enter the number of failed attempts allowed before blocking the IP for 24 hours.
Command to Run When an IP Address Triggers a One-Day Block: Enter a command to run when an IP triggers a one-day block.
- Block IP Addresses at the Firewall Level for One-Day Blocks: Use this option to block an IP address at the firewall level if it triggers a one-day block.
Login History
This section tracks and retains information about failed login attempts.
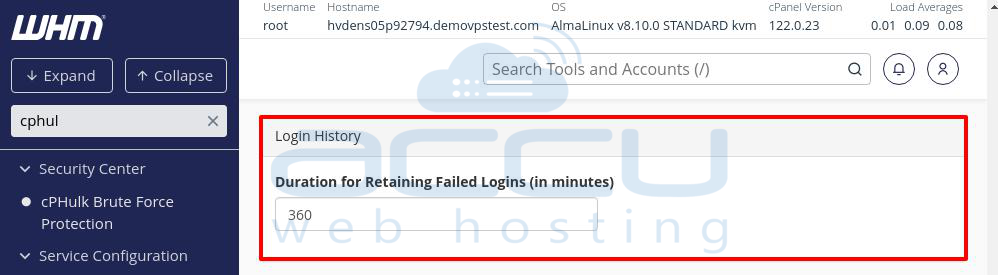
Duration for Retaining Failed Login Attempts (in minutes): Enter the time (in minutes) for how long failed login attempts are stored. This also affects how long the “login is invalid” message is shown after an account or IP is blocked.
Notifications
This section lets you configure alerts for specific events:
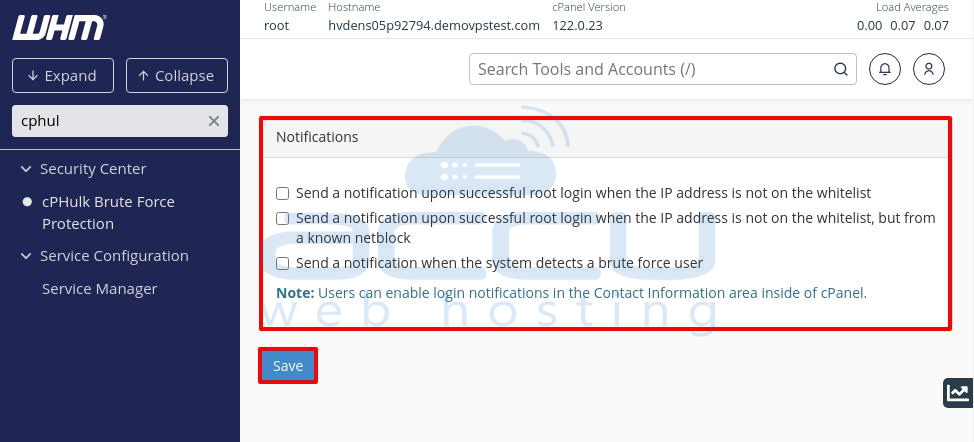
- Notify on Successful Root Login from a Non-whitelisted IP: Enable this to get notified if the root user logs in from an IP not on the whitelist.
Notify on Root Login from a Known Netblock but not on Whitelist: Get notified if the root user logs in from a known network block but not on the whitelist.
Notify on Detected Brute Force Attack: Enable this option to receive alerts when cPHulk detects a brute force attack.
Saving Your Settings
Once you’ve made all the necessary changes, click the Save button at the bottom of the page to apply them.
The Whitelist Management Tab
To open the Whitelist Management tab, click on its name to the right of the Configuration Settings tab.
Overview of the Whitelist Management Page
At the top of the page, you’ll see a blue message reminding you that any IP address you whitelist will have unrestricted access to your server. Be careful when adding IPs here, as whitelisting a harmful IP could expose your server to attacks.

Adding a New Whitelist Entry
Below the message, you’ll find the New Whitelist Records section. Here, you can enter the IP address you want to whitelist. Along with the IP address, you can add a note to describe the IP (e.g., “This is the office IP address”). To add a note, you need to add # after the IP address. Adding comments helps you keep track of why each IP was whitelisted.
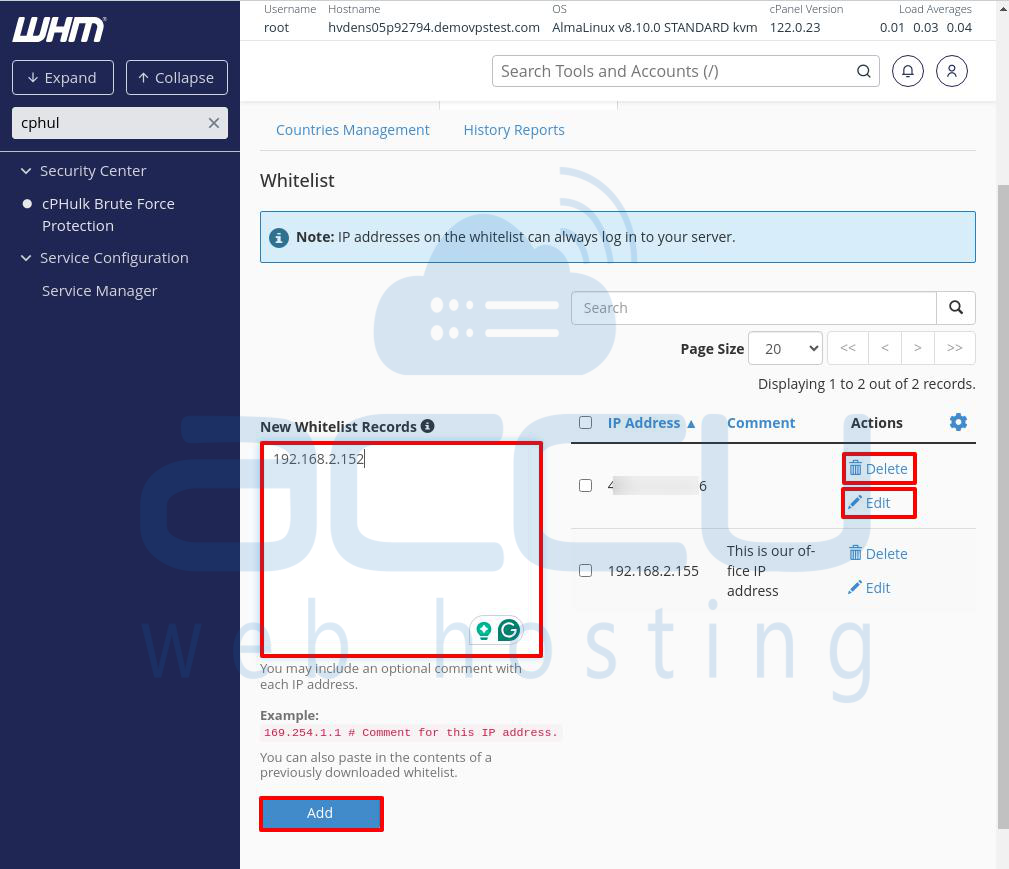
Once you’ve entered the IP and a comment, click the Add button at the bottom of the page.
Managing Whitelisted IPs
After adding an IP, you’ll see it listed to the right of the New Whitelist Records section, along with the comment you added.
Delete: Click this link to remove the IP from the whitelist.
Edit: Use this link to modify the comment, but the IP address itself cannot be changed.
Use these options carefully to keep your server secure.
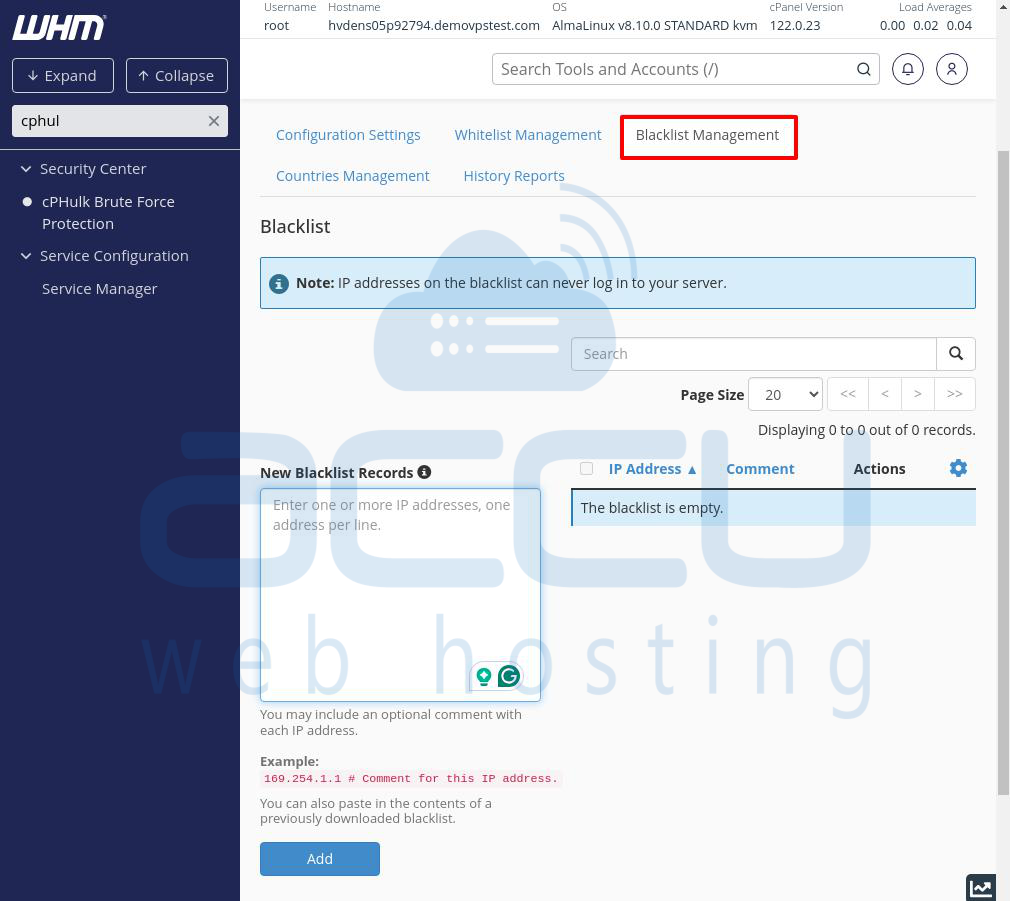
The Blacklist Management Tab
To access the Blacklist Management tab, click on it to the right of the Whitelist Management tab.
Overview of the Blacklist Management Page
At the top of the page, you’ll see a blue message reminding you that any IP address you blacklist will be completely blocked from logging in to your server. Be careful when blacklisting IPs—you could accidentally block your own home or office IP, locking yourself out of the server.
Adding a New Blacklist Entry
Below the message, you’ll find the New Blacklist Records section, where you can enter the IP address you want to block. You can add a note to describe the IP (e.g., “Hacker IP address”) along with the IP address. To add a note, you must add # after the IP address. You can identify suspicious IPs you may want to block by checking the History Reports section, which we’ll cover later.
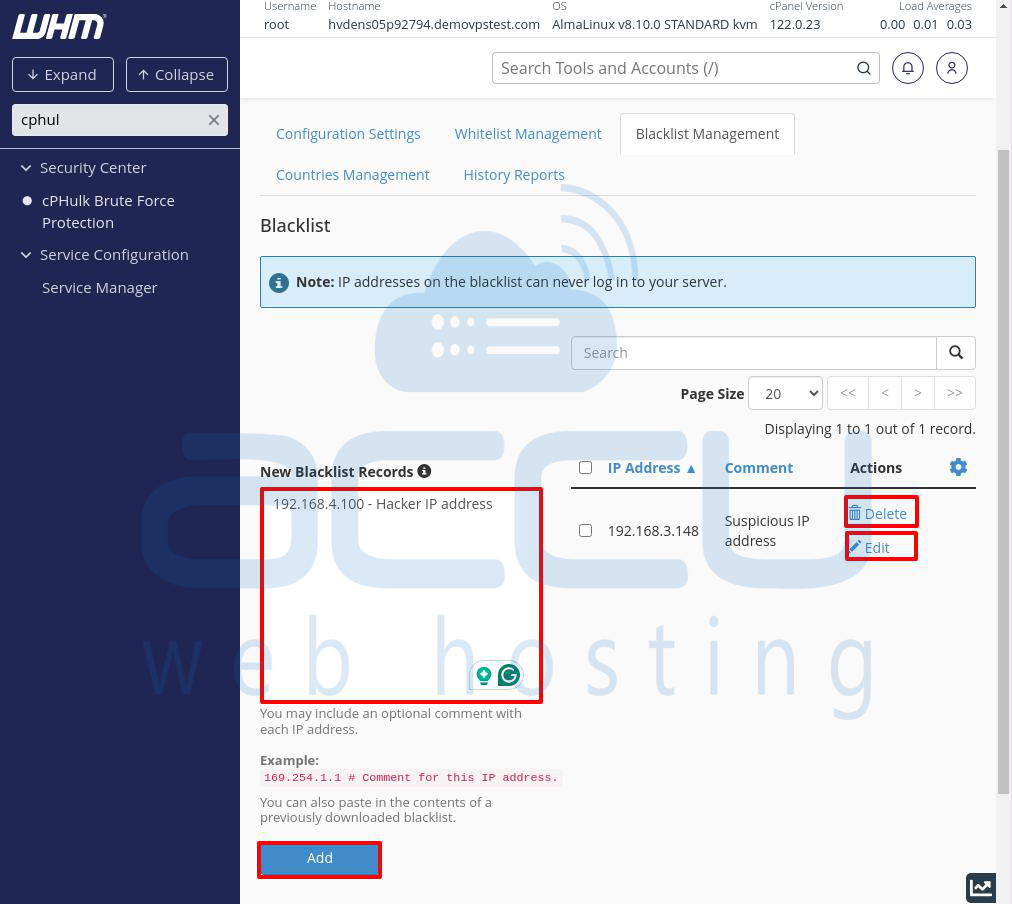
Once you’ve entered the IP and added a comment, click the Add button at the bottom of the page.
Managing Blacklisted IPs
After adding an IP, it will appear to the right of the New Blacklist Records section, along with the comment you added.
Delete: Click this link to remove the IP from the blacklist.
Edit: Use this link to modify the comment, though the IP address itself can’t be changed.
Use these options carefully to avoid blocking access to your important services.
The Countries Management Tab
To open the Countries Management tab, click on it to the right of the Blacklist Management tab.
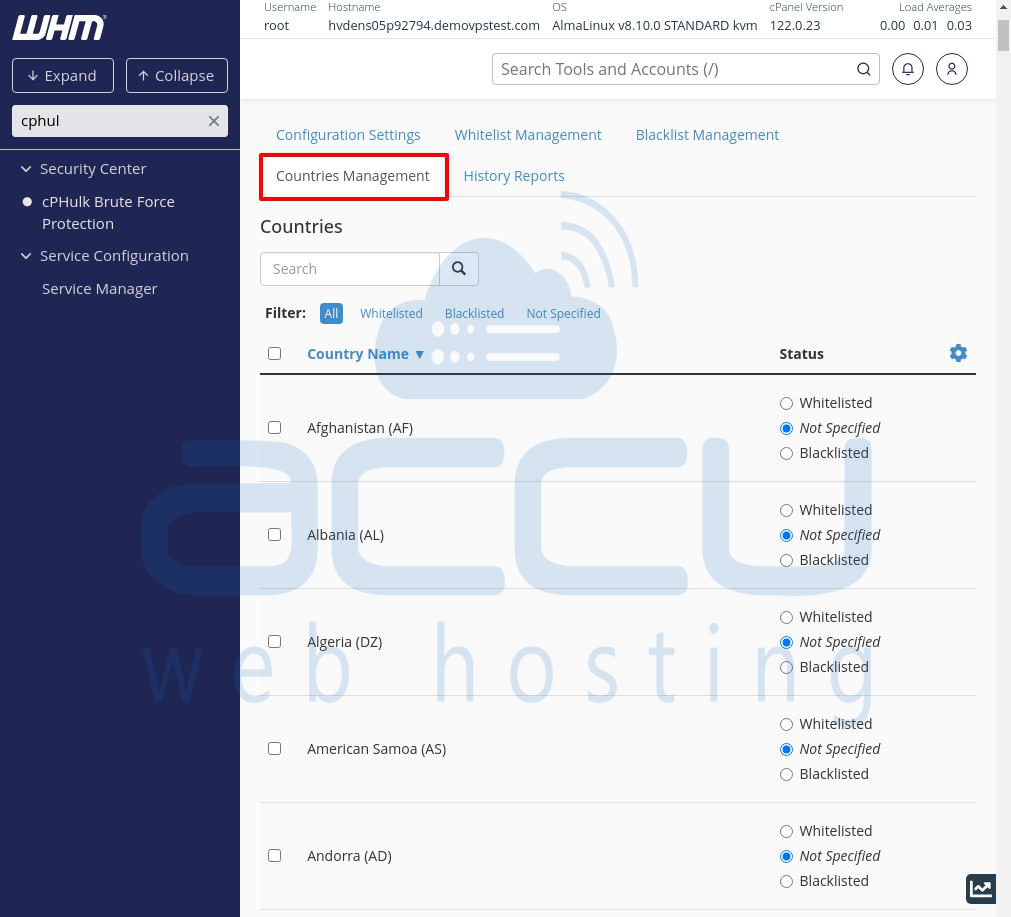
What You Can Do with This Tab
Using this tab, you can:
Whitelist a country: Allows all login attempts from that country.
Blacklist a country: Blocks all login attempts from that country.
Remove a country from both lists: The country will have no restrictions.
How the Page Works
At the top, under the Countries heading, you’ll see a search bar. Below it, there’s a filter to display countries by their current status:
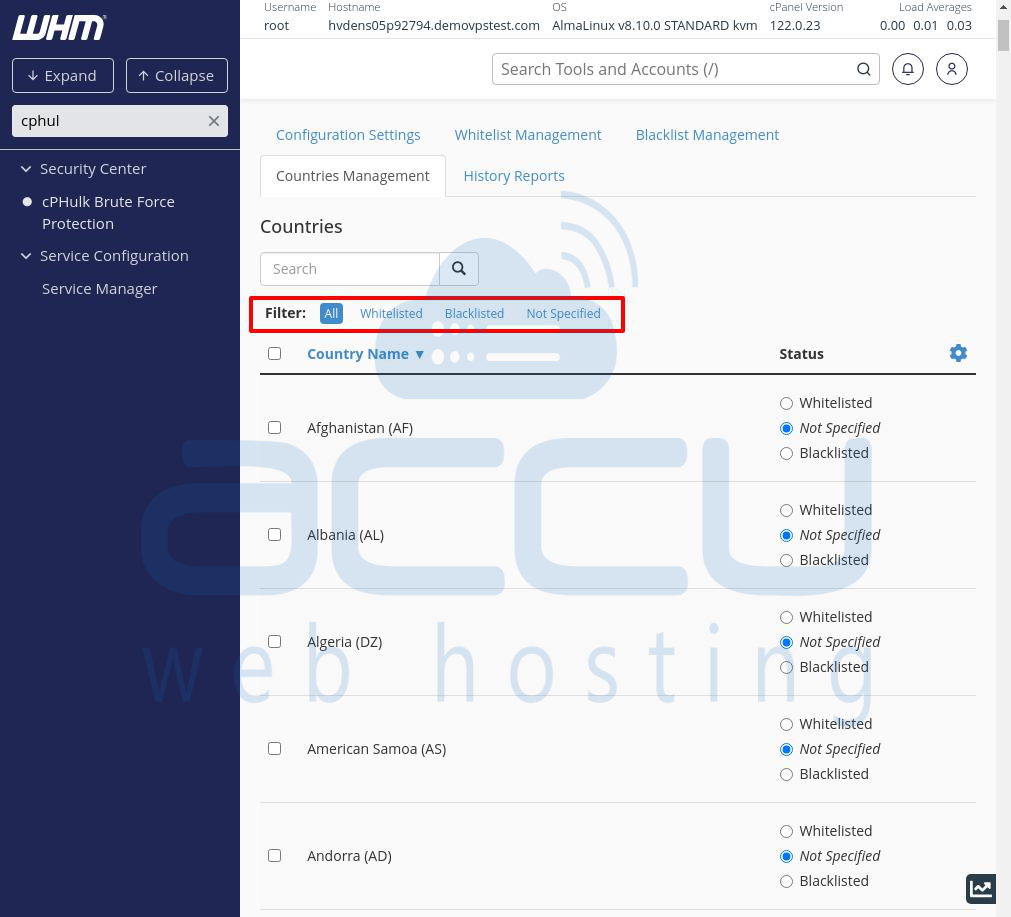
- Whitelisted
- Blacklisted
- Not Specified (no special rules)
- All (shows all countries, regardless of status)
Managing Countries
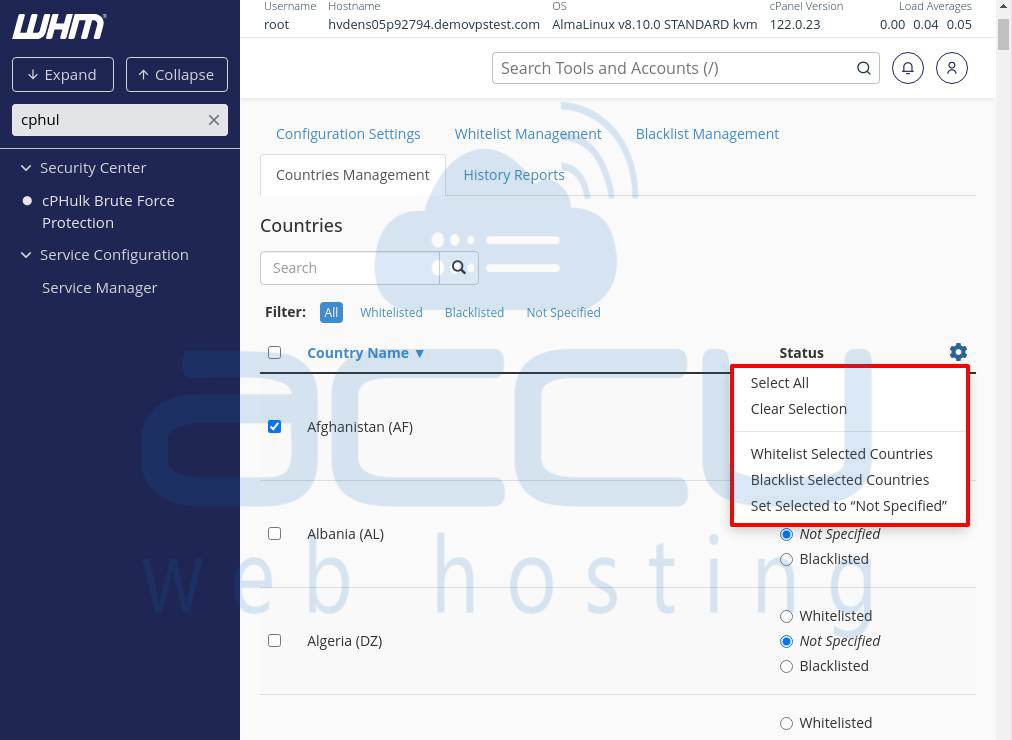
Each country in the list has a checkbox on the left side. You can:
1. Select multiple countries and use the cogwheel icon in the top-right corner to:
- Whitelist
- Blacklist
- Set as "Not Specified"
- Select or deselect all countries at once
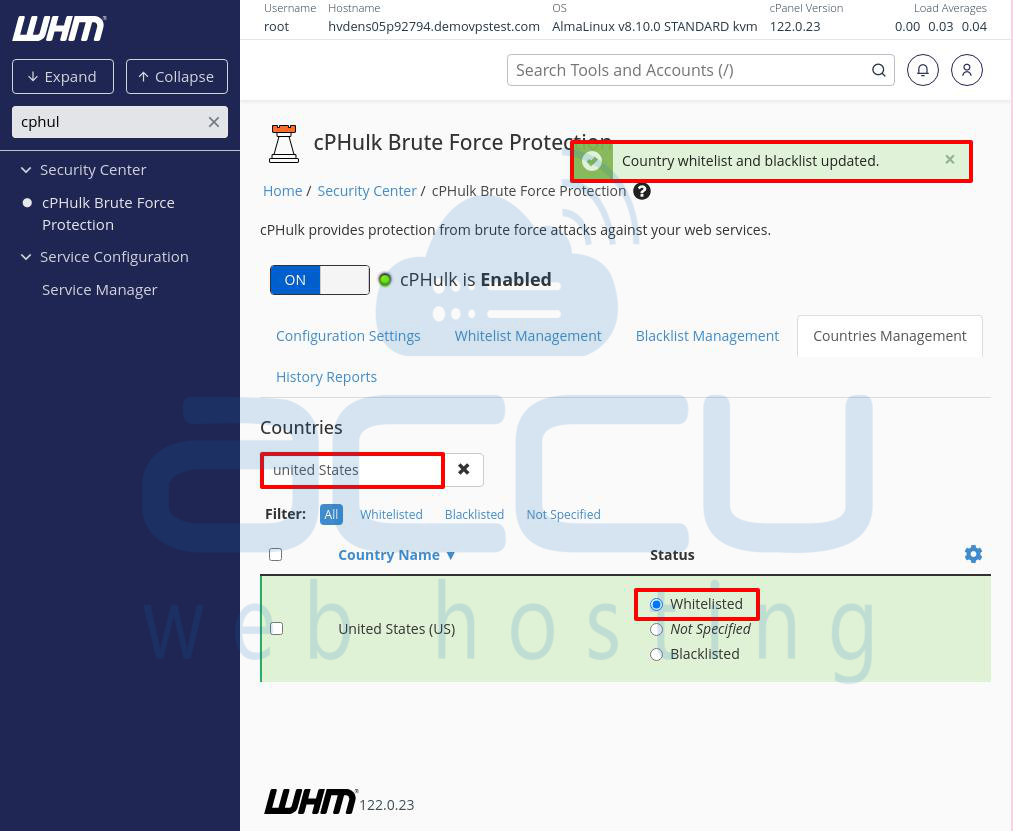
2. Search for a specific country using the search bar. Once found, use the radio buttons to set the country’s status:
- Whitelisted: The row will turn green.
- Blacklisted: The row will turn red.
- Not Specified: No color change.
This tab makes it easy to control access based on country. Next, we’ll look at the History Reports tab.
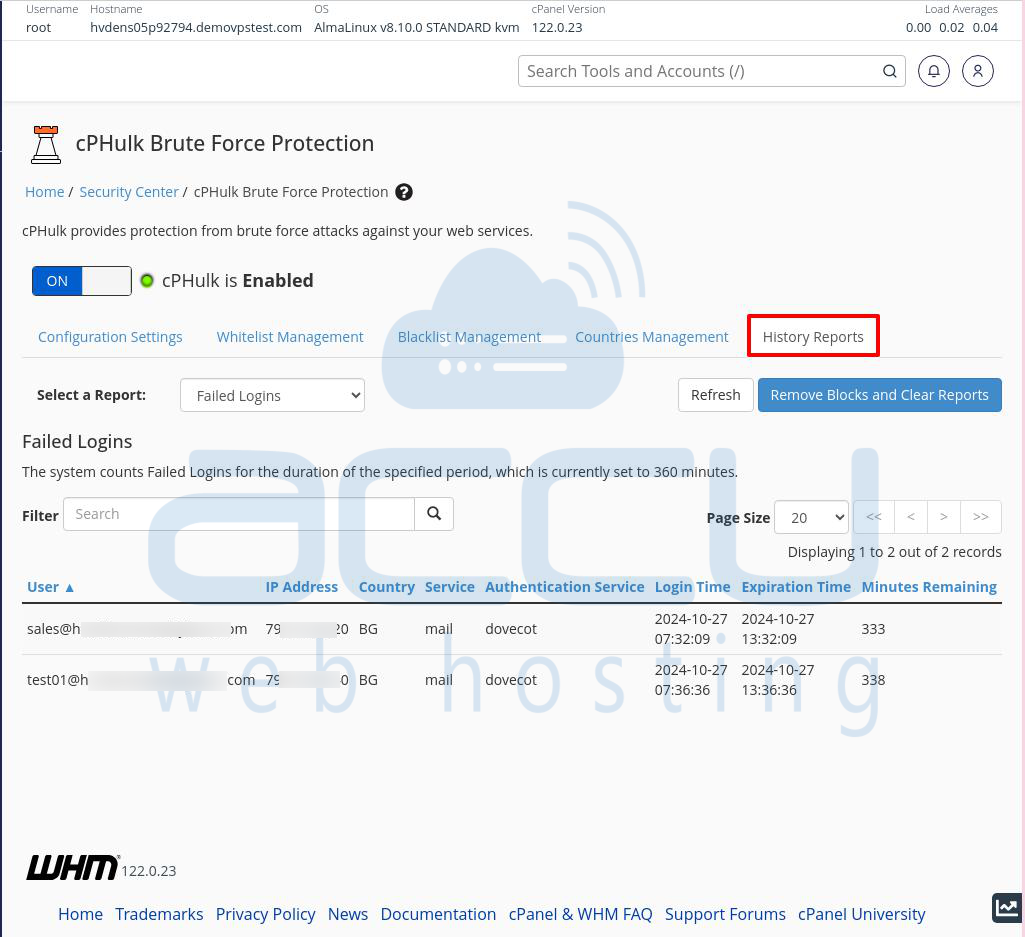
The History Reports Tab
To access the History Reports tab, click on it to the right of the Countries Management tab. This tab shows details about failed login attempts on your server.
Why This Tab is Useful
You can use the information here to decide if an IP address needs to be blacklisted. The reports include data on brute-force attacks and the IPs responsible for them.
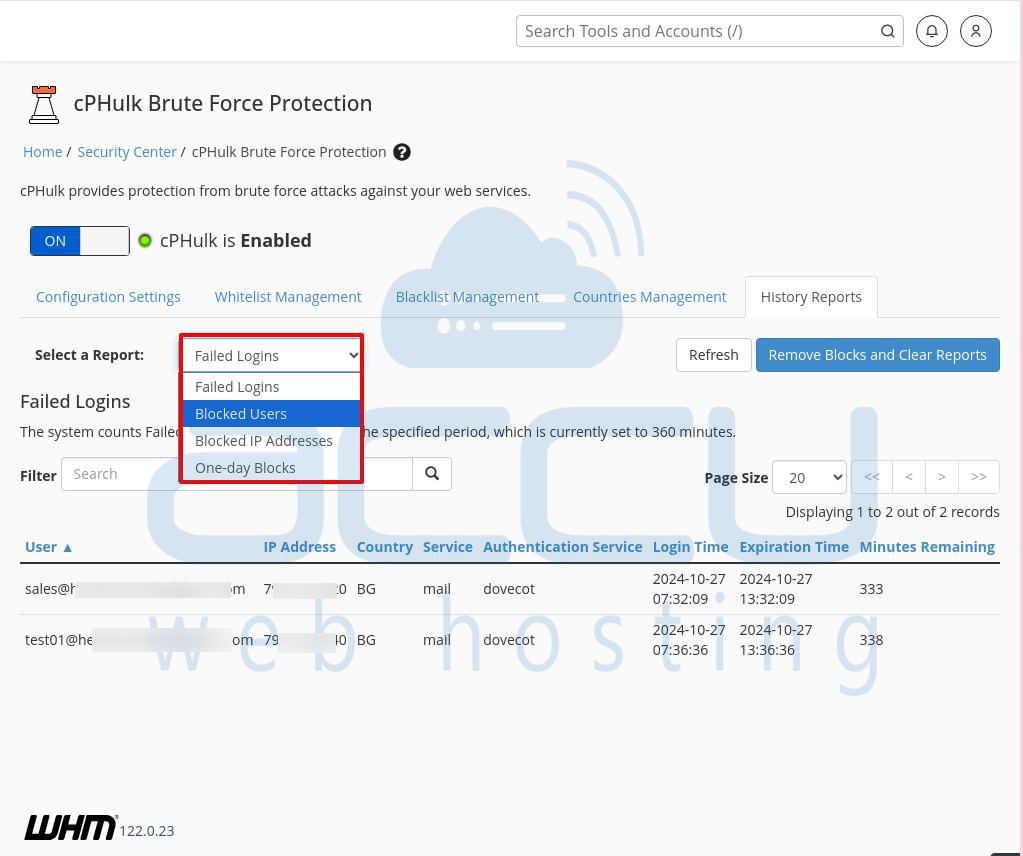
How to Use the History Reports Tab
At the top, you’ll see the “Select a Report” label with a dropdown menu next to it. Use the menu to choose the type of report you want to see in the table below.
Below the dropdown, there’s a search bar where you can filter results. For example, typing “sshd” will show all failed login attempts related to the SSH service.
Understanding the Report Table
Here’s what each column in the report table shows:
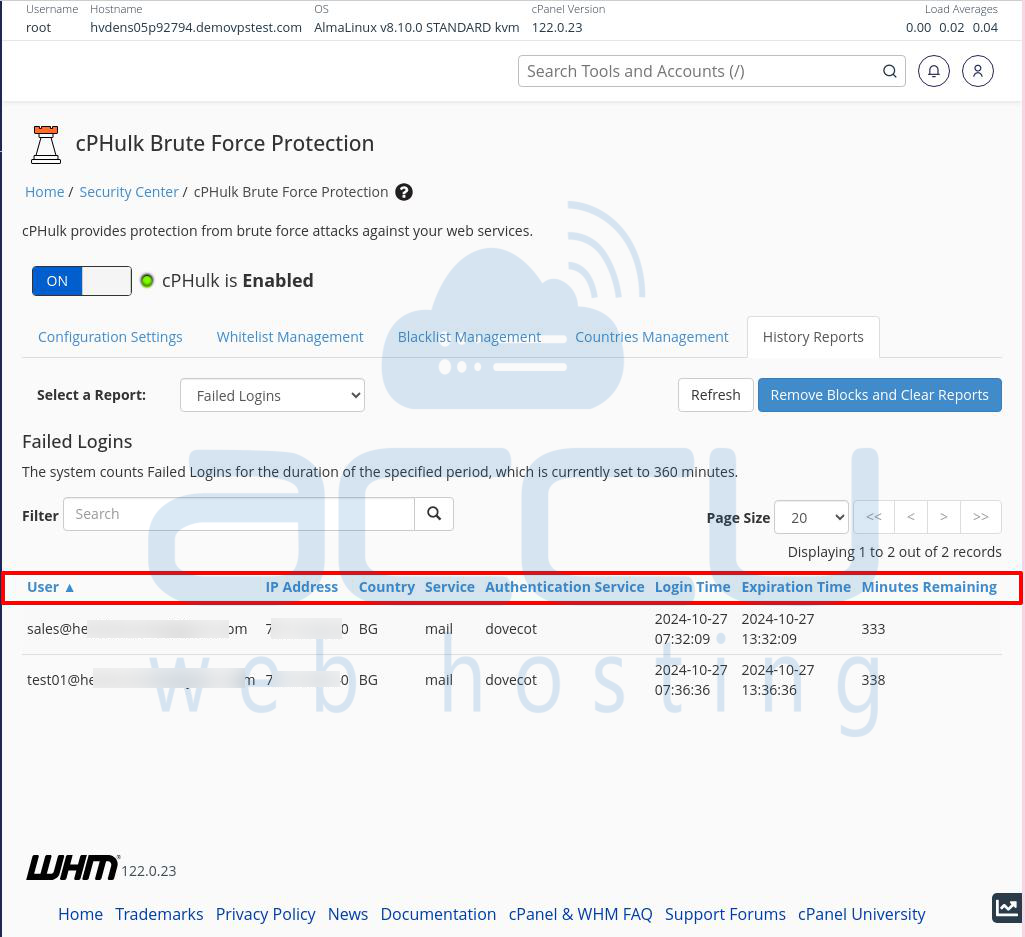
User: The username the attacker tried to use.
IP Address: The IP address that made the failed login attempt.
Country: The attacker’s country.
Service: The service targeted by the attack (e.g., cPanel, SSH, or WHM).
Authentication Service: The specific service the attacker tried to access.
Login Time: The date and time the IP was blocked.
Expiration Time: When the block will end.
Minutes Remaining: How many minutes are left before the IP is unblocked?
This tab helps you monitor security events and take action, like adding IPs to the blacklist to prevent further attacks.
Conclusion
Whitelisting an IP address in cPHulk is an important step to allow trusted users to access your server without problems. To do this, go to the Whitelist Management tab in the cPHulk settings. Enter the IP address you want to whitelist and add a note about it for future reference. Once you save it, that IP will have full access and won’t be blocked for failed login attempts. Always check the IPs you whitelist to make sure you’re not giving access to any potentially harmful users. This helps keep your server secure while letting legitimate users connect easily.


