SmarterMail is comprehensive email server software designed to facilitate efficient email management for businesses, organizations, and individuals. It offers many features and functionalities to streamline email communication, enhance productivity, and ensure security. It can manage emails, contacts, calendars, and more. In this guide, we will walk you through installing the latest SmarterMail version on your Windows operating system.

System Requirements for SmarterMail
SmarterMail is optimized to operate seamlessly alongside multiple applications on a single server. Below are the minimum system requirements specifically for SmarterMail.
- Windows Server 2016 64-bit or above OS
- Microsoft .NET Framework
- Microsoft Internet Information Server (IIS)
- Dedicated domain name
- Dedicated IP address
- 4GB RAM
- 2-core CPU
- 1GB disk space for installation
- Microsoft 2010 C++ Redistributable Packages (for ClamAV)
Steps to install the latest SmarterMail on Windows OS
Step 1. Start by acquiring the latest version of SmarterMail from the official website [here](https://www.smartertools.com/smartermail/downloads). Ensure to select the appropriate version compatible with your Windows server.

Step 2. Once you have obtained the SmarterMail installer, transfer the EXE or MSI file to the server where you plan to install SmarterMail. Execute the installer file to launch the installation wizard.
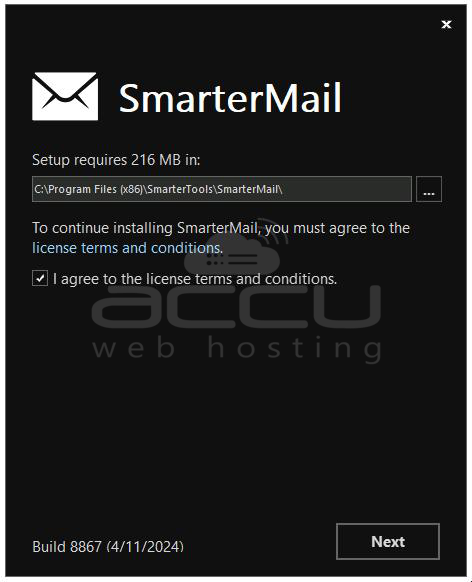
Step 3. You will be prompted to accept the license terms as you progress through the installation process. Be sure to review and agree to the terms by checking the designated box and clicking on the Next button.
Step 4: Now, you must enter the licensing and activation details.
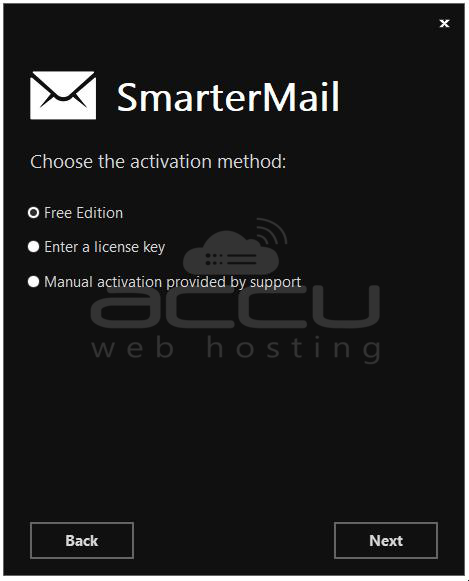
- Free Edition: If you intend to test out SmarterMail, opt for this option. The Free Edition essentially offers the features of SmarterMail Enterprise, albeit with certain limitations. It is suitable for a single domain and supports up to 10 email accounts.
- Enter a License Key: If you have purchased SmarterMail, choose this option. You will then be prompted to input the license key to activate the product.
- Manual Activation Provided by Support: In certain scenarios, such as environments with stringent network security policies, SmarterMail may be utilized solely for internal purposes. In such cases, the product's "manual activation" becomes necessary. These activations are facilitated by the SmarterTools support team.
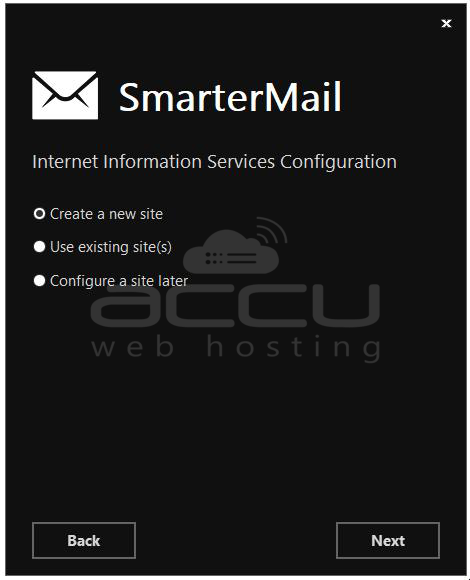
Step 5. If you haven't previously set up a site in IIS specifically for SmarterMail, choose the "Create a new site" option. Alternatively, if you already have a site configured for SmarterMail, select "Use an existing site".
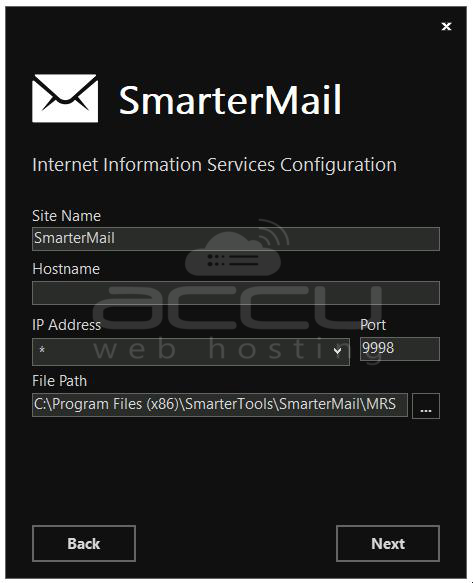
Step 6. When creating a new site, you can retain the default settings or customize them to match your preferences. If necessary, you can adjust the site name or add a hostname.
Step 7. Once all configurations are set, initiate the installation process by clicking the "Install" button.
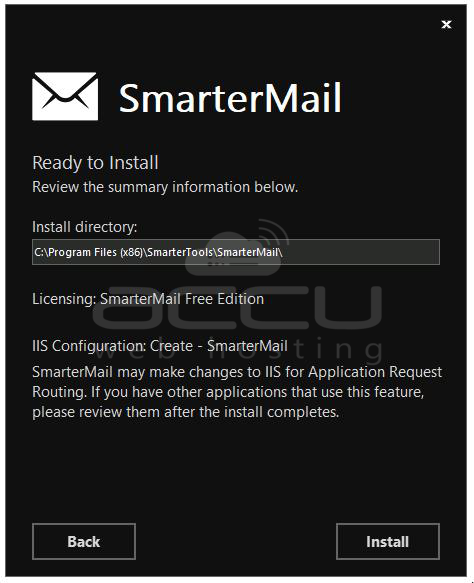
Allow the installer to proceed with the installation of SmarterMail on your server.

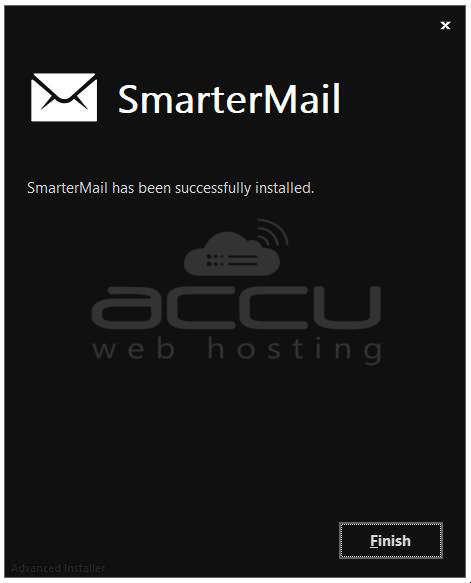
Step 8. Upon completing the installation process, you will receive confirmation that SmarterMail has been installed on your server.
Post-installation Setup of SmarterMail
Step 1. Open any browser, and navigate to http://127.0.0.1:9998/ to access the SmarterMail interface.

Step 2. Enter the required credentials, including username, password, and data path, as prompted by the SmarterMail interface. Once entered, click "Finish" to complete the setup process.
Steps to Login into the SmarterMail Admin Section
To access the SmarterMail admin section, follow these steps:
Step 1. Launch any web browser installed on your computer or device. In the address bar, type the URL for the SmarterMail admin section. The default URL is typically http://127.0.0.1:9998.
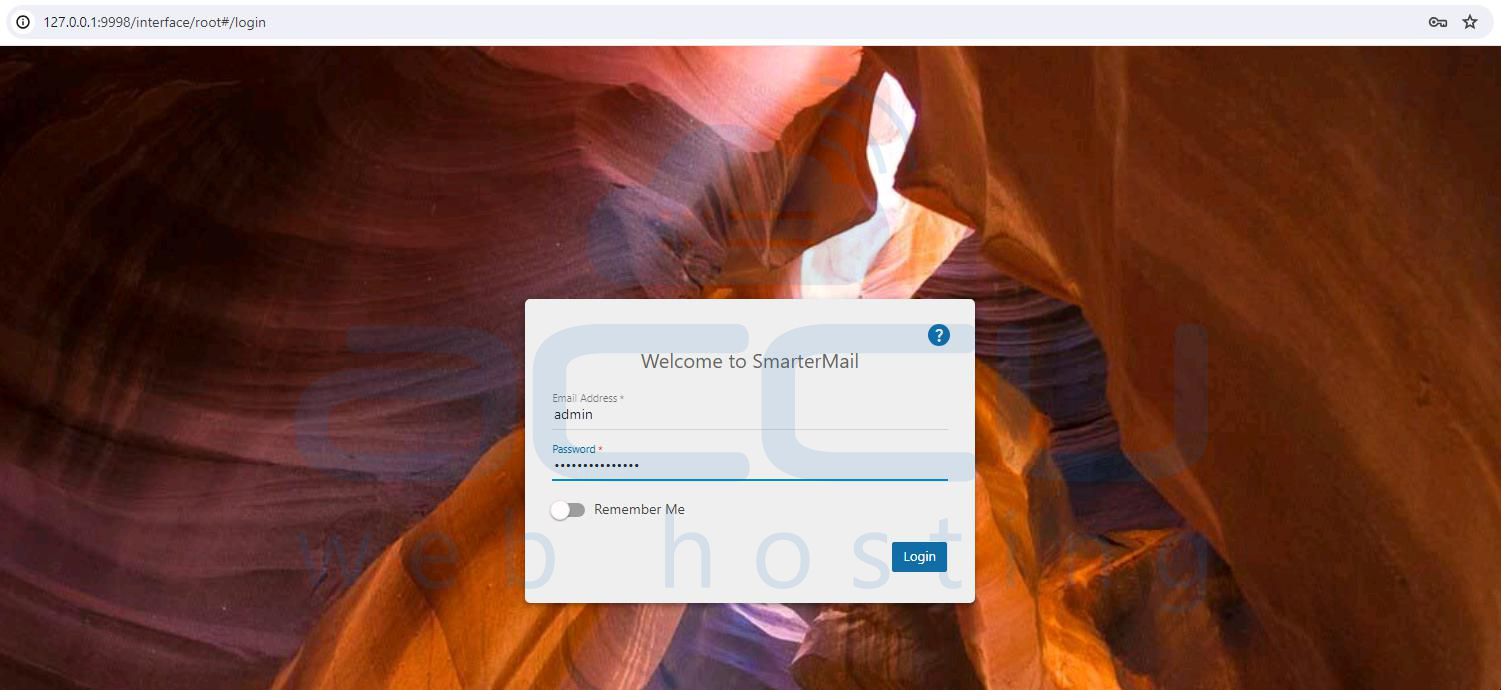
Step 2. Once the login page loads, enter your administrator username and password in the provided fields.
Step 3. After entering your credentials, click the "Login" button to proceed.
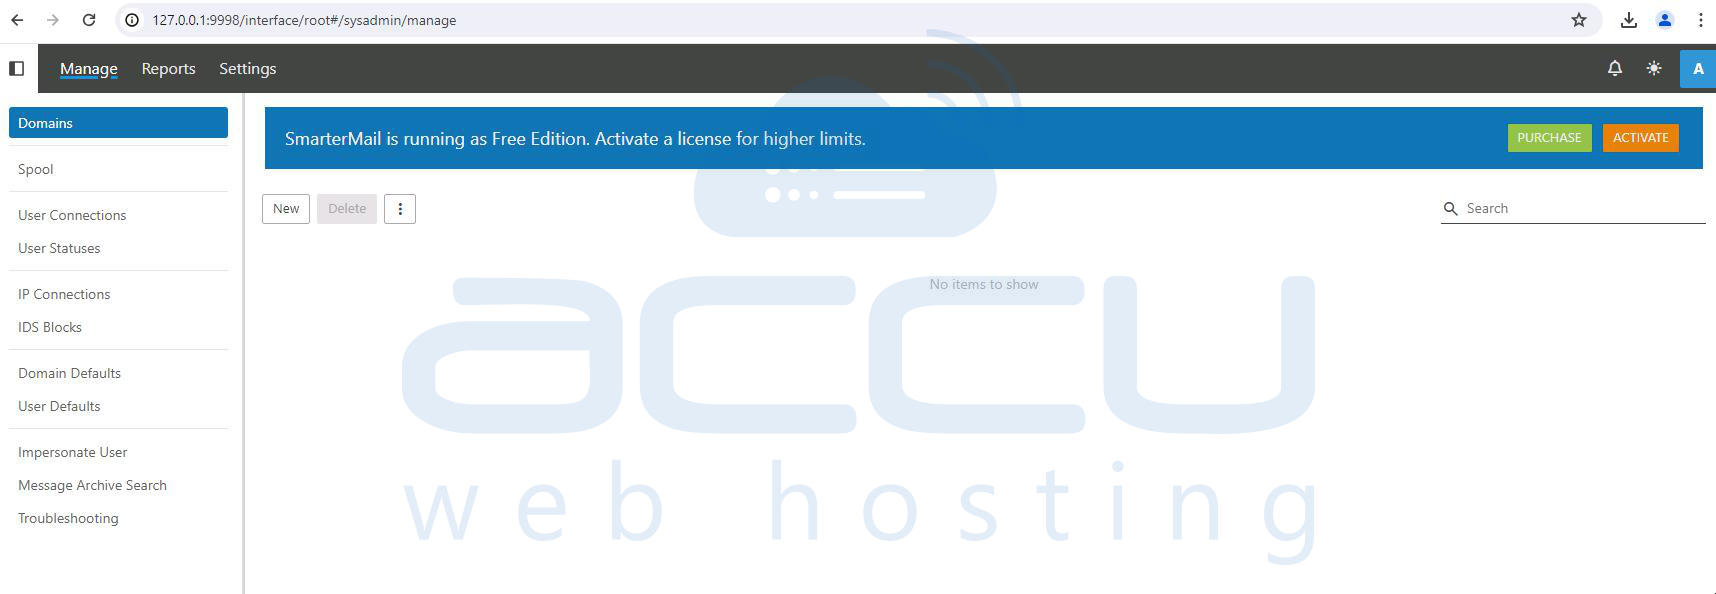
Step 4. Upon successful authentication, you will be directed to the SmarterMail admin dashboard. Here, you can manage various settings, domains, users, and other aspects of your SmarterMail installation.
Conclusion
Congratulations! You have now completed the installation and setup of SmarterMail on your Windows server. By following these simple steps, you can log into the SmarterMail admin section using the URL http://127.0.0.1:9998 and begin managing your email server easily.
