Private nameservers, also known as custom nameservers. It resolves the domain name into an IP address and directs the traffic to the appropriate server.
A private nameserver must be registered with the domain registrar and associated with the server's IP address before configuring it in the WHM panel.
For instance, if you're configuring ns1.demovpstest.com and ns2.demovpstest.com as your private nameservers, and let's say you purchased the domain demovpstest.com from Accuwebhosting, you can easily register and set private name servers from your Accuwebhosting account client area
Nameservers link domain names to IP addresses. When someone tries to visit a website hosted on your server, their computer asks a nameserver for the website's IP address. The nameserver then provides the IP address and directs the visitor to the correct page.
You need to publish records for your domain names to nameservers so visitors can access your sites. These nameservers share the information with other nameservers to make your sites accessible across the internet. The propagation period is the time it takes for your domain's DNS records to update everywhere online.
How to Set Up a Private Nameserver Using WHM:
To set up nameservers in WHM, follow these steps:
1.Choose a nameserver software:
Note: If you're already using your registrar’s DNS services, you can skip this step. To choose a nameserver software:
Step 1: Go to WHM’s Nameserver Selection interface (WHM » Home » Service Configuration » Nameserver Selection).
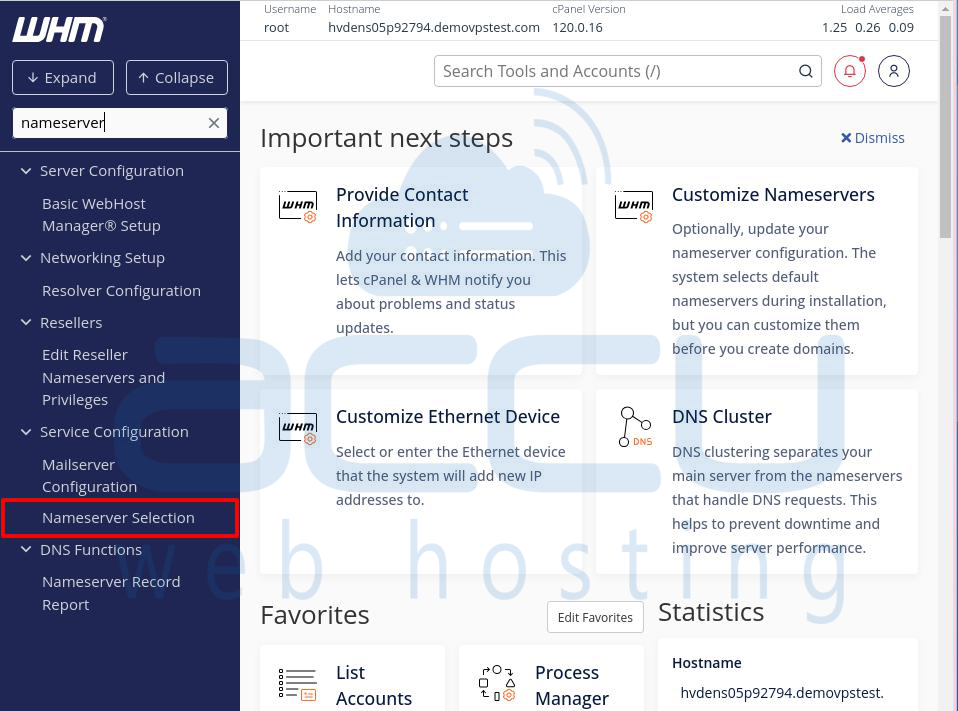
Step 2: Pick the nameserver software you want to use. For example, you can select BIND Nameserver.
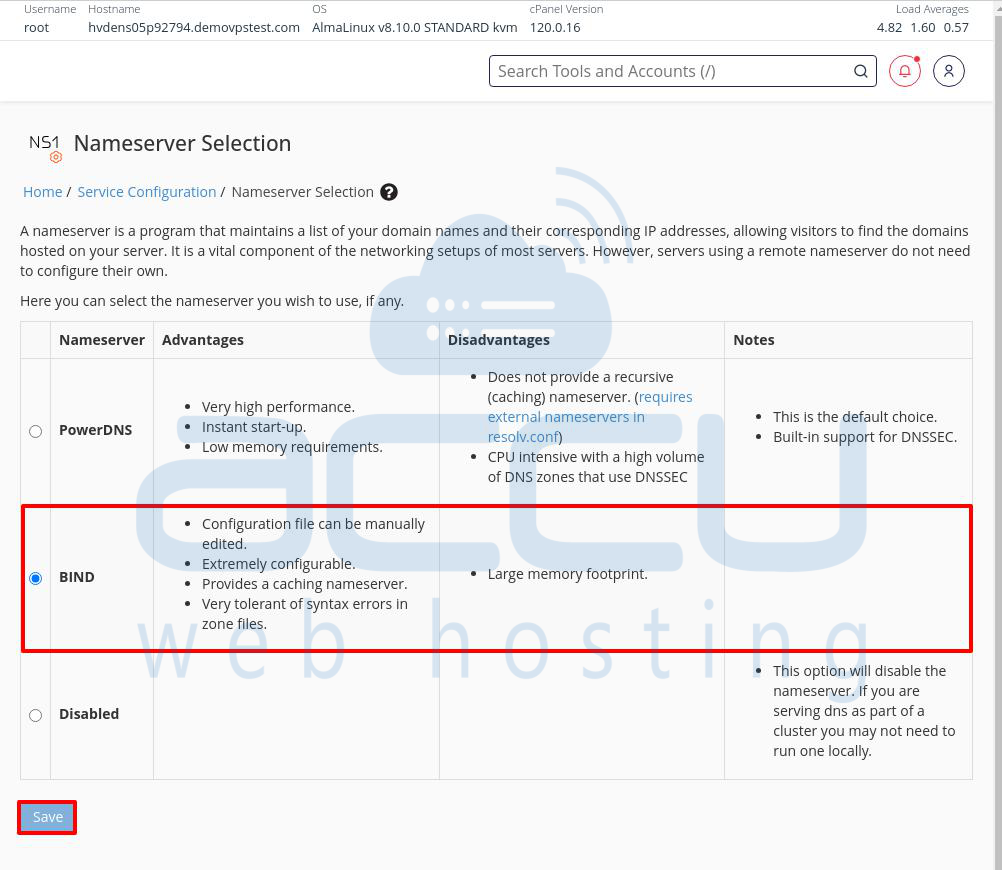
Step 3: Click the Save button to apply the changes.
Note: The system uses PowerDNS as the default nameserver.
2.Set Up Your Default Nameservers
To set up your default nameservers, follow these steps:
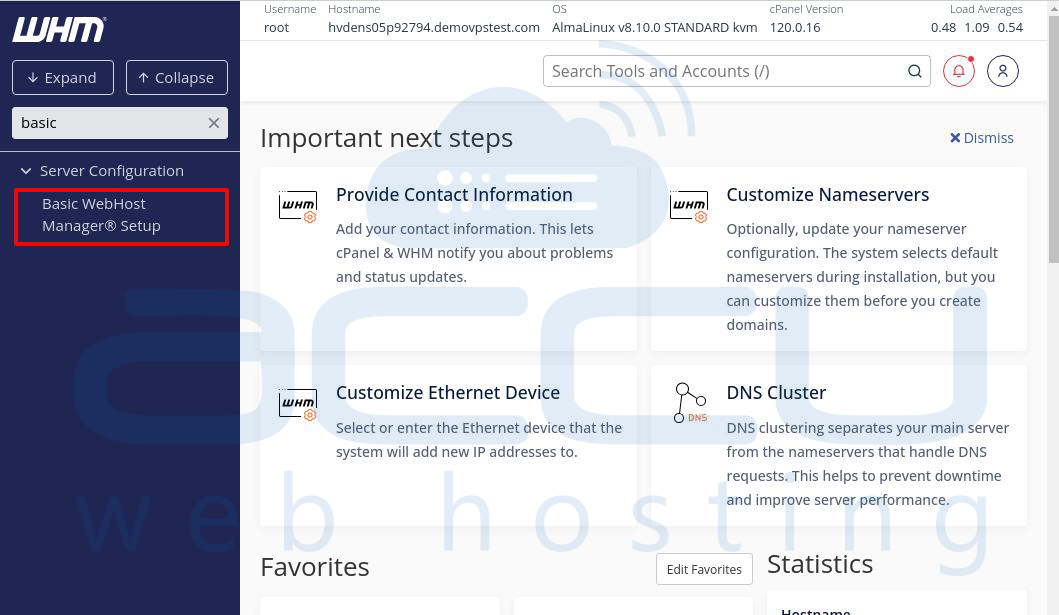
Step 1: Log in to the WHM Panel.
Step 2: Click on Basic WebHost Manager Setup under Server Configuration in the left menu.
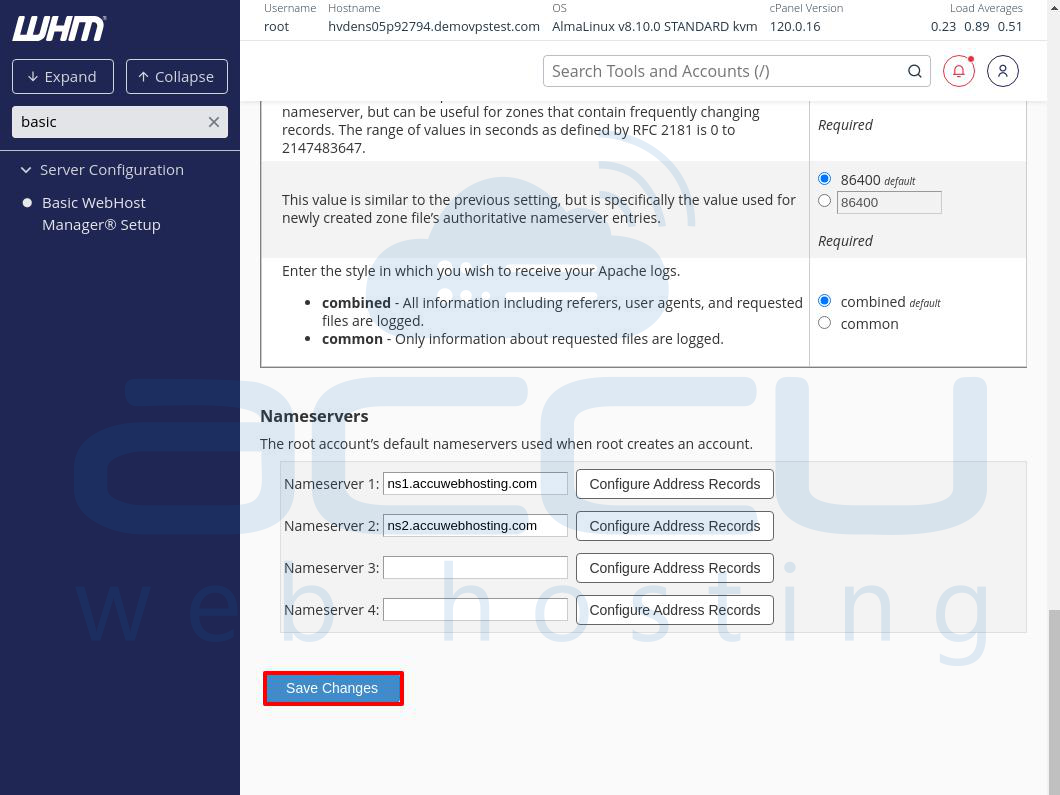
Step 3: On the Basic cPanel & WHM Setup page, scroll down to find the Nameservers section.
Step 4: Enter your nameserver addresses. You need to enter at least two nameservers for backup.
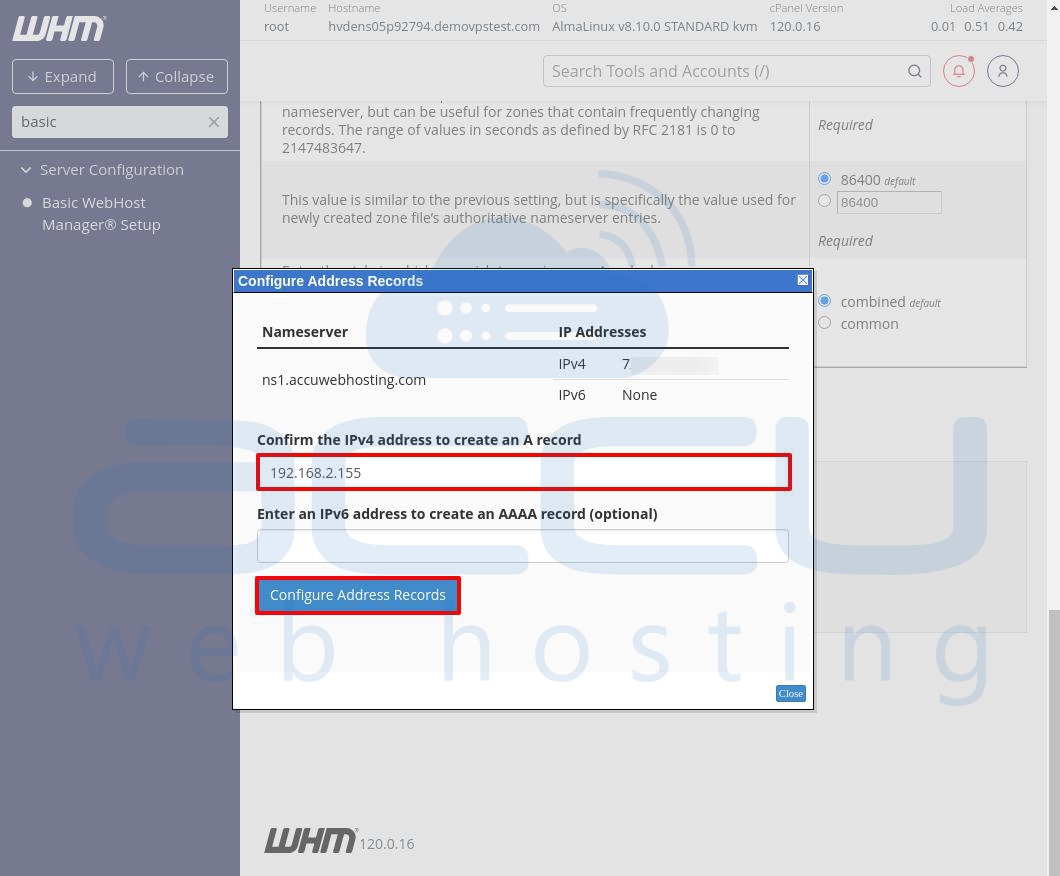
Step 5: Next to each nameserver you entered, click on the Configure Address Records.
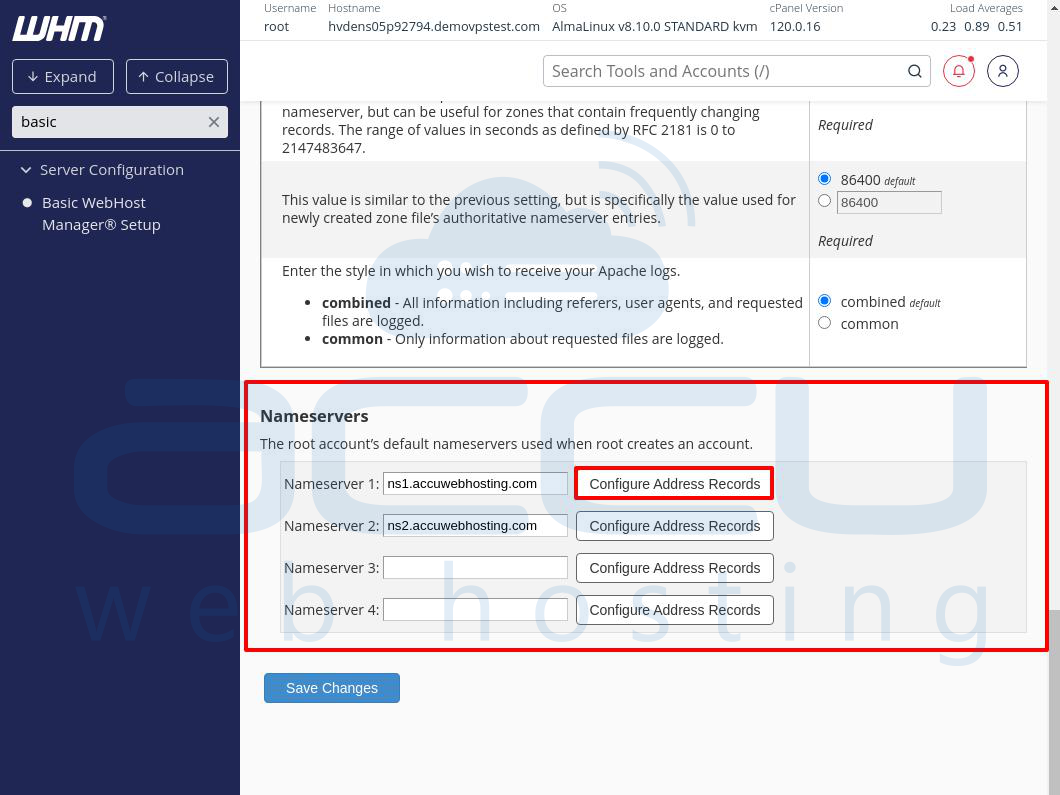
Step 6: Enter the IP address for your domain’s hostname/server and click the Configure Address Records button.
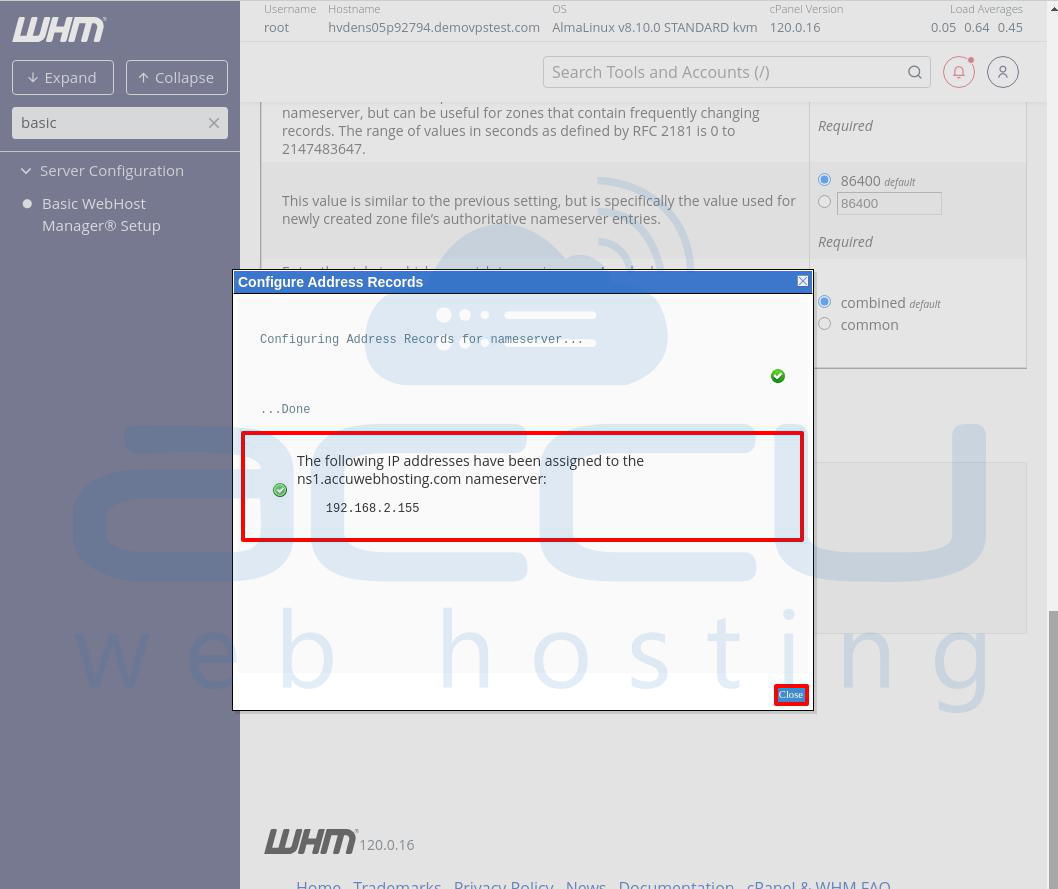
You need to set up at least two nameservers. Repeat the process to create a second nameserver.
Step 7: After adding your two (or more) nameservers to WHM, click Save Changes.
Guidelines for naming your nameservers:
-> The name should include a prefix, a dot (.), and your domain name. A common format is to prefix your domain with ns1 (e.g., ns1.example.com and ns2.example.com).
-> Each nameserver should have a unique name.
-> We recommend using a domain name that reflects your company’s main website URL.
3. Registering Your Nameservers
Even though you’ve already registered your server’s domain name, you still need to register your nameservers with your domain registrar. This is usually free, but it depends on your registrar. If you registered your domain through your AccuWeb account, follow these steps:
Step 1: Log in to your DirectI Domain Control Panel.
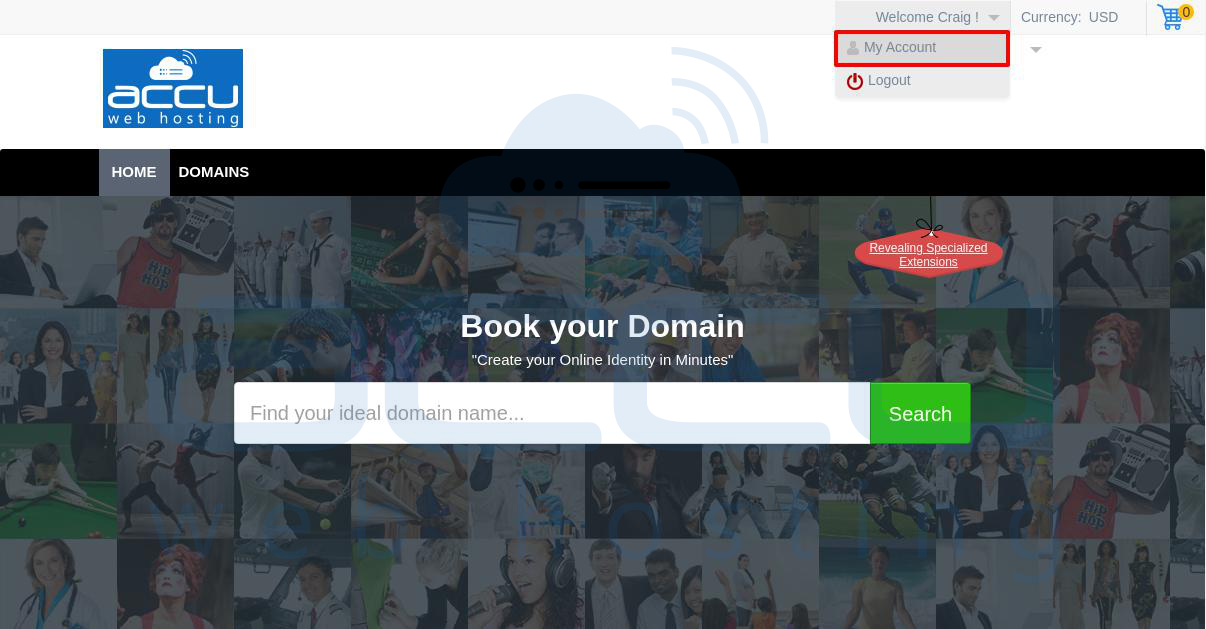
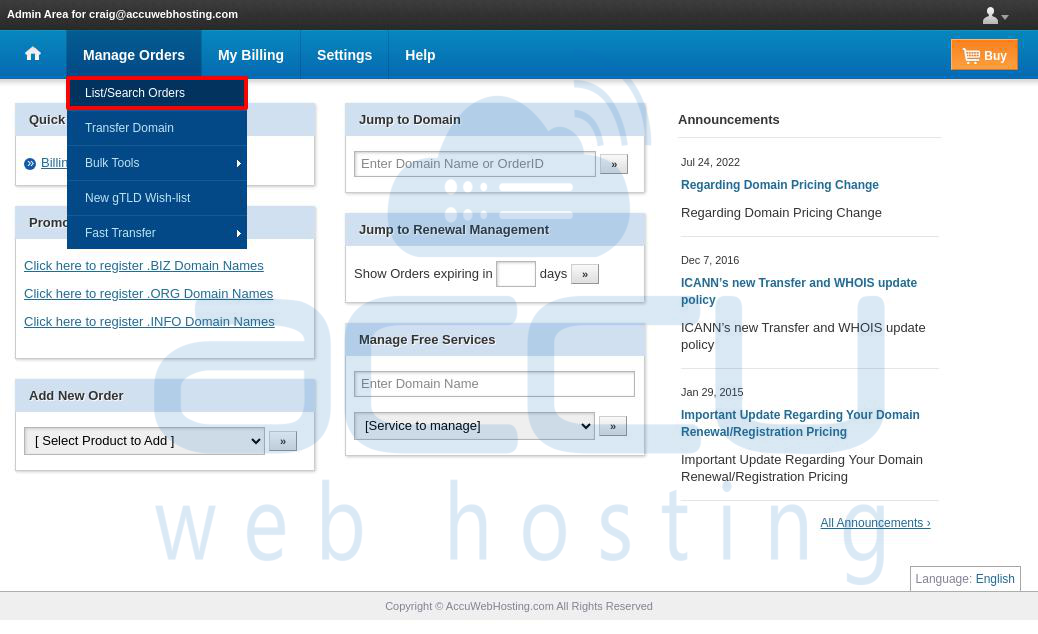
Step 2: In the top-right corner of the control panel home page, click on your username, then click on the My Account link.
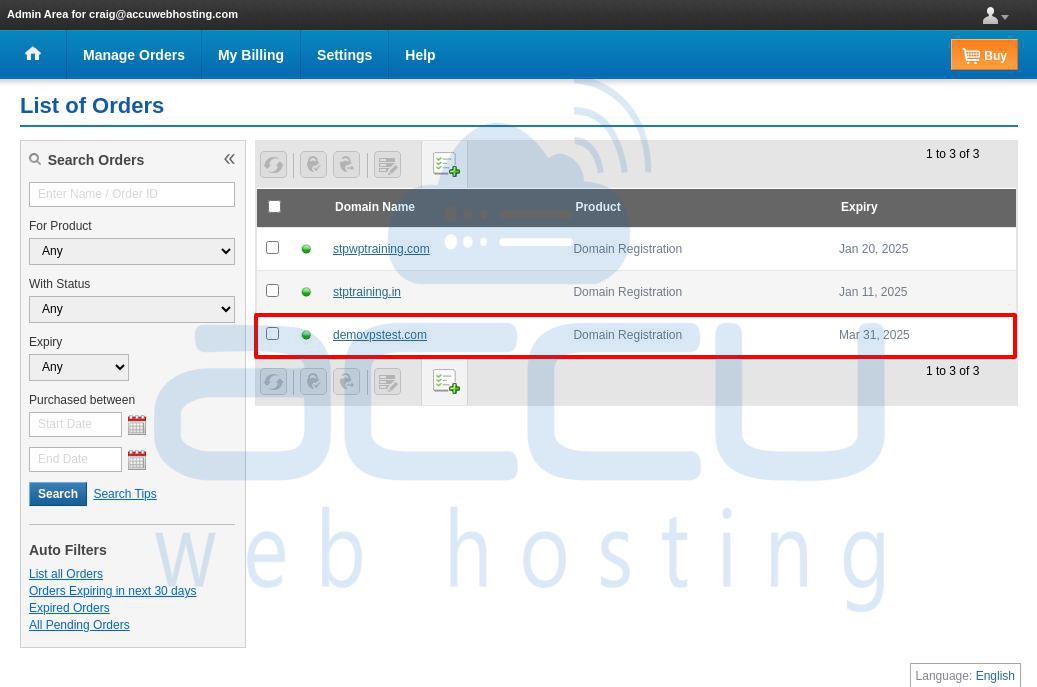
Step 3: Click the List/Search Orders link under the Manage Orders menu.
Step 4: Find and click on your domain name. For example, you might select demovpstest.com.
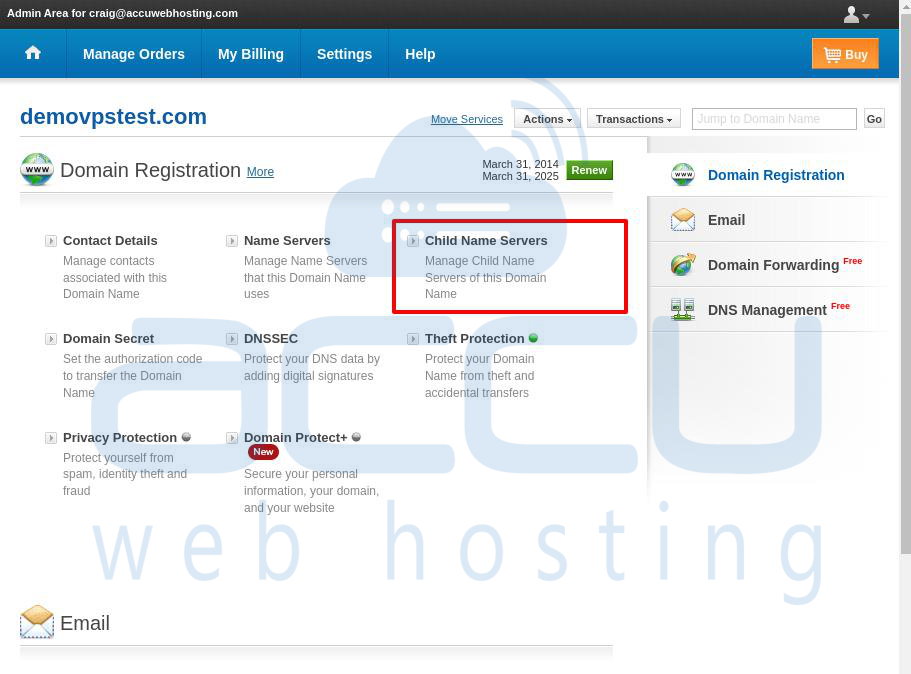
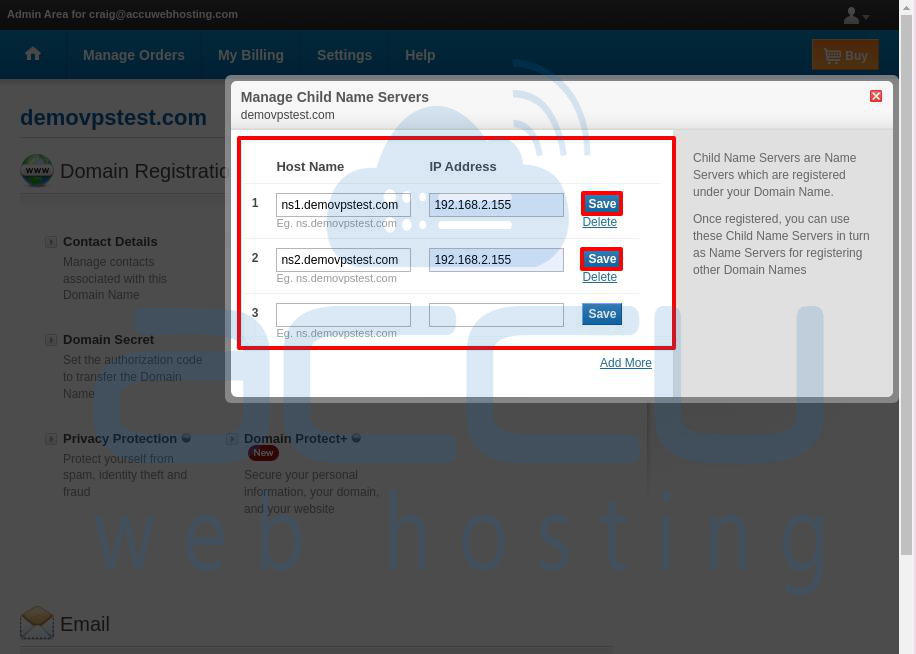
Step 5: Click on the Child Name Servers link. Enter the nameservers you want to use, along with their IP addresses.
For instance, if your domain is "demovpstest.com" and you want to use nameservers like ns1.demovpstest.com and ns2.demovpstest.com, enter these names under the "Host Name" boxes and the corresponding IP addresses under the "IP Address" boxes.
Step 6: Click the Save button after entering each nameserver.
Step 7: Once the nameservers are registered, you can use them for your domain. Simply replace the current nameservers with the new ones. Detailed instructions can be found at the provided URL.
Note: DNS changes take 24-48 hours to propagate globally.
4. Redirecting Your Domains
The final step in setting up private nameservers is to ensure that your new nameservers are handling your DNS records instead of the old ones. Like registering nameservers, this step is done at the registrar level, not on your server.
If you registered your domain with AccuWeb, check out our article "Changing Your Website’s Nameservers" to learn how to switch your domains to use your new nameservers. If you registered your domain elsewhere, log in to your account with your registrar, find the domain you want to use with your private nameservers, and make sure it’s set to use the new private nameservers instead of the registrar’s default nameservers.
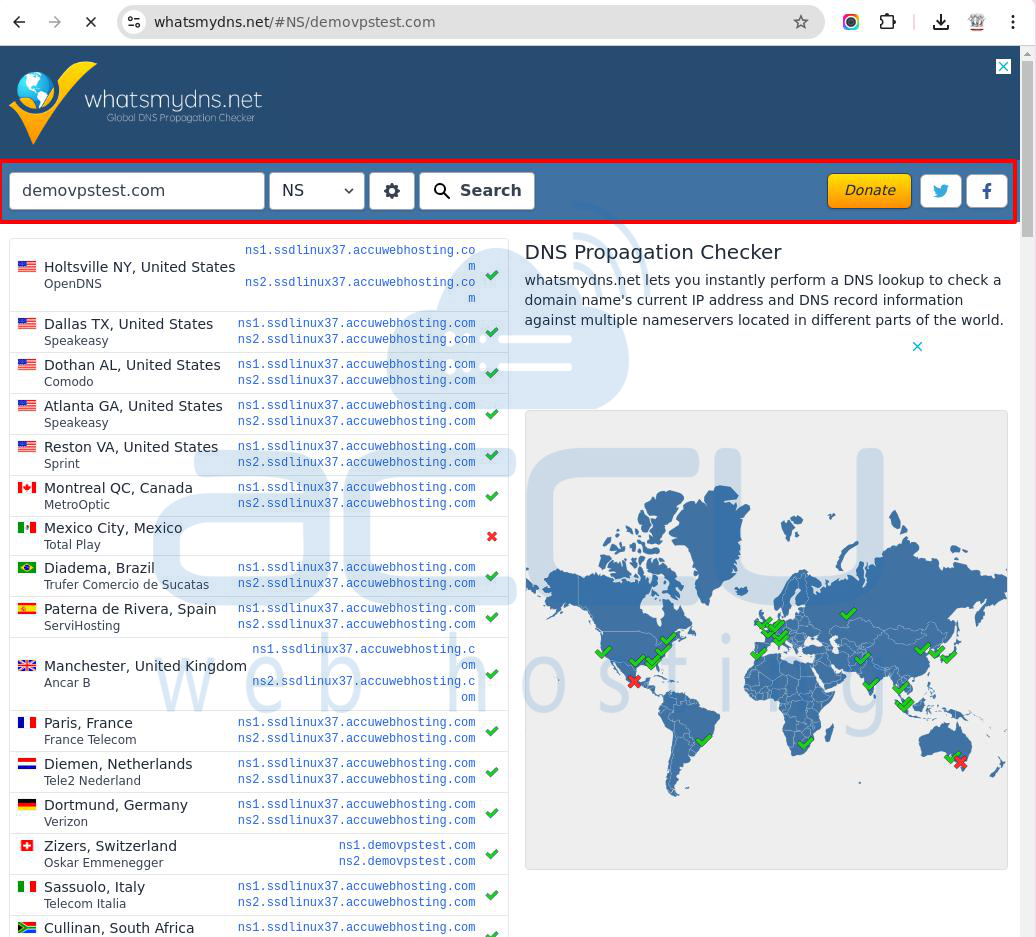
5. Verify the Setup
After making the changes, DNS propagation will take some time.
You can use whatsmydns.net or dig commands to check that the nameservers correctly point to your IP addresses.
Optional: Configure Glue Records (if needed)
Some registrars require glue records when setting up private nameservers. Glue records link your domain name with the IP address of your nameserver.
This step is usually included when registering the nameservers with your registrar.
Once the DNS changes have propagated, your private nameservers will be fully operational and can be used for all domains hosted on your cloud hosting server.
Alternative Solution:
You can also set up a private nameserver using the command line (terminal).
cPanel keeps the nameserver IP assignments in a file located at:
/var/cpanel/nameserverips.yaml
You can log in to your server using SSH to edit this file manually and update the nameserver settings.
To view the file, use this command:
# cat /var/cpanel/nameserverips.yaml
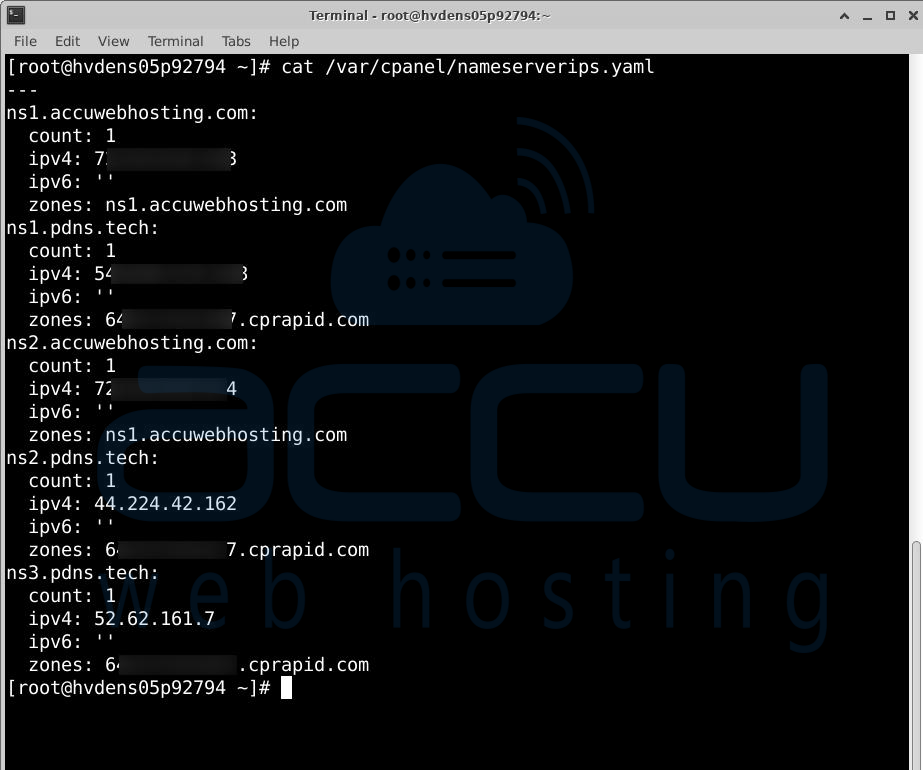
This command displays the content of the file. You can then edit it using a text editor like vim or nano. Before making any changes to the nameserverips.yaml file, delete the following cache file:
# rm /var/cpanel/nameserverips.cache
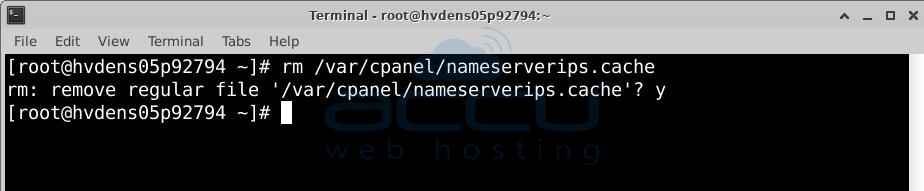
cPanel will automatically rebuild this cache file after you make your changes.
AccuWeb Hosting support always recommends backing up any file you plan to edit via SSH. You can create a backup with this command:
# cp /var/cpanel/nameserverips.yaml /var/cpanel/nameserverips.yaml.bak
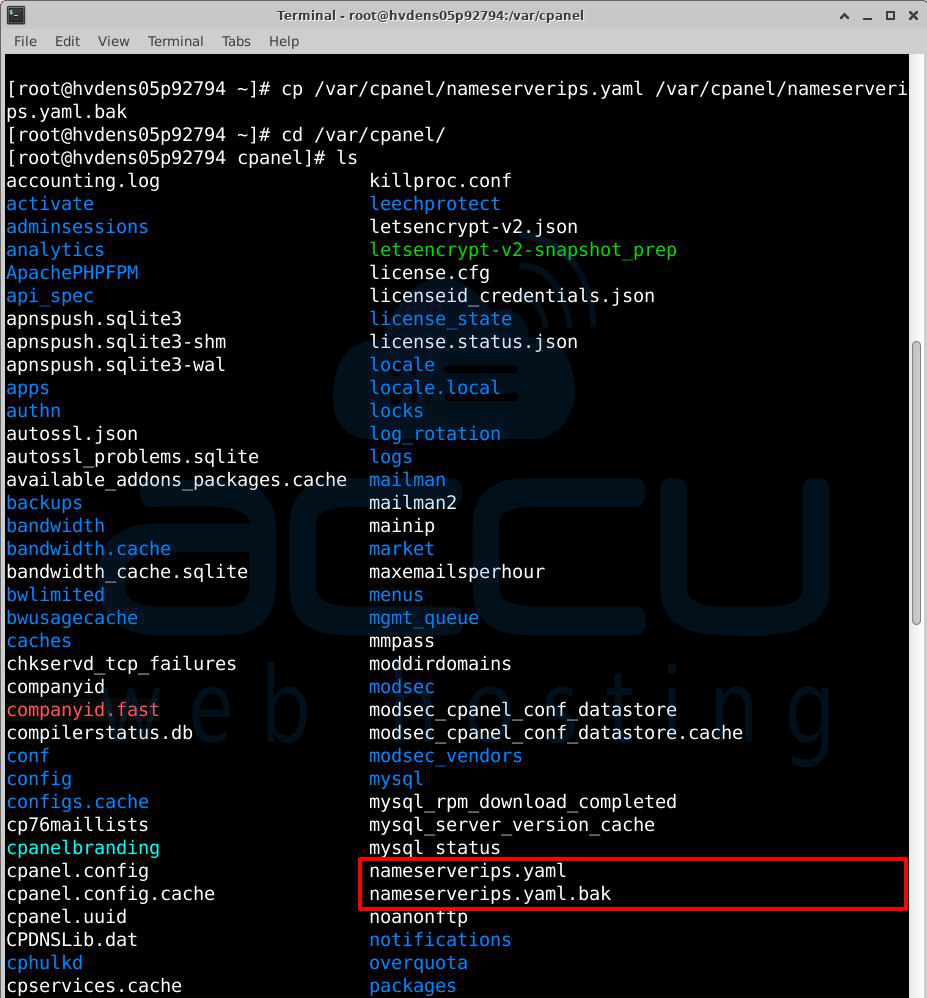
If something goes wrong, you can easily restore the original file by renaming the backup. To edit the file, run this command in the terminal:
# nano /var/cpanel/nameserverips.yaml
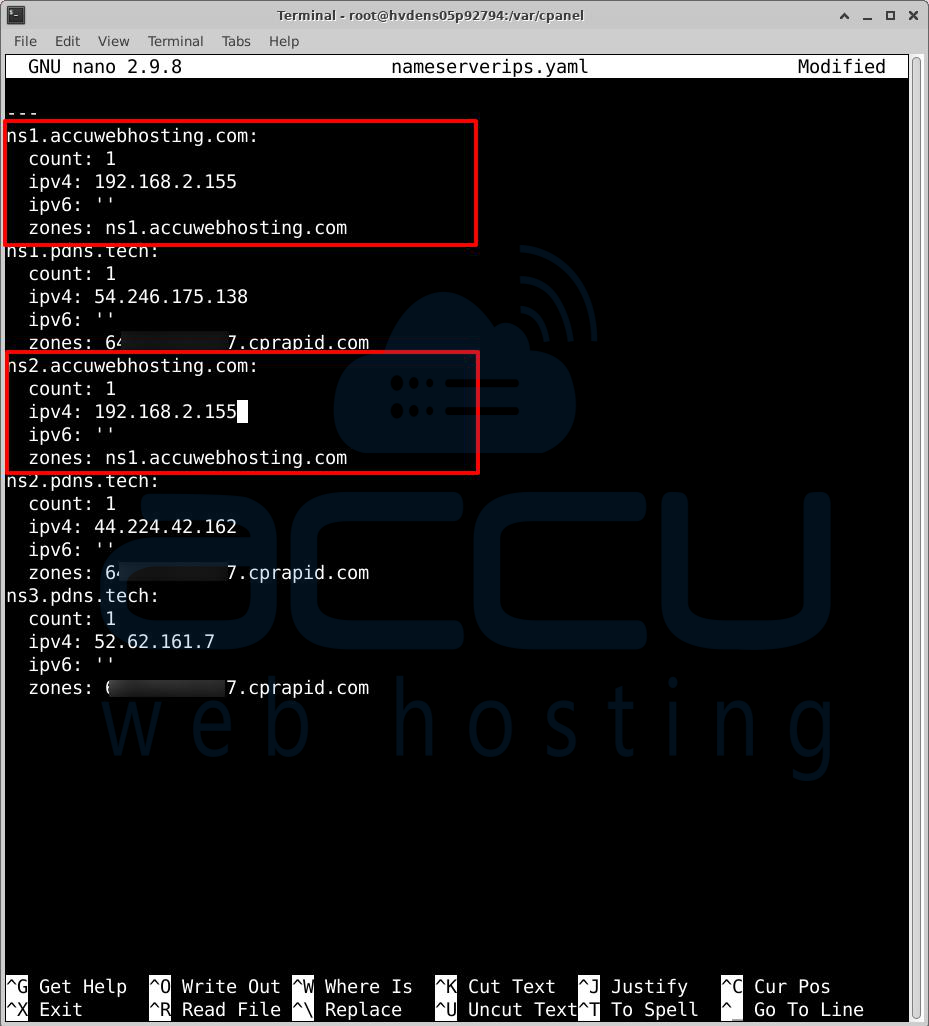
After making the necessary changes to the nameserver details, save your edits by pressing Ctrl+X.
Conclusion:
Setting up private nameservers in WHM/cPanel means configuring your server to manage DNS for your domain directly. The process usually involves registering the nameservers with your domain registrar, adding A records for the nameservers in your DNS zone, and ensuring the server is set up to handle DNS requests. Once done, these private nameservers will let you manage your domain's DNS settings through WHM/cPanel, giving you more control and a personalized web hosting service.


