The main benefit of blocking WHM server access for particular countries is to enhance the security of your server by reducing the risk of unauthorized access, brute force attacks, and other malicious activities originating from countries with a higher level of cybercrime.
Before we move forward to see how to block WHM server access for specific countries, it is important to ensure that you will have to enable the cPHulk function in your WHM panel, which is a built-in WHM function.
However, we will see how and from where you can enable this feature.
We will present two methods that you can use.
Method #1 - with cPHulk function
Please follow the below steps to block your WHM server access for specific countries from WHM’s built-in function, cPHulk.
Step 1: Log into the WHM panel as the root user.
Step 2: Navigate to Security Center -> cPHulk Brute Force Protection.

Step 3: Now if the cPHulk function is disabled in your VPS, click here to enable it.

Once you enable this function, you will see multiple options and settings to protect your WHM server.
Step 4: Here, go to the Countries Management tab.

Step 5: Select the countries you want to block, click the gear icon to the right of the list, and select the option Blacklist selected countries.
You can also search for your desired country name in the search field given there.

Now, users of the selected countries are no longer able to log in to your Email, FTP, and cPanel.
Method #2 - with csf
We assume that you already have CSF installed on your cPanel server, so let's follow the steps to block traffic by country using the CSF firewall.
Step 1: Log into the WHM panel as the root user.
Step 2: Go to Plugins -> ConfigServer Security & Firewall
Step 3: Scroll down and click on the csf – ConfigServer Firewall option, then click on the Firewall configuration option.
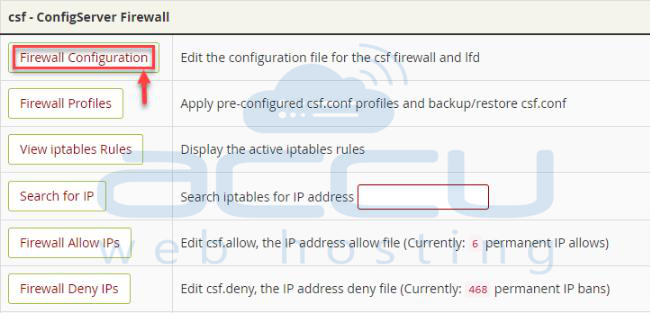
Step 4: On the Firewall Configuration page, navigate to the Country Code Lists and Settings section.
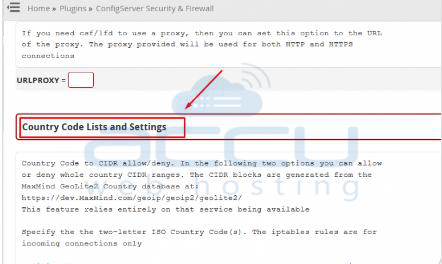
Step 5: Here, you will find below two options:
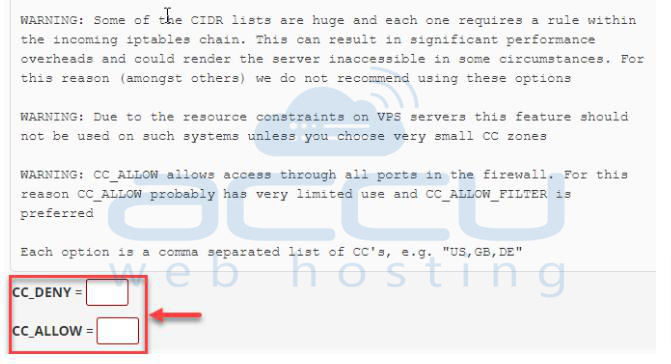
You will have to use the CC_DENY field to block by country code.

Here, CC_DENY field accepts two-letter country codes, such as “US” for the United States of America, “GB” for Great Britain, and “DE” for Germany.
Note: You can also add multiple countries separated by commas with no intervening spaces. For example, “US,GB,DE” to deny access to your desired countries.
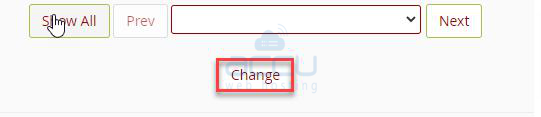
Step 6: Scroll down and click the Change button as shown in the image below.
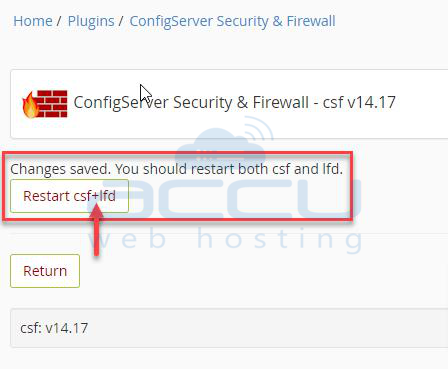
Step 7: You will see a message that your changes have been saved.
To restart the firewall with the updated settings, click on the Restart csf+lfd button on the following screen:
That’s it!!


