cPanel provides a free SSL Certificate to the WHM/cPanel users. Since it is an automated process by cPanel, there is no need to copy/paste the certificate.
The Main benefit of an Auto SSL Certificate is, it will be renewed automatically on its expiration time, and it will also cover the sub-domains of the same cPanel user account.
Let us go through the steps to enable the Auto-SSL Certificate.
How to enable AutoSSL?
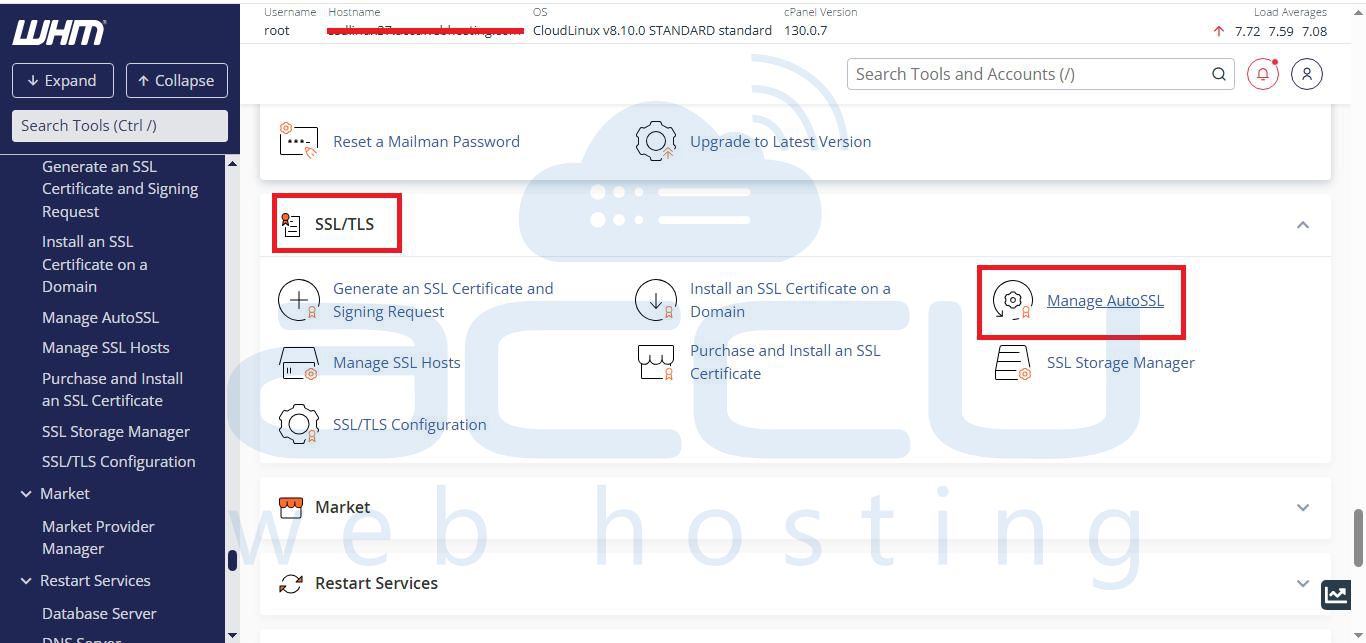
Step 1: Log in to the WHM Panel. Navigate to the SSL/TLS >> Click on Manage AutoSSL.
Step 2: Navigate to the SSL/TLS >> Choose an AutoSSL provider: Let’s Encrypt, and click on Save.
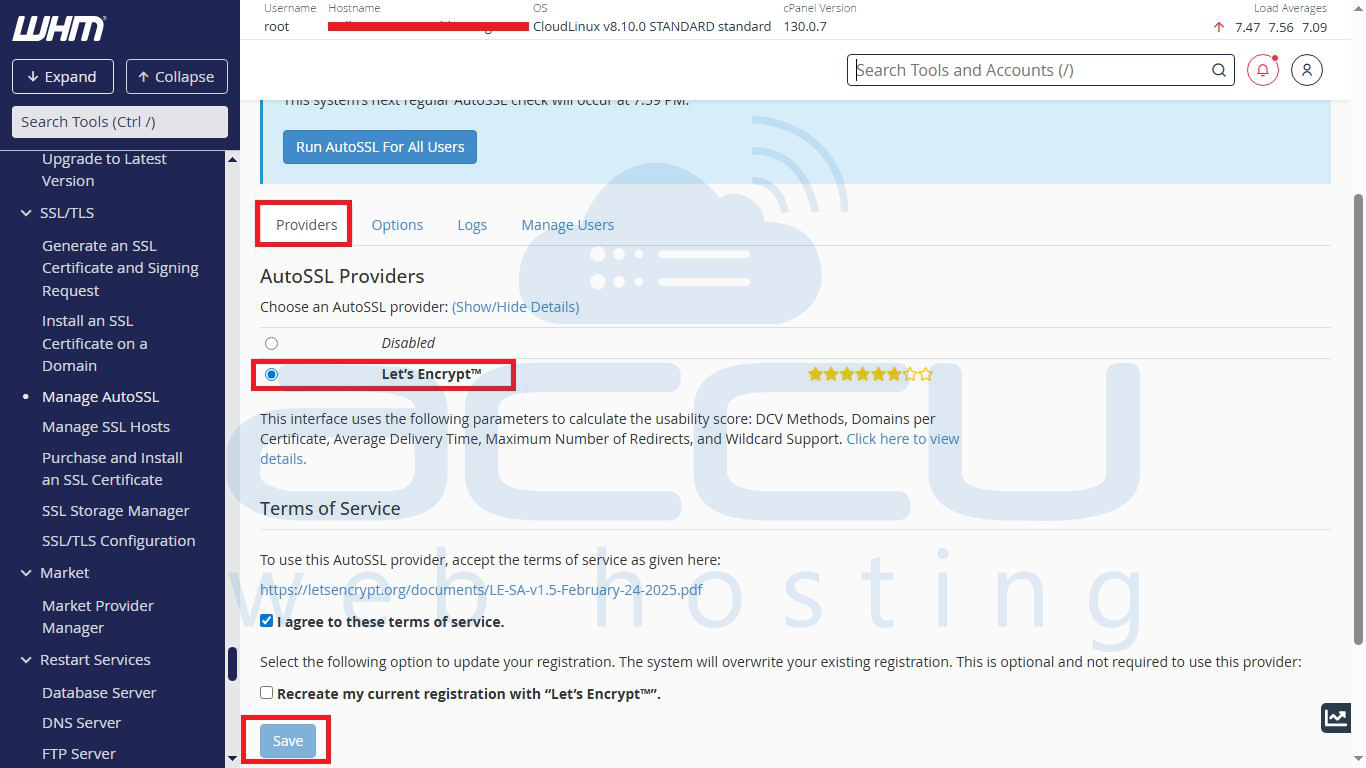
This will lead the WHM to add the AutoSSL Package in Feature Manager. It will also set a cron job to install and download the SSL Certificate for the hosted Domains.
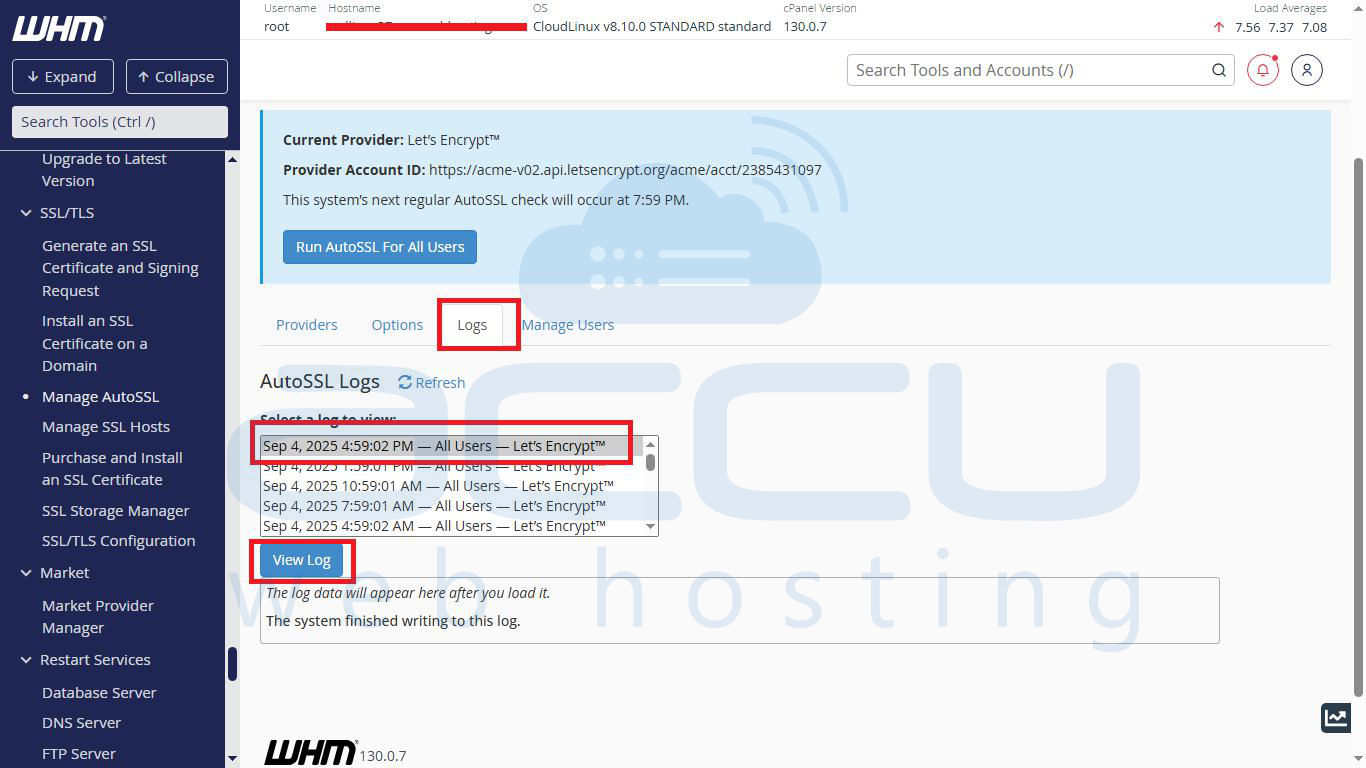
You can check the status of your Auto SSL Certificate from the Logs. The Log file can be for all users or for a separate cPanel user. Select the log and click on the View Log button.
How to enable AutoSSL for a User?
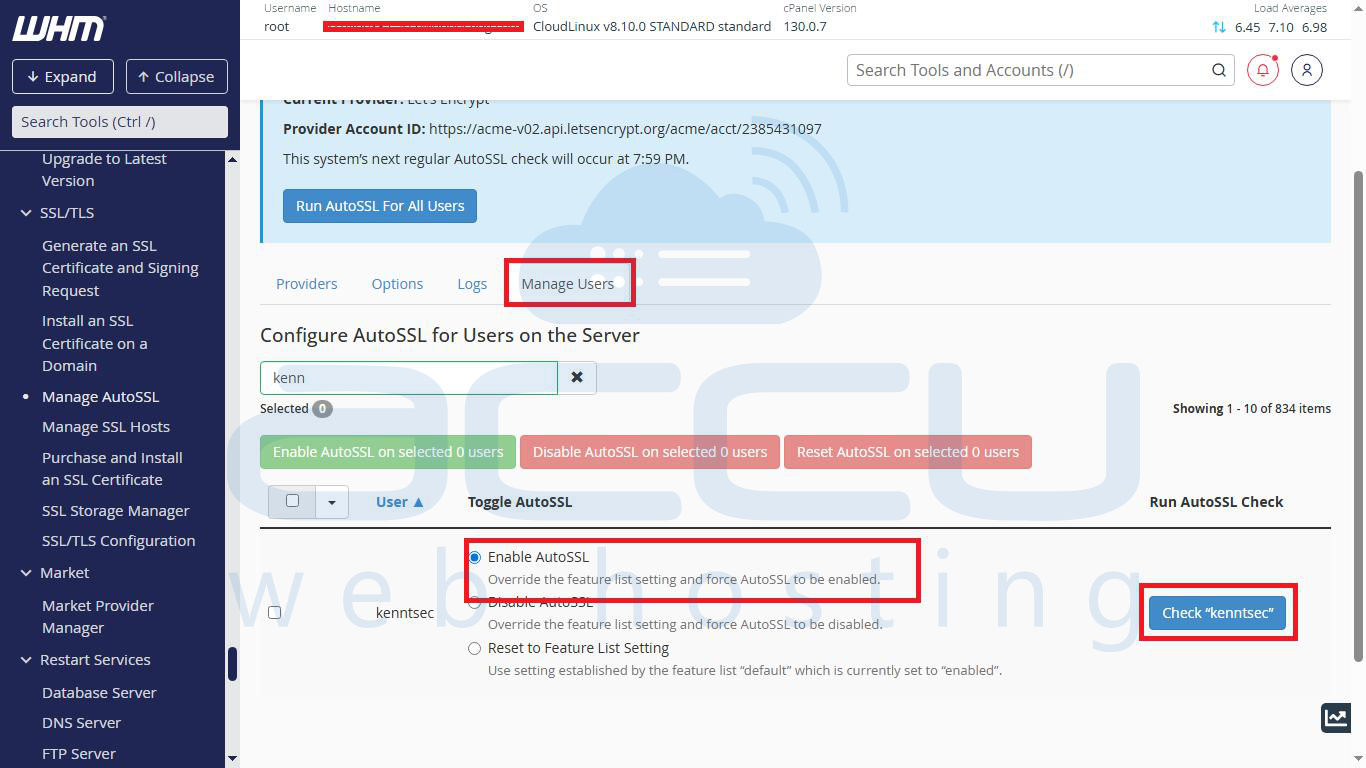
Step 1: Navigate to the Manage AutoSSL a Click on the Manage Users button.
Step 2: Select your User and choose the Enable AutoSSL option. will add your user to the queue to install the Auto SSL Certificate.
You can verify the Auto-SSL Logs for the same user from Manage SSL>>Logs.