This article will describe to you how to enable Let's Encrypt SSL Certificate for your website/domain from the Plesk control panel. If you are looking for the paid SSL Certificate Get SSL > Pricing details.
What is Let's Encrypt?
Let's Encrypt is a free, global Certificate Authority (CA) that allows you to enable secure HTTPS connections between your web server and your visitors' web browsers to prevent sensitive information from eavesdropping, data tampering, and message forgery. It is valid for 90 days. You can renew it automatically by setting a cron (Daily, Weekly, or monthly) from the Scheduled Task option.
Below are the steps to enable Let’s Encrypt Free SSL Certificate on your domain. Please note that we are installing SSL on a subdomain, test1.accutsetraining.com, to demonstrate the process.
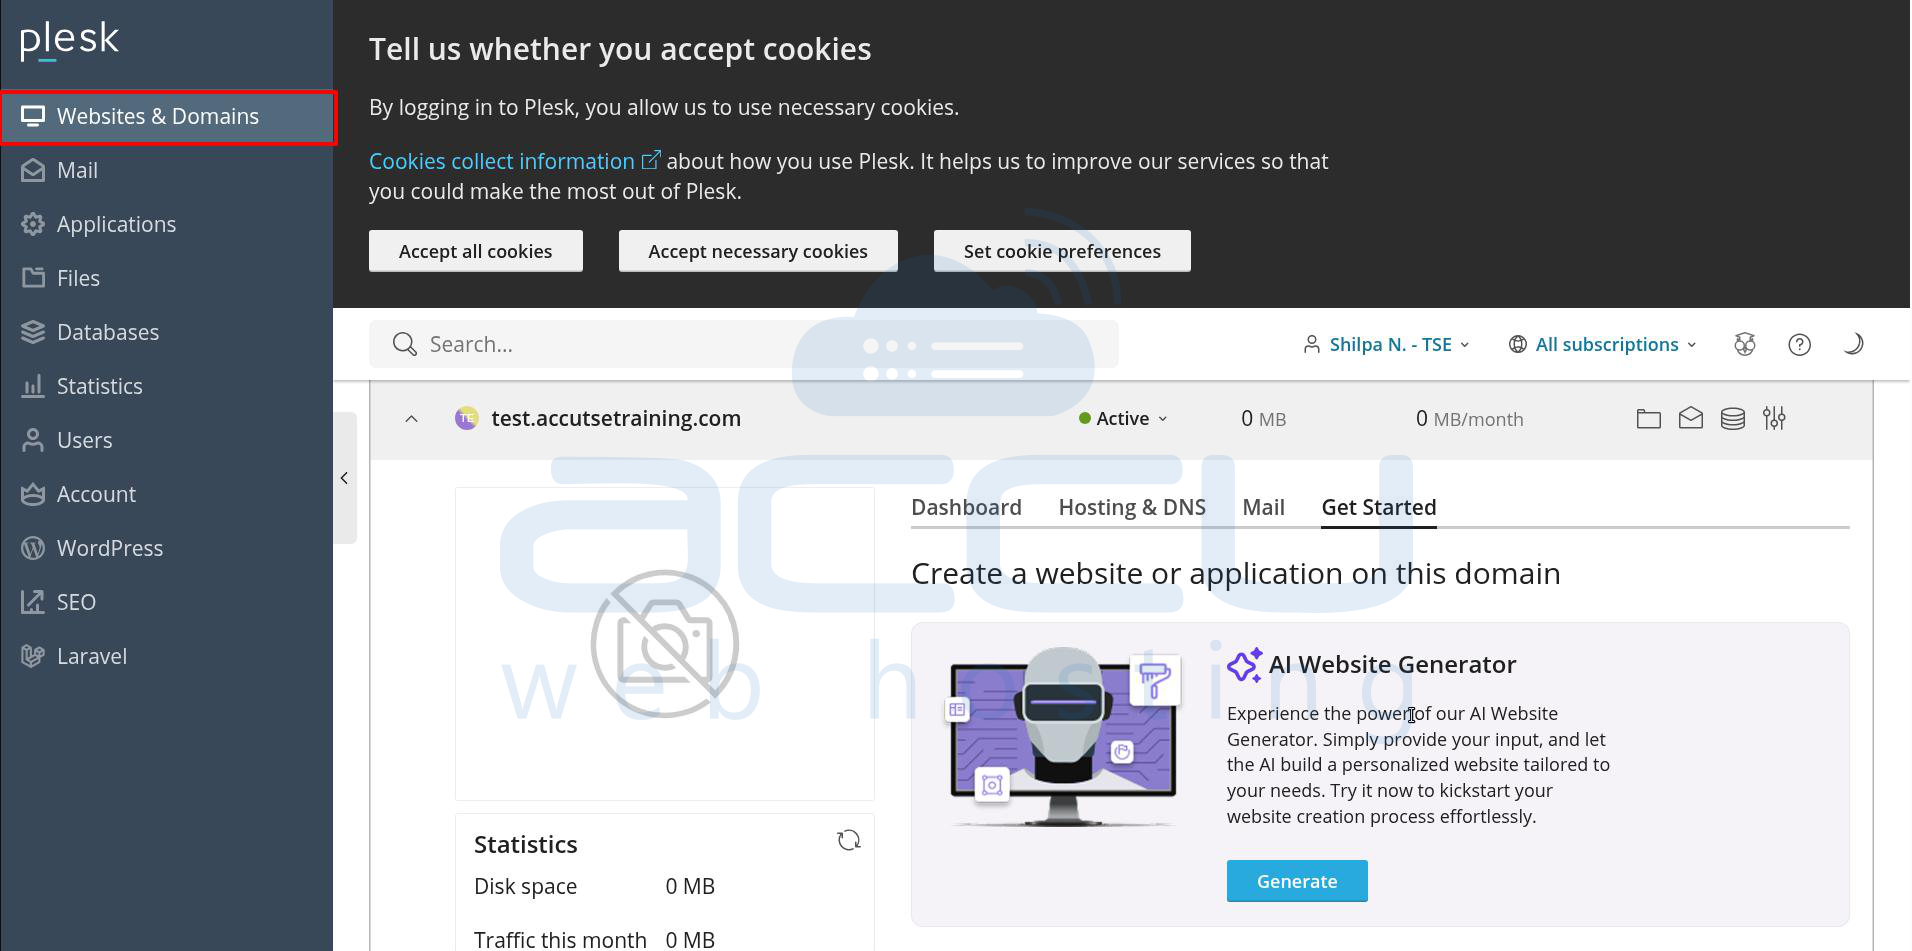
- Login to Plesk Control Panel.
- Click on the Website & Domains option.
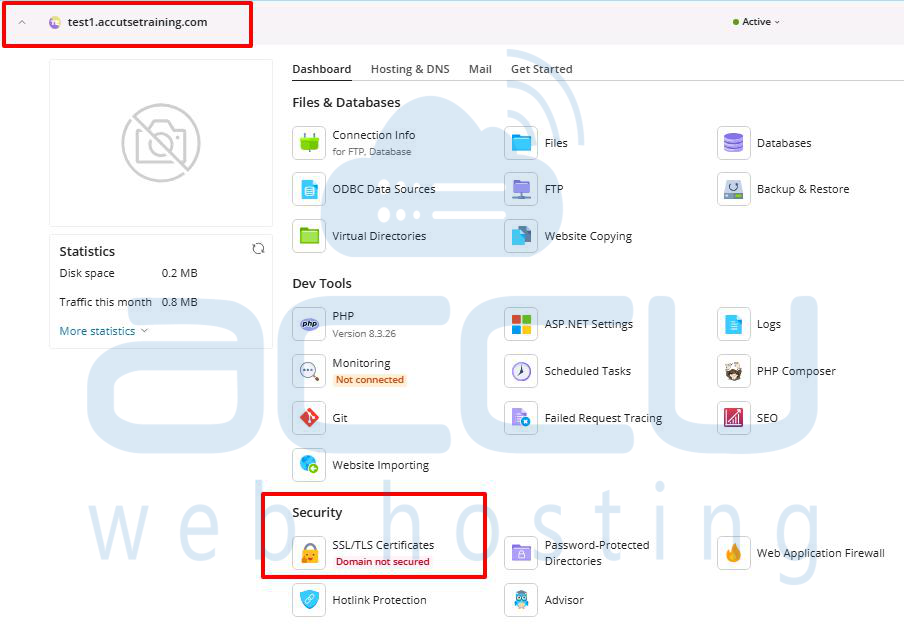
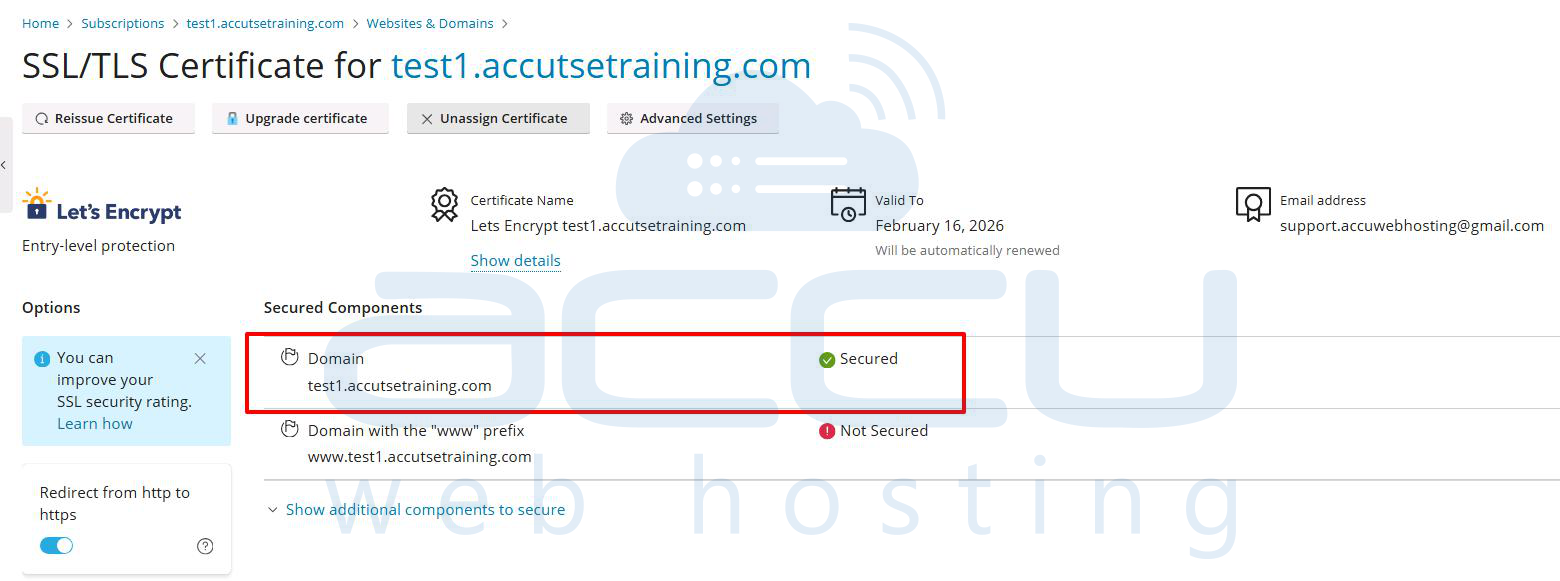
- Locate the domain on which you want to enable and click on the SSL/TLS Certificates option.
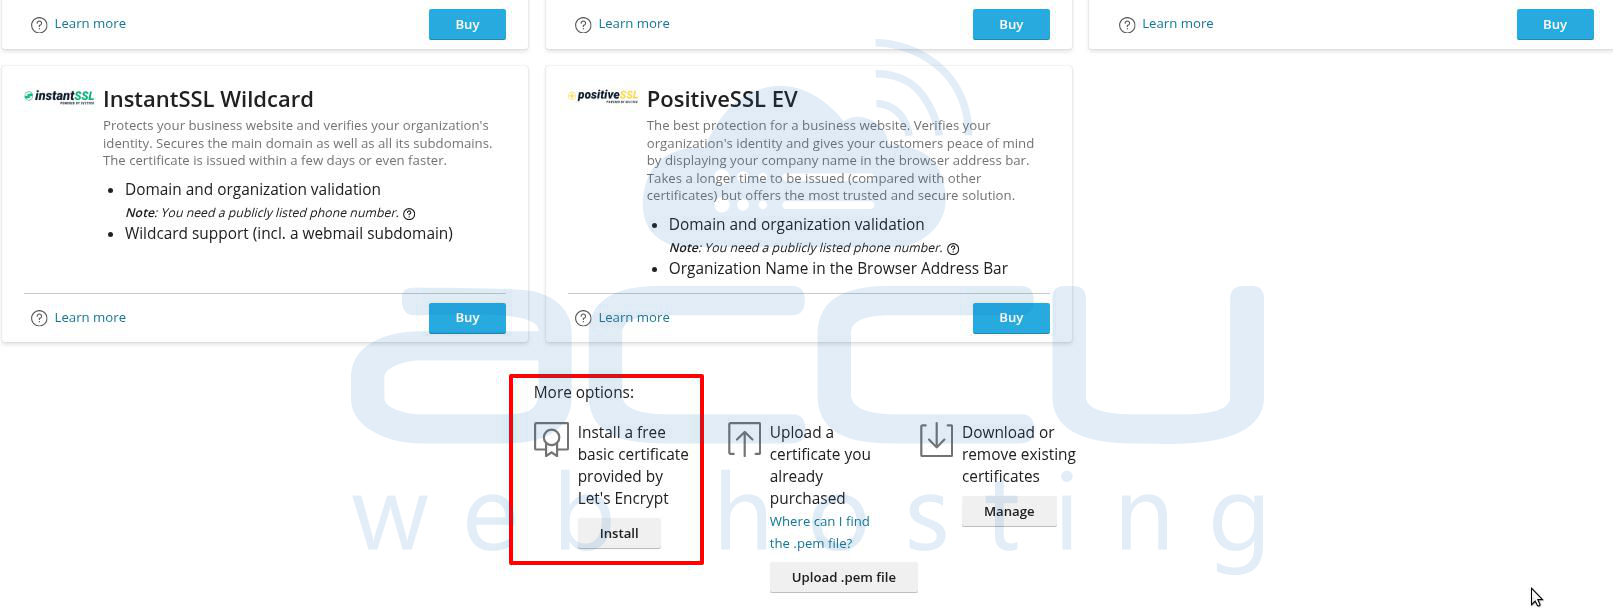
- You will find more options. Click Install under “Install a free basic certificate provided by Let's Encrypt.”
- Enter a valid email address in the field and check the box "Include a 'www' subdomain for the domain and each selected alias", if you want the SSL Certificate to cover the domain both with and without the "www" prefix, and then click on the Get it Free button.
Note: If you don't check the include a www... box, then your certificate will be valid only for yourdomain.com. If you do check the box, both domains yourdomain.com and www.yourdomain.com will be covered.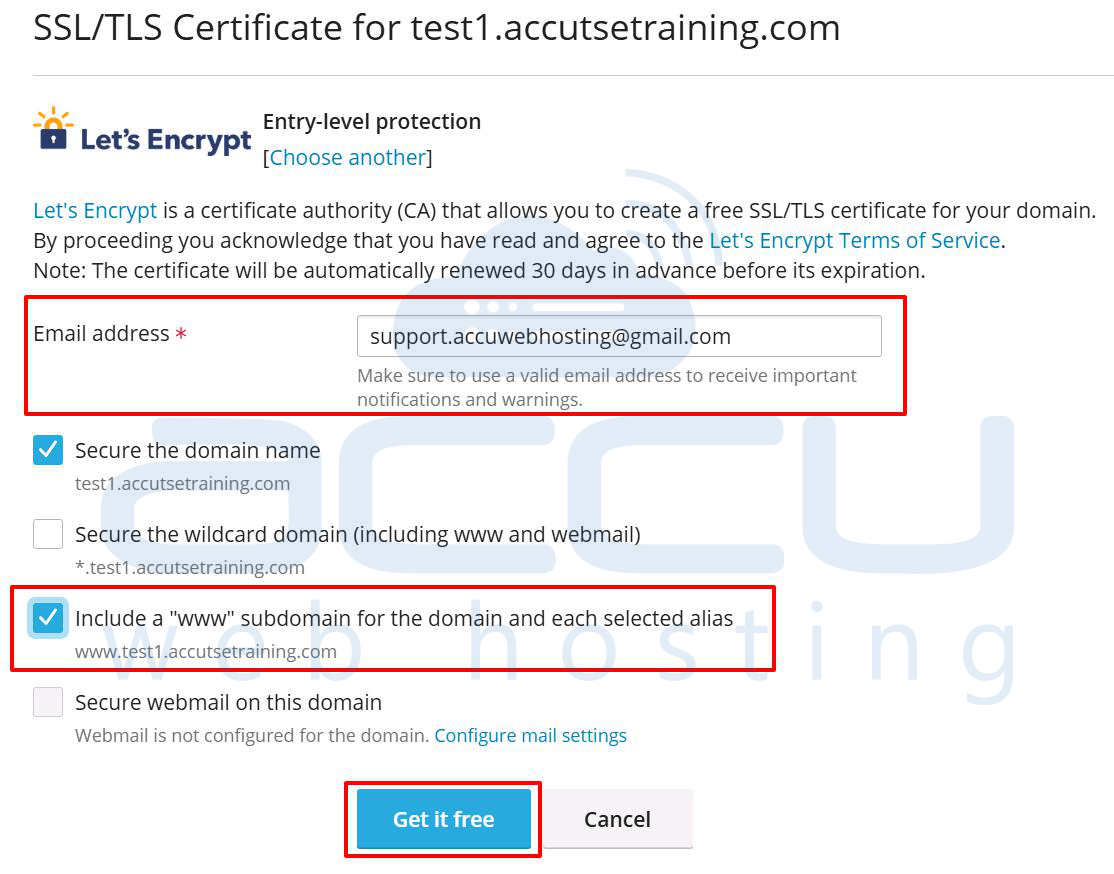
- Once the installation is completed, you will be returned to the hosting page, where a success message will let you know the process is completed.
If the process was not successful, check that the domain name that you have entered is valid. The domain name you have entered in the Let's Encrypt request form must:- Be spelled correctly.
- Be registered and active.
- Be resolved with your hosting service.
- Go back to Website & Domains. Select the domain where SSL is installed.
Go to Hosting & DNS → Hosting Settings.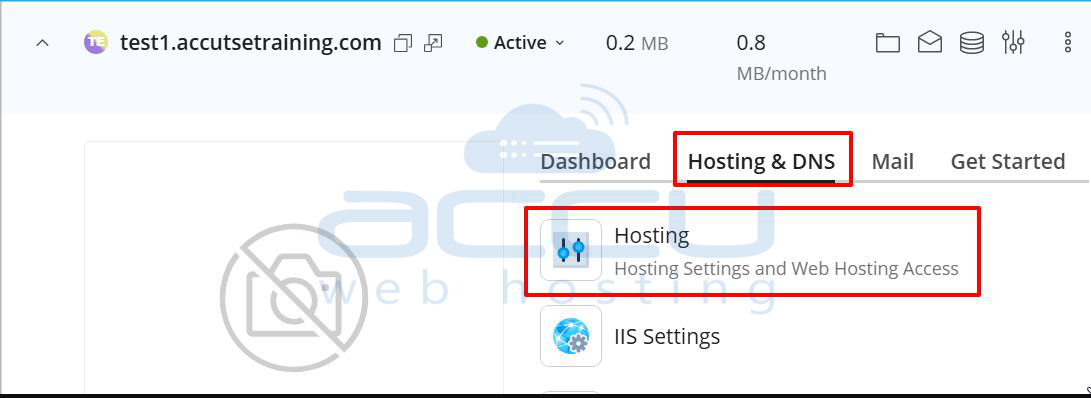
- Enable Redirect visitors from HTTP to HTTPS under SSL/TLS Support.
Click Save.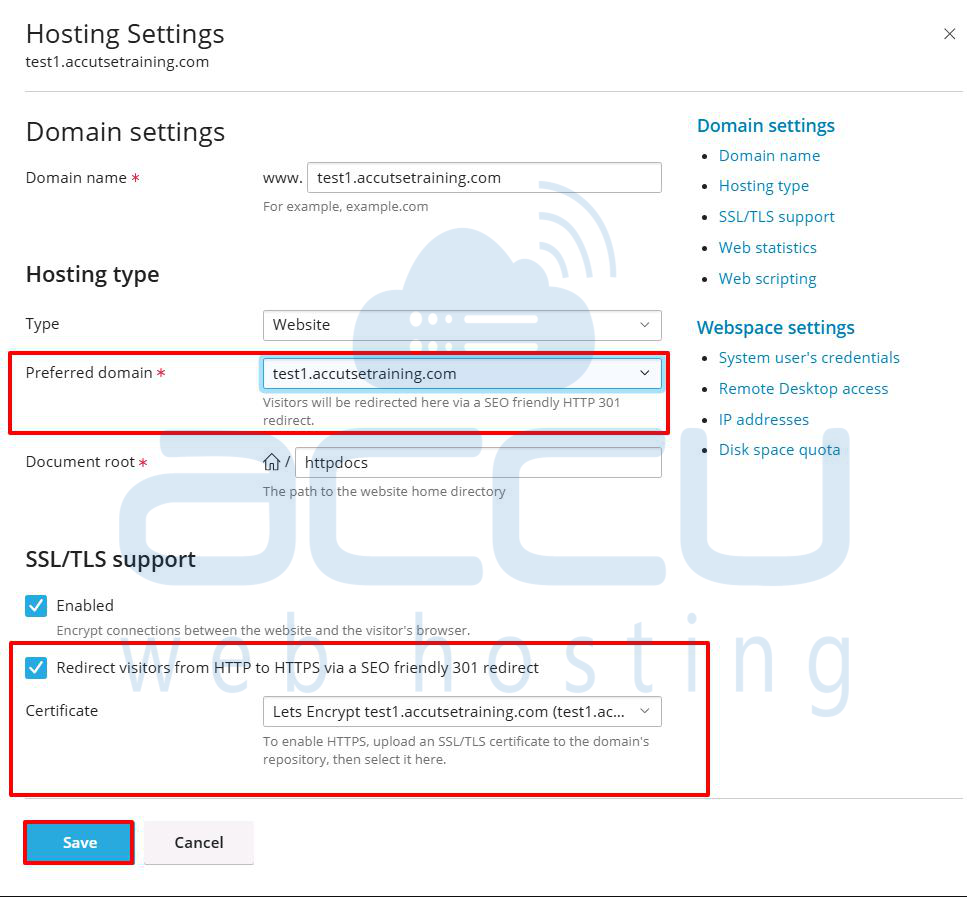
- Now you can browse your website using https:// without any SSL warnings.
