This article will assist you in placing the Forex VPS order through our site.
1. Go to the Forex VPS page that lists the Forex VPS plans and their details.
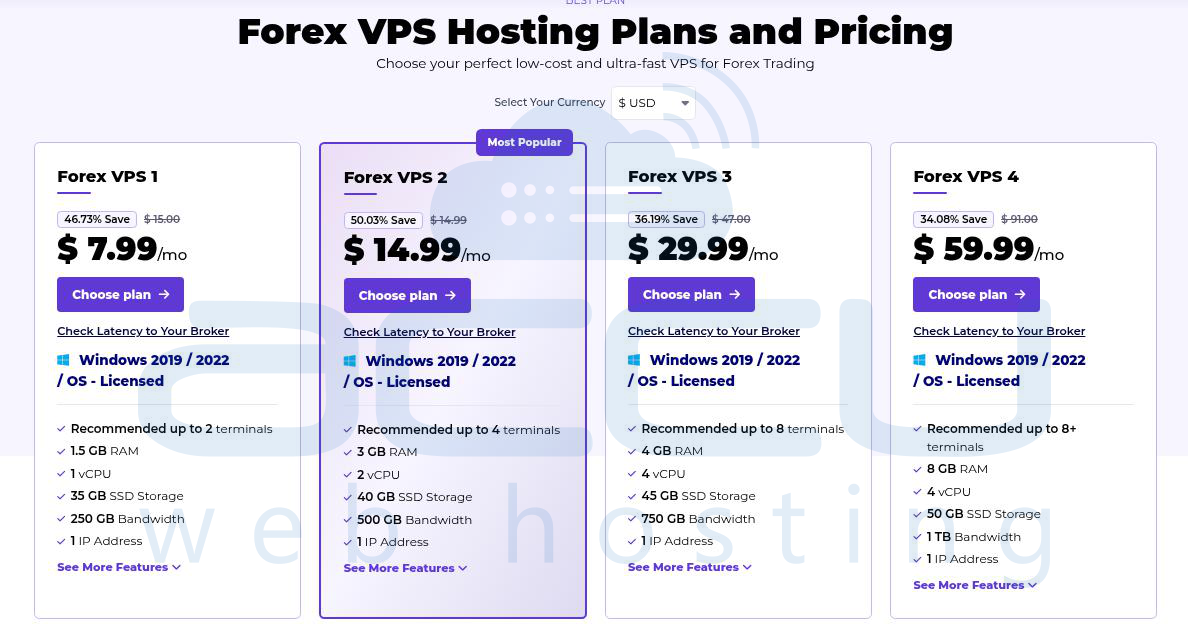
2. Select your desired plan according to your requirements and click the Test Latency button. The Test Latency button will help you find your broker's nearest server location.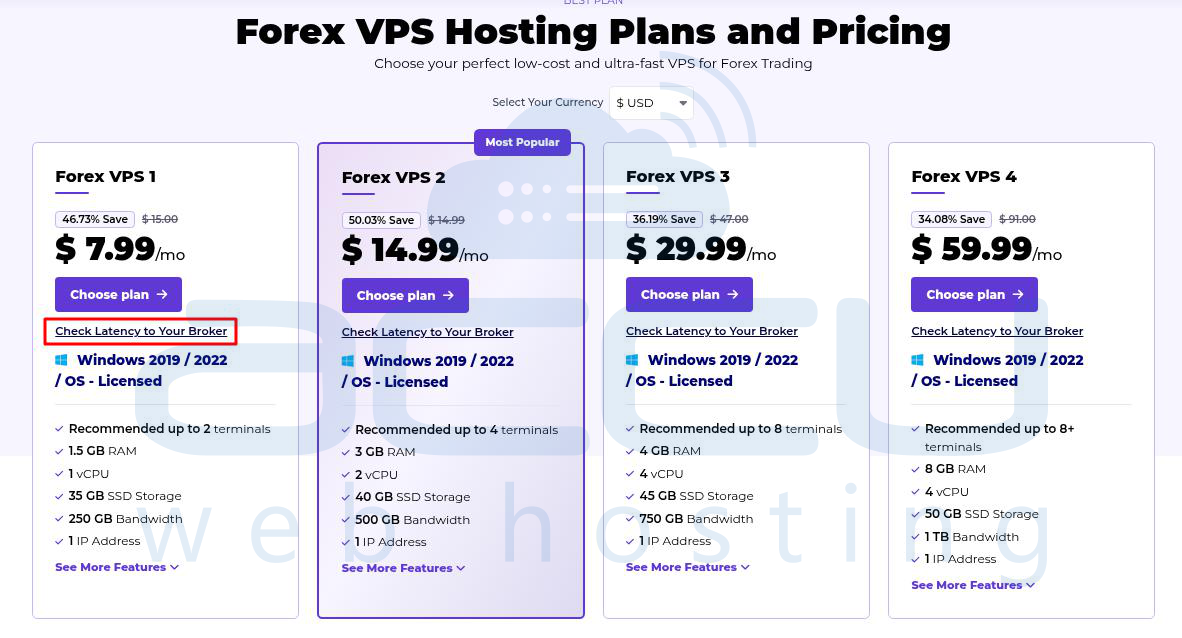
3. On this screen, you will see the list of your brokers; select your broker. If you can't find your broker's name in the list, you can ask our team to add it to the list. This can be accomplished by live chat or a ticket to our sales team.
In this article, we have selected TMGM for demonstration.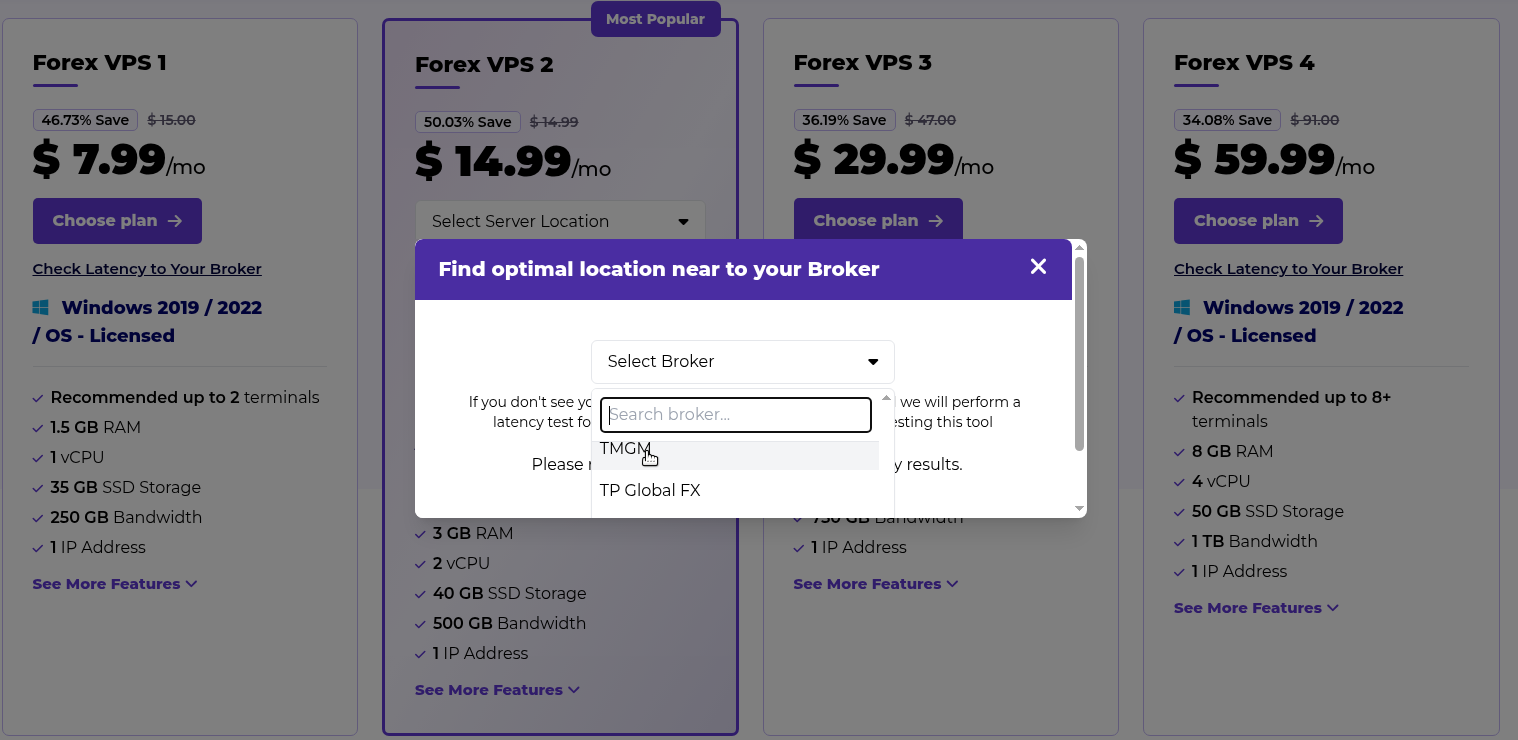
4. Once you select your broker, you will see the VPS location nearest your broker's server. We strongly recommend choosing the VPS nearest to your broker's server.
5. Please click the "Order Now" button to order a Forex VPS.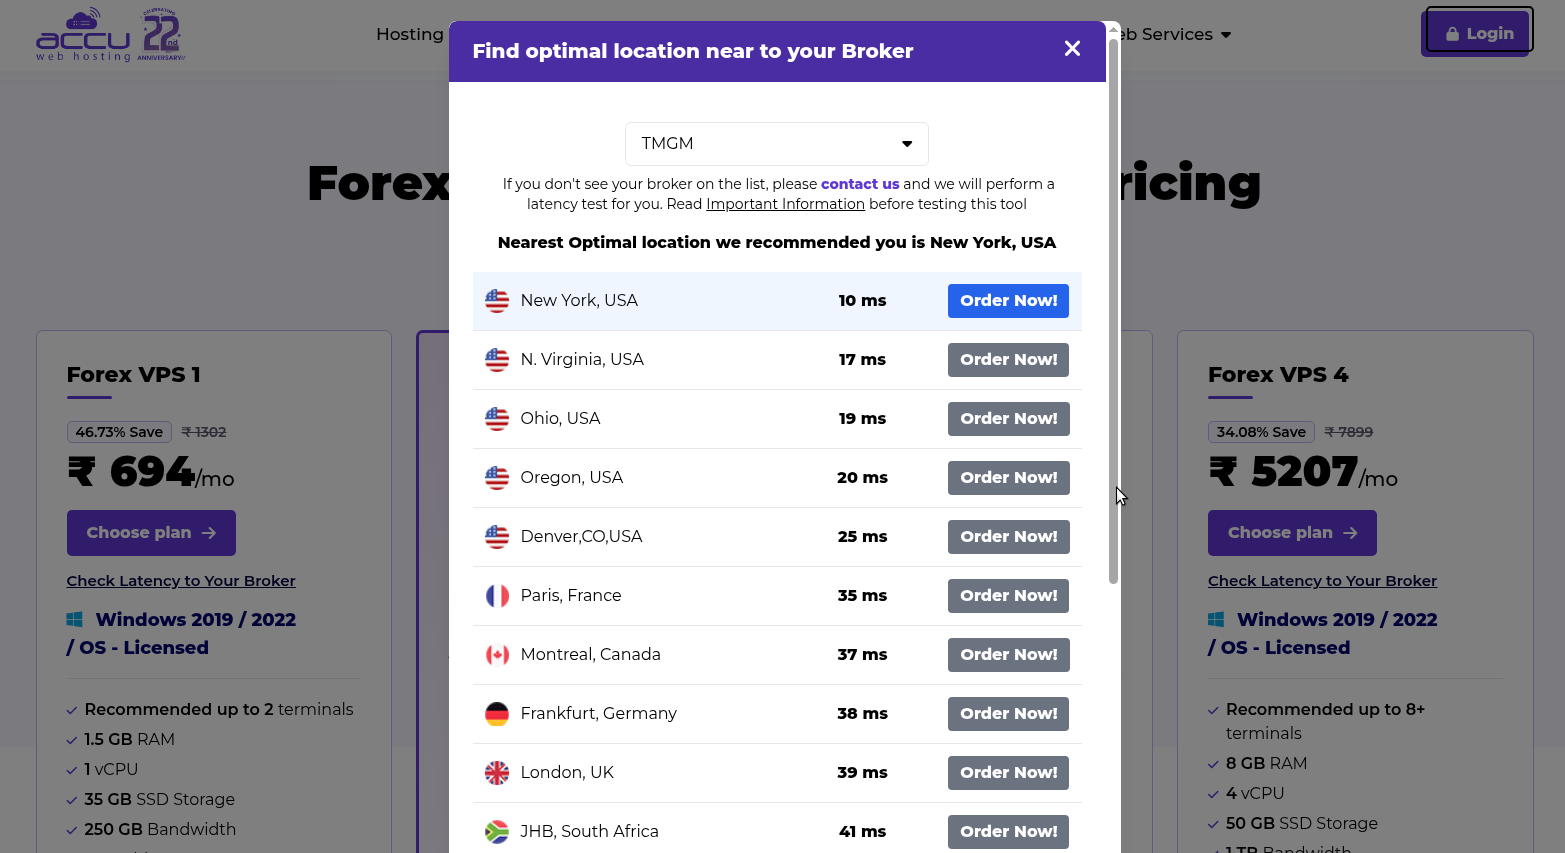
6. Once you click the "Order Now" Button, you will be redirected to the page below.
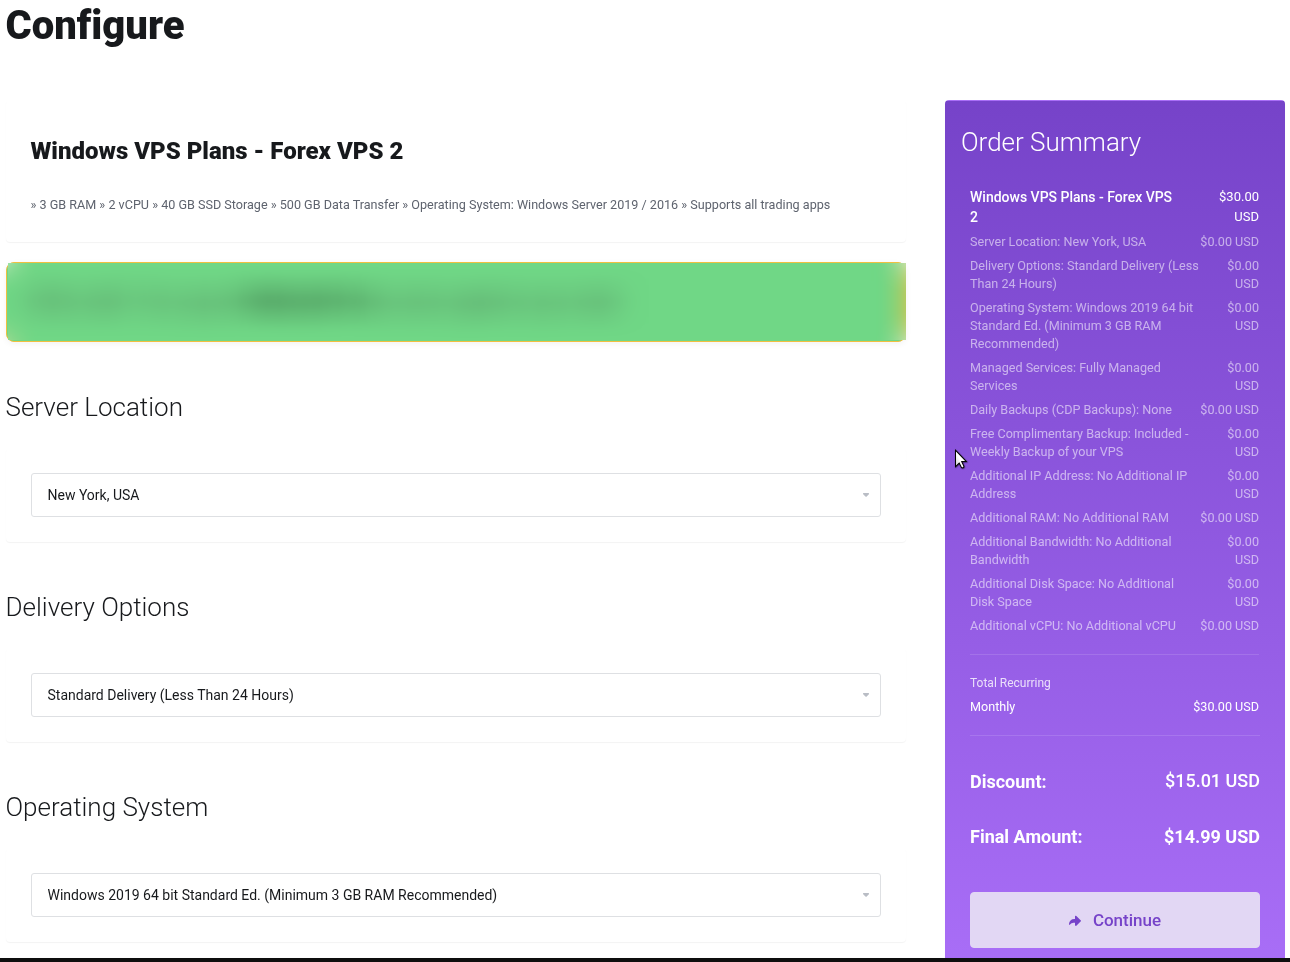
Now, you will see configurable options. Finally, you have to select the required details from the options below for your order.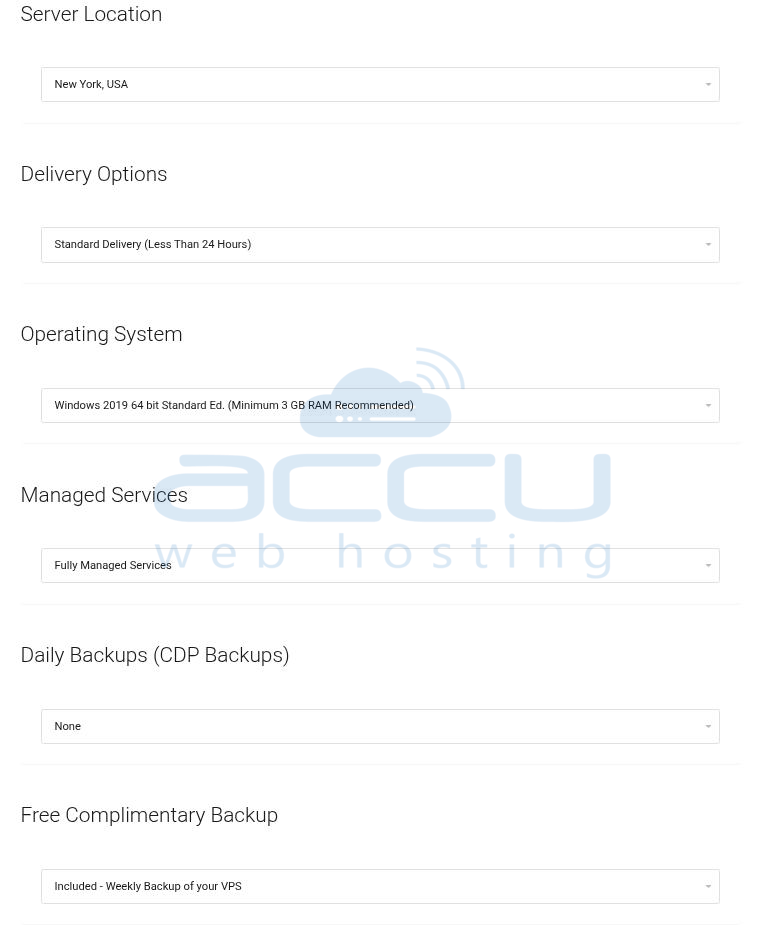
Server Location: You can choose your server location nearest your broker's.
Delivery Options: We offer two types of delivery options: Standard Delivery and Priority Delivery.
Operating System: You can choose your desired OS (Operating System) for your order.
Managed services: We provide managed service on Forex VPS free of cost. To know what we include, check out this link for Managed services.
Daily backups (CDP backups): You can purchase a CDP backup service if you want to secure the backup of your server daily. A minimum 20 GB CDP space purchase is required. Leave the None option as it is if you do not need CDP Backup.
Free complimentary backup: AccuWeb Hosting offers a free backup to all VPS in Denver, USA. For more details, click here.
Additionally, if your broker is situated near the locations of Denver (USA), New York (USA), London (UK), Frankfurt (Germany), and Hyderabad (India), and you have chosen one of these locations, you will find the configuration option below.
Please be aware that these additional options will not be available for any location other than those specified above.
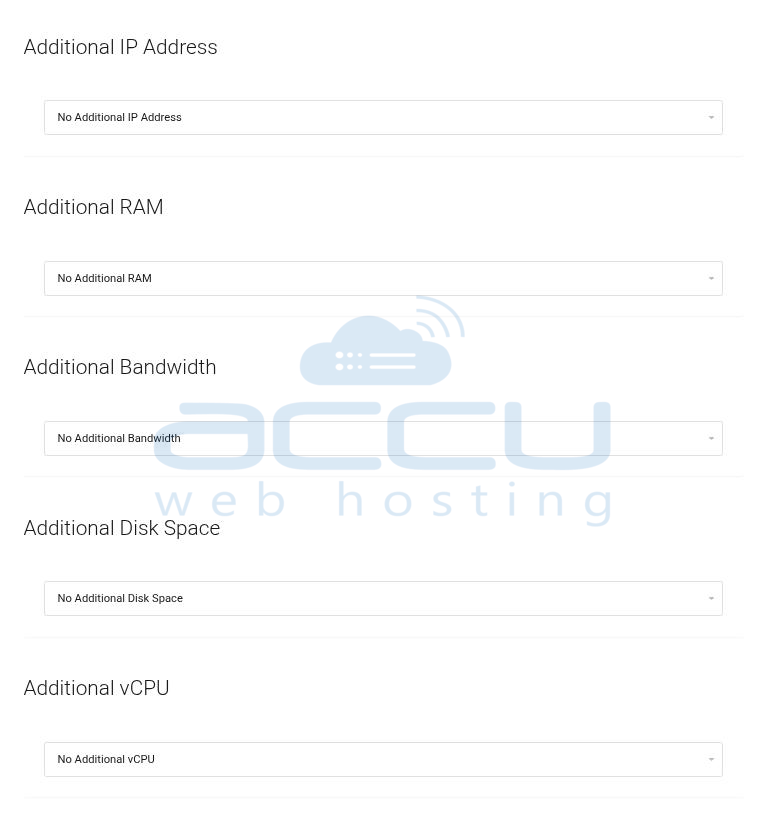
Additional IP address: Select the number of additional IP addresses that you need for your VPS. Leave No Additional IP Address options as it is if you do not need an Additional IP Address.
Additional RAM: Select the additional RAM you need for your VPS. Leave No Additional RAM options as it is if you do not need Additional RAM.
Additional Bandwidth: Select the amount of additional bandwidth you need for your VPS. Leave No Additional Bandwidth options as it is if you do not need Additional Bandwidth.
Additional Disk Space: Select the amount of additional Disk space you need for your VPS. Leave No Additional Disk Space options as it is if you do not need Additional Disk Space.
Additional vCPU: Select the number of additional vCPUs you need for your VPS. Leave No Additional vCPU options as it is if you do not need Additional vCPUs.
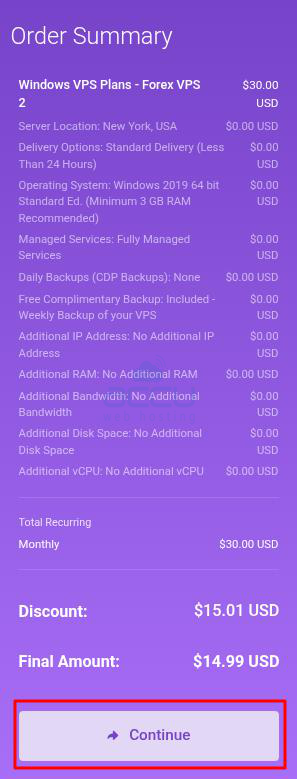
7. Once you select the required details for your VPS from the configurable options, you can see the selected details under the order summary. Once you verify the details, click the continue button to proceed further.
8. You will get a new window by clicking the continue button. You can review and check out the selected product during the configurable option in this window.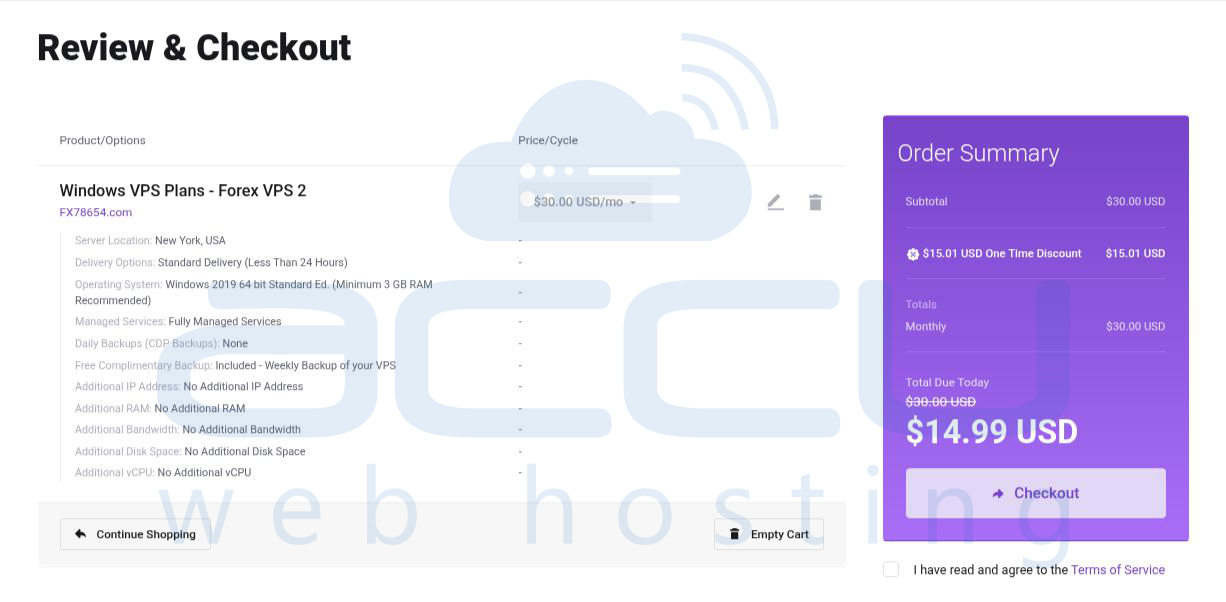
9. Next, you must enter your product's billing details in the billing information. If you are an existing client, you must select the option “Existing customer login” or if you are a new client, then you must select the option “Create a new account”. Please note that all the fields are mandatory.
Also, you have to choose a security question for your account. This will be used to recover your client area password.
10. Next, you have to choose a payment method for your product. We do offer three payment methods to make the payment. The first is Stripe, the Second is PayPal, and the Third is a Credit Card. You can choose any one method to make the payment. 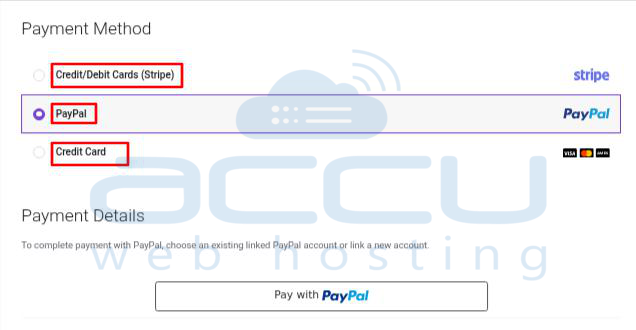
11. Next, you will see the Notes/additional information option. In this option, you can put a message/note in the additional information field if you want to add any special notes for configuring your VPS. We will check it during setup time and configure it. 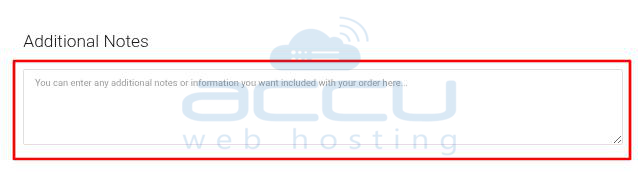
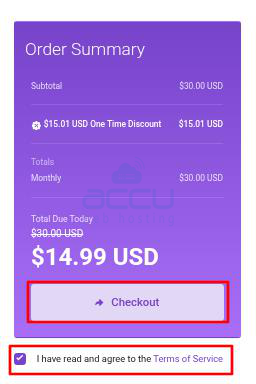
12. Once all is done, tick the Terms and Service option and the Complete Order button.
13. Once you click the checkout button, you will be redirected to the Payment Gateway, which you would have selected in the payment method. In this article, we have selected the PayPal Method to make the payment, so that you will be redirected to the PayPal Payment Gateway.
You can select Credit Card in the Payment Method if you want to make the payment through a credit card.
14. Your order will pass through our verification process after completing the payment. Once it is verified and approved, it will be queued for setup. The setup process may take up to two hours.
→ Looking to know the accepted payment method by Accuwebhosting? Please refer to the Accepted Payment Method for more details.
→ Looking to set up your MT4/MT5 to automatically starts after reboot? Please refer to setup autostart mt4/mt5 for more details.
→ Looking to install MetaTrader on your VPS? Please refer to install meta-trader for more details.
→ Looking to connect your Forex VPS from a different OS? Please refer to Connect my Forex VPS for more details.
