First, you will need to enable the DKIM from Plesk using the following steps.
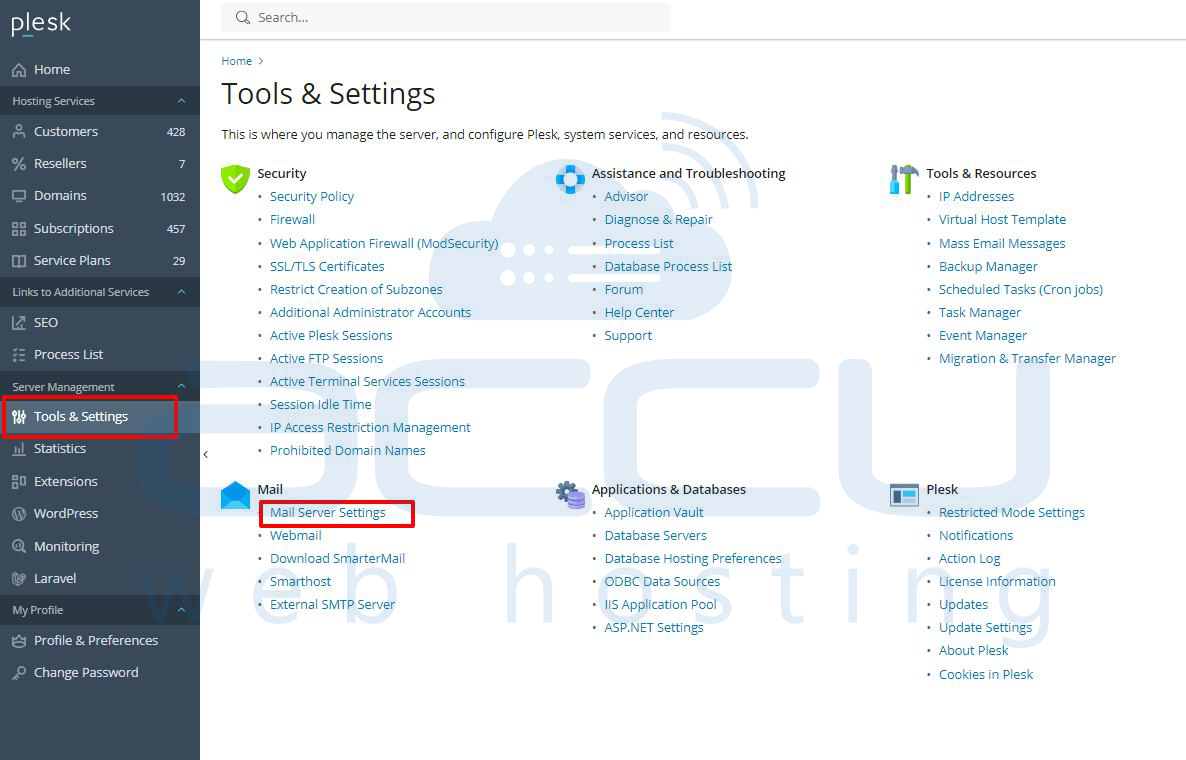
Step 1: Log in to the Plesk Panel.
Step 2: Go to Tools & Settings > Mail Server Settings (in the Mail group)
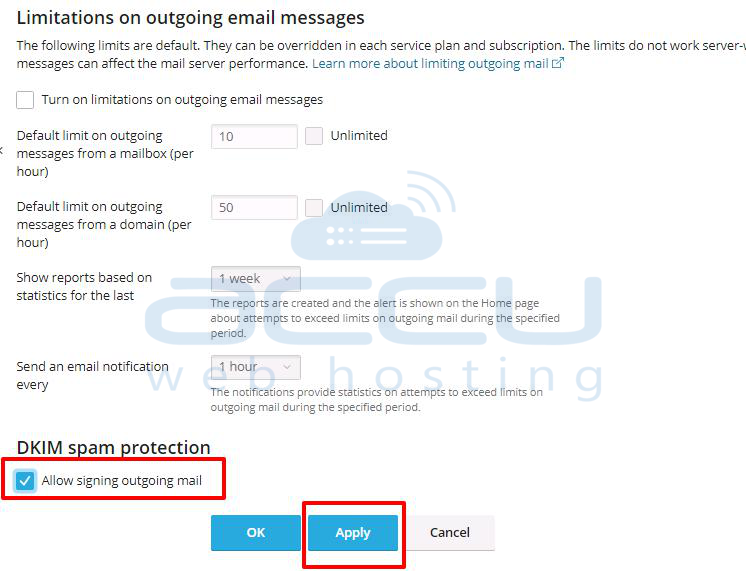
Step 3: Scroll down to the DKIM spam protection section. Tick the Allow signing outgoing mail, apply, and save this change.
Once you have enabled the DKIM from Plesk, you can enable it for the Domain.
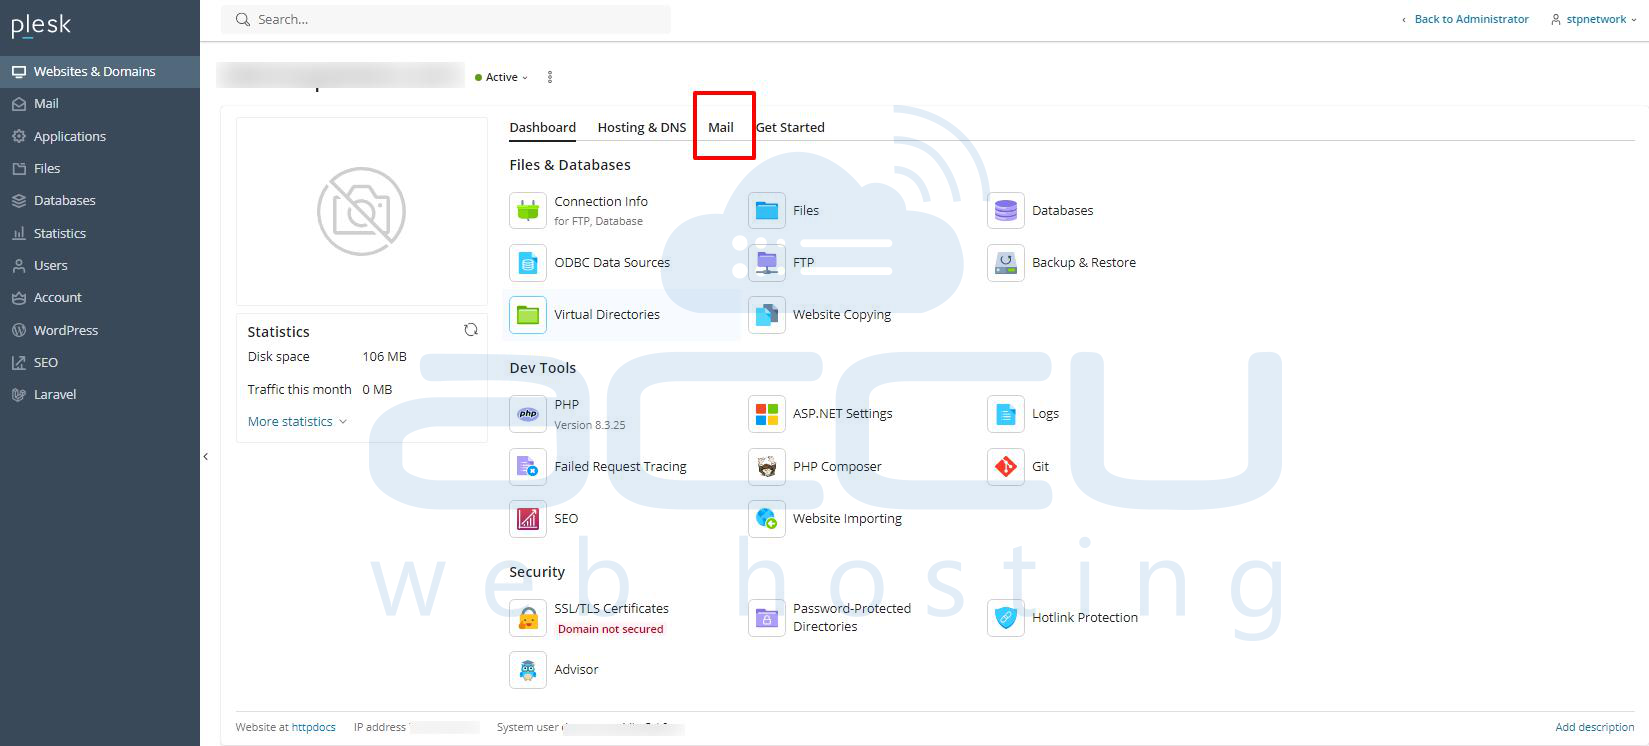
Step 1: Select the Domain
Step 2: Go to the Mail tab.
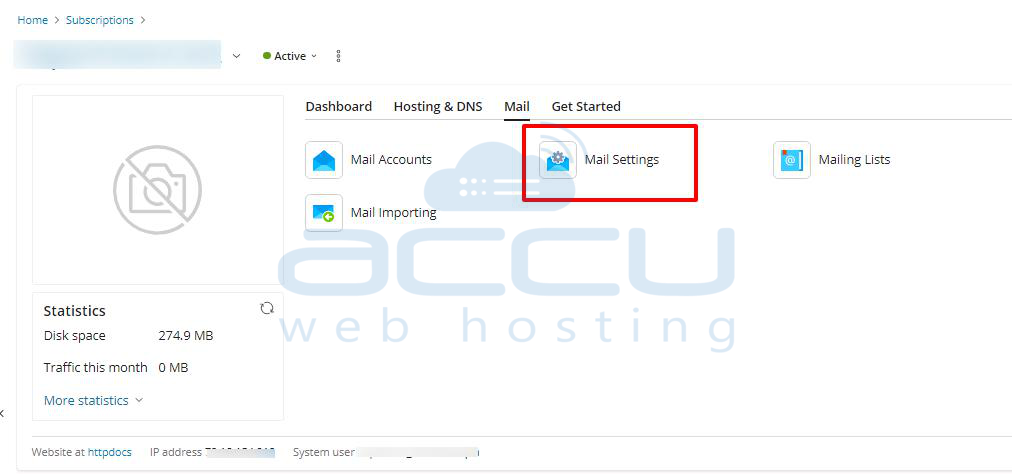
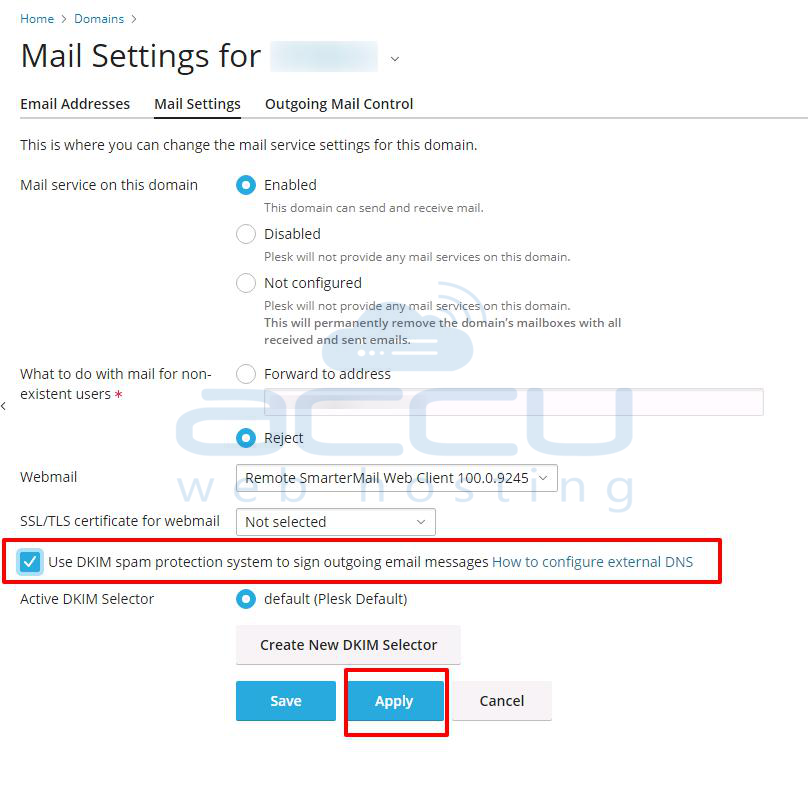
Step 3: Click on the Mail Settings.
Step 4: Select Enable for the DKIM spam protection system to sign outgoing email messages and click OK.
Note: The DNS service must be activated on a domain, and it must be using the Plesk DNS.
Plesk will automatically add the following two records to the DNS zone of the domain. Hence, you don’t need to add the record in the DNS Zone.
default._domainkey.<example.com>  - contains the public part of the generated key.
_domainkey.<example.com>              - contains the DKIM policy.
If the domain is not using the server's DNS, it requires adding the necessary TXT records in the DNS zone of that domain.
