In this article we'll discuss how to upgrade Apache using EasyApache tool in WHM. EasyApache is a powerful script that allows you to upgrade and configure Apache web server. To perform these steps you would require root access on your VPS or dedicated server.
- Login to WHM as root user.
- Under Software section, click EasyApache option. At next screen, you would see the current Apache configuration (current profile) under Previously Saved Config. Hover the mouse over gear icon Customize Profile located under Action column.

- At next screen, you would see EasyApache wizard consisting of following stages.
- Apache Version == At this stage, EasyApache build process allows you to select Apache version you want to use in your profile. Select the Apache version of your choice and click on Next Step button.

- PHP Version == At next stage, EasyApache build process allows you to select PHP version you wish to choose. We are keeping the same PHP version since we're just updating Apache, so on the PHP Version page simply click on Next Step button.

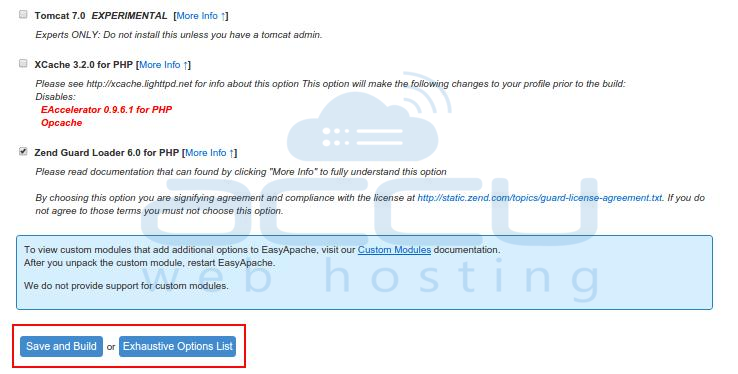
- Short Options List == At Short Options List, EasyApache build process allows you to select the features you wish to include in your EasyApache profile. At this point, If you want to explore some more features to include in profile, click on Exhaustive Options List button at bottom. In this article, we are just upgrading Apache without making any custom changes, so just scroll down to the bottom of the page and click on Save and Build. A Confirm Action window will prompt you to Recompile Apache and PHP now? just go ahead and click Yes.

- Exhaustive Options List == If you have already built the Apache profile in previous step, you would not see this stage. At this stage, EasyApache build process allows you to select more features to include with your EasyApache profile.
- Apache Version == At this stage, EasyApache build process allows you to select Apache version you want to use in your profile. Select the Apache version of your choice and click on Next Step button.
Please be patient and do not to close the browser during this process since Apache rebuild may take between 15 to 20 minutes. Once the Apache rebuild is finished, your WHM server should be running the updated version of Apache.
We install following Apache/PHP modules with default Linux cPanel VPS. If you wish to enable additional PHP/Apache modules, you can follow above steps to recompile Apache/PHP using Easyapache with selecting your choice of modules.
For Short Options List (In Easyapache)
- Mod SuPHP
- IonCube Loader for PHP
- Mod Bandwidth
- Zend Guard Loader for PHP
Exhaustive Options List -> Apache Built-in Modules
- Keep "Apache Default" modules as they area (selected modules in "Orange" color)
- Fileprotect
- Headers
- Mod SuPHP
- Symlink Race Condition Protection
Exhaustive Options List -> Other Modules
- IonCube Loader for PHP
- Mod Bandwidth
- Zend Guard Loader for PHP
Exhaustive Options List -> PHP 5.x.x
- Bcmath
- Bz2
- CGI
- Calendar
- CurlSSL
- Curlwrappers
- Exif
- FTP
- GD
- Gettext
- Iconv
- Imap
- MailHeaders
- Mbregex
- Mbstring
- Mcrypt
- Mysql
- Mysql of the system
- MySQL "Improved" extension
- Openssl
- PDO
- PDO MySQL
- POSIX Path Info Check
- Pear
- SOAP
- SQLite3
- Sockets
- TTF
- Tidy
- Wddx
- XSL
- XmlRPC
- Zip Zlib


