Nowadays, email spam has become a significant annoyance in day-to-day email communications. You may have seen your mailbox filled with unsolicited bulk electronic messages. These spam emails may contain virus attachments or malicious links that tempt you to visit some random website where you will be asked to buy products, or these websites may deliver malware to your computer.
In this article, we have compiled techniques to reduce the number of unwanted emails that get delivered to your mailbox.
Enable SpamAssassin
SpamAssassin is a widely used automated filtering system that identifies spam based on message headers and email content. It uses a rule-based scoring system to determine whether an incoming email is legit or spam; an email with a higher score is more likely to be spam.
Note:
To prevent legitimate emails from being rejected, store the spam emails in the Junk/Spam folder rather than rejecting them immediately.
You can enable SpamAssassin from cPanel by clicking the SpamAssassin icon under the Mail section.
For more information, refer to our article How to Enable SpamAssassin from cPanel.
Filter Emails with Spammy Words
If you can determine spammy words in emails that identify them as spam, you can filter out such emails easily through cPanel's account-level and user-level filtering features.
Refer to our article - Create an Account-level and User-level filters from cPanel.
Enable Email Authentication from cPanel
The cPanel Email Authentication section combines two technologies - DKIM and SPF to reduce spam.
- Enable SPF, DKIM & DMARC
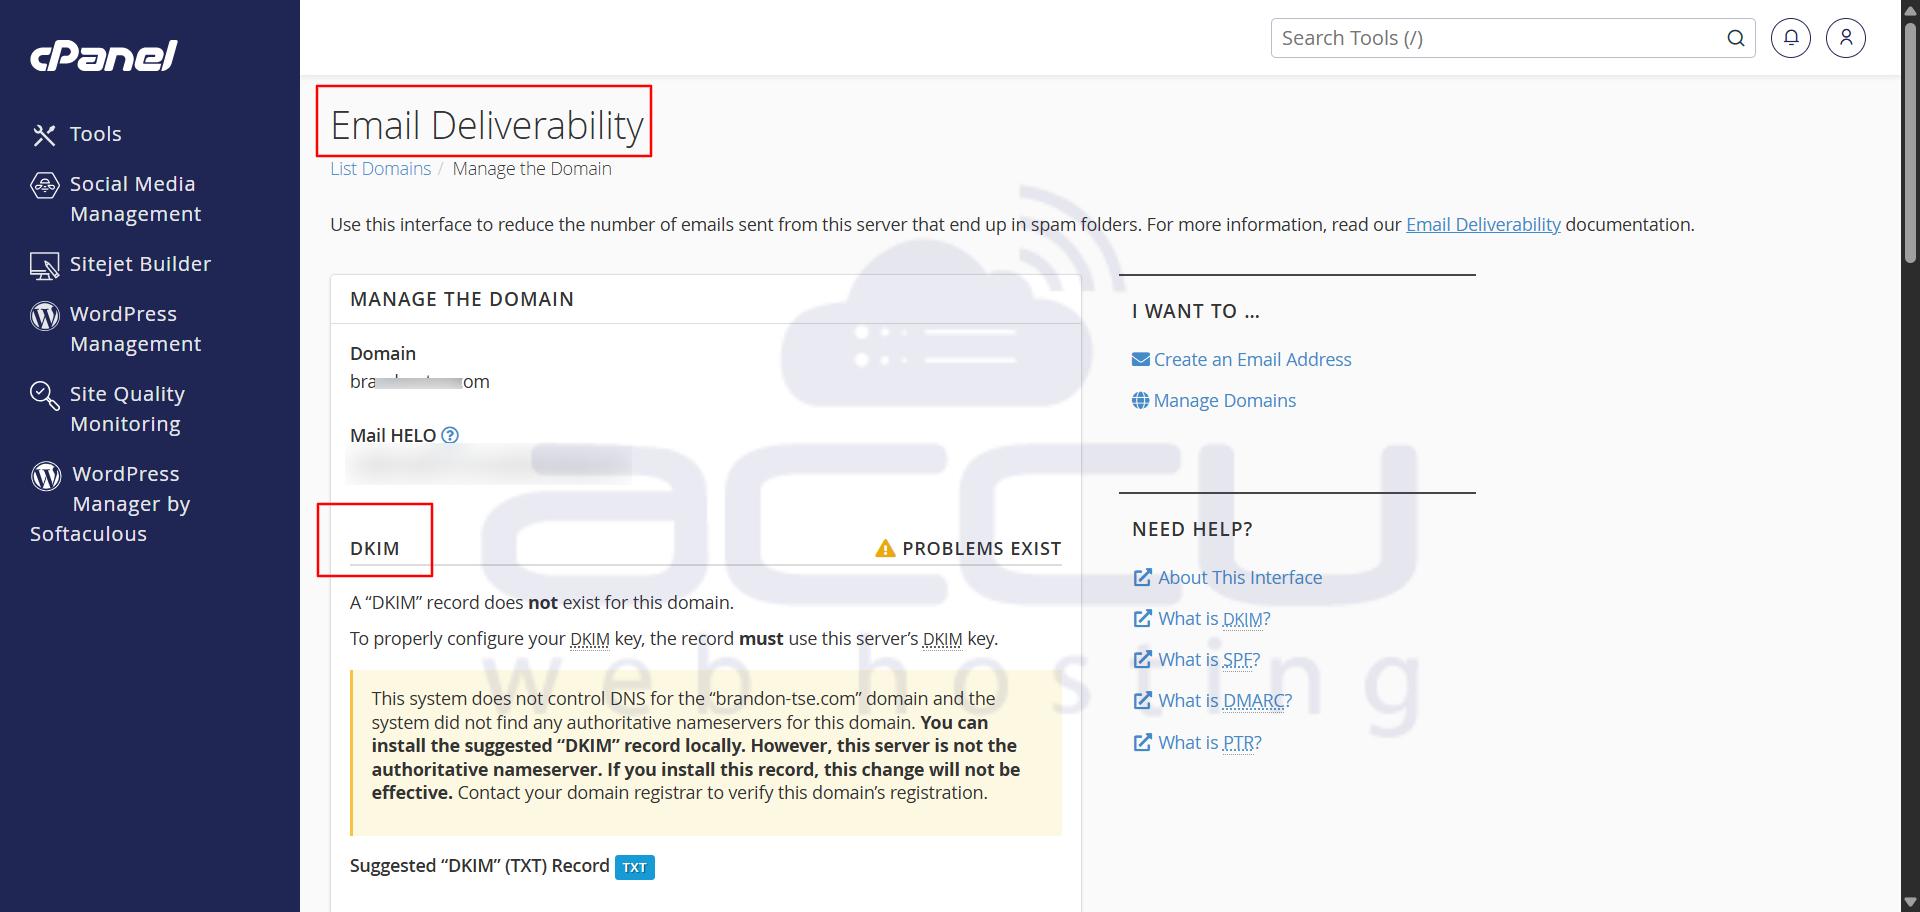
Go to: cPanel → Email → Email Deliverability
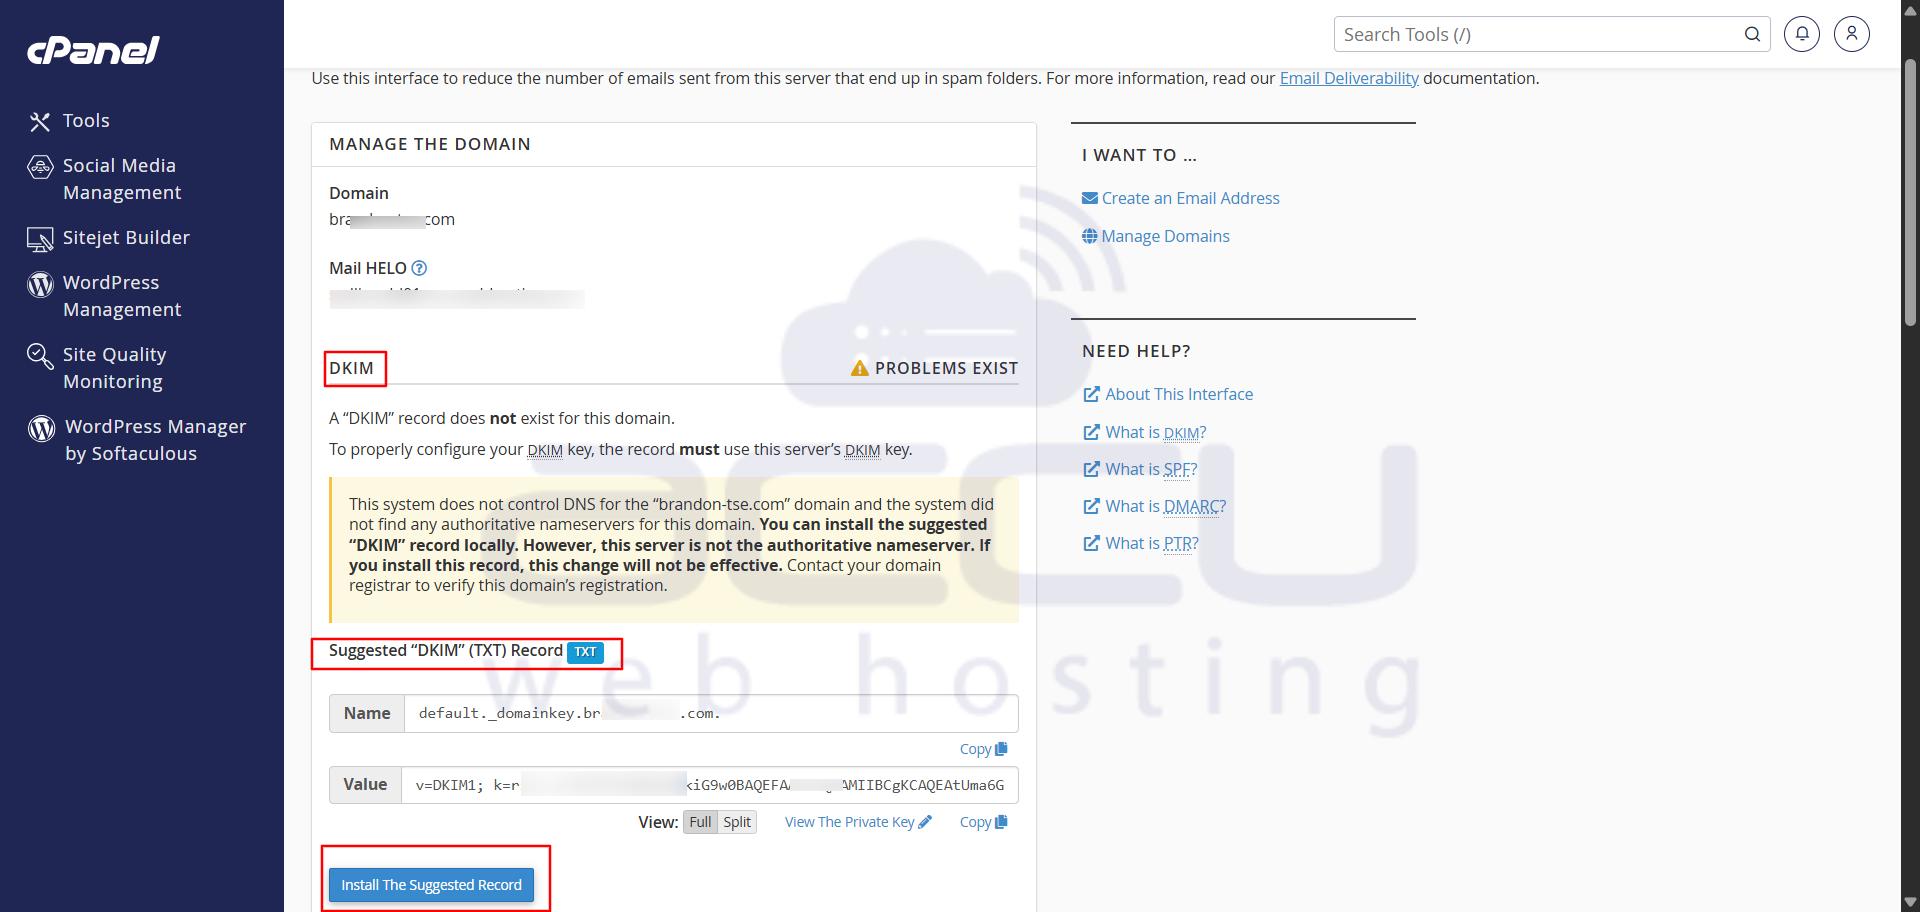
From there, you can enable or repair SPF and DKIM for your domain.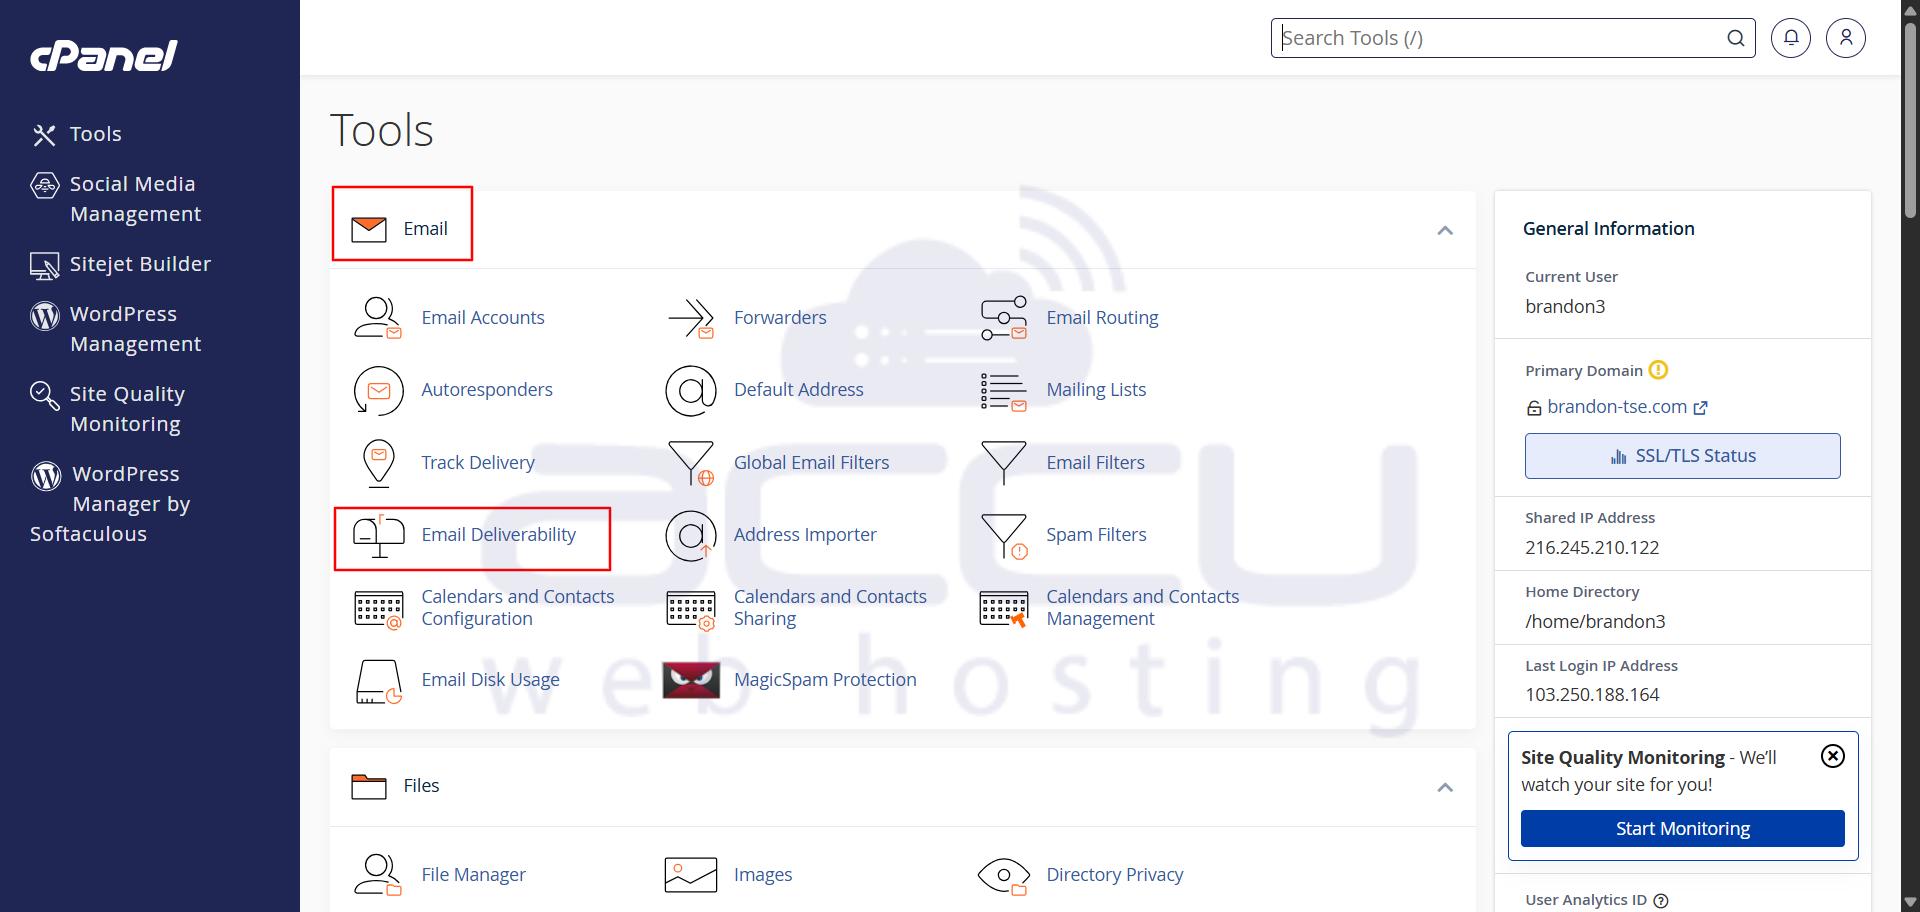
- DKIM adds a digital signature to outgoing mail so recipients can verify the message hasn’t been altered and that it truly came from your domain.
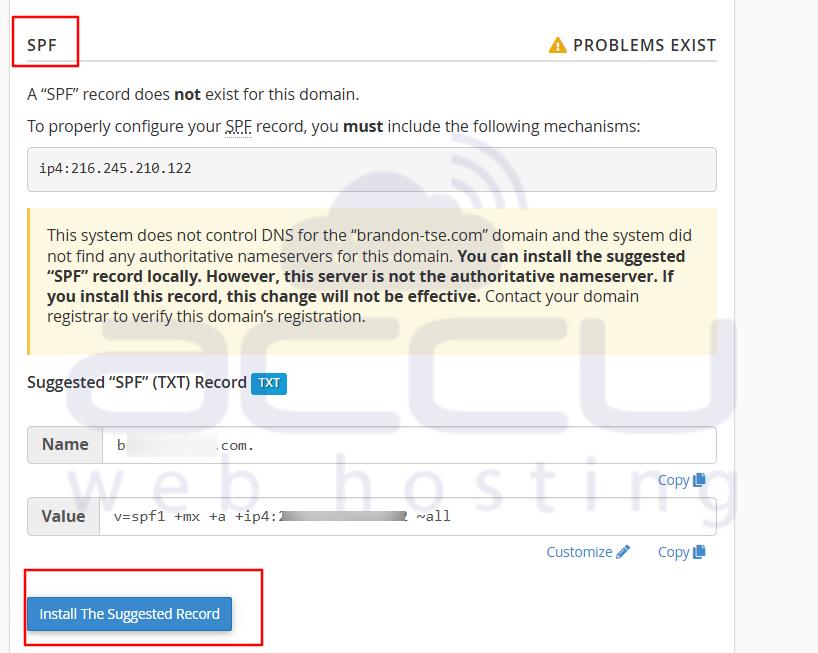
- SPF defines which mail servers are authorized to send email on behalf of your domain and protects against unauthorized senders and spoofing.
-
After enabling SPF, you can fine-tune the record:
- Add additional IP addresses or mail servers authorized to send an email to your domain.
- Use include: mechanisms for trusted relays (like Google Workspace or SendGrid).
- Adjust the enforcement mode (~all for soft fail, -all for hard fail).
Caution: Avoid overwriting existing SPF or DKIM entries. If multiple services send on your behalf, merge their settings carefully to prevent authentication conflicts.
Also, ensure domain alignment. The domain used in the DKIM signature and the domain in the “From” address should match (or belong to the same organizational domain).
- DMARC builds on SPF and DKIM, telling receiving mail servers how to handle messages that fail these checks.
A basic DMARC record looks like this:- v=DMARC1; p=quarantine; pct=100; rua=mailto:[email protected]
- Add this DMARC record as a TXT record in your DNS zone.
Global / System-Level Filters & Exim-Level Rules
When you control the server (WHM), you can enforce stronger rules beyond per-account:
- Use Exim System Filter to enforce domain-wide or server-wide filtering (e.g. block all mail from .xyz TLD, block certain keywords).
- Use Global Email Filters in cPanel (available in the “Global Email Filters” section) to apply filters across all accounts.
Monitor mail logs/Exim logs for patterns (same sender, repeated IPs) and add custom Exim ACLs or filters accordingly.
Other Useful Tips
Spammers can crawl your website to collect email addresses and store them in their system. Hence, displaying your email address on your website is not recommended. When you see a spam email, immediately mark it as Junk or Spam.
Try to avoid registering at unknown websites, which you will never read for the newsletters. If you have already signed up to receive the messages and want to stop receiving them, use the unsubscribe method of the respective website. You can also go for an Anti-Spam solution to reduce incoming spam mail.
