Here are the steps to assign dedicated IP address to a website from WebsitePanel:
- Login to WebsitePanel.
- Click on the name of your Hosting space.

- If you have not allocated any dedicated IP address in your plan then follow these steps:
- Click on the Edit Details.

- Select the second option 'Override quotas on Space level' in order to modify the default resource.

- Under the Web Sites section, specify the Dedicated IP Addresses as 1 [if you want to assign one dedicated IP address] and click on Save button.

- Click on the Edit Details.
- Click on your hosting space and then go to IP Addresses from the left pane option.

- Now, click on the Allocate button.

- Select the second option 'Select IP addresses from the list' and select the free IP address from the list and click on Add button.

- After allocating an IP address to your hosting space, go to the user under which you are going to create your website and click on Web → IP Addresses.

- Repeat step 5 and 6 to allocate an IP address for your website.
- Now, create a website by clicking on Web → Web Sites.

- Click on Create Web Site button.

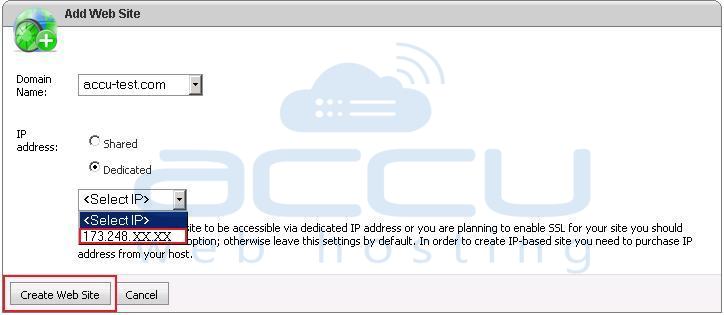
- Select a domain name from the drop down list for which you want to create a website e.g. accu-test.com.

- After selecting the domain, click on the second option 'Dedicated' and select the IP address from the list to assign it to your website and click on Create Web Site button.


