Introduction:
noVNC is a browser-based tool that lets you interact with your VPS (Virtual Private Server) screen directly through your web browser without needing any additional VNC software. It's especially useful for troubleshooting boot issues, installing or repairing the operating system, or managing servers when SSH is unavailable.
What is noVNC?
noVNC is an HTML5-based VNC client that works with modern browsers using WebSockets and Canvas. It allows you to control and view your VPS as if you were physically in front of it, right from your browser.
Key Benefits:
- Works with most modern browsers (both desktop and mobile).
- No need to install any VNC software.
- Great for recovery tasks or accessing a graphical interface.
Common Use Cases:
You might use noVNC when:
- SSH access is blocked due to network settings.
- You need to install or repair the operating system manually.
- You're troubleshooting boot or GRUB issues.
- noVNC provides direct console access to your VPS even if normal remote access is not available.
Enable noVNC in the Virtualizor Admin Panel:
To use noVNC, you first need to enable it in the Virtualizor Admin Panel:
1. Log in to your Virtualizor Admin Panel.
2. Go to: Configuration → Master Settings → NoVNC Settings.
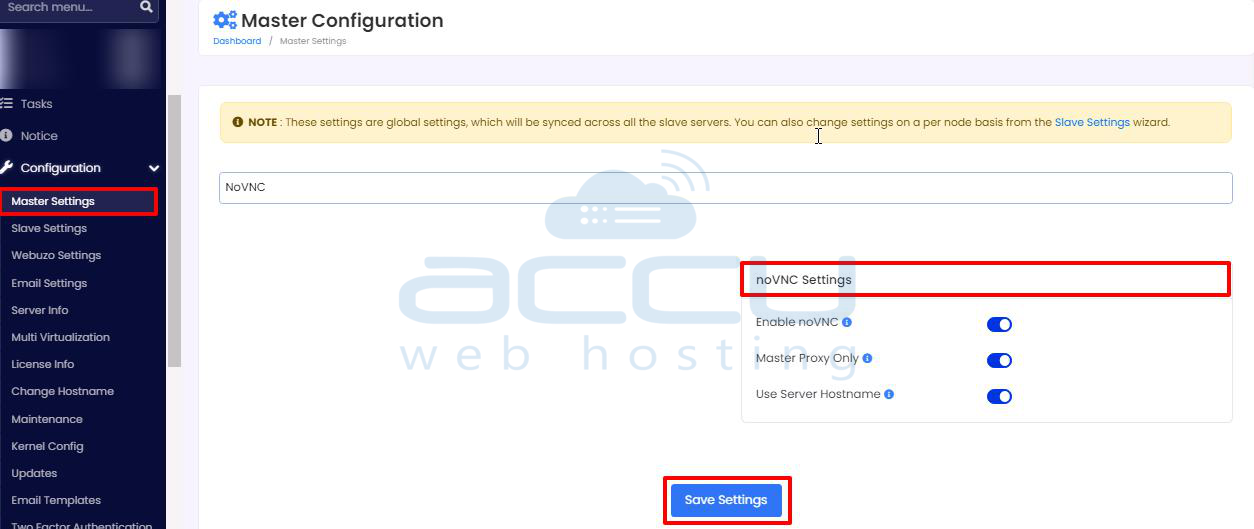
3. Adjust the following settings:
|
Setting |
What It Does |
|
Enable noVNC |
Turns on the noVNC feature for your VPS cluster. |
|
Master Proxy Only |
Runs the WebSocket service on the Master server (recommended for better performance). |
|
Use Server Hostname |
Using DNS hostnames instead of IP addresses is helpful when SSL is used. |
Note: If your panel uses SSL (HTTPS) and you host slave servers, ensure you have valid SSL certificates or enable the "Use Server Hostname" option to avoid browser security blocks.
4. Save your settings.
Once you’ve enabled noVNC, it will be available for all VPS consoles within your cluster.
Allow VNC When Creating or Managing a VPS:
After enabling noVNC:
- When creating a new VPS, make sure the option to allow VNC is enabled.
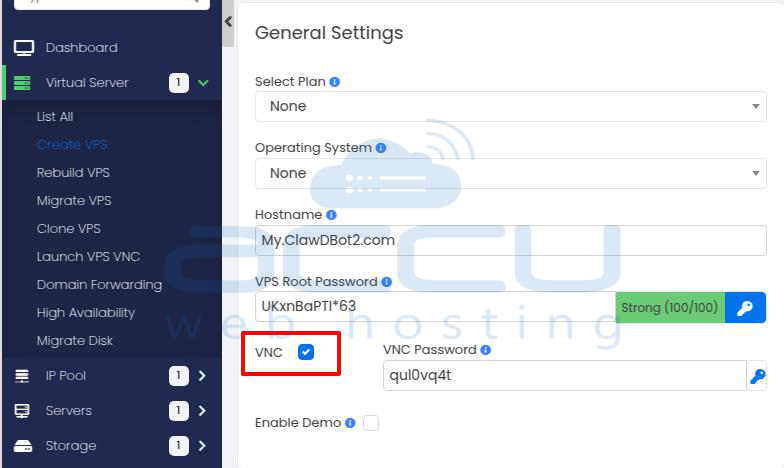
- For existing VPS, this option is usually enabled by default, but you can double-check under the VPS’s Details or Configuration in Virtualizor.
Access noVNC from the Virtualizor Panel:
To access your VPS console:
1. Log in to the Virtualizor Panel.
2. Go to List All VPS or your VPS overview.
3. Find the VPS you want to access.
4. Click on the VPS name.
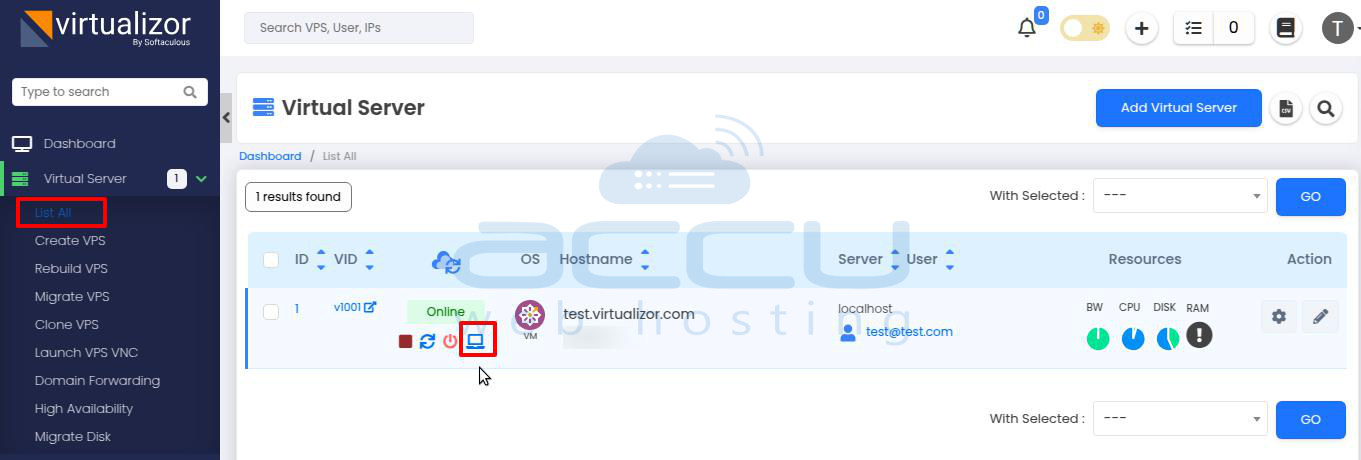
5. Look for the VNC/Console button, represented by a “screen" icon, and click on it.
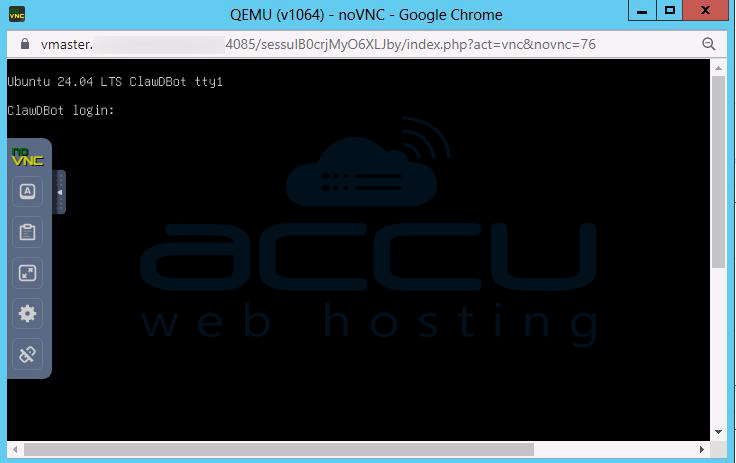
- OR - If you have logged in to Virtualizor Panel as a user:

A new browser window or tab will open, showing your VPS console. You'll see the VPS login prompt, or desktop, depending on the operating system.
Conclusion:
In summary, noVNC is a convenient and powerful tool that allows you to access and manage your VPS directly through your web browser, without the need for additional software. It’s especially useful in situations where SSH access is unavailable or when you need to perform recovery tasks, install an OS, or troubleshoot boot issues.
By following the steps mentioned in this article to enable and access noVNC in the Virtualizor Admin Panel, you can easily take control of your VPS console from anywhere, at any time. Whether you're working with a Linux or Windows VPS, noVNC provides a straightforward solution to ensure you're never locked out of your server.
