Migrating your website from cPanel to aaPanel is a straightforward process. aaPanel is a popular alternative to cPanel, providing an easy to use interface and useful features for managing websites. While the look and feel of aaPanel are different from cPanel, the steps for migrating are quite similar. You’ll mainly be moving your website files, databases, and updating your DNS settings. In this guide, we will show you how to migrate your website from cPanel to aaPanel.
Step 1: Backup Website Files and Databases from cPanel
Before you begin the migration, the first step is to create backups of your website files and databases from cPanel. This ensures that you have everything needed for a smooth migration process.
Backup Website Files
Step 1: Log in to cPanel.
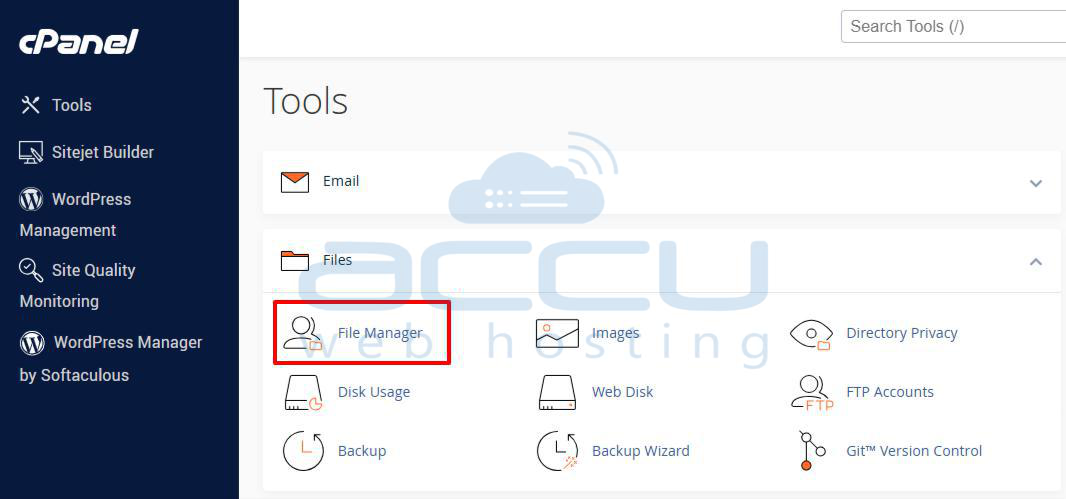
Step 2: In the Files section of cPanel, click on File Manager.
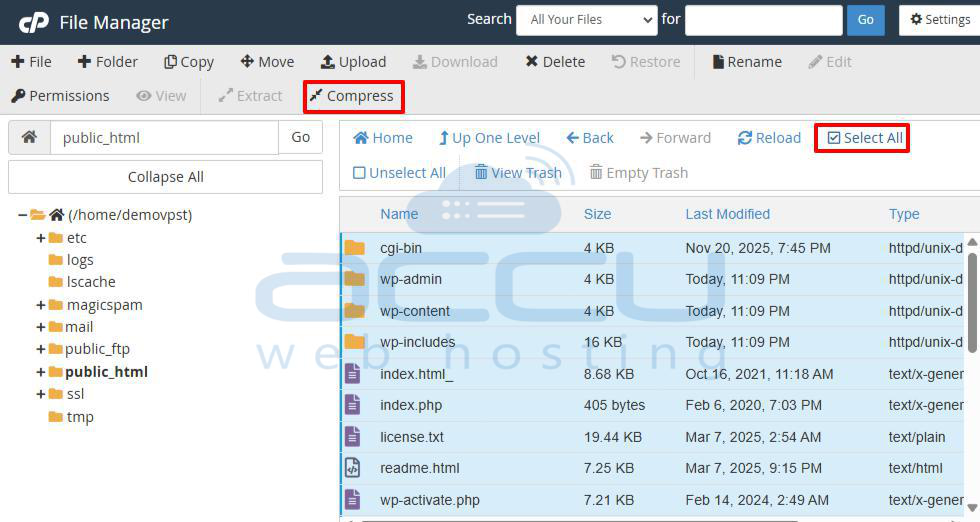
Step 3: In File Manager, go to the public_html folder, or whichever folder contains your website’s files.
Step 4: Click on Select All to highlight all files in the folder.
Step 5: Once all files are selected, click on the Compress option, and choose ZIP as the format.
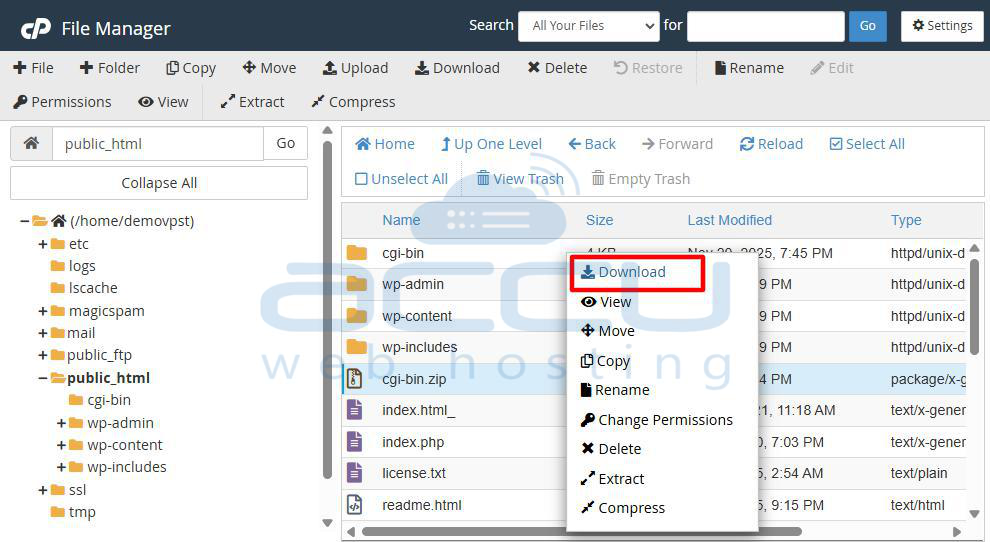
Step 6: After compression, download the ZIP file to your local computer.
Backup Databases
Step 1: In cPanel, go to the Databases section and click on phpMyAdmin.
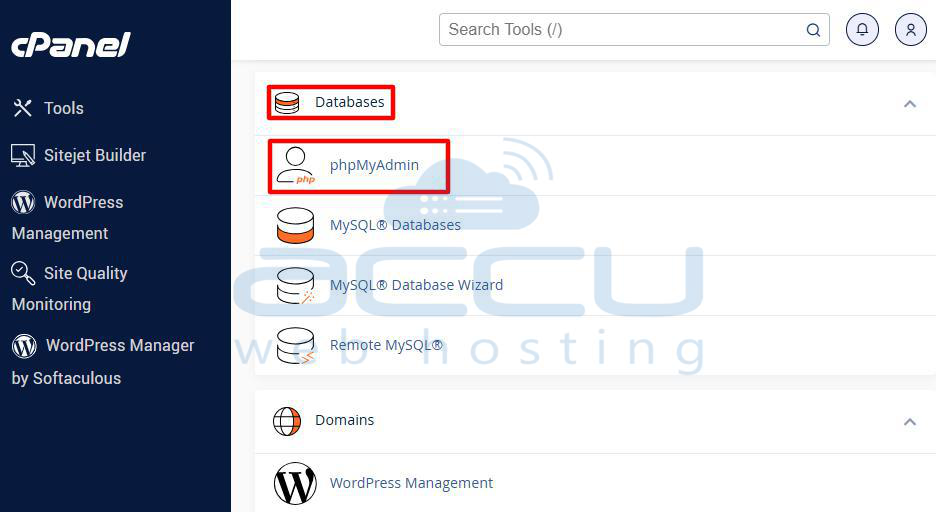
Step 2: In phpMyAdmin, choose the database that your website uses.
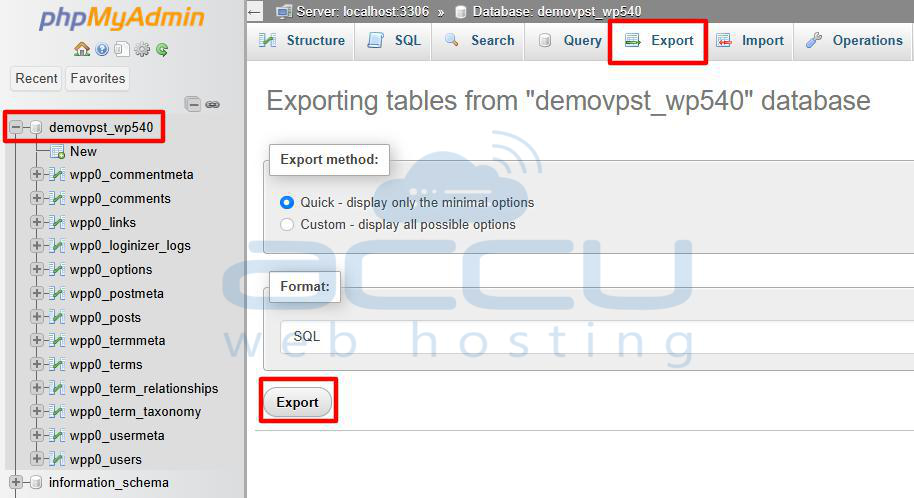
Step 3: Click on the Export option in the top menu. Use the Quick export method and select SQL format.
Step 4: Click Export to download the .sql file containing your website’s database.
Once both your website files and database have been backed up, you’re ready to proceed with the migration.
Step 2: Prepare Your New aaPanel Hosting Environment
Before migrating the website to aaPanel, ensure that your new hosting account is set up properly and that you have access to the aaPanel dashboard.
Step 1: Log in to aaPanel.
Step 2: If your domain name isn’t already set up on aaPanel, you’ll need to add it. Once logged in, look at the left sidebar menu and Click on the Website menu item.
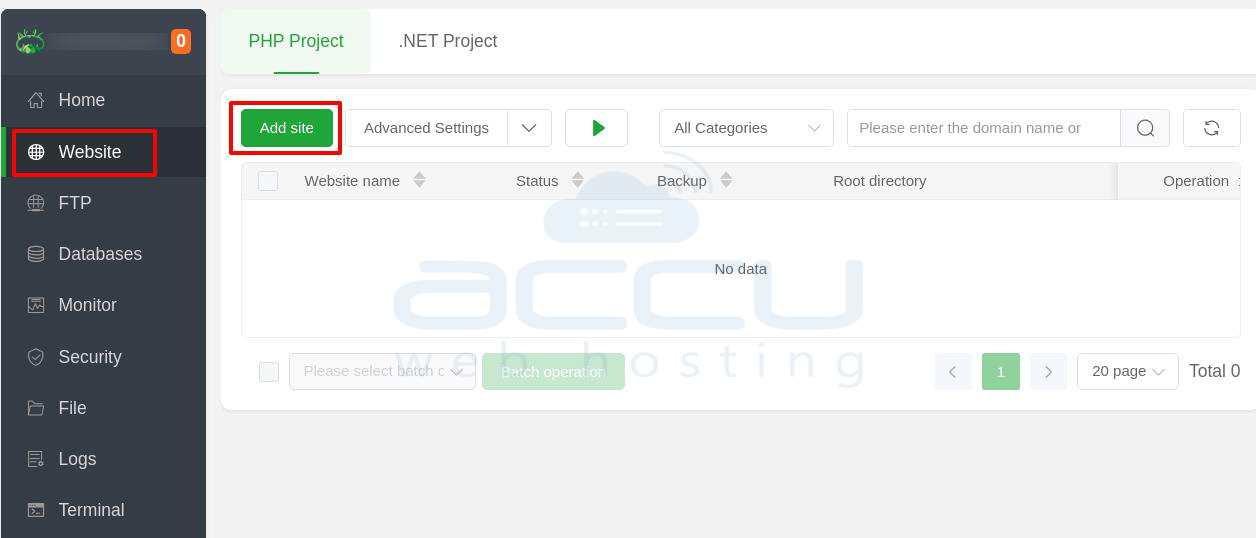
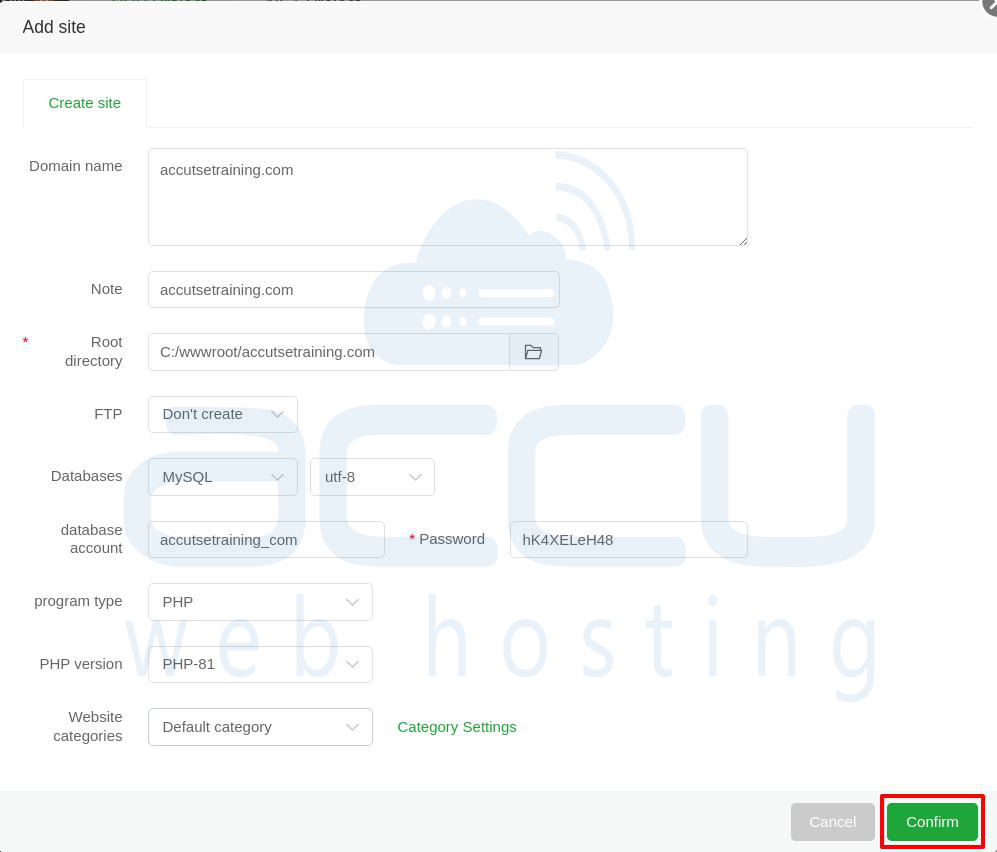
Step 3: In the main content area, ensure the PHP Project tab is selected (if you are adding a PHP site). Click the green Add site button.
Step 4: A pop-up window will appear where you need to configure your new website:
Domain name: Enter the full domain name you want to add.
Note: Add a descriptive note for the domain.
Root directory: This is the folder where your website files will be stored. The panel usually suggests a path; confirm or change it as needed.
FTP: Select an option for creating an FTP account.
Databases: Choose the database type (e.g., MySQL) and character set (e.g., utf-8).
Database account: The panel will often suggest a database name.
Password: Set a strong password for the database account.
program type: Select the type of project (e.g., PHP).
PHP version: Choose the desired PHP version (e.g., PHP-81).
Website categories: Select a category, if applicable.
Step 5: After filling in all the required fields, click the green Confirm button at the bottom right of the pop-up window.
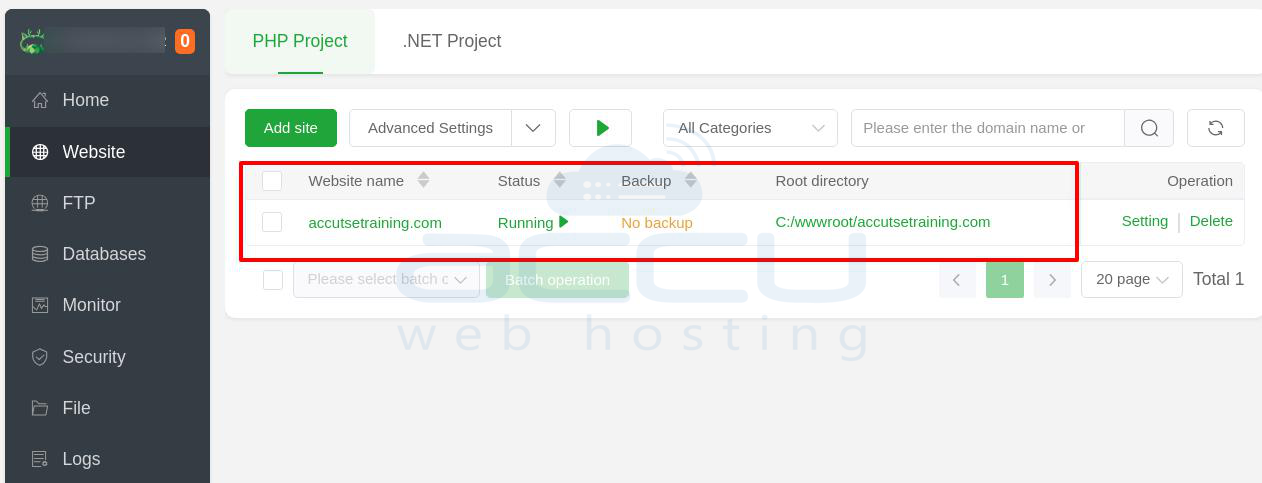
Step 6: The new domain should now appear in the Website list with its details, including the Website name, Status (Running), and Root directory.
Step 3: Upload Website Files and Databases to aaPanel
With your aaPanel environment ready, the next step is to upload your website files.
Upload Website Files to aaPanel
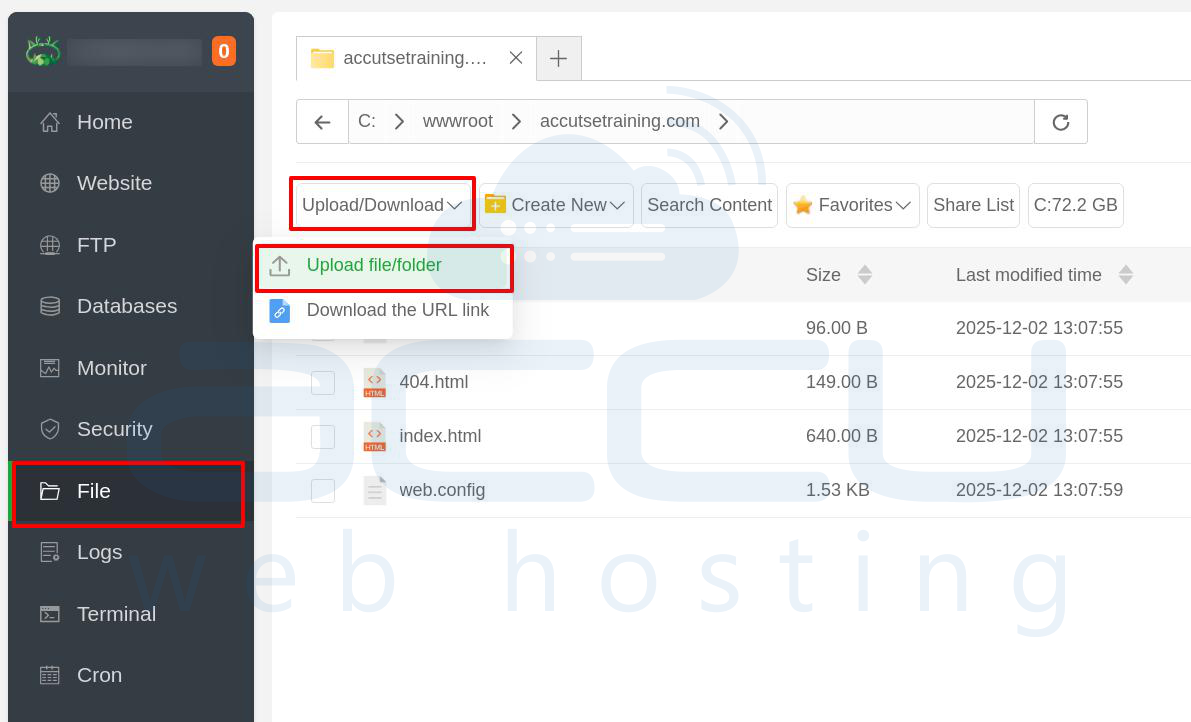
Step 1: Log in to aaPanel.
Step 2: Navigate to the File Manager section within aaPanel.
Step 3: In the File Manager, find the root folder where your website files will be stored (typically under /wwwroot/).
Step 4: Upload the ZIP file you downloaded earlier from cPanel.
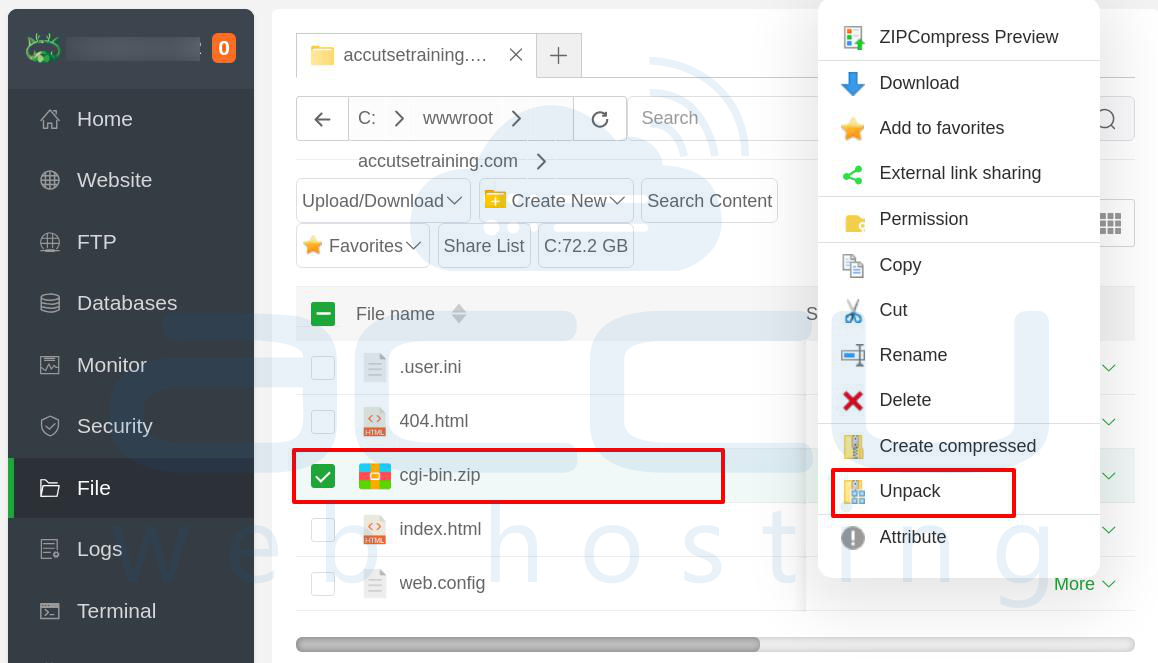
Step 5: Once the file is uploaded, extract it to the appropriate directory.
Import Databases to aaPanel
Step 1: In aaPanel, go to the Databases section and create a new MySQL database and a new user. Note down the database name, username, and password as you’ll need them later.
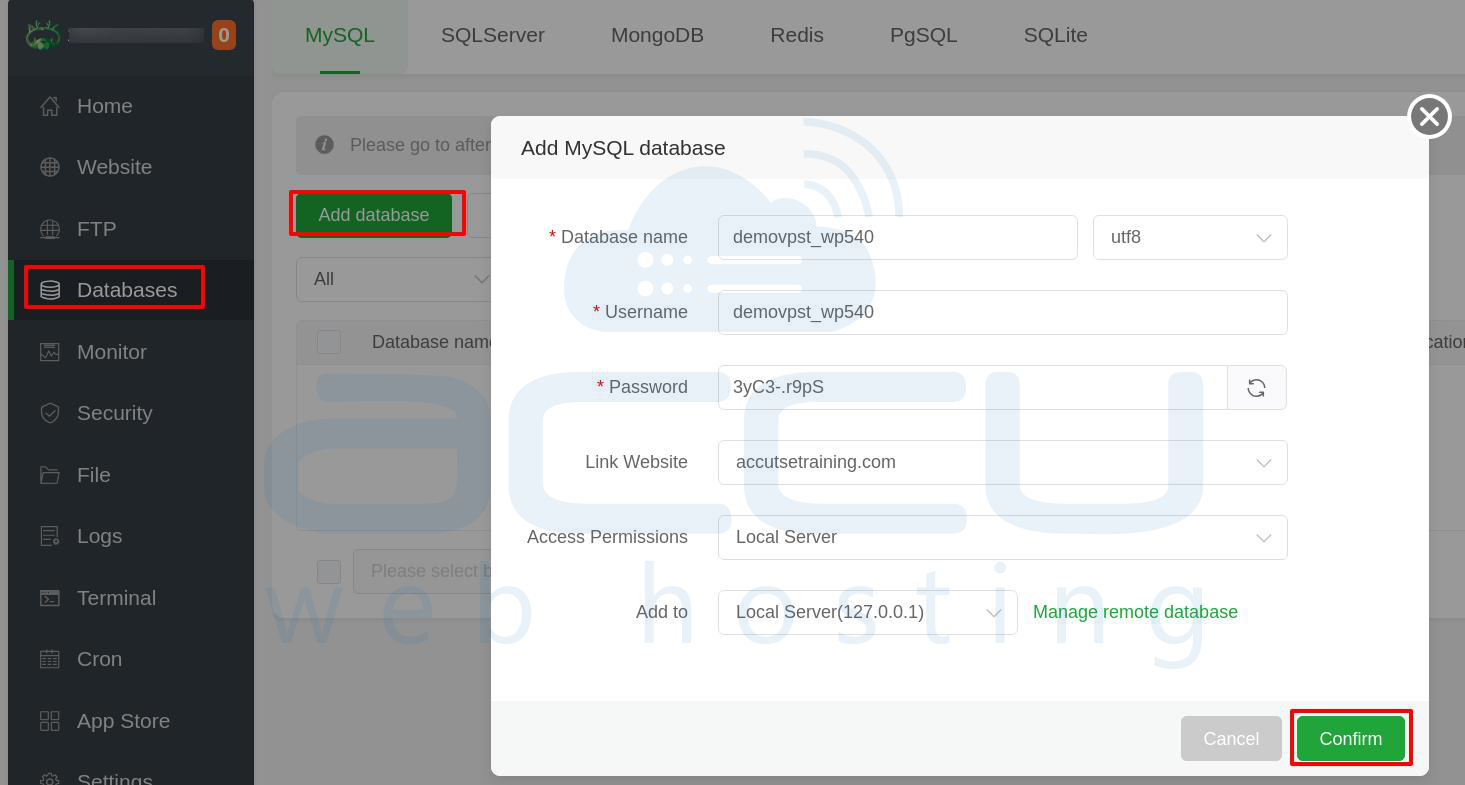
Step 2: In the Databases section of aaPanel, click on phpMyAdmin.
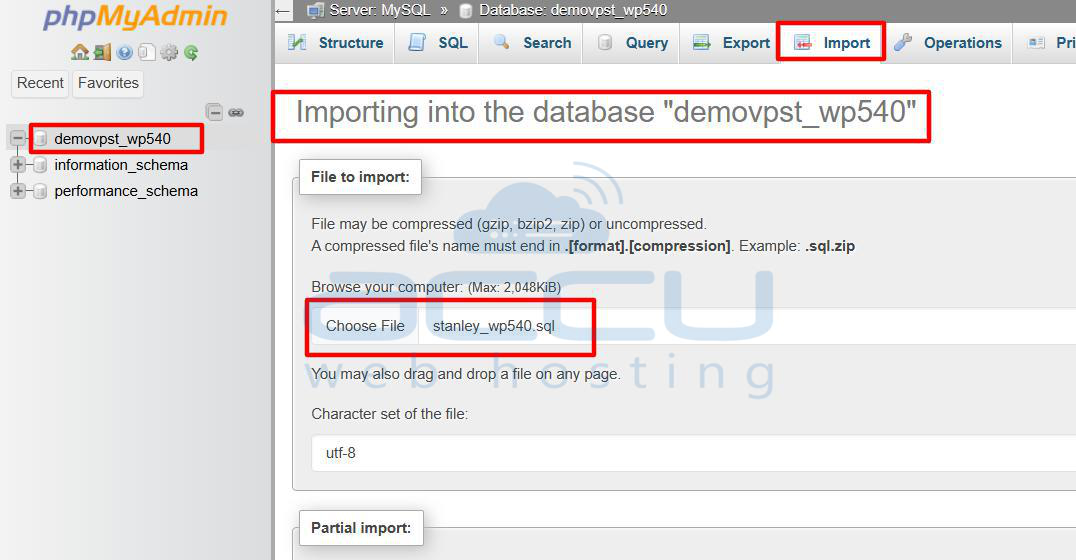
Step 3: In phpMyAdmin, select the database you just created.
Step 4: Click on Import from the menu, browse to the .sql file you exported from cPanel, and upload it.
Step 4: Update Configuration Files
If your website uses a Content Management System (CMS) like WordPress, Joomla, or others, you’ll need to update the configuration files to reflect the new database credentials on aaPanel.
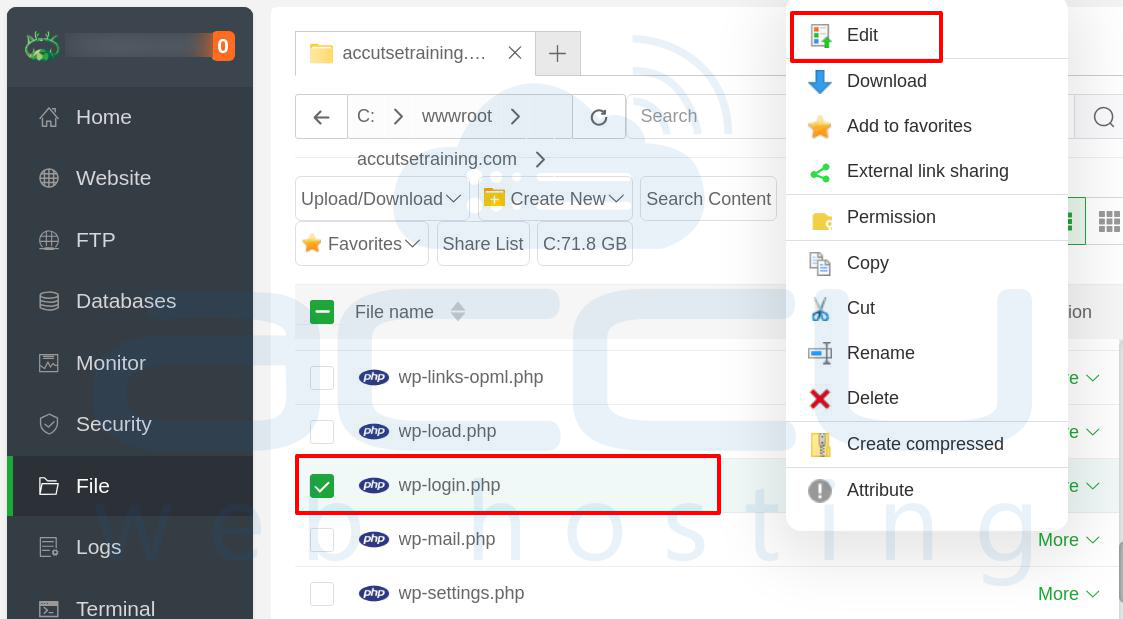
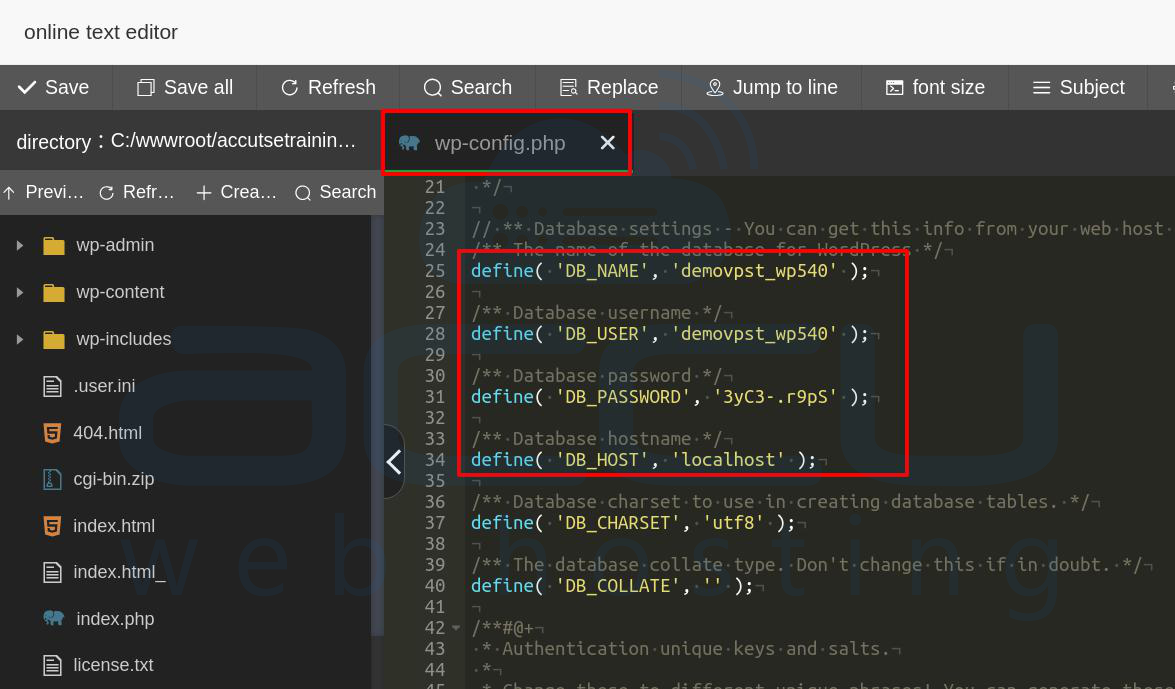
For WordPress Websites: Access the wp-config.php File: In your website’s root directory, locate and open the wp-config.php file.
Replace the database information in the file with the new details:
define('DB_NAME', 'your_new_db_name');
define('DB_USER', 'your_new_db_user');
define('DB_PASSWORD', 'your_new_db_password');
Once the updates are made, save the file and close the editor.
Repeat similar steps for other CMS platforms, such as Joomla or Drupal, ensuring the database connection information is updated to match the new server configuration.
Step 5: Update DNS Settings
Now that your website files and database are in place, it’s time to point your domain to the new server by updating your DNS settings. Go to the website of the company where you registered your domain. In the domain management section, update the nameservers
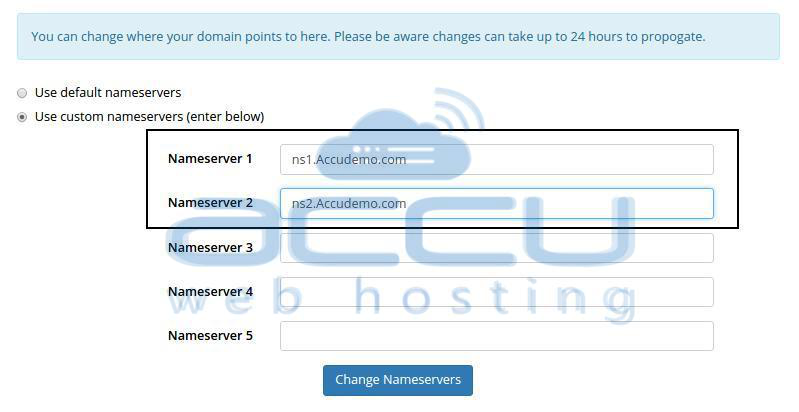
DNS changes can take anywhere from 24 to 48 hours to propagate globally. During this period, your domain might still point to the old hosting server.
Step 6: Test the Website on aaPanel
Once the DNS changes have propagated, you can test your website to ensure everything is functioning correctly. Verify that all static website files (images, CSS, JavaScript, etc.) are loading properly. Ensure that all dynamic content powered by the database (e.g., posts, comments, user logins) is functioning as expected.
Conclusion
Moving your website from cPanel to aaPanel is manageable with some planning. You’ll need to back up your website files and databases from cPanel, upload them to aaPanel, update some settings, and change your DNS records. By following these simple steps, you can successfully move your website to aaPanel and keep managing it without any issues.
