Follow the below steps to complete Plesk to Plesk Migration.
You can begin by installing the extension through either the Plesk Installer or Plesk Extensions Catalog.
1. Log in to the Plesk control panel (Where you want to migrate your account) and locate Extensions in the menu on the left side of the screen.
2. Open the Extensions catalog and click the install icon next to Plesk Migrator.

Following is the detailed overview of the Extension catalog.
- Source server :
- Panel Type: Select the service (from where you want to migrate). When migrating between Plesk services, if the receiving server's version of Plesk is lower than the host server, the migration will fail.
- IP Address: You have to enter the IP address of your old Plesk account. Remember that this IP address is sharable, or the migration will fail.
- If migrating from a Windows-based server, specify the method for installing the RPC agent (an application enabling Plesk Migrator to gather data):
- Automatic (recommended) - Plesk Migrator will deploy and start the RPC agent on the source server using the built-in administrator account. However, automatic deployment may fail (for example, because firewall settings or the File and Printer Sharing or RPC services are disabled). If this happens, deploy the agent manually.
- Manual - You will get a link to download the RPC agent package. Download the package and install the agent on the source server manually.
- Built-In Administrator Login: Enter the username of the source Plesk account.
- Built-In Administrator Password: Enter the password of the source Plesk account.
- Temp Directory: The path of temporary files will be stored during the migration.
- This server :
- Enter the current account username and password in the Built-In administrator login and password fields.
3. Once you have filled out the migration form, click on the Prepare migration button. Now, Plesk will verify if it can connect to the remote host and that the setup is compatible with a migration.
Now, you can see the List of subscriptions tab.
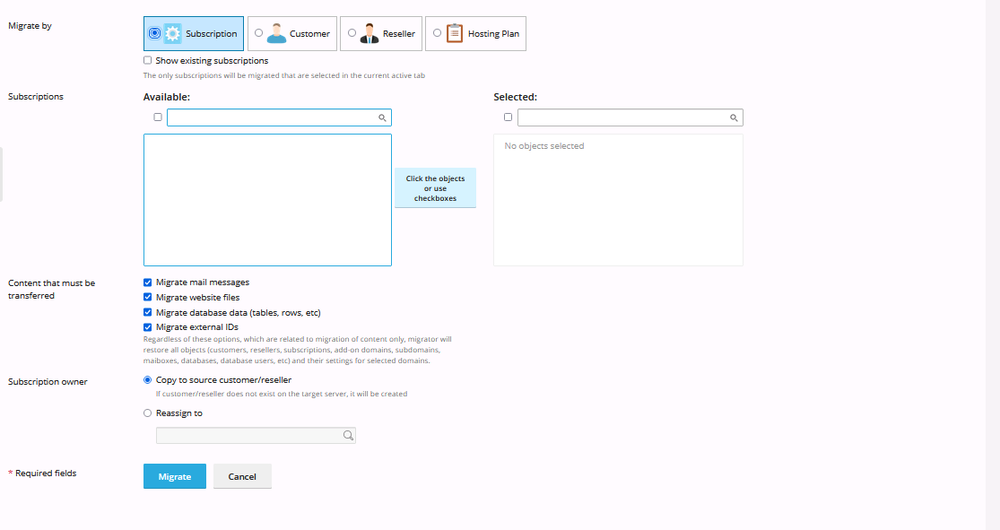
- Here you must select the subscriptions to be migrated (note that you cannot migrate individual domains, you can migrate the few amounts of domains or all domains of a single subscription). Now, you can use one of four available filters:
- By Subscription - If you migrate a subscription owned by a customer or a reseller, the corresponding customer/reseller account will also be migrated (unless a custom subscription owner is specified - see below). In addition, the "hosting plan" subscription is based on that will also be migrated.
- By Customer - All subscriptions accounts, including the hosting plans, will be migrated together if you migrate a customer account.
- By Reseller - All subscriptions owned by the account, including the hosting plans, will be migrated together if you migrate a reseller account. Note that migrating a reseller account does not automatically migrate the customer accounts owned by the reseller. For example, suppose you select a reseller account and one or more customer accounts owned by that reseller for migration. In that case, the reseller's ownership of the customer accounts will be preserved on the destination server.
- By Hosting Plan - All subscriptions are based on the shared plan will be migrated if you migrate a hosting plan. Likewise, if you migrate a hosting plan belonging to a reseller, said reseller will be migrated as well, plus all subscriptions based on the selected hosting plan together with the customers who own those subscriptions.
4. Once Plesk verifies your settings, click on the Start Migration button. Depending on the amount of migrated data, this process may take several minutes.
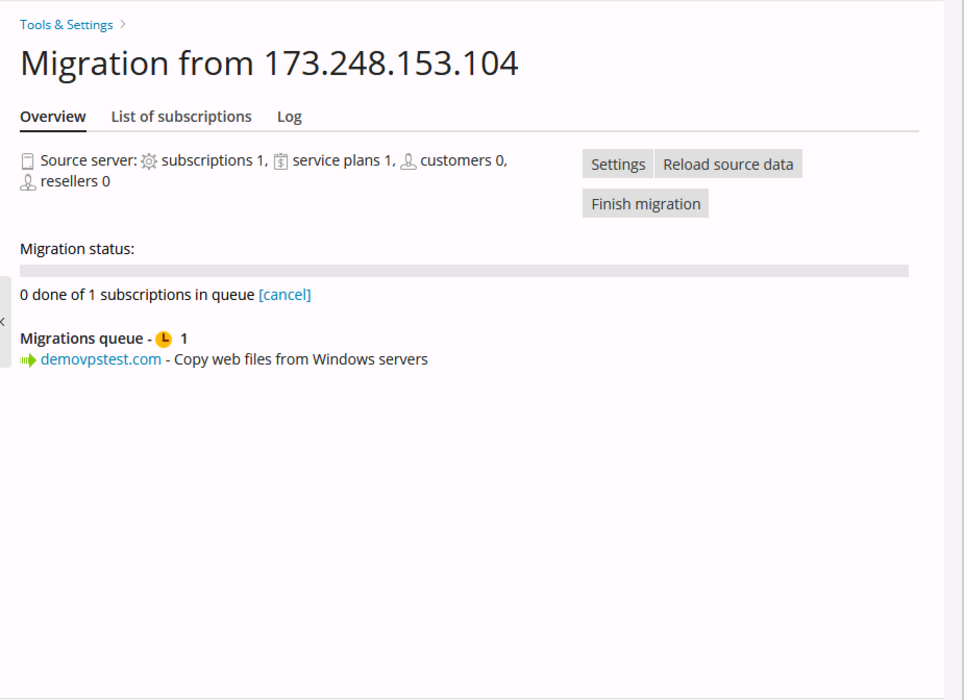
5. Once the migration is completed, you will see the below page.

