
Website staging is crucial for testing changes before they impact your live site. This guide provides a step-by-step walkthrough of using Plesk to set up a staging environment. We'll cover the process of duplicating your website, including files, databases, and essential configurations, enabling you to thoroughly test updates in a safe and controlled environment.
Understanding Website Staging in Plesk
Website staging in Plesk on Windows Hosting involves creating a duplicate of your live website for testing changes before they're made public. This separate environment allows you to experiment with new features, designs, or code without affecting the currently running site.
Plesk offers tools to simplify this process, enabling you to copy files, databases, and settings to a staging area. This allows for a controlled testing ground where you can identify and fix issues before they impact your live website and its visitors. Think of it as a practice run before the real performance.
Setting Up the Website Staging Environment
You can set up your staging environment within your existing Plesk webspace by creating a new domain or subdomain. For instance, if your main domain is example.com, you could create a subdomain like staging.example.com for testing purposes.
For detailed instructions on creating a domain or subdomain in Plesk, refer to this article.
Copying Your Website
Once the staging environment is set up, you need to copy your production environment into it. Follow these steps to ensure all files, databases, and settings are copied correctly.
1. Log in to your Plesk panel using the credentials provided by your web hosting provider.
2. Click Websites & Domains from the left sidebar.
3. Next, you will see an interface as shown below. Locate the website you want to copy and click on Website Copying.
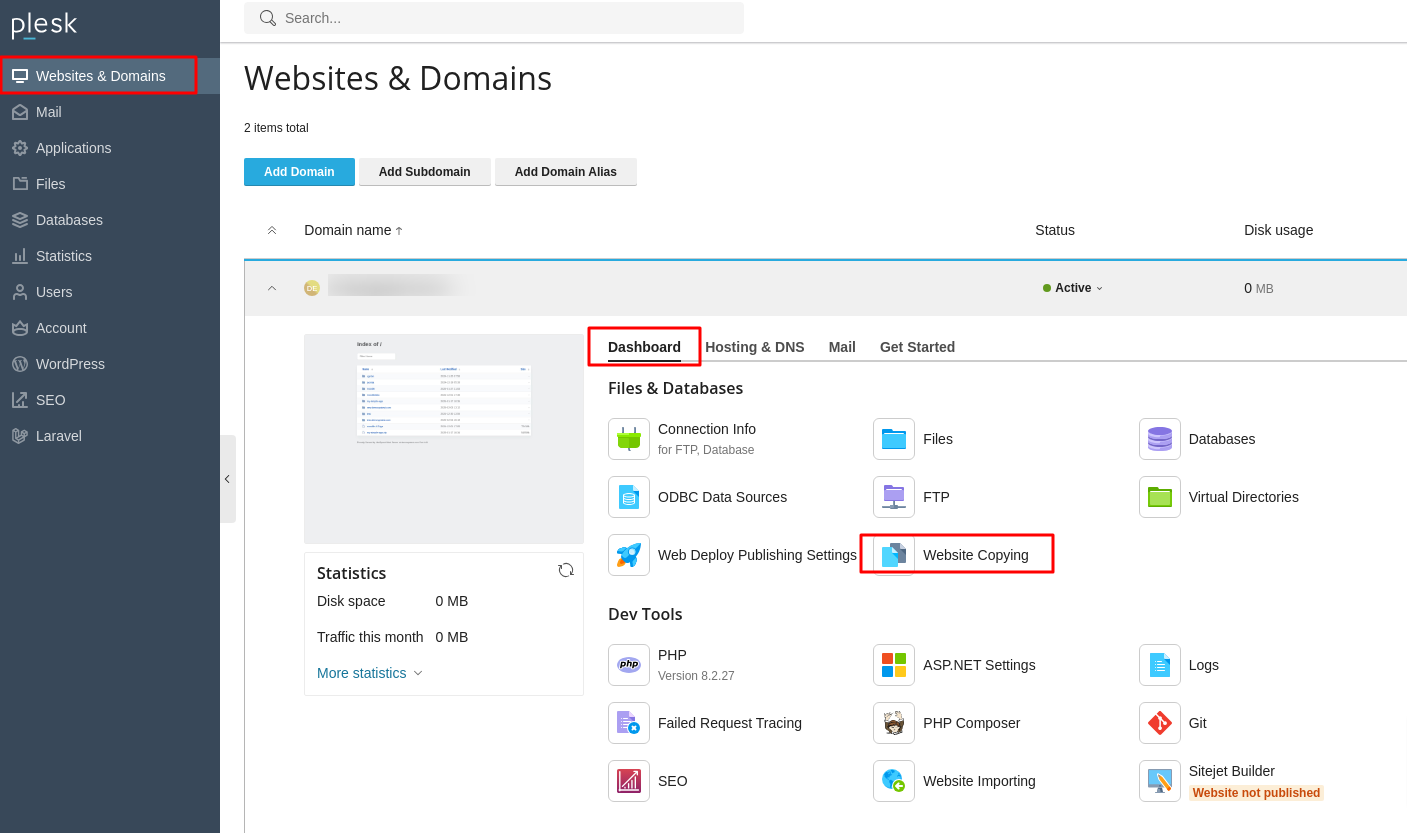
4. The Copy Files page opens.
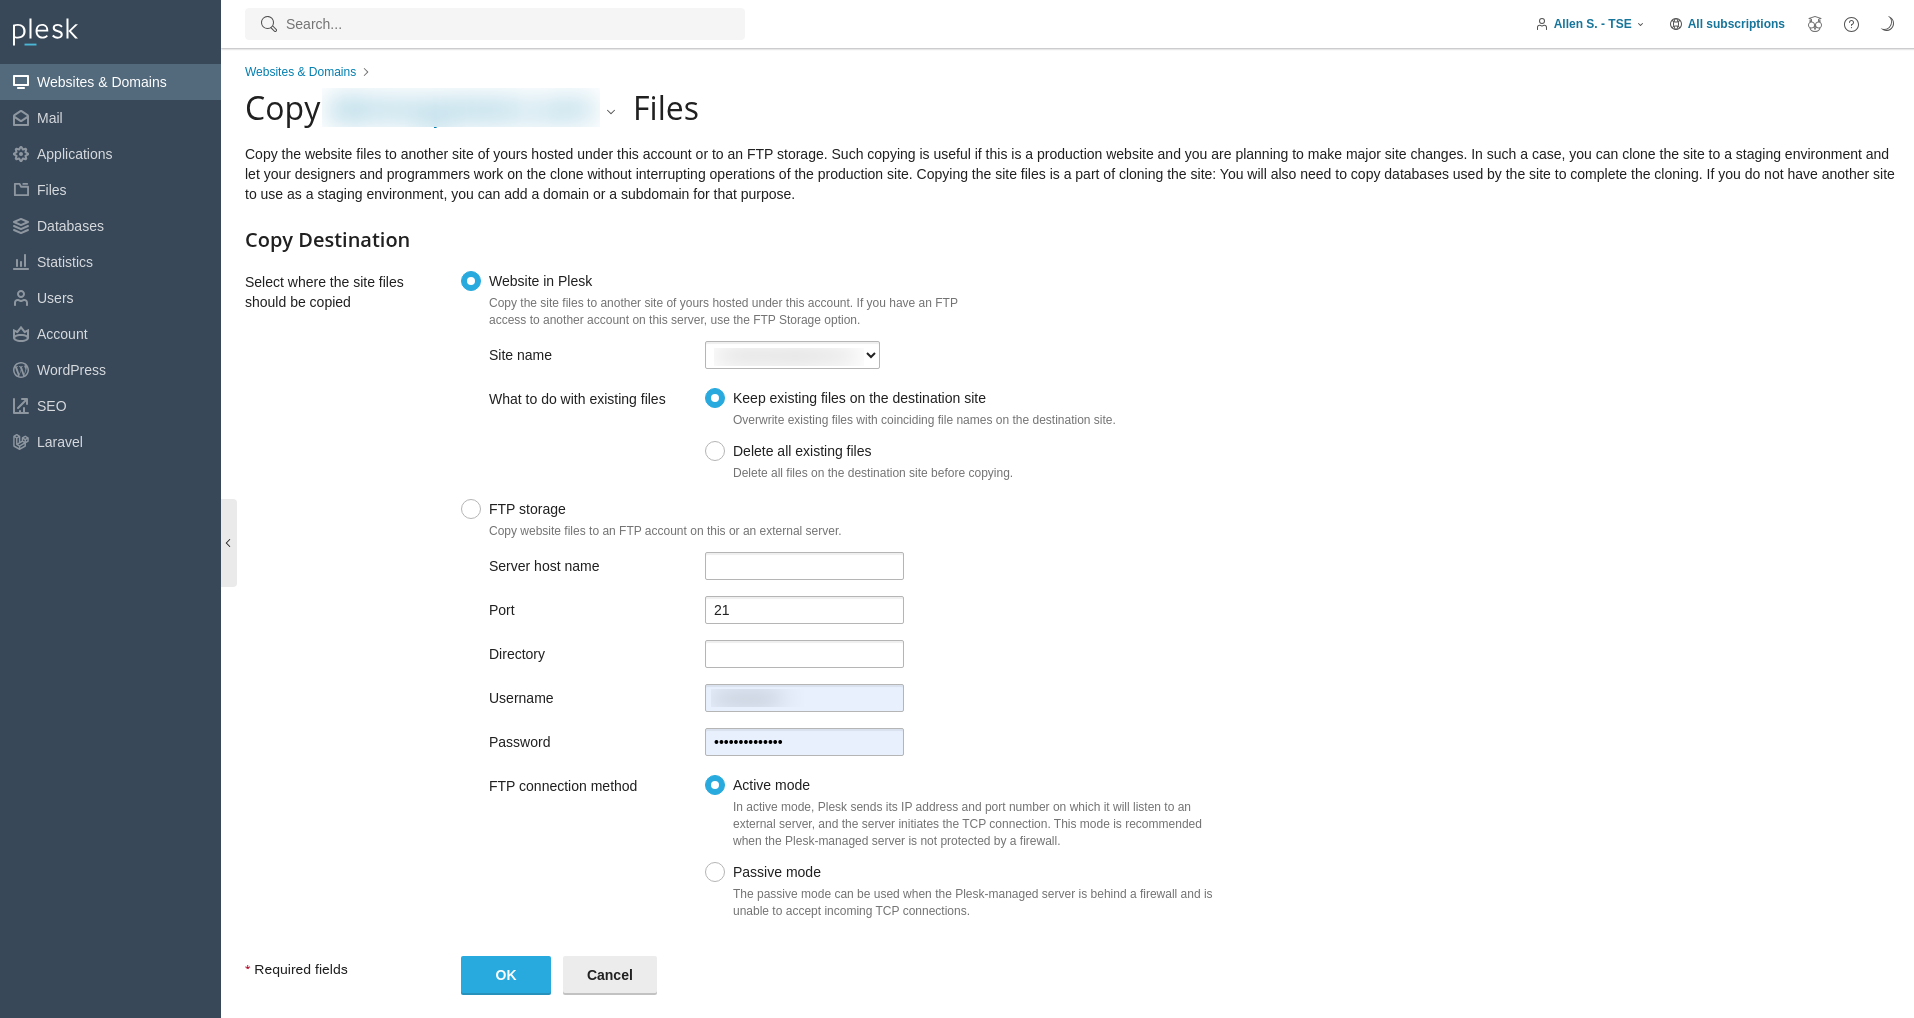
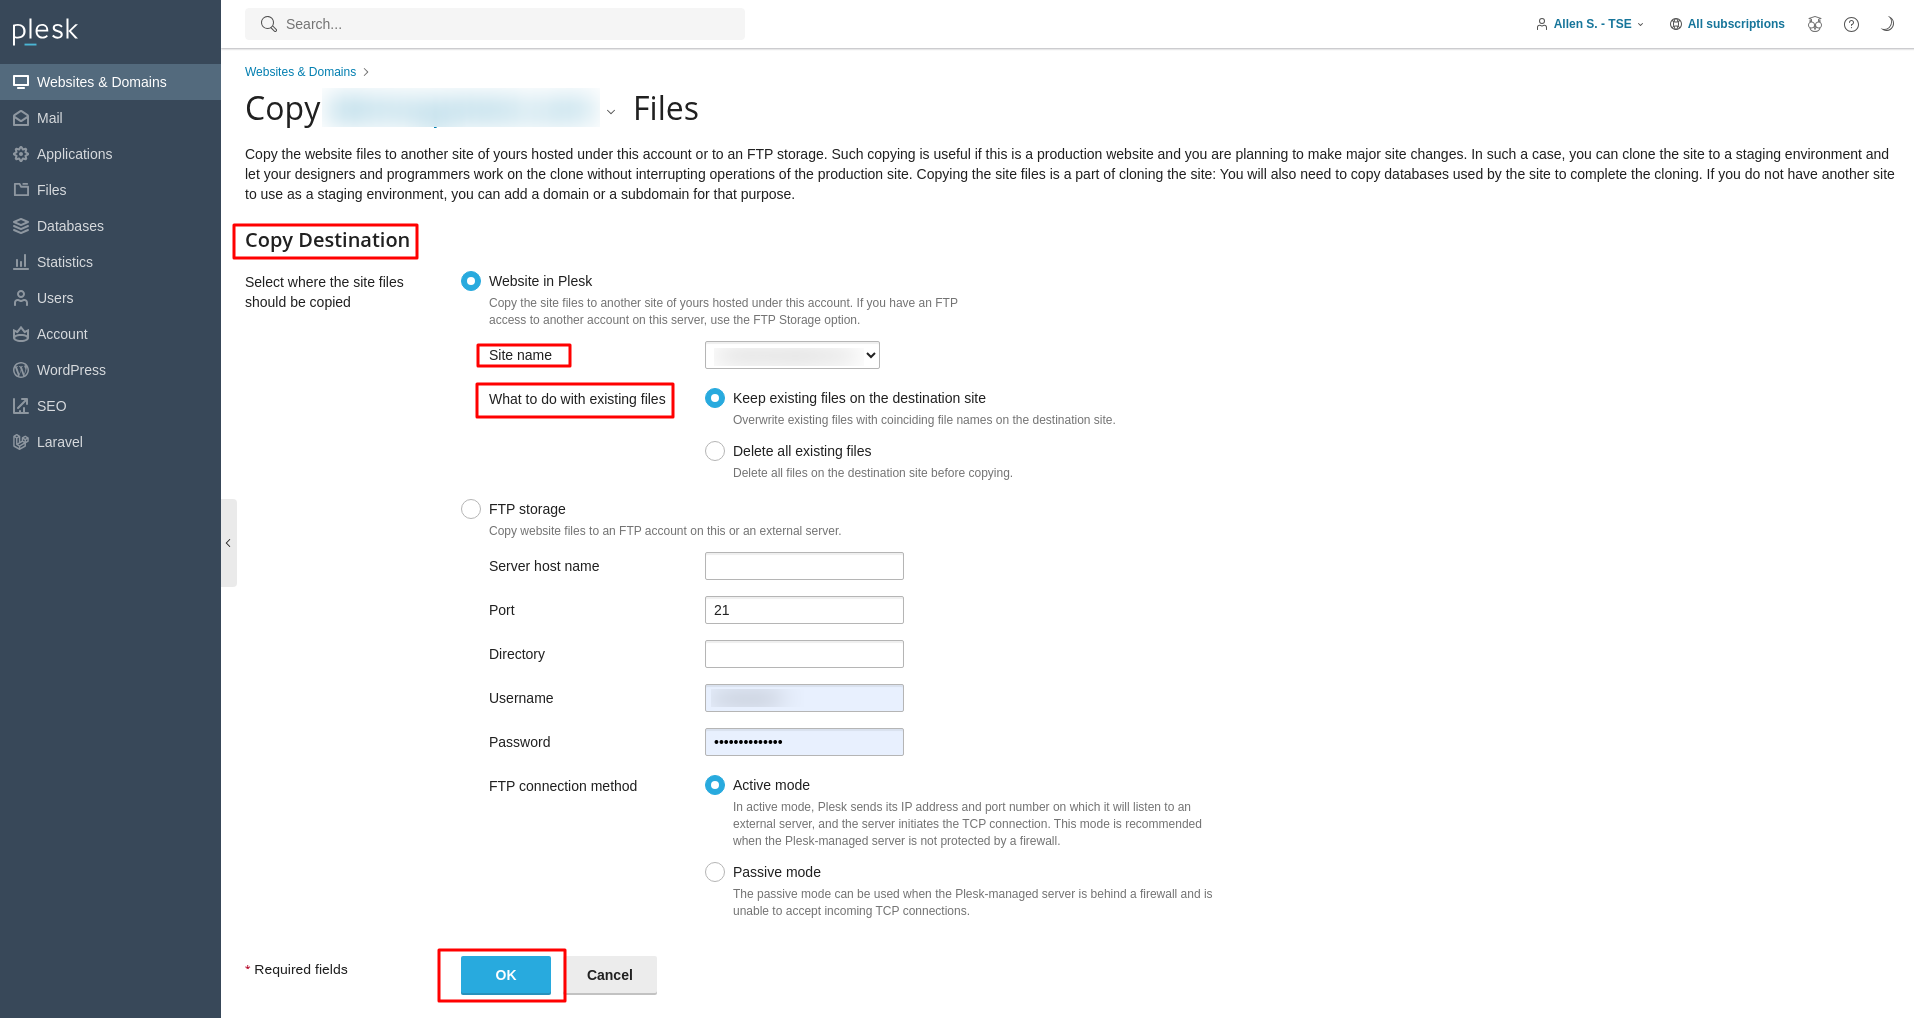
5. Under Copy Destination, click Website in Plesk.
6. In the Site Name dropdown, choose the destination domain.
7. In the What to do with existing files section, select how to handle any existing files on the destination domain.
8. Click OK to start copying the site to the destination domain.
Copying Databases
If your website uses one or more databases, you should also copy them to the staging environment. To do this, follow these steps.
1. Log in to your Plesk panel using the credentials provided by your hosting provider.
2. Click Databases from the left sidebar.
3. Find the database you want to copy and click on Copy.
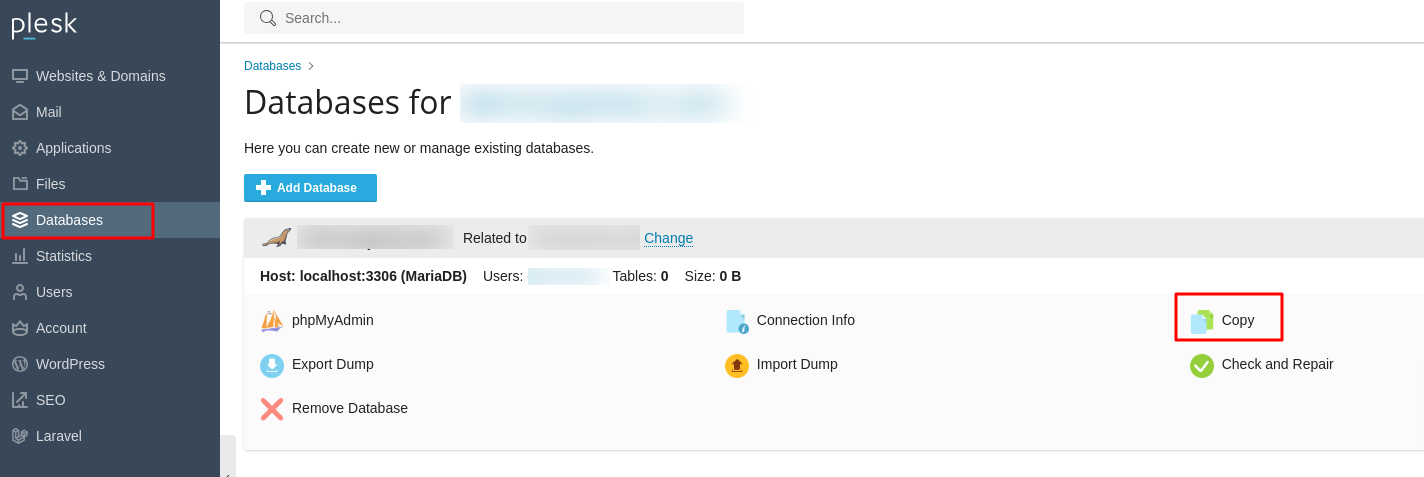
4. The Copy Files page opens.
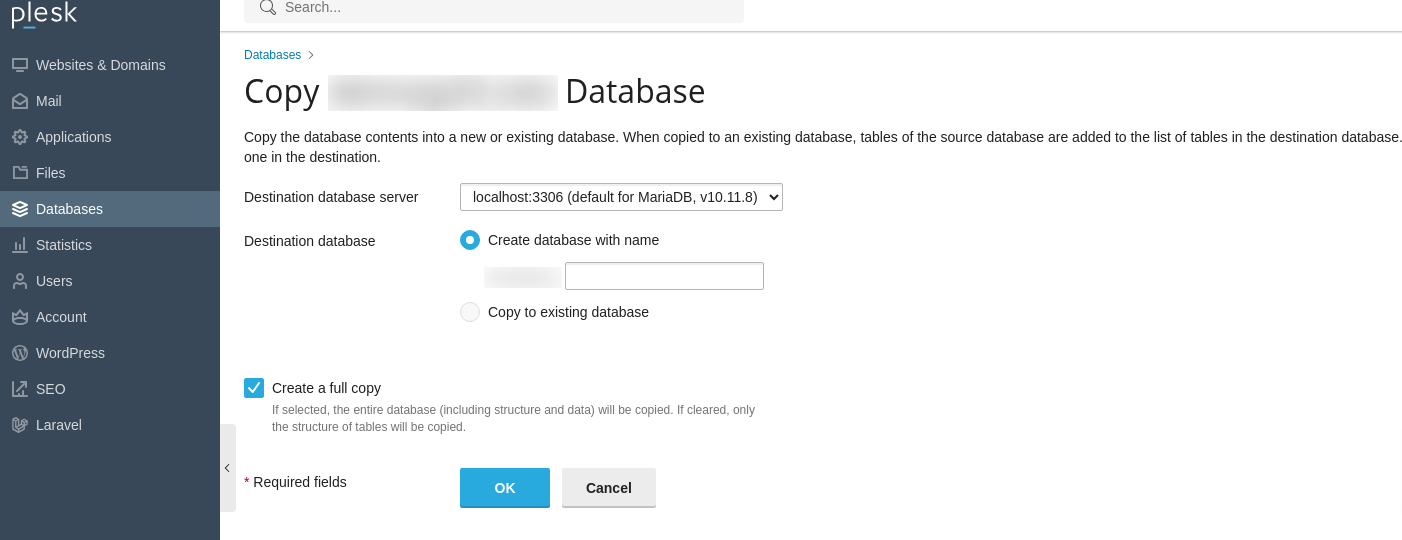
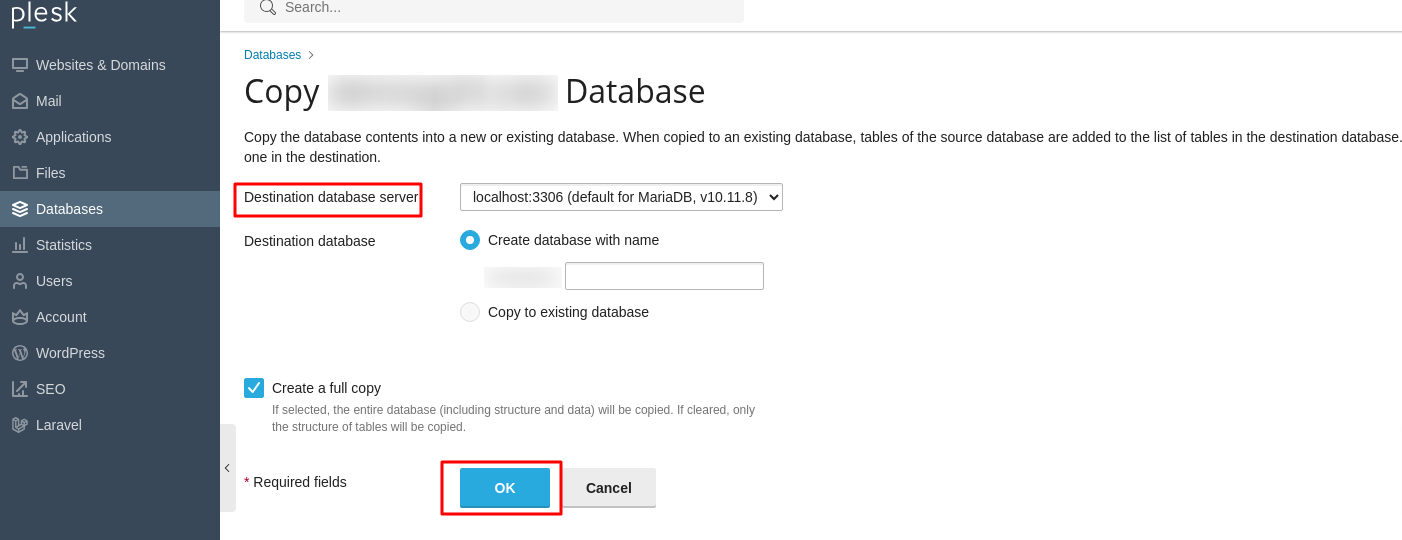
5. In the Destination database server dropdown, select localhost:3306.
6. In the Destination database section, choose Create database with name and enter a name for the new database.
7. Check the Create a full copy box.
8. Click OK to copy the database using Plesk.
Testing Changes in Staging
Once your files and databases are copied, you can make changes in your staging environment without affecting your live site
- Update code, test new features, or modify content as needed.
- Ensure that any database connection settings in your scripts point to the staging database instead of the live one.
Publishing the site
After testing is complete and you are satisfied with the updates:
1. Log back into Plesk.
2. Click Websites & Domains from the left sidebar.
3. Click Hosting DNS, then click Hosting.
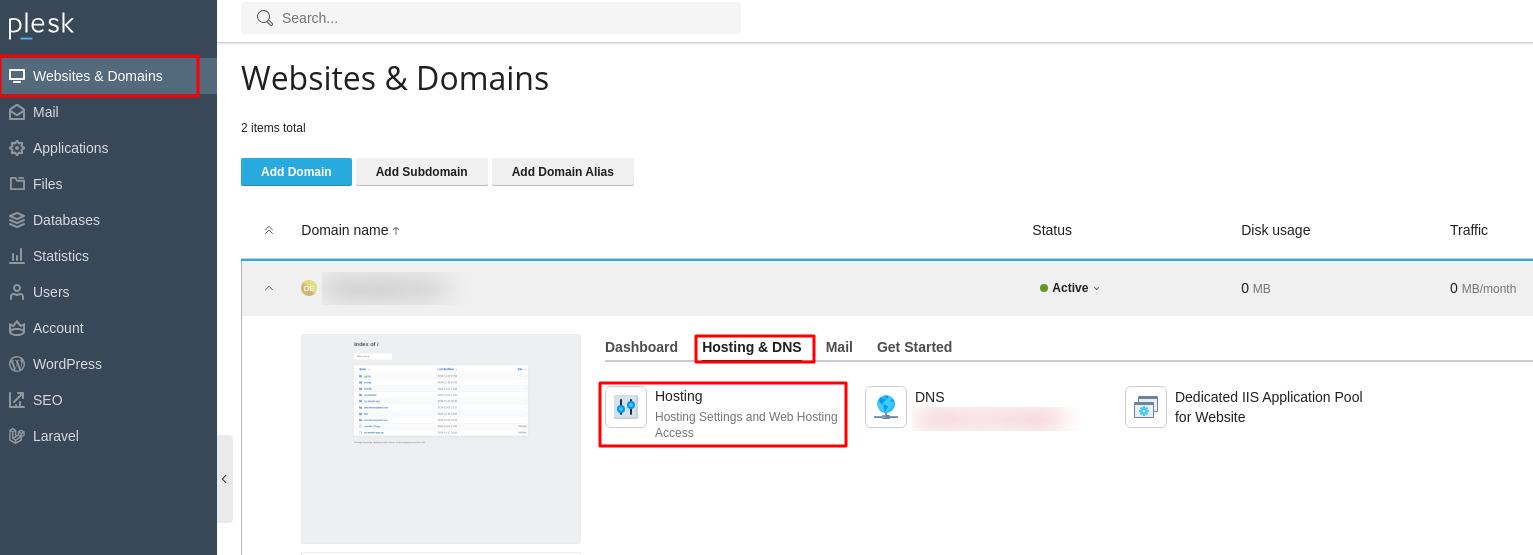
4. In the Document Root field, enter the directory for the staging site environment.

5. Click OK to publish your changes live.
Setting up a staging environment in Plesk is straightforward yet invaluable for any website owner. By following the steps outlined in this guide, you can create a safe space to experiment with updates, new features, and design changes without risking the stability or user experience of your live website. Ultimately, A staging environment in Plesk minimizes the risks associated with website changes, helping you maintain a well-functioning and secure website.