In Plesk, a virtual directory refers to a feature that allows you to create a shortcut or alias to a directory located elsewhere on the server. This directory isn't physically located where it appears to be but is instead mapped to a different directory path.
The benefit of using a virtual directory is that it allows you to organize and manage your website content more flexibly. For example:
Separating Content: You can keep different parts of your website in separate directories for better organization. With virtual directories, you can map these directories to appear as subdirectories under the main website URL without physically moving the content.
Centralized Management: Virtual directories allow you to maintain centralized website content management while presenting a logical structure to visitors.
Avoid Duplication: Instead of copying files across multiple directories, you can use virtual directories to link to a single set of files. This helps to avoid duplication and ensures consistency across your website.
Easier Maintenance: Virtual directories simplify the process of making changes to your website structure. You can rearrange or update content locations without affecting visitors' URLs to access your site.
In short, a virtual directory in Plesk acts as a pointer or alias to another directory, providing a flexible and efficient way to organize and manage website content without physically duplicating files. This helps maintain a well-structured and easily manageable website.
Steps to create a virtual folder in Plesk:
Step 1. Log in to the Plesk control panel with your username and password.
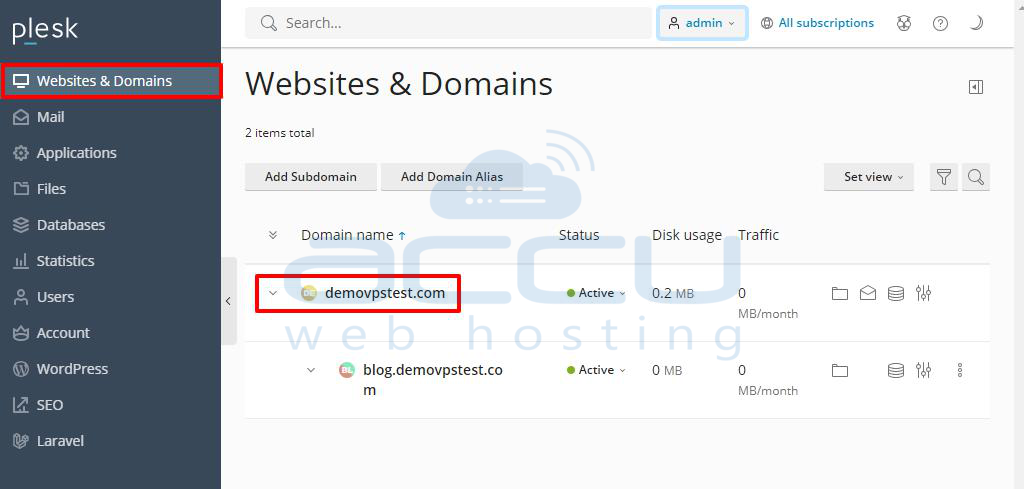
Step 2. Inside Plesk, go to the "Websites & Domains" section, where you can adjust settings for your domains.
Step 3. In "Websites & Domains," select the domain where you want to create the virtual folder. Click on the domain name to go to its management page.
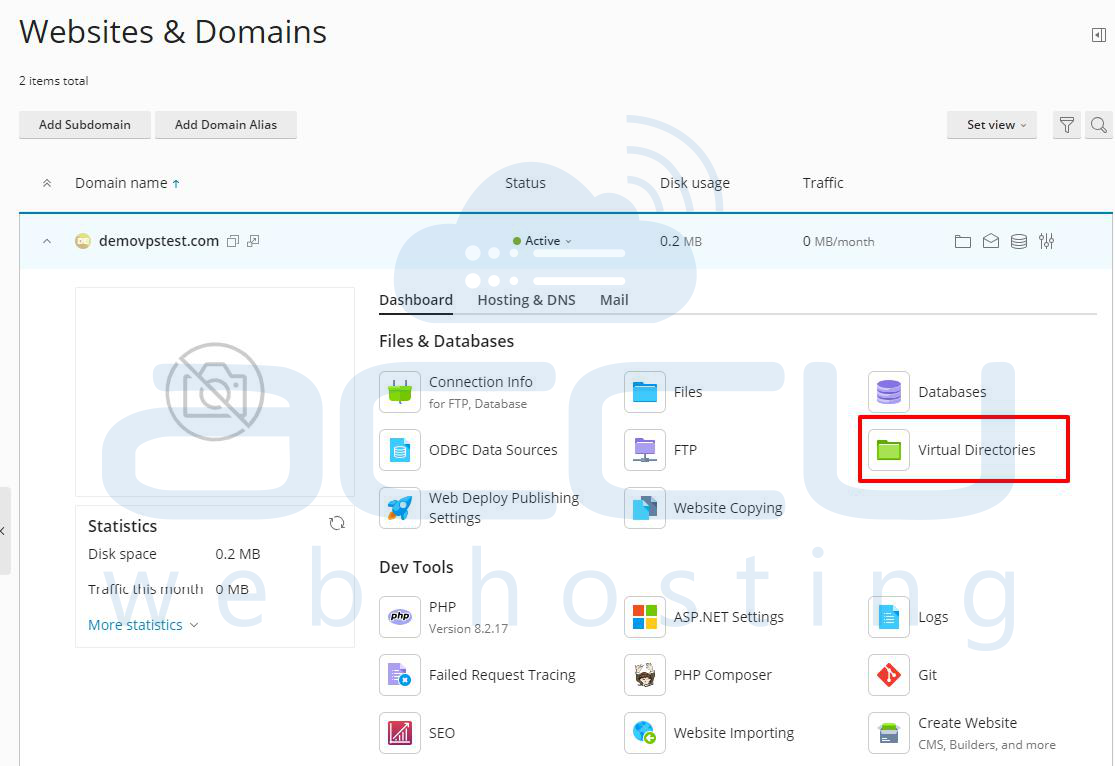
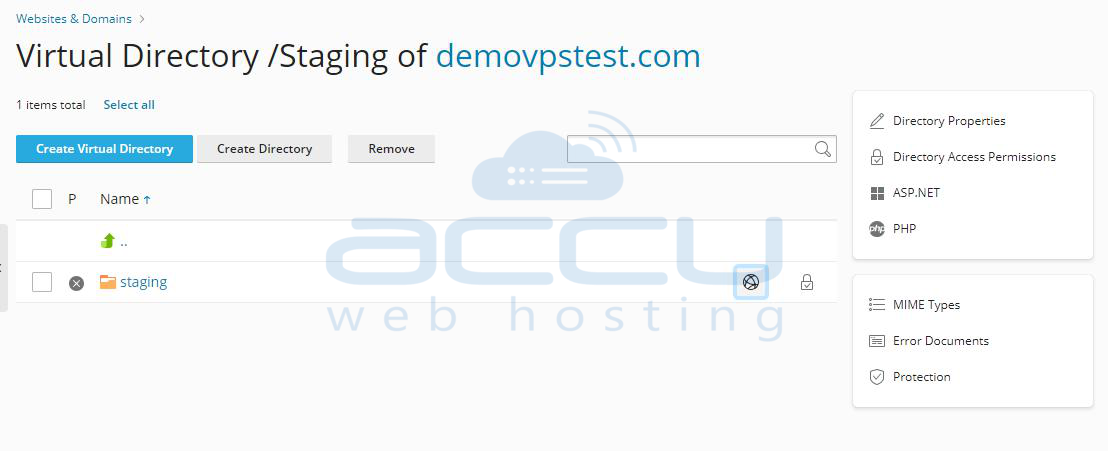
Step 4. Within the domain's management interface, find and click "Virtual Directories" It will take you to your website's main directory, where you can manage virtual folders.
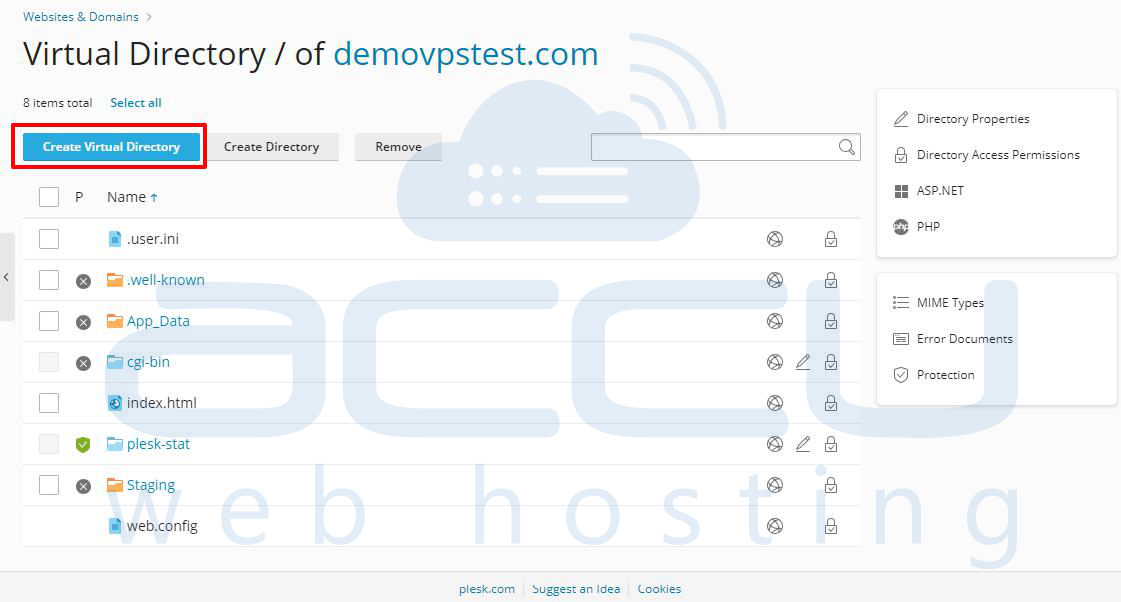
Step 5. Navigate through the directory structure until you reach where you want to place the virtual folder.
Step 6. Once you're in the right directory, click "Create Virtual Directory" to start making the virtual folder.
Step 7: In the creation form, you'll specify settings for the virtual directory:
Name: Enter the desired name for your virtual directory.
Specify Path (Optional): Check the' Path' checkbox to choose whether to automatically create a new physical directory with the same name as the virtual directory. Clear the checkbox and enter the path in the provided text box to use an existing physical directory.
Script Source Access: Check this box if you want to allow users to access the source code if read and write permissions are enabled.
Read Permission: Check this box to allow users to read the file content and associated properties.
Write Permission: Check this box to allow users to upload files to the virtual directory or edit existing files if write permissions are enabled.
Directory Browsing: Check this box to enable users to view an index containing the files and directories in the virtual directory.
Log Visits: Check this box to log and save visitor information for the virtual directory.

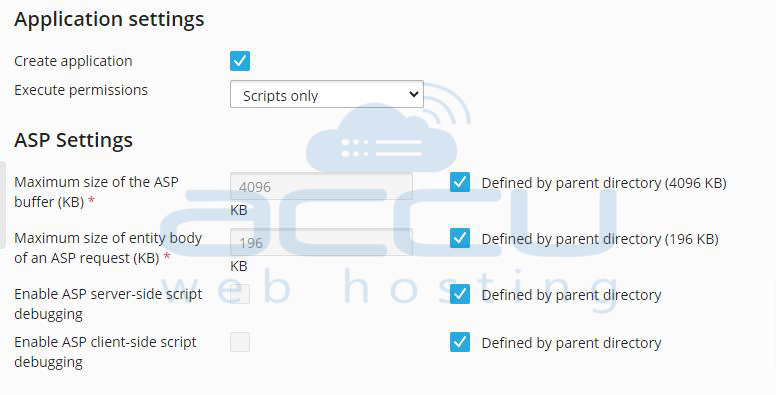
Application Settings:
Create Application: Select this checkbox to designate the directory as an IIS application, making it independent of the website.
Execute Permissions: Choose the appropriate level of program execution required for your virtual directory (None, Scripts Only, Scripts and Executables).
ASP Settings: If you're using ASP-based applications, customize specific settings for enhanced functionality and debugging:
Maximum Size of the ASP Buffer (KB): Determine the maximum size in kilobytes (KB) of the ASP buffer, which stores the output generated by ASP scripts before sending it to the client's browser.
Maximum Size of Entity Body of an ASP Request (KB): Specify the maximum size in kilobytes (KB) of the entity-body of an ASP request, referring to the content of the HTTP request sent to the server.
Enable ASP Server-Side Script Debugging: Enable server-side script debugging for ASP applications within the virtual directory, allowing administrators to debug server-side ASP scripts directly on the server for real-time troubleshooting and error identification.
Enable ASP Client-Side Script Debugging: Enable client-side script debugging for ASP applications within the virtual directory, facilitating the identification and resolution of client-side scripting errors in the user's browser.
Step 8: Once you have set up all the settings, click the 'OK' button.

After that, Plesk will create the virtual directory using the specified settings, and it will be ready to use on your domain.
Conclusion:
Creating a virtual directory in Plesk involves accessing the control panel, navigating to the "Websites & Domains" section, selecting the desired domain, and then accessing the "Virtual Directories" option within the domain's management interface. From there, you specify the name and settings for the virtual directory, including permissions and application settings.
Once configured, you save the settings, and Plesk will create the virtual directory based on your specifications. This allows for efficient organization and management of website content within your domain.
