Imunify360 is a security solution for web servers, designed to protect shared hosting accounts from malware, viruses, and cyber threats.
It detects and removes malicious code, has a firewall to block attacks, uses machine learning for proactive defense, and provides centralized management for server administrators.
Essentially, it enhances the security of shared hosting environments by preventing and mitigating various types of online threats.
Imunify360 is security software that comes by default in every Shared Hosting Plan at AccuWebhosting. The six-layer security of imunify360 provides every cPanel user with an extreme level of security from all kinds of malicious attacks.
Imunify360 is almost an automated software that automatically blocks all malicious IPs, files, and users. However, there are two methods to blacklist and whitelist IP addresses in Imunify360 manually. The first one is from the WHM interface, whereas the second one could be done by using some basic Linux commands in SSH. Both methods require root access.
Please note: If you’re a Shared Hosting user with User-Level Access, you should contact the AccuWebhosting Technical team to whitelist or unblock the IP address for your website and application.
Let's see both the methods to Blacklist/ Whitelist IP addresses in Imunify360 one by one:
Method 1: Blacklist/Whitelist IPs in Imunify360 from WHM
To Whitelist/Blacklist an IP address in Imunify360 through WHM, follow these steps:
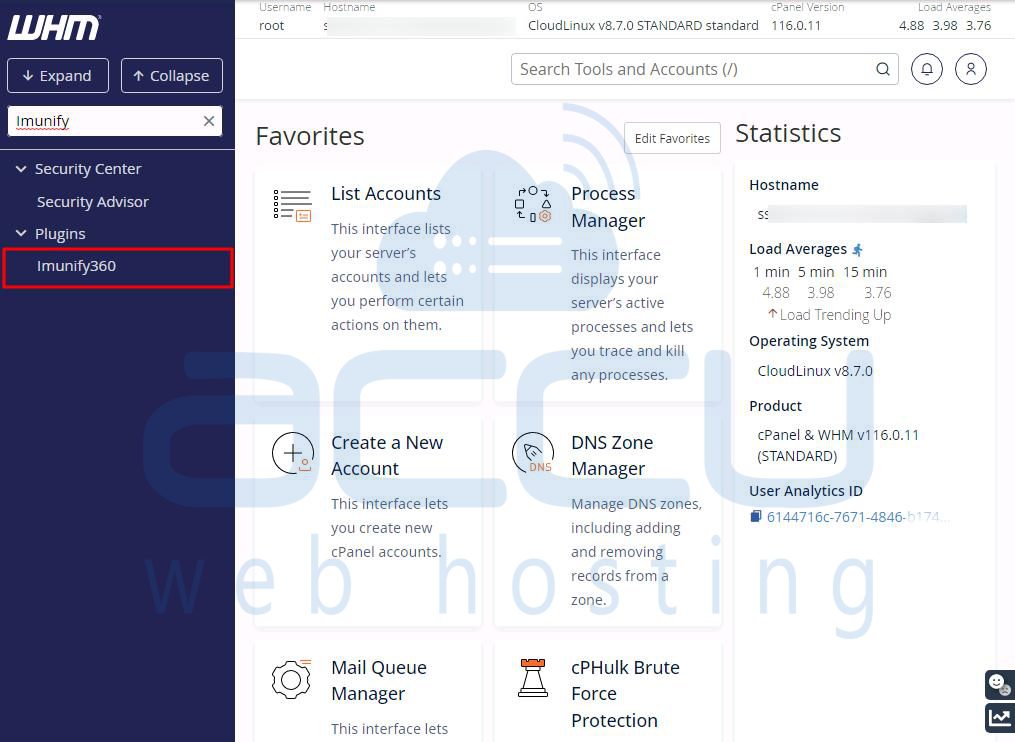
- Log in to your WHM control panel.
- Search for 'Imunify' in the search bar and select Imunify360 from the results.

- On the Imunify page, click on the Firewall tab.
- To whitelist an IP or a list of IPs, click on the WHITE LIST option under List and then hit the ADD button.
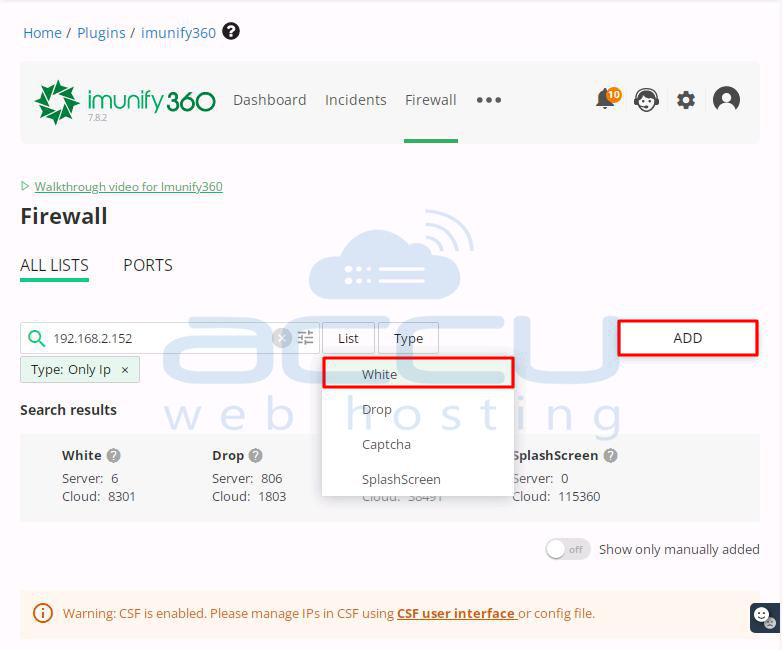
Now, there are two Types to whitelist or blacklist IPs in Imunify360's Firewall:
- Type 1: Only IP (Whitelist or blacklist by IP or a range of IPs (using CIDR))
- Type 2: Only Country (Whitelist or blacklist country-wise)
Let's learn both types one by one.
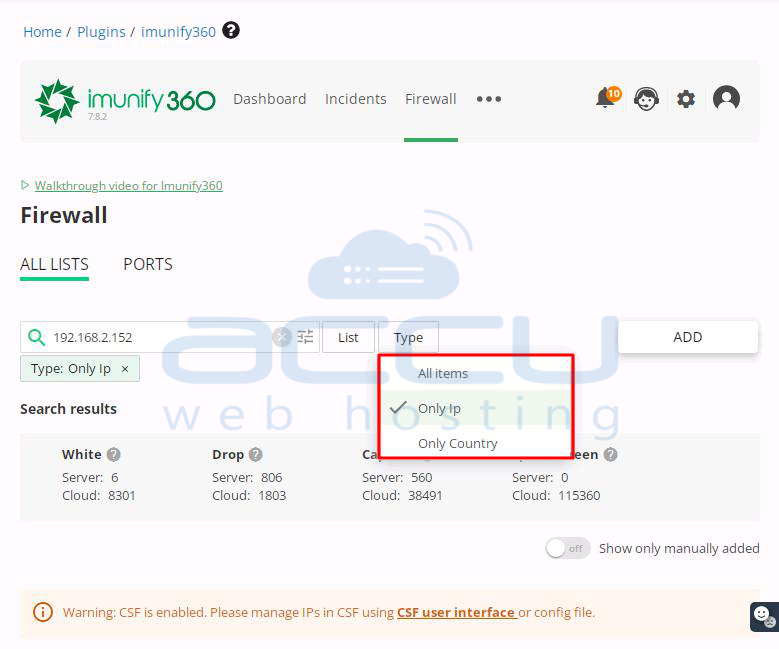
Type 1: Only IP (Whitelist or blacklist by IP or a range of IPs (using CIDR))
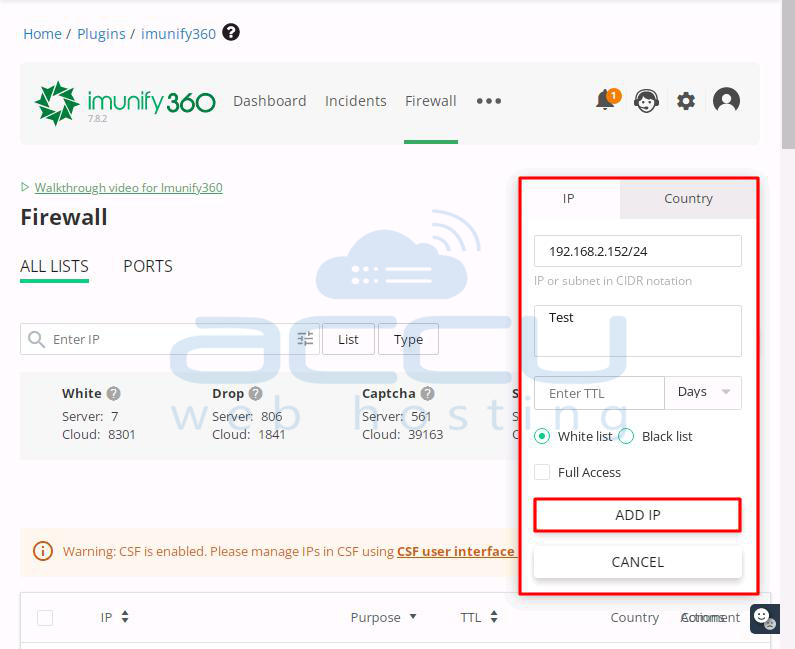
- Select type: Only IP and click on the Add button. After clicking the ADD button, you'll see two methods to whitelist or blacklist IPs on the right side of the page.
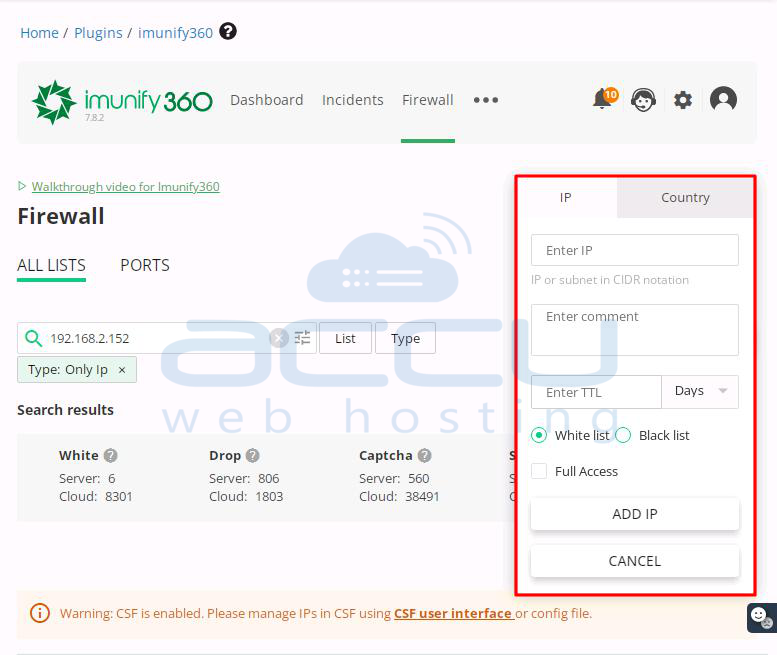
i. First, we will see how to Whitelist/ Blacklista Single IP address:
- Enter an IP address in the Enter IP box. Now choose from the options whether you want to Whitelist or Blacklist the added IP address. Here we have chosen to Whitelist the IP address.
- Click the ADD IP button.

- A pop-up will appear with a success message. You've successfully whitelisted an IP address in Imunify360.

ii. Now we will see how to Whitelist/Blacklist a Range of IPs using CIDR in Imunify
You can easily Whitelist or Blacklist a range of IPs in Imunify360 using the CIDR method. Follow the simple steps below:
- Go to Imunify360 in WHM and click the ADD button.
- Enter the IP address using CIDR and click the ADD IP button.
- The CIDR Command /24 will either allow or block all IPs starting from 156.143.150. You can learn more about CIDR Commands by clicking the link.
- You can use different CIDR formats to expand or shrink the IP range.
- That's it.
Type 2: Only Country (Whitelist or blacklist country-wise)
i. First, we will see how to block an IP address from a specific country:
You can easily stop IP addresses from a specific country in Imunify360. Follow these steps to do it:
- Go to Imunify360 in your WHM dashboard and click on the ADD button.
- Enter and select the country you want to block or allow access to your server.
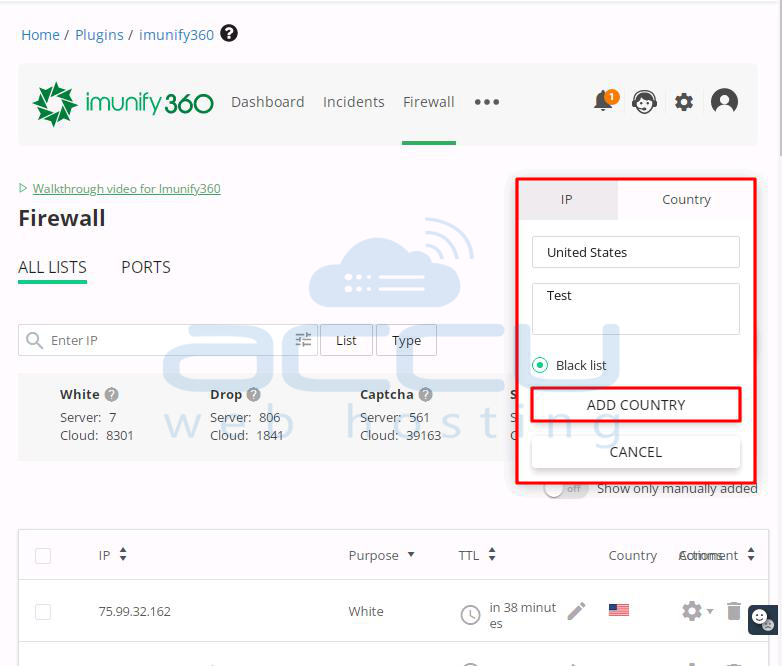
- Click ADD COUNTRY to add the entire country to the blocklist. Now, no one from the selected country can access your server and its associated websites.
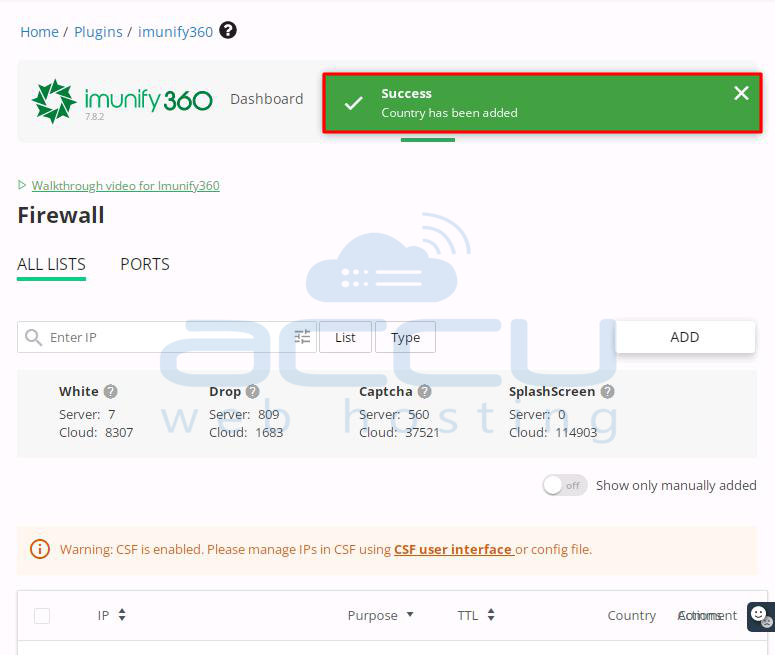
- That’s it.
- This is how you can easily block an entire country in Imunify360.
ii. Now we will see how to allow IPs from a Specific Country in Imunify:
You can easily permit IP addresses from a specific country in Imunify360. Follow these steps to do it:
- Go to Imunify360 in your WHM dashboard.
- Look for the entry with the word Drop and check the country in the country field.
- Click the Delete button to remove the entire country from the blocklist. Now, anyone from the selected country can access your server and its associated websites.
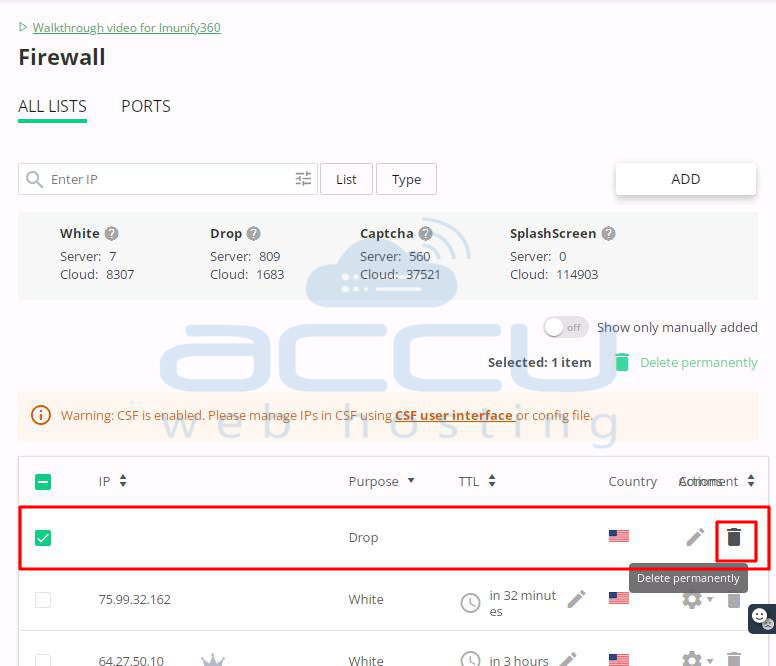
- That’s it.
- This is how you can easily allow an entire country in Imunify360.
Method 2: Blacklist/Whitelist IPs in Imunify from SSH
- To allow certain IPs, make a directory named whitelist, add a file inside it, and list the IPs (one per line) you want to allow.
- To block IPs, make a directory named blacklist and repeat the same steps.
- You need special access (root) to do this.
- Write one IP on each line.
- Make sure the directory is named either whitelist or blacklist.
Follow these steps to allow/Block IP Addresses in Imunify using SSH Commands.
- Log in to SSH as a root user.
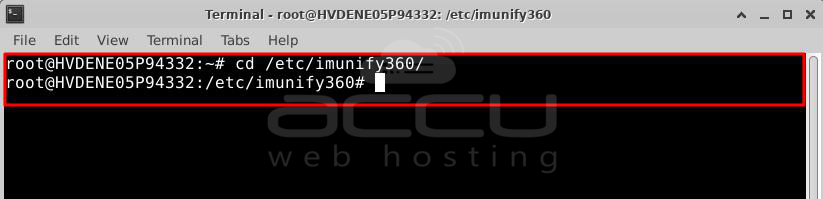
- Once logged in, go to the imunify360 directory using the command: cd /etc/imunify360/
# cd /etc/imunify360
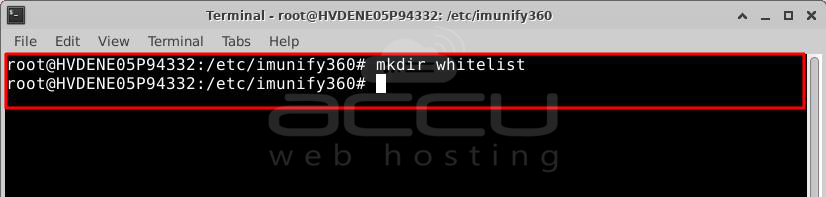
- Create a new directory called whitelist using the command:
# mkdir whitelist
- Use ls to check the new directory.
- Go inside the whitelist directory and create a new file:
# cd whitelist
# touch IPs.php
# ls

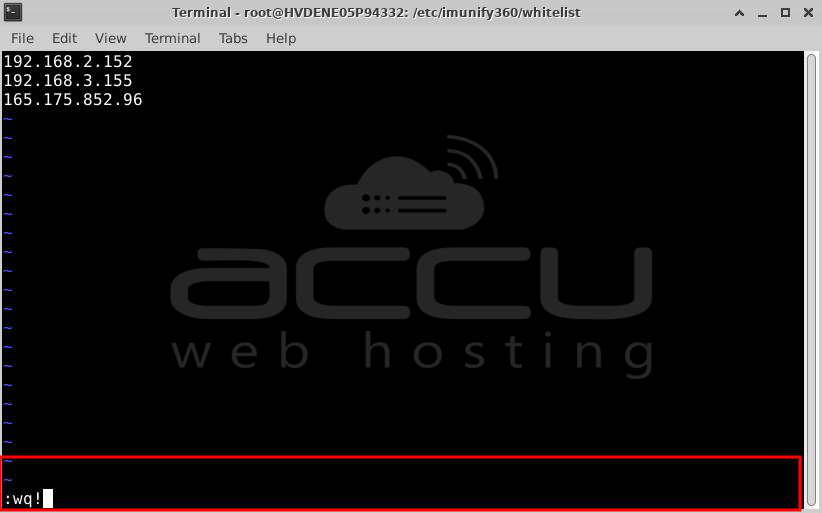
- Edit the new file using vi or nano and add the IPs you want to allow.
# vi /etc/imunify360/whitelist

- To save & exit, press Esc, then type :wq!, and hit Enter.
- That’s it. All IPs in the whitelist file will be allowed automatically.
Note: You can use the same method to block IPs. Just create a directory named blacklist, and the rest of the process is the same.
Conclusion:
In conclusion, blacklisting or whitelisting IP addresses in Imunify360 involves creating specific directories (whitelist or blacklist), adding IP addresses to files within these directories, and ensuring root access for execution. Through simple SSH commands, users can effectively manage access to their servers and associated websites, enhancing security and control.
