Changing your server's time zone from the Plesk dashboard is a simple process. Plesk control panel provides a user-friendly interface, making it simple for you to manage various server settings, including time zone adjustments.
An important aspect of server management is setting the correct time zone. The server's time zone affects not only how the internal system works but also ensures that timestamps for things like logs, emails, and other server activities are accurate. In this article, we'll show you how to change your server's time zone using the Plesk Control Panel.
Here are the steps to change the server time zone in Plesk:
Step 1: Login to your Plesk Control Panel
Open your web browser and enter the below URL for your Plesk control panel.
"https://your-server-ip:8443" or "https://your-domain.com:8443."
For a non-secure Plesk panel connection, you can use the below URLs:
"http://your-server-ip:8880" or "http://your-domain.com:8880."
Once you show the login screen, log in to your Plesk panel with your administrative username and password.
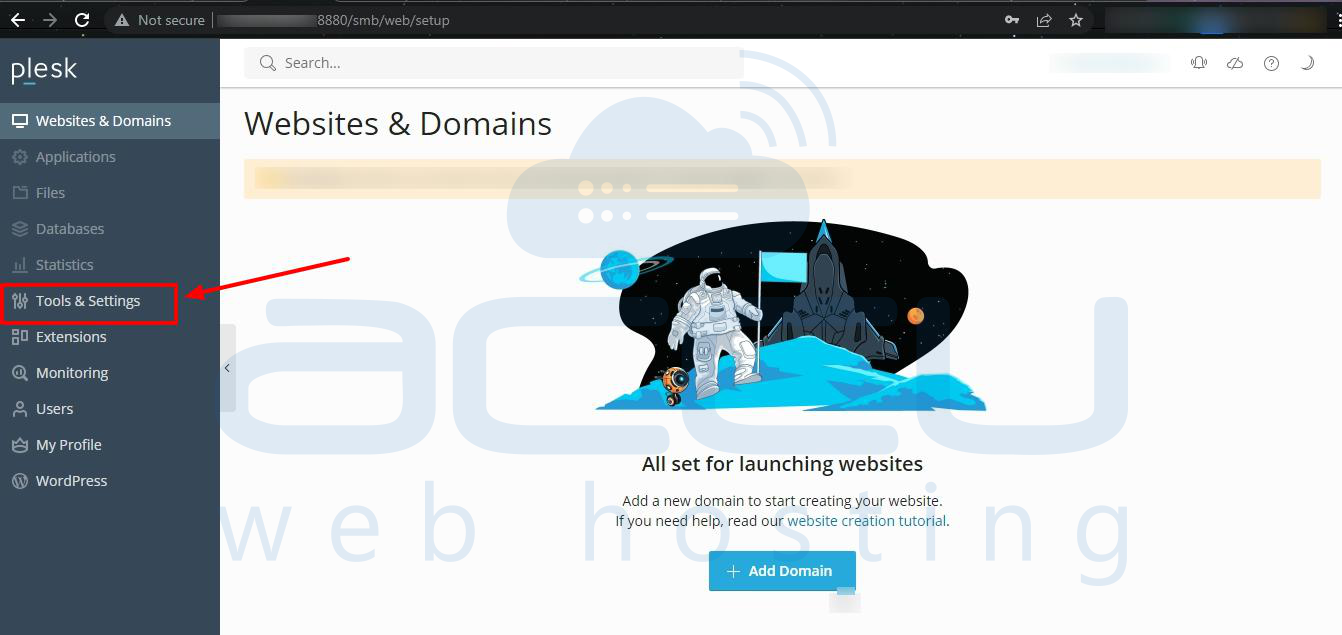
Step 2: Once you have logged in to Plesk, click on Tools & Settings. This will open a new window or tab with various server settings.
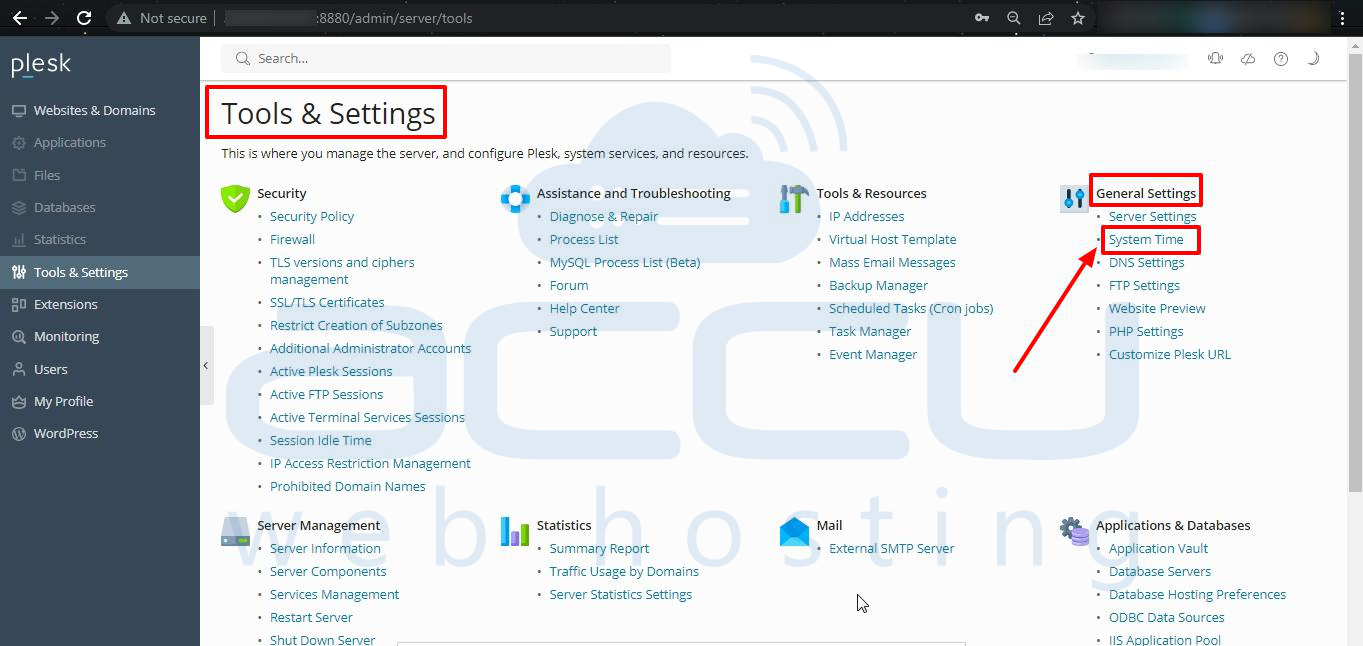
Step 3: Within the "Tools & Settings" section, you should see a category System Time Under General Settings. Click on this category to access the time zone settings.
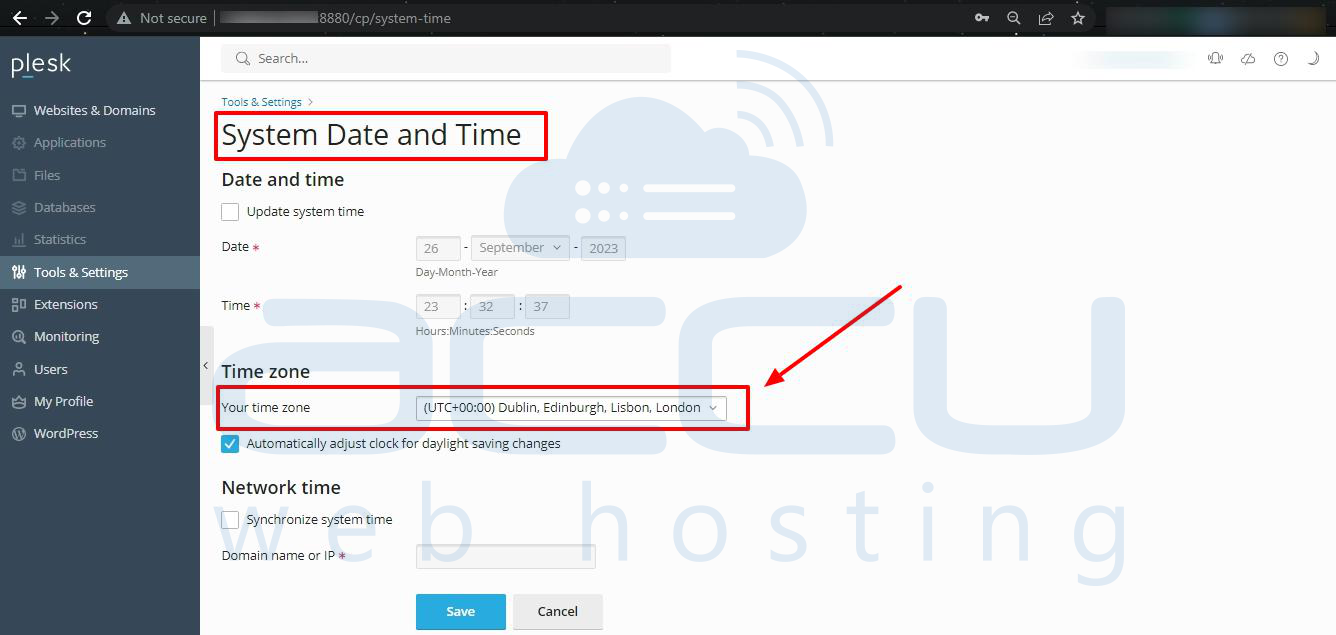
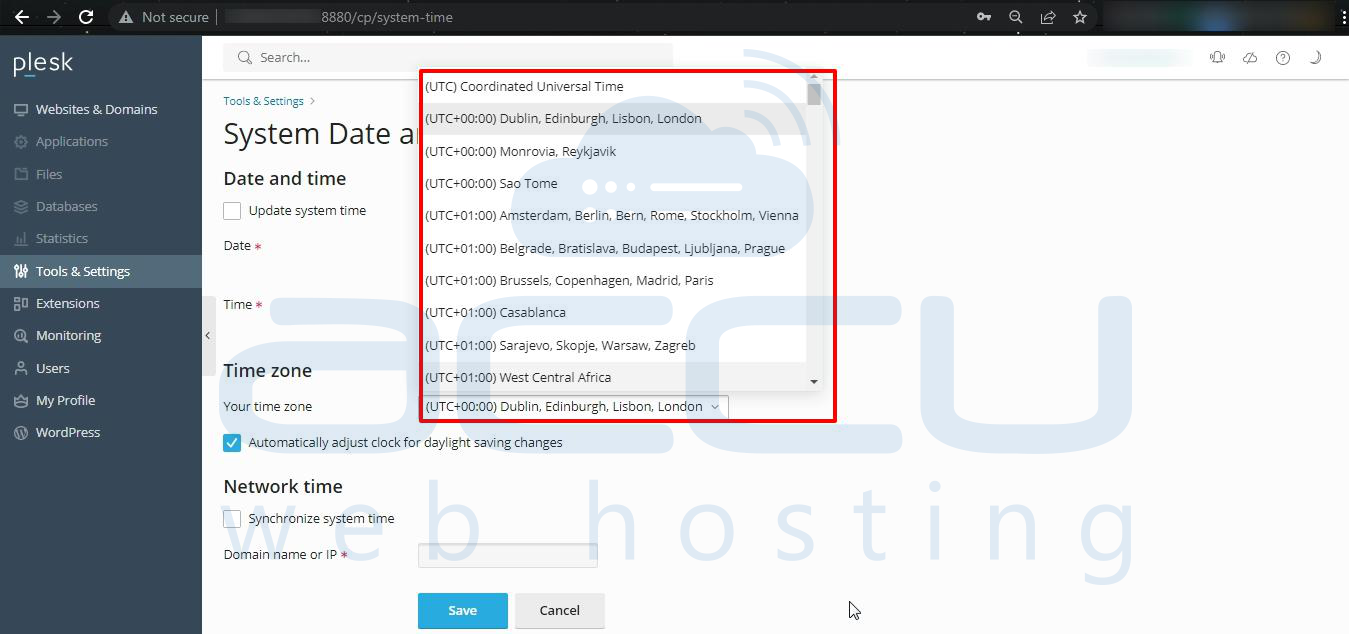
Step 4: Under Time Zone select your desired time zone from the list of available zones.
Required Notes:
- You can uncheck the Automatically adjust clock for daylight saving changes checkbox if you don't want Plesk panel to change your server clock automatically.
- To make sure your server's time matches your server using the Network Time Protocol, simply check the box Synchronize system time, and enter a valid IP address or domain name.
- If you check the Synchronize system time function, it will replace the time and date you have set manually in the System date and time section. Also, please make a note that the domain name or IP address you have entered in synchronization should be a valid NTP server. If its not valid, this function will not work, and your server will be adjusted with its current time settings.
Step 6: Once you select your preferred time zone, find the "Save" button at the bottom of the page and click it to save your changes.

Step 7: Restart your Plesk server to apply these time zone changes.
Conclusion:
Changing your server's time zone in the Plesk control panel is an important task. It matters because it guarantees that the time shown on your website or app is correct, which makes it more user-friendly for visitors.
The steps provided in this article make it easy to change the server's time zone to either match your server's physical location or to suit the preferences of the people using it. Accurate timekeeping is a crucial part of managing a server, and it's a small but important detail that you should always remember to handle correctly.
