SmarterMail lets users add an extra security step to their logins, known as two-step authentication or two-factor authentication (2FA). This feature adds another layer of protection beyond just a password. The system administrator may or may not enable this feature by default for your domain. If not, domain administrators can turn it on. Once enabled, users can set it up by logging into their accounts through webmail.
In simple terms, two-step authentication adds an extra step to the usual username and password login process. After entering their password, users are asked for a second code. This code can be sent to their recovery email address or generated by an app like Google Authenticator.
This guide helps you protect your SmarterMail email account by enabling two-factor authentication. This extra step makes sure that only you can log in, preventing someone who has stolen or guessed your password from accessing your account.
Turning On Two-Step Authentication
Domain administrators can easily turn on Two-Step Authentication for all users in the domain. However, this feature will apply to all users and cannot be enabled for individual users separately. To set it up, follow these steps:
What You Need to Set Up 2FA on SmarterMail
Before you begin, make sure you have:
- An authenticator app
- A recovery email address
Authenticator App
Install an authenticator app on your mobile phone or tablet. This app generates the security code you'll need for the second step of logging in. Some popular authenticator apps include:
- Google Authenticator
- Microsoft Authenticator
- Okta
- Authy
If you already have one of these apps on your device, you can use it without needing to install a new one.
Recovery Email Address
A recovery email address is a personal email address not linked to First Class support. It helps you recover your account if you forget your password.
How to Turn On 2FA in SmarterMail
Follow these steps to set up Two-Step Authentication in SmarterMail:
Step 1: Log in to your SmarterMail server as an administrator or domain administrator.
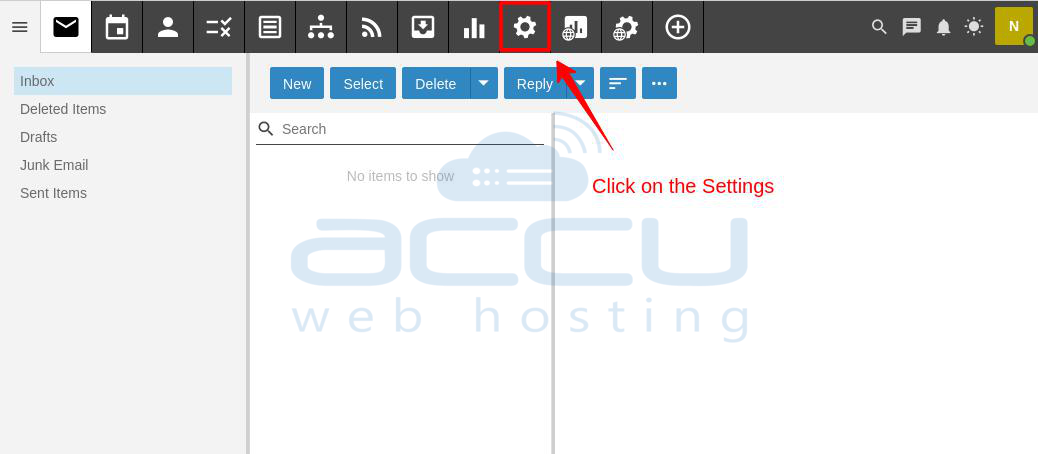
Step 2: Click on Settings in the navigation menu.
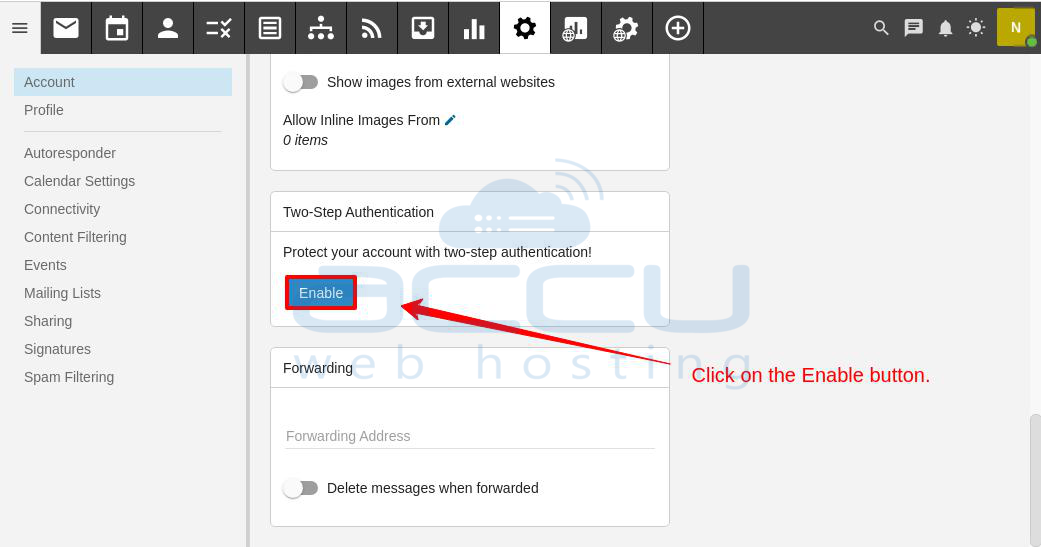
Step 3: Find the option to enable two-factor authentication on the right side of the settings page. Ensure you have your authenticator app and recovery email ready, then click the Enable button to start the setup.
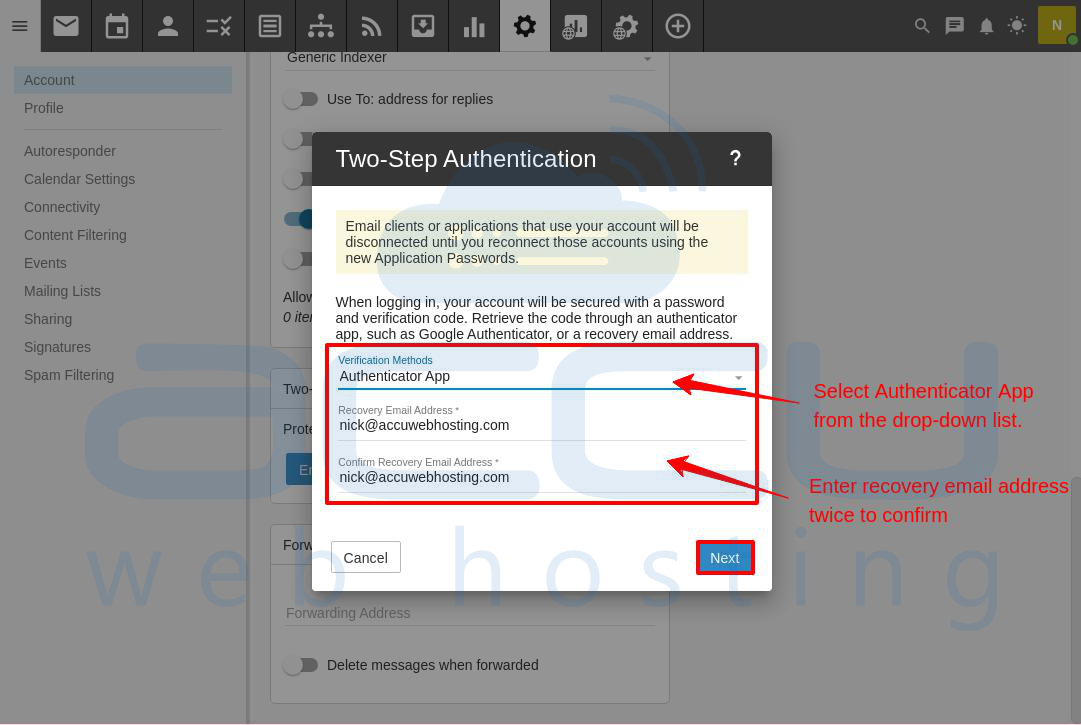
Step 4: You’ll be asked to set up the 2FA method. Choose Authenticator App from the dropdown menu for Verification Methods. Enter your recovery email address twice to confirm it, and then click Next.
Step 5: Download and install the Google Authenticator app on your phone.
For Android, go to the Google Play Store.
For iOS, visit the App Store.
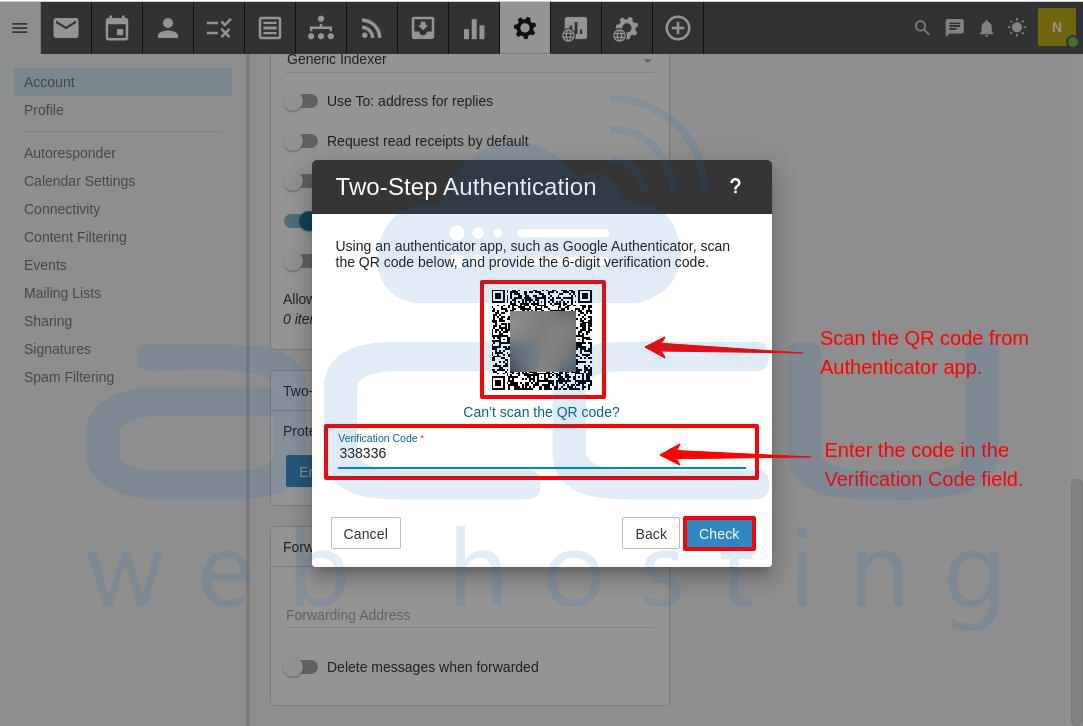
Step 6: You will see a QR code to scan with your authenticator app. Open the app, tap the button to add an account using a QR code, and point your phone's camera at the QR code to scan it.
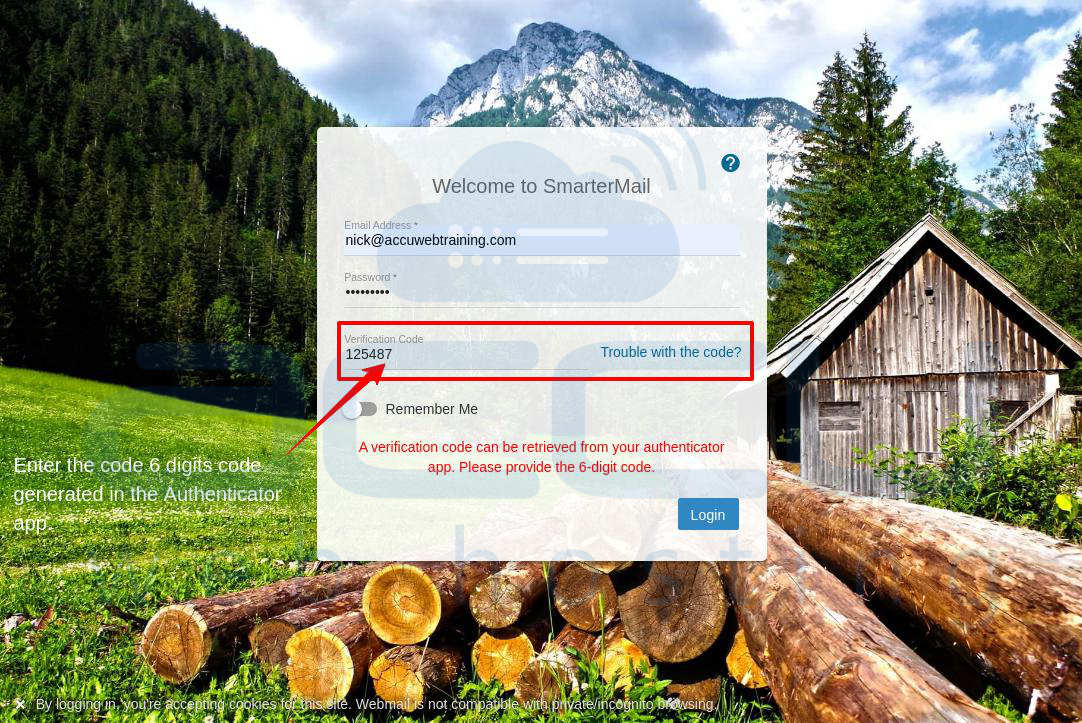
Step 7: After scanning, the authenticator app will generate a six-digit code. Enter this code in the Verification Code field on the two-factor authentication setup screen and click Check.
Once the code is verified, Two-Factor Authentication will be active for your SmarterMail account. Each time you log in, your authenticator app will provide a new six-digit code for secure access, ensuring your account is protected with two-factor authentication.
Re-authenticating Email on Your Phone or Tablet
For security, any phone or tablet connected to your email will be logged out after you set up two-factor authentication. Fortunately, you won't need the app every time you check email on your phone or tablet. Instead, you'll use a special, complex password.
Getting the Password for Your Mobile or Tablet
After setting up two-factor authentication on your webmail, several secure passwords will be created. Look for the first password listed for IMAP/POP/SMTP.
Click the eye icon next to the IMAP/POP/SMTP password to see it.
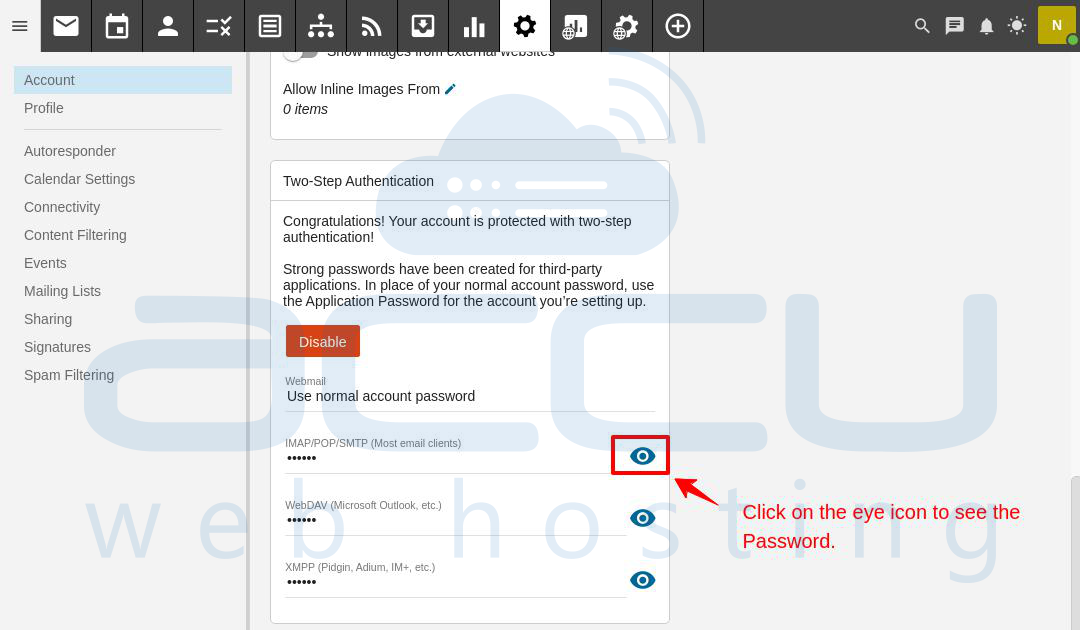
This is the unique password you'll use to connect your phone or tablet to your email.
Important Notes:
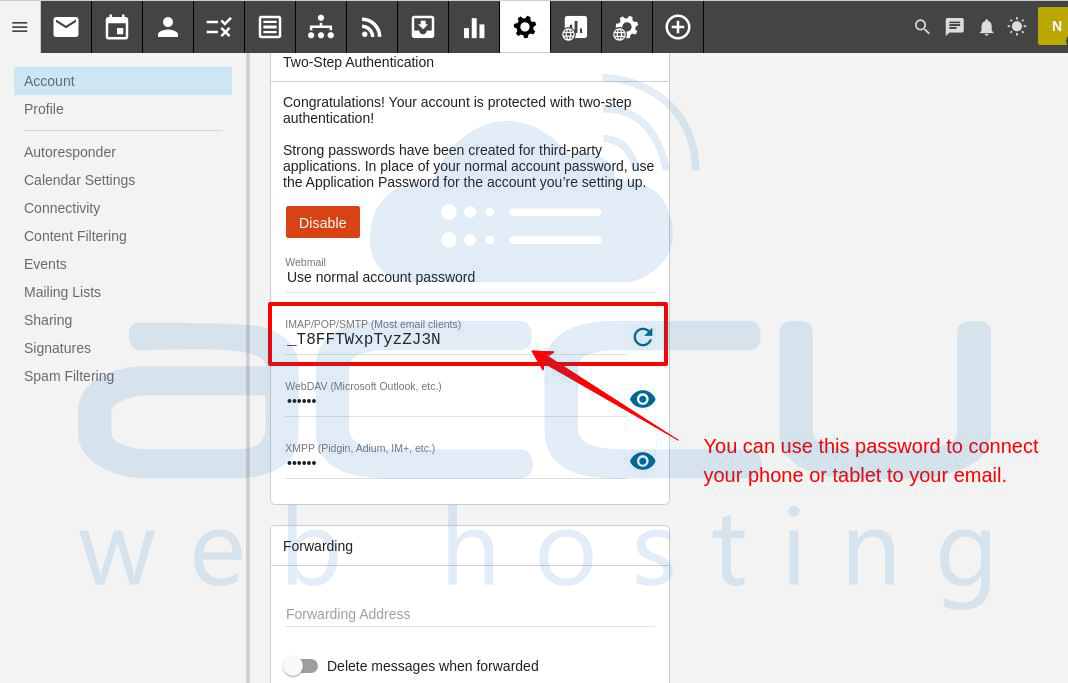
-> When your phone or tablet disconnects from your email account, your mail app will likely prompt you for the password. Enter the password mentioned in the IMAP/POP/SMTP section, and you'll be reconnected.
-> If your device doesn’t prompt you for the new password, go to your device settings and manually enter the new password under mail settings to reconnect and secure your device with your email service.
Conclusion:
To turn on two-factor authentication (2FA) on SmarterMail, first log in as an administrator. Go to Settings and then select Security. Find the Two-Factor Authentication option and make sure it is turned on. Users will then set up their own 2FA by choosing a method like an authenticator app or email and following the instructions shown. This extra step during login makes accounts safer and prevents unauthorized access.
