When you send an email, it stays in the recipient's inbox until they read or delete it. Email providers set a limit on how much data a user can store in their inbox. Once this limit is reached, the inbox is full, and no new emails can be received unless old ones are deleted or the inbox size is increased.
When the recipient's inbox is full, the email server returns an error message: "550 Mailbox quota exceeded." This lets the sender know that the email couldn't be delivered because the recipient's inbox is full.
Sample of Error message:
The bounce-back message for the 550 error resembles the following:
This message was created automatically by mail delivery software.
A message that you sent could not be delivered to one or more of its recipients. This is a permanent error. The following address(es) failed: user@domain.com
SMTP error from remote mail server after RCPT TO:<user@domain.com>:
host domain.com [11.22.33.44]: 550 Mailbox quota exceeded
Reasons for the Error Message:
Here are the possible reasons for the error message:
- The email account has reached its disk space limit.
- The domain's total disk space limit has been exceeded.
Note: If you have Windows Shared hosting with Accuwebhosting and the domain's total disk space limit has been exceeded, you need to contact us through ticket and chat. We will temporarily increase the disk space and update you on the ticket. Then, you need to remove unnecessary emails from the Email accounts and update us so we can revert the total disk space limit to the previous one. Due to technical limitations, increasing the Domain disk space in the Windows Shared hosting is impossible.
Possible Solutions:
If your email account has used up its allowed space, here are some ways to fix it:
Delete some emails: Removing emails, especially those with large attachments, will free up space on the server and reduce the storage used.
If all the emails are important and you can't delete them because you need them for future reference, you can increase the Mail disk quota through your cPanel account.
Steps to Increase the Email Account Quota in cPanel:
Here are the steps to increase the email account quota from your cPanel account.
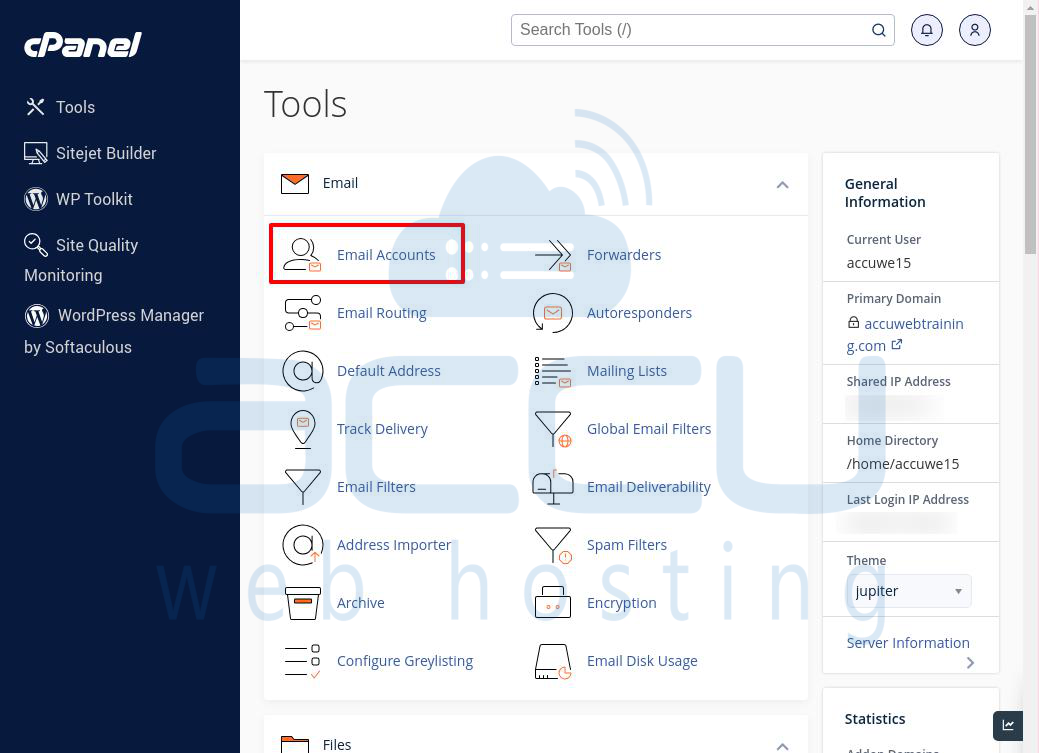
Step 1: Log in to your cPanel account.
Step 2: Go to the "Email Accounts" section under "Mail." You will see a list of the email accounts you've created for your domain.
Step 3: Check if any accounts are over their quota. These will be highlighted in red. You can either delete unnecessary emails or increase the storage quota.
Step 4: Click the "Manage" option next to the email account to increase the quota.

Step 5: In the "Manage an Email Account" window, go to the "Current Storage Usage" section. Enter the new size for the account and choose the appropriate option, such as KB, MB, or GB, from the drop-down menu.
You can also select the maximum allowed storage by clicking on the storage amount below the field.
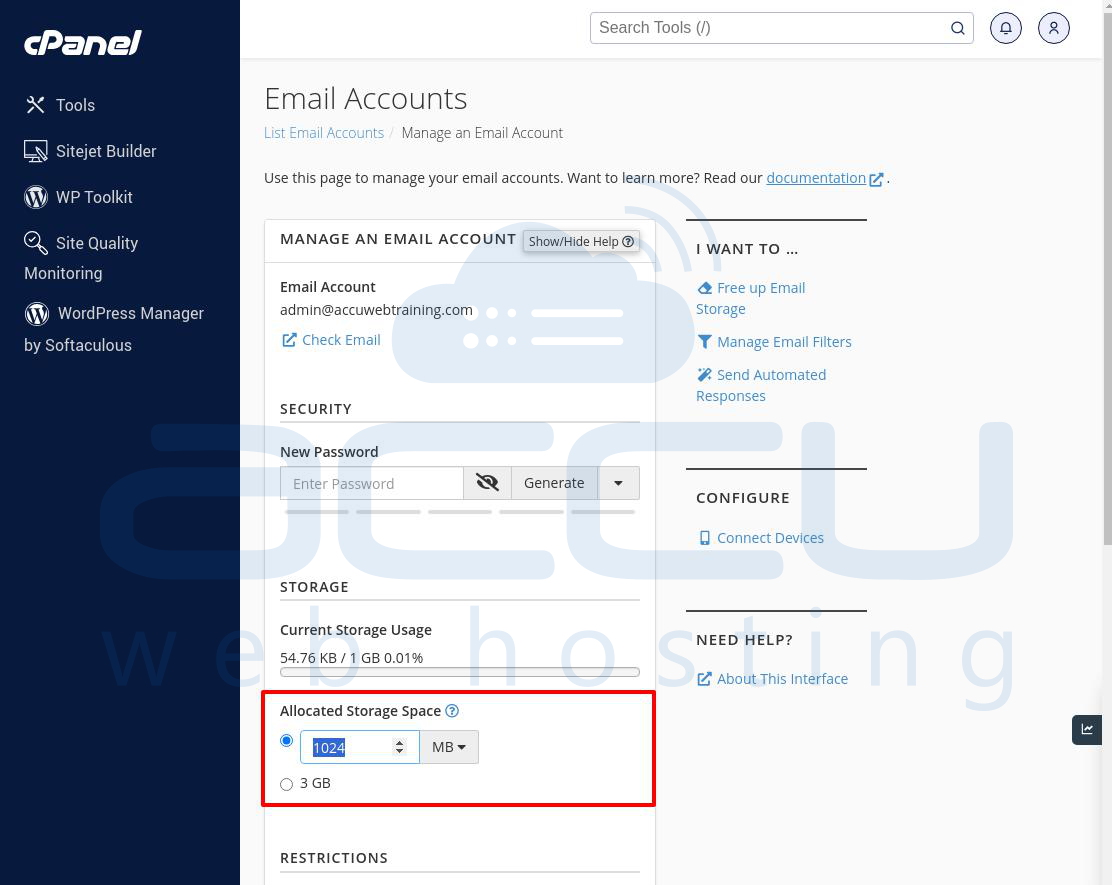
Step 6: After setting the desired size, scroll down and click the "Update Email Settings" button to save the changes.

Step 7: The system will update the email account size, and you will see a success message. You can also verify the new storage limit in the "Storage" section under "Email Accounts."

Steps to Increase the Email Account Quota in Plesk Panel:
Below are the steps on how to increase the Email account Quota from the Plesk Panel.
Step 1: Log into the Plesk Panel.
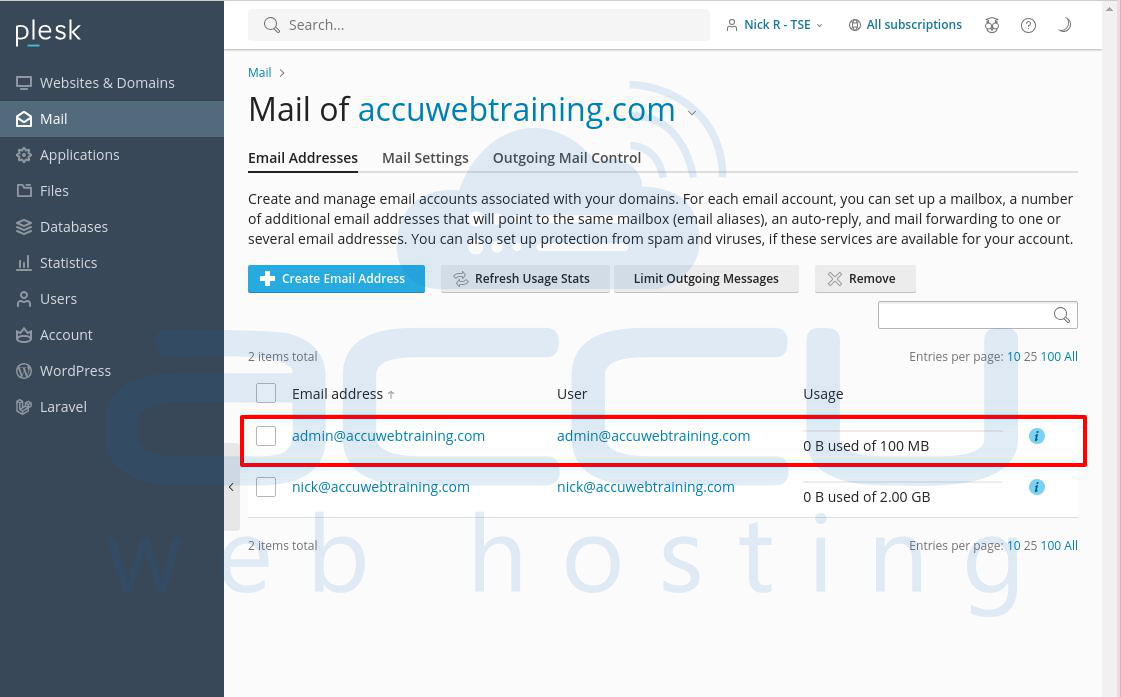
Step 2: Choose the domain where you want to increase the email account quota. For example, accuwebtraining.com.

Step 3: Click on the Mail icon.
Step 4: In the Mail window, you will get the email accounts you've created. Select the account you want to increase the quota for, like admin@accuwebtraining.com.
Step 5: In the Email addresses window, go to the MailBox section. Enter the new size for the account and choose options such as KB, MB, GB, etc., from the dropdown menu. You can also select the maximum storage limit by clicking the storage amount.
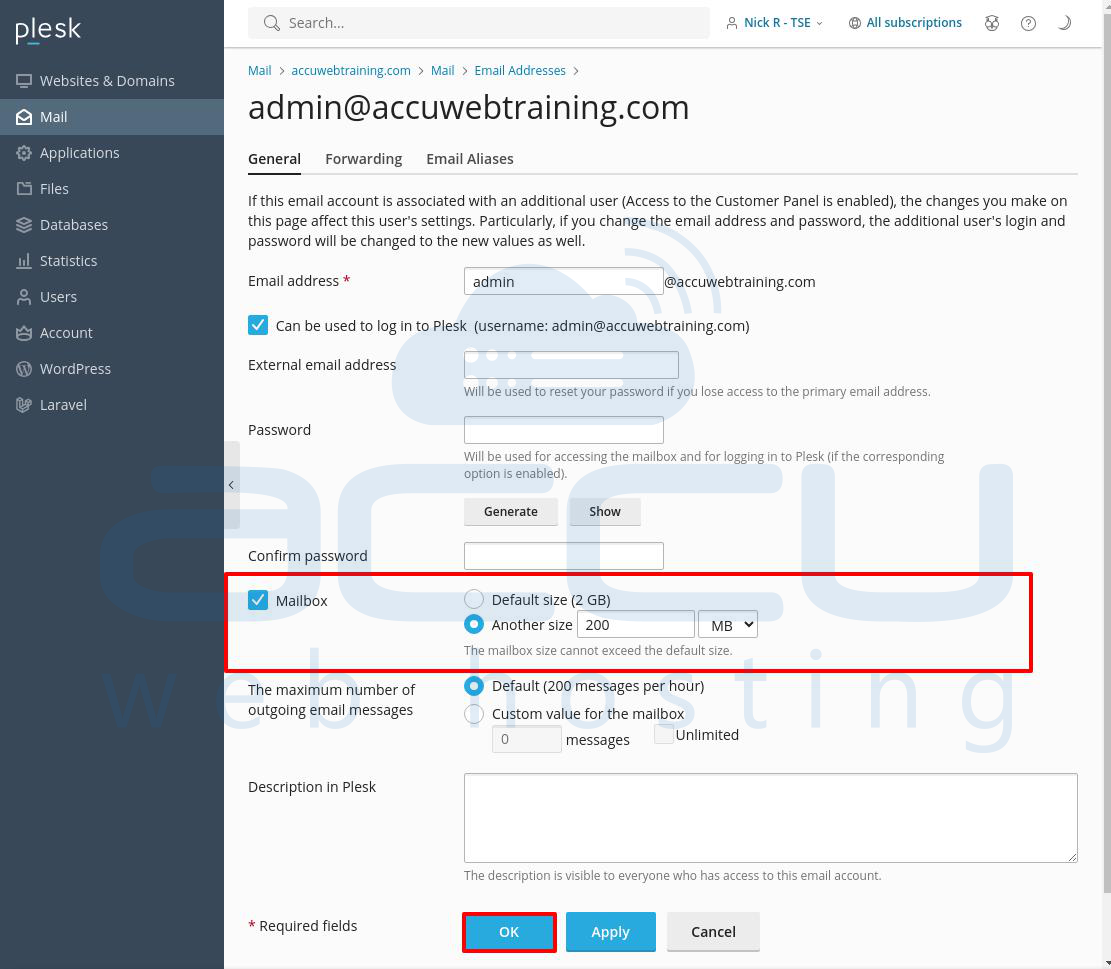
Step 6: Click OK to save the changes.
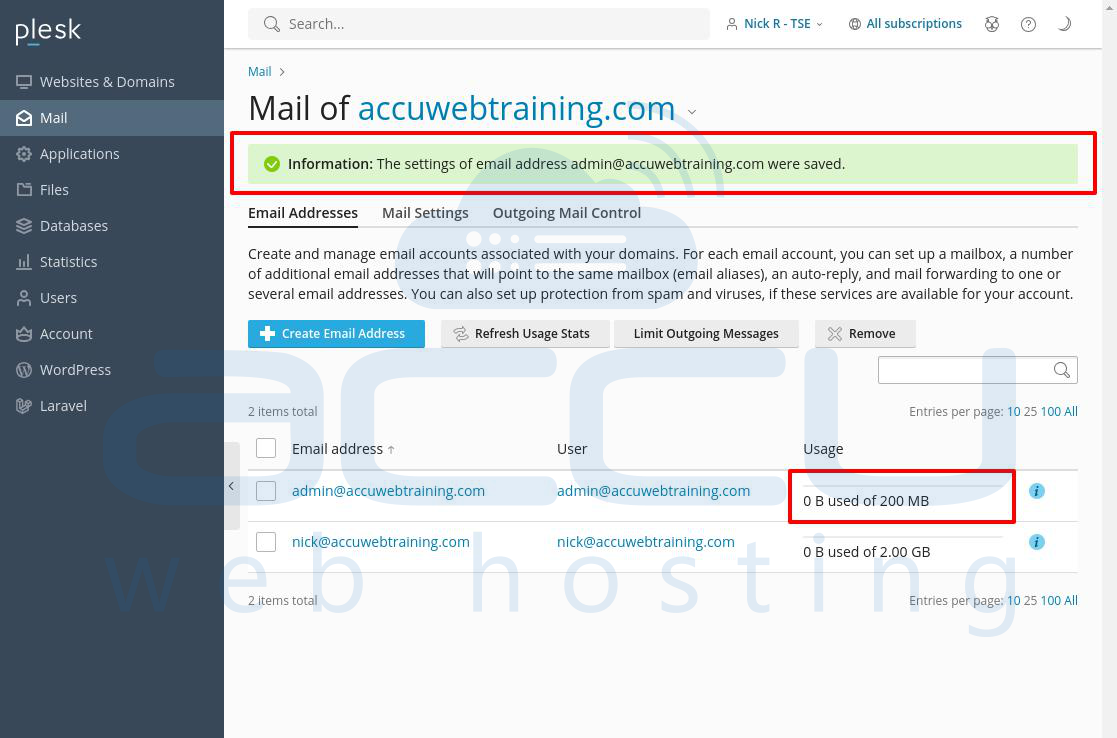
Step 7: The system will update the account size, and you'll see a success message. You can check the new limit in the "Usage" section under "Email Accounts."
Alternative Solution:
Here are some steps the recipient can take to fix this error:
1. Download emails to your computer: Instead of deleting important emails, you can save them to your computer or an external storage device. You can set up your email account in an email client application like Outlook or Thunderbird to download all your emails to your computer. This helps free up space on the server. After saving them, you can delete the older emails from your inbox.
2. Archive messages: The recipient can move old emails to an archive folder or another location. This helps reduce mailbox size and improves email performance.
3. Use cloud storage: For large attachments or files, the recipient can use cloud services like Google Drive, Dropbox, or OneDrive. This frees up space in the mailbox and reduces the chance of reaching the storage limit.
Conclusion:
In short, the "550 Mailbox quota exceeded" error can be resolved by freeing up space in the mailbox. The recipient can delete old emails, archive messages, increase storage, or use cloud storage for large files.


