What is a 403 Forbidden Error?
The 403 error is a client-side error. It is an HTTP status code, which means that the website or resources you are trying to reach are blocked for some reason.
Generally, it occurs when a visitor/user tries to access a website or resources from their browser, and the server denies it.
Causes of 403 Forbidden Errors
Generally, 403 forbidden errors occur for one of two reasons:
Cause 1: The first one is that the owner of the web server has set the correct settings, and you are not allowed to access the website.
Cause 2: The second reason is that the owner of the web server has set incorrect settings/misconfigured them, and you are getting denied access, which you should not be.
Like 404 errors and 502 errors, the website designer can customize the 403 errors. They can be labeled in different ways, such as: 403 Forbidden error | 403 Error | Error 403 | Error 403 - Forbidden | HTTP 403 | HTTP 403 - Forbidden
The common cause of these errors is the file or folder permission settings, which control who can read, write, and execute the file or folder.
It also occurs if the .htaccess file is corrupted or if you have set an incorrect setting in it.
Below are some other common causes of the 403 forbidden error:
Missing index page: You have not created/uploaded an index page on the hosting service where your website is hosted.
Faulty WordPress Plugin: If a WordPress plugin is not installed and configured correctly or is incompatible with another plugin or PHP version, you may get 403 errors.
Wrong IP address: The domain name is pointing to an incorrect IP address, which is now hosting a new website that blocks your request.
Malware infection: A malware infection may constantly corrupt the .htaccess file. Therefore, you must secure your hosting account with an updated antivirus or malware scanner before uploading or restoring the file.
How to fix the 403 Forbidden Error?
If you are receiving a 403 error, do not worry about it. You need to follow the given methods, which may help you fix it. You can choose the one that fits your current situation.
Method 1: Check the .htaccess File
Generally, the .htaccess file is hidden in the cPanel account, so you need to make it visible from the cPanel account. Follow the following steps to locate the .htaccess file.
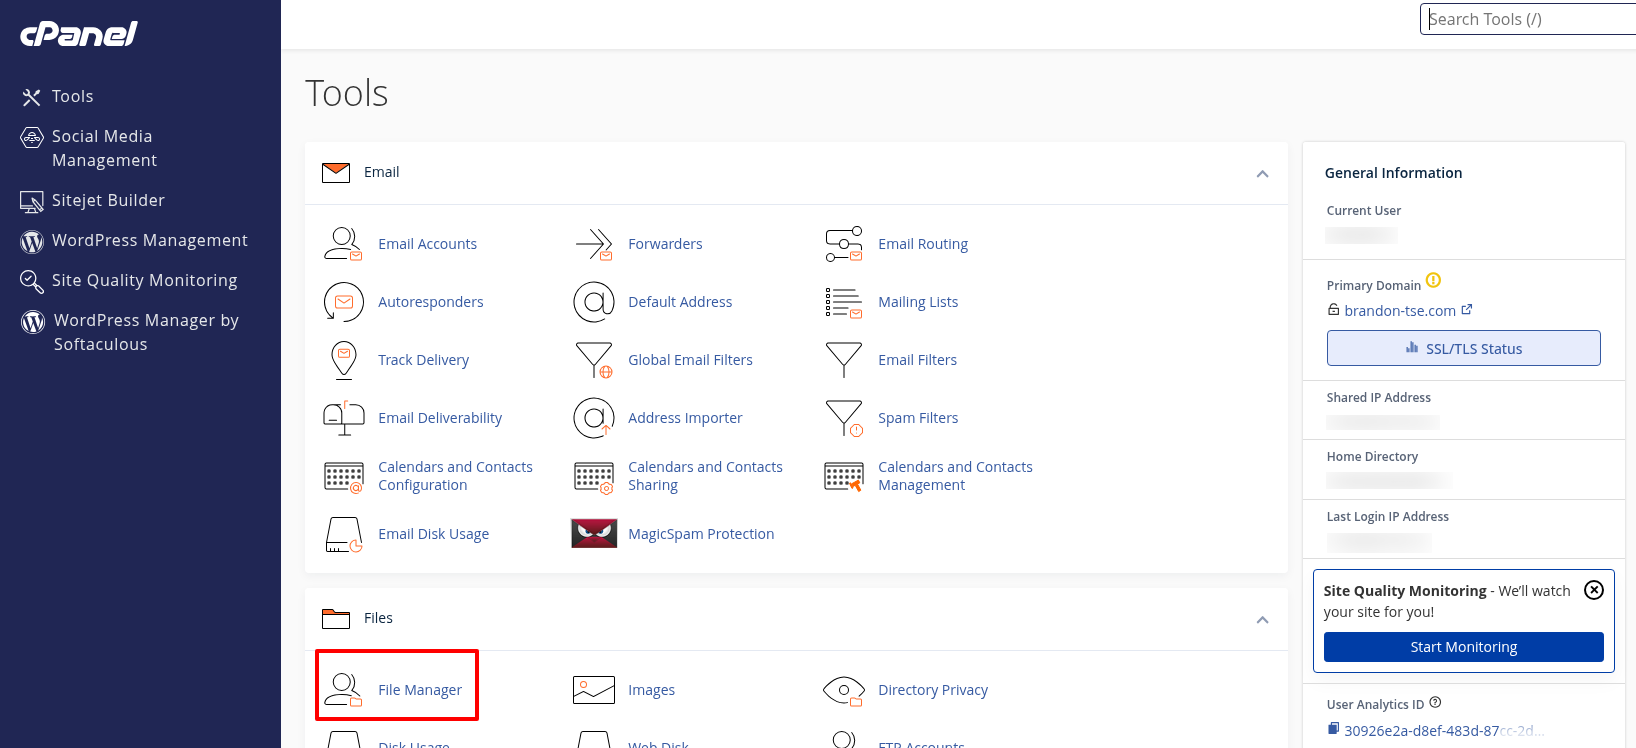
Step 1: Log in to your cPanel account.
Step 2: Go to the File Section and click on File Manager.
Step 3: Go to the left side of the screen and click on the public_html folder.

Step 4: Select the domain or folder name on which you have uploaded/stored the website content. Here, we have uploaded the site content under the wp folder. So, we will select the WP folder and click on it.
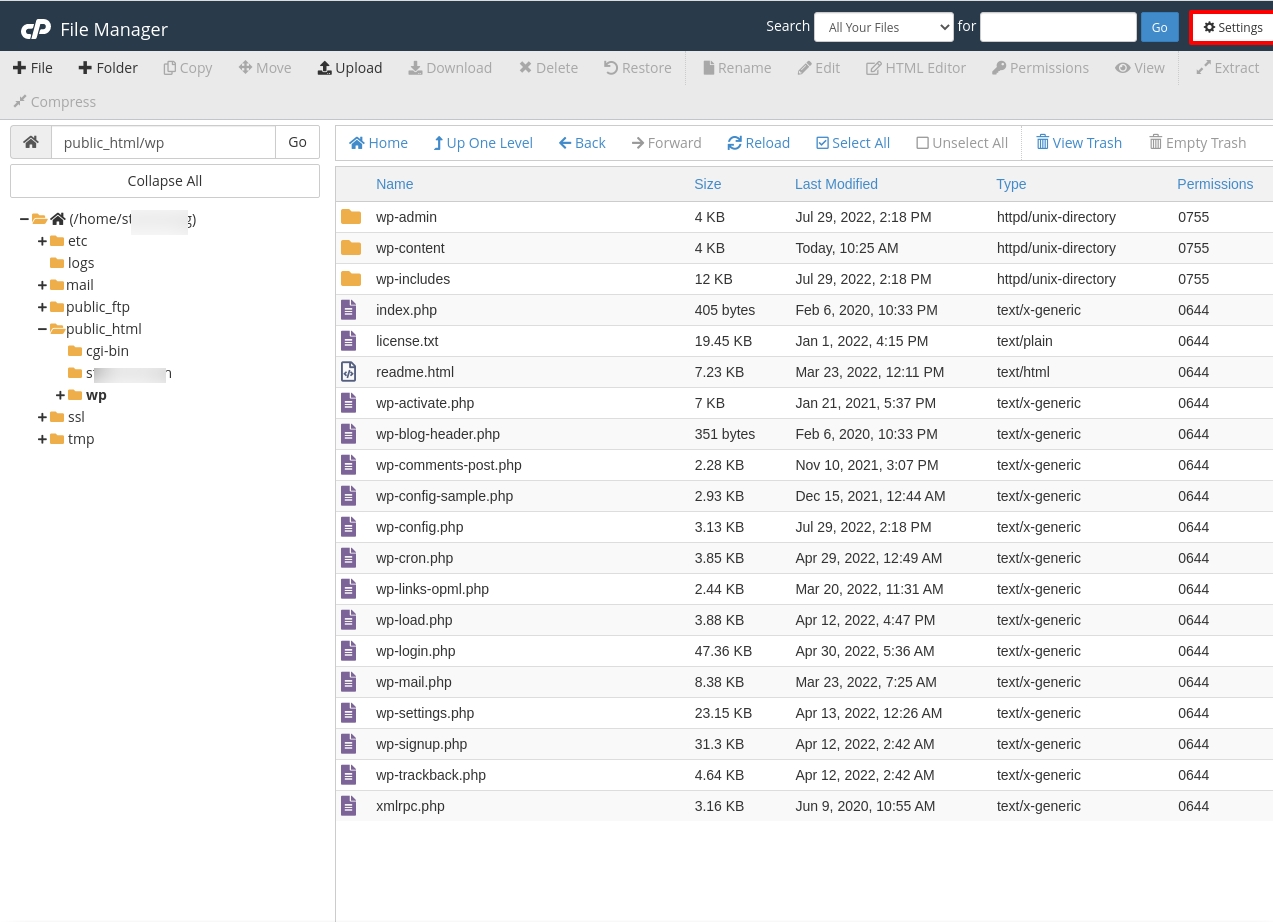
Step 5: It is hidden if you do not find the .htaccess file. To make it visible, go to the settings option on the screen's upper right side and click on it.
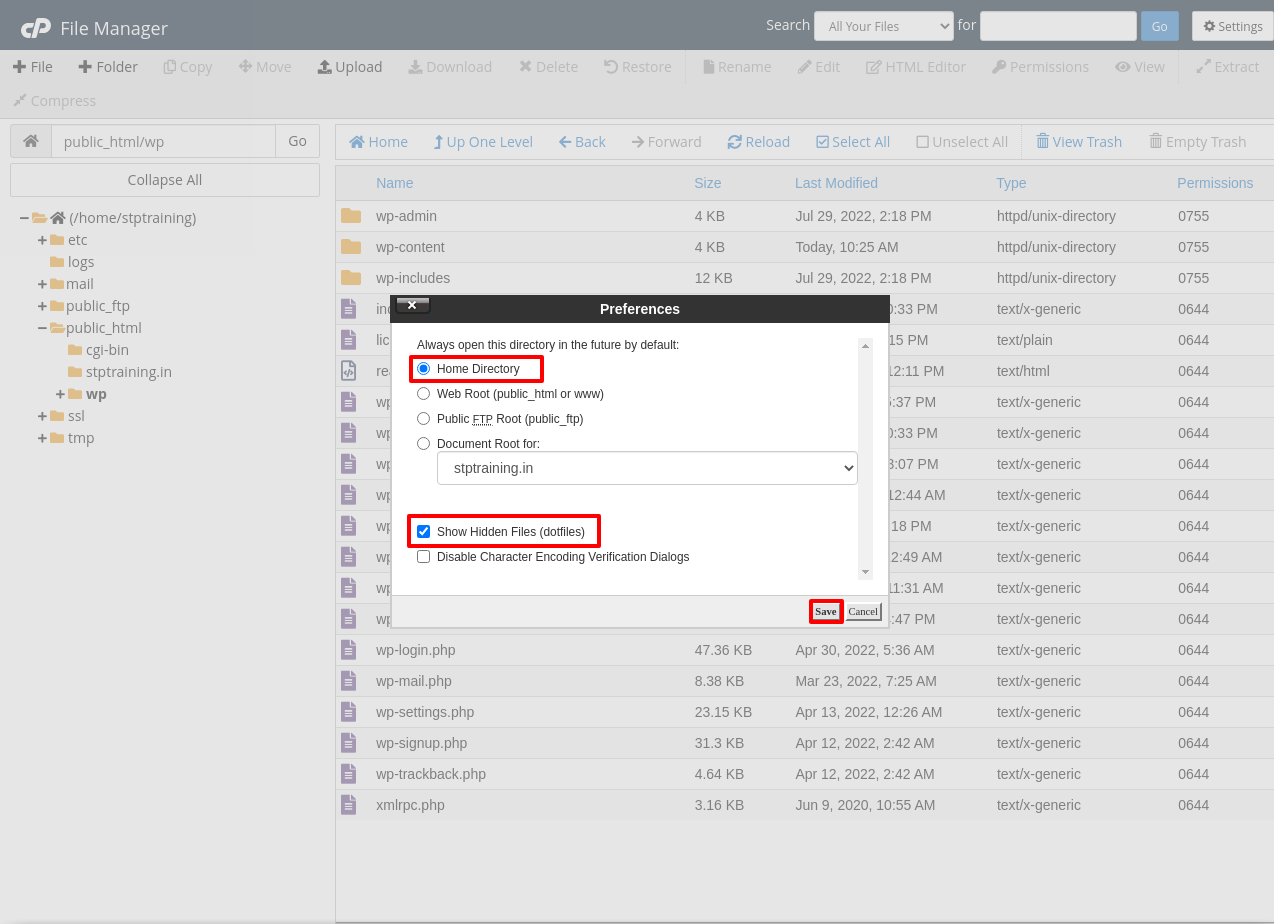
Step 6: Select the Home Directory radius button and tick the box Show Hidden files (dotfiles). Click on the Save button to save the changes.
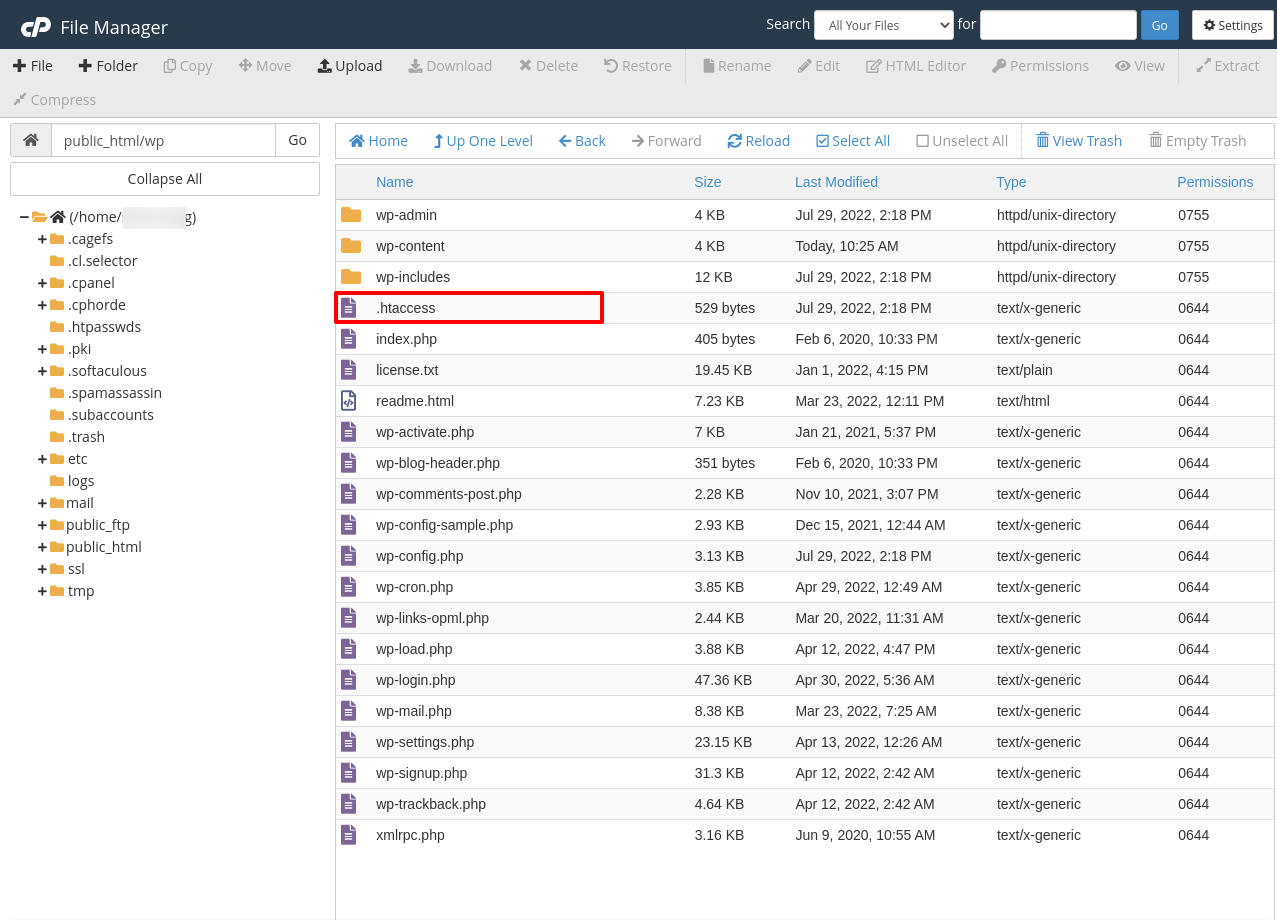
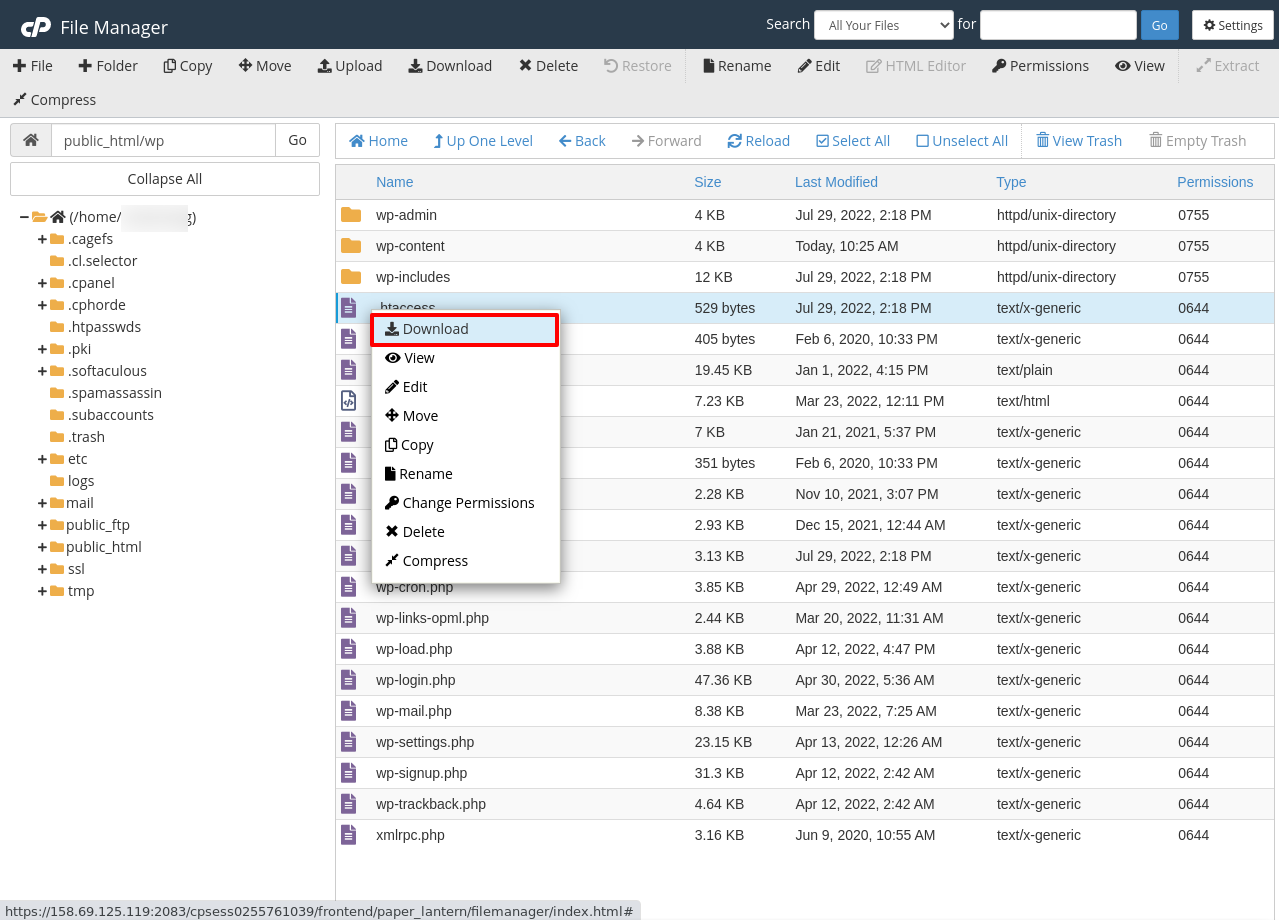
Step 7: You can see that the .htaccess file is visible now.
Step 8: Right-click on the .htaccess file and click on the Download option to download the .htaccess file in the local system. Here, we have secured a copy of the .htaccess file so that we can restore the file from the backup when something goes wrong.
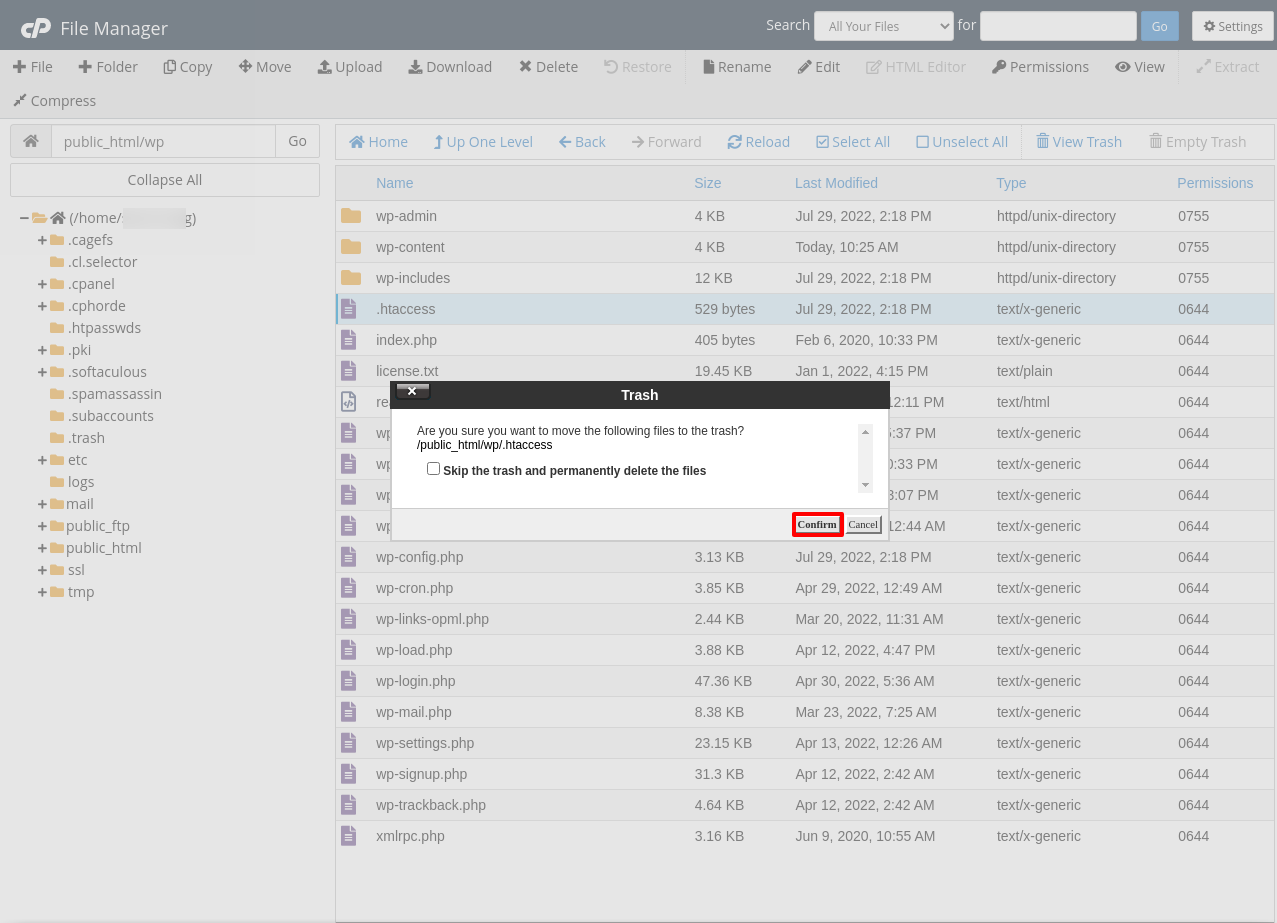
Step 9: Click on the delete option to delete the .htaccess file.

Step 10: Click the confirm button to move the file to the trash folder. You can safely restore the file from the trash folder in the future if the file is present in the trash folder.
Step 11: Now, try to access the website. If it works fine, it means that the file was corrupted.
Step 12: If you are still getting the same error, then the .htaccess is correct. You can regenerate a new .htaccess file from the WordPress Admin dashboard or restore the same file from the trash folder.
Step 13: To generate a new .htaccess file, log in to your WordPress dashboard and click on Settings -> Permalinks.
Step 14: Do not make any changes to the page. Click the Save Changes button at the bottom of the page to re-create the .htaccess file.
Method 2: Reset file and Directory permissions.
The second possible reason for the 403 error is incorrect permissions for files or folders. Here, we would like to inform you that when a file/folder is created, it comes with default file permission which controls how you can read, write, and execute it.
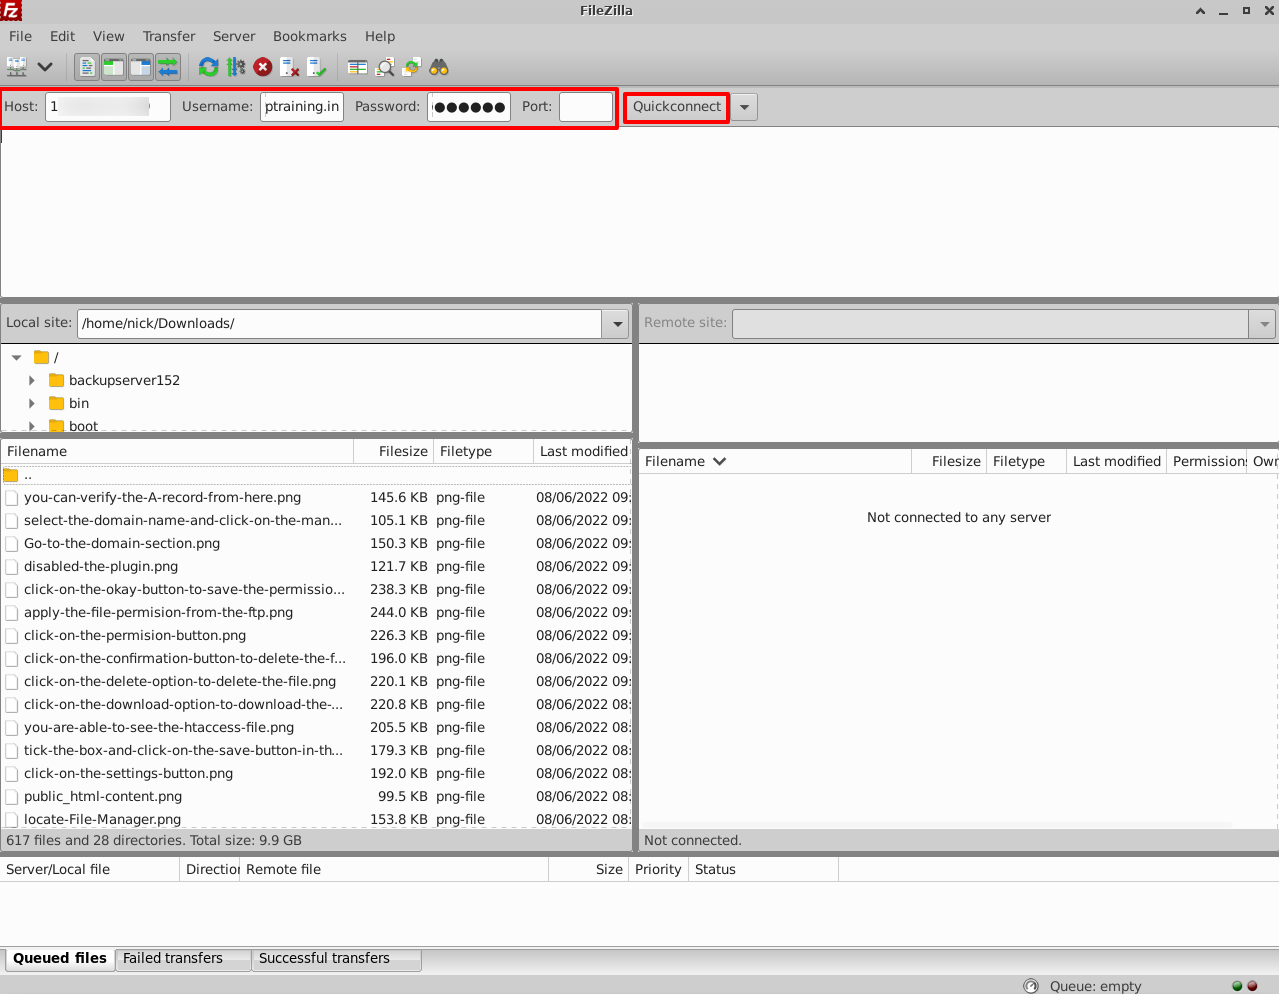
Step 1: Open an FTP client on your local system.
Step 2: Enter the necessary credentials in the respective field and click on the Quick Connect button to connect to your hosting account.
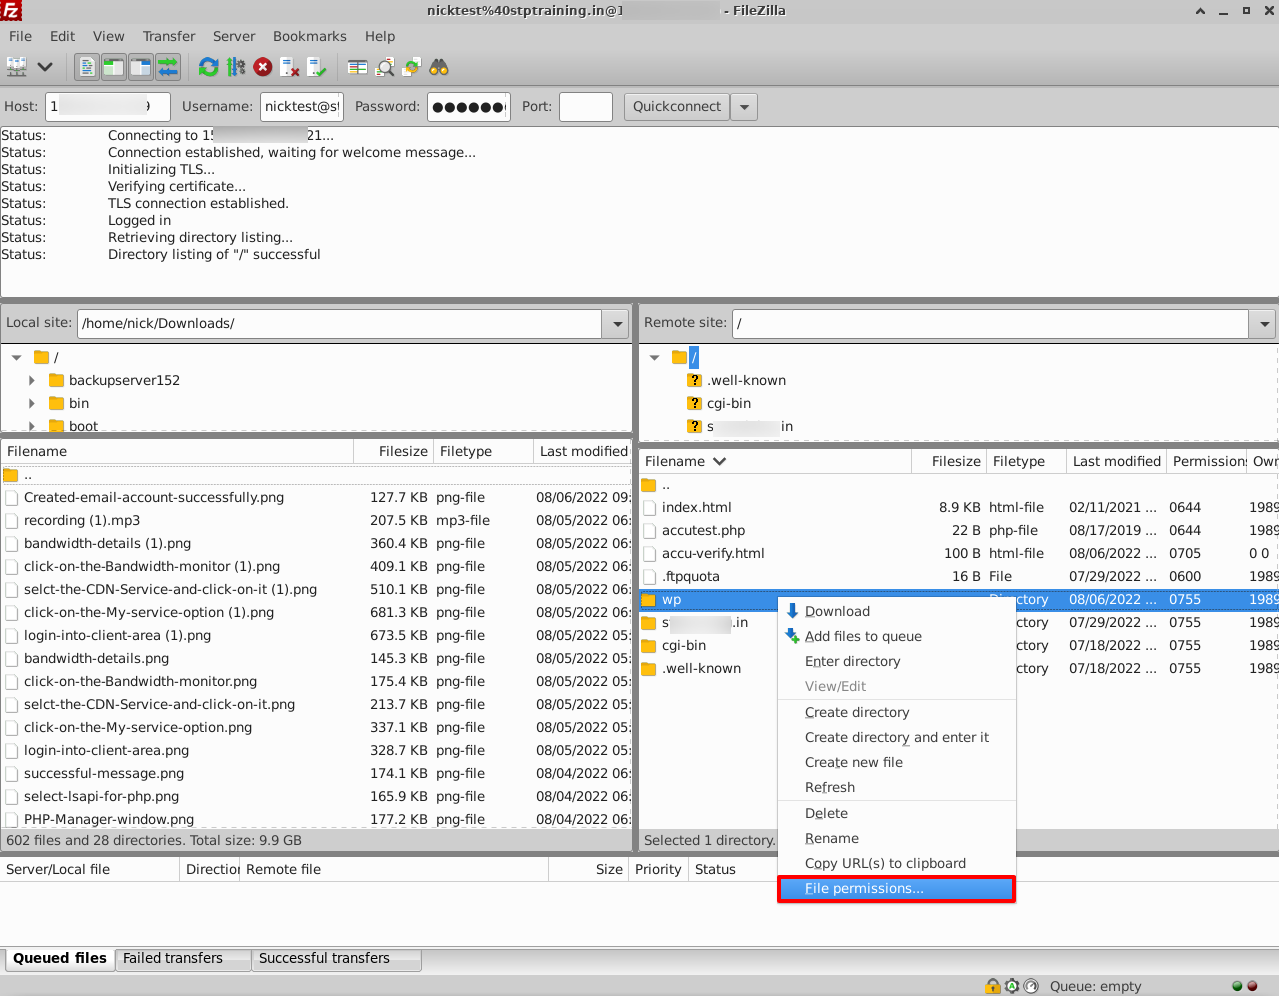
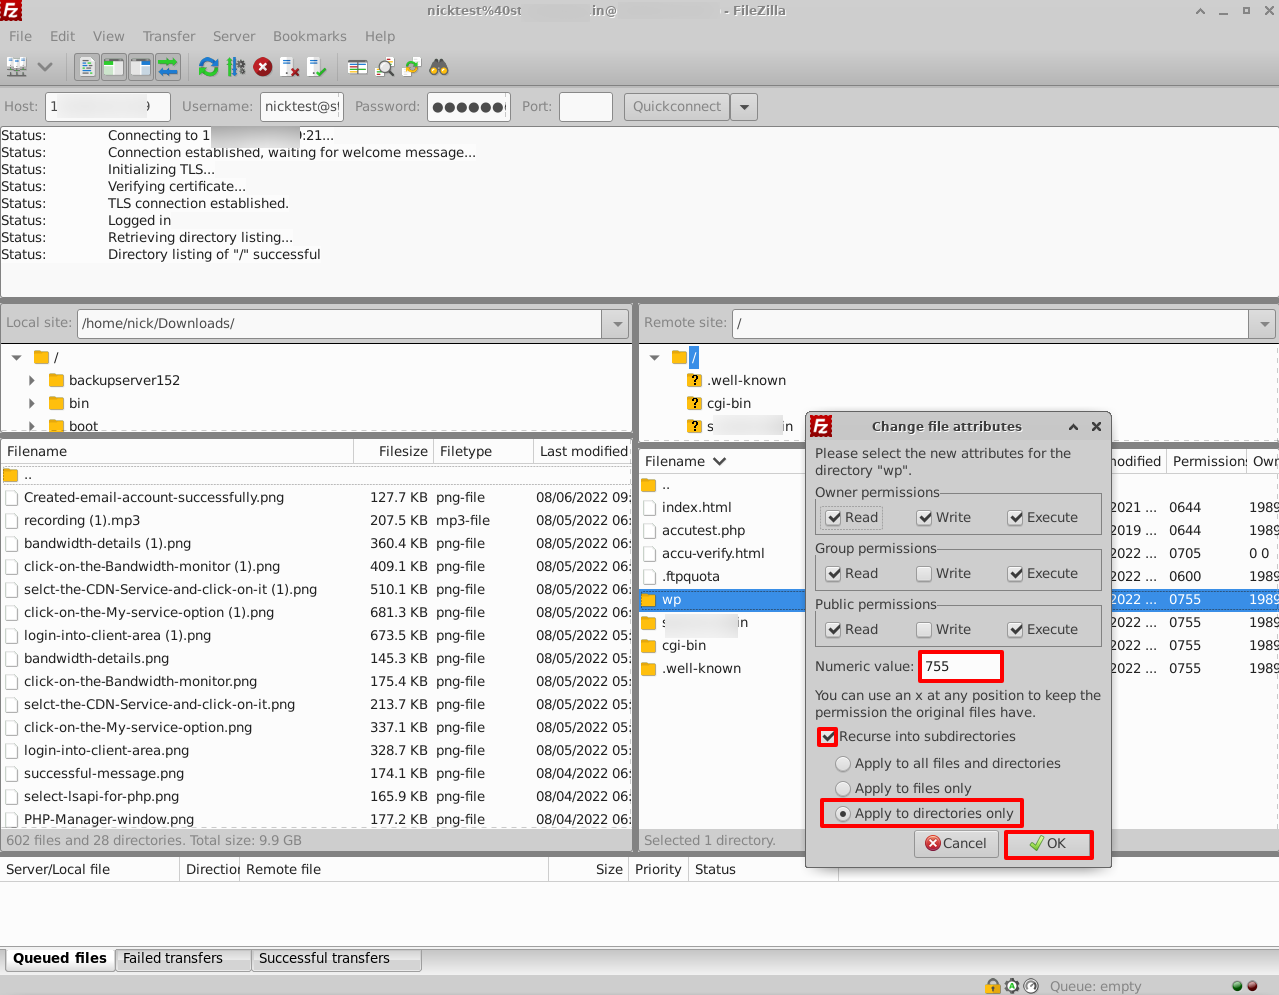
Step 3: Once you connect, right-click on the folder name or domain name on which you have uploaded the website and click on the File permission option.
Step 4: Enter permission 755 in the Numeric value field in the Change file attributes. After that, tick the box Recurse into subdirectories and select the Apply to directories only option. In the end, click on the Okay button to apply for permission.
Generally, we use the following file permission numeric value for a folder, file, and dynamic content: Folder → 755, File → 644, Dynamic content → 700
Step 5: After changing the directory permission, we need to give default permission to the files. For that, you need to repeat steps 3 and 1 and enter permission 644 in the Numeric value field. After then, tick the box Recurse into subdirectories and select the Apply to files only option. In the end, click on the Okay button to apply for permission.

Step 6: Once done, try to access the website and see if the error is resolved.
Method 3. Disable WordPress Plugins
If you are still getting the same error after applying the previous method, it may be possible that the error occurs due to an incompatible or corrupt plugin. This step will guide you on how to disable the plugin.
Step 1: Log in to your cPanel account.
Step 2: Go to the File Section and click on File Manager.
Step 3: Go to the left side of the screen and click on the public_html folder.
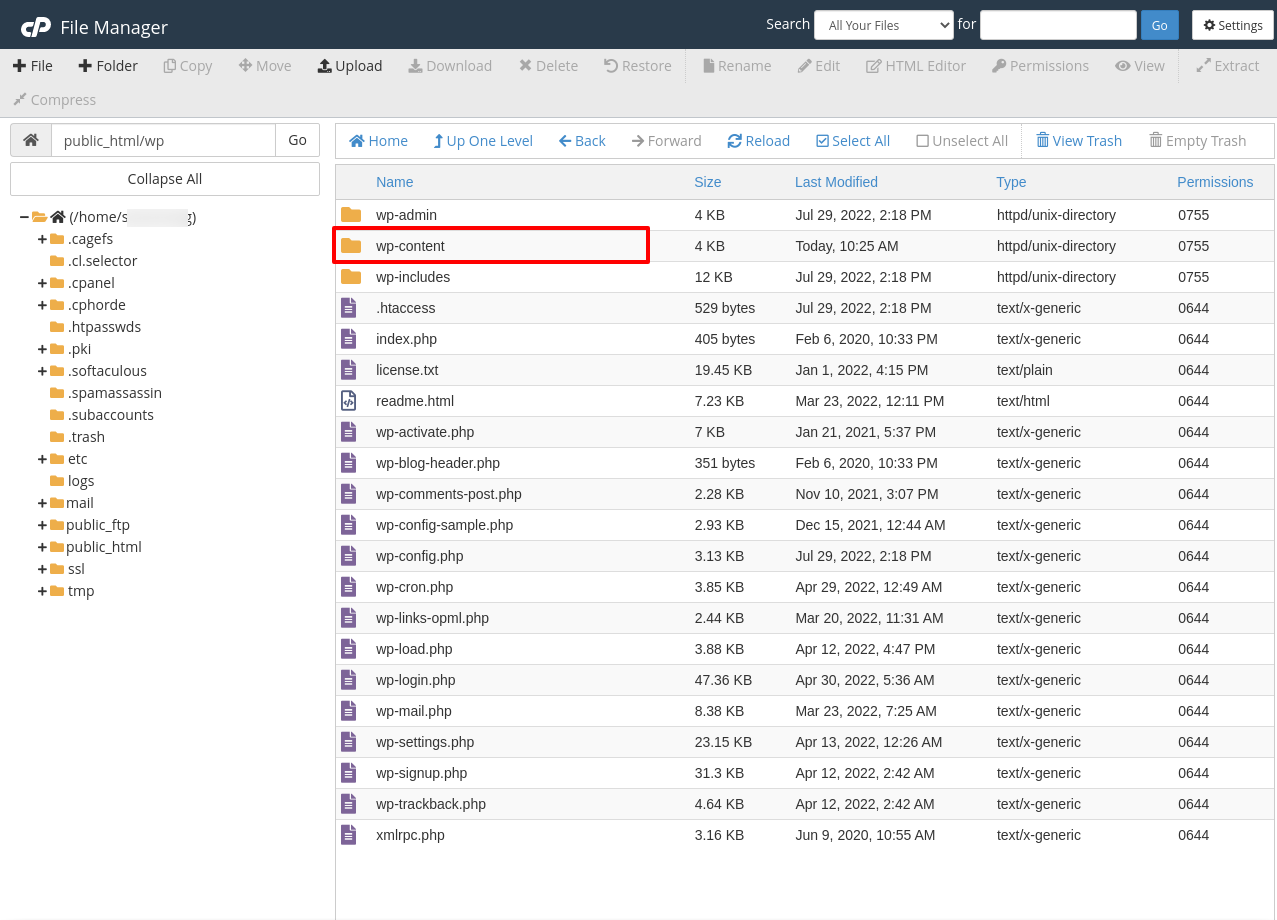
Step 4: Select the domain or folder name on which you have uploaded/stored the website content. Here, we have uploaded the site content under the wp folder. So, we will select the WP folder and click on it.
Step 5: Double-click on the wp-content.
Step 6: Find the Plugins folder and rename it with a different name, like "disabled-plugins" to disable all plugins.
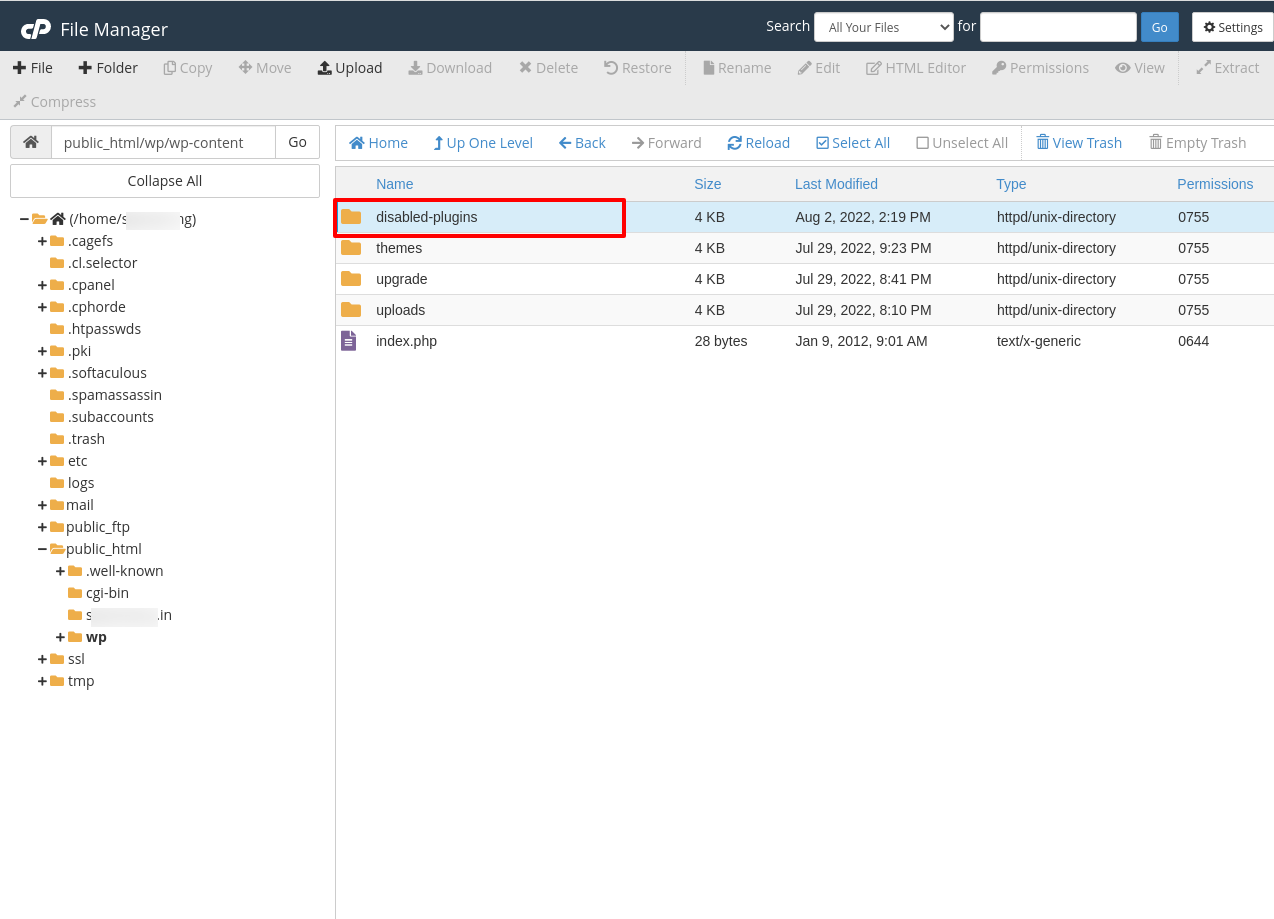
Step 7: Now, try to reaccess the website. If the error disappears, a faulty plugin is the actual source of the error.
In that situation, you need to rename that folder back to plugins.
After that, you need to disable the plugins from the WordPress dashboard and check if the site is still running. This way, you can find the faulty plugin.
Once you find it, you can update that plugin or delete it.
Method 4: Upload an Index Page
If the plugin solution does not fix the error 403, you need to check the homepage name of your website. It should be index.html or index.php. If it is not, then you have two options. The first one is to rename the homepage as index.html or index.php.
The second one is to upload an index page to the public_html Directory and create a redirect rule to redirect it to your existing home page.
Below are the steps to upload an index file to the public_html and redirect it to the homepage.
Step 1: Upload an index.html or index.php file to the public_html folder through the upload option or FTP account.
Step 2: Open the .htaccess file.
Step 3: Insert the following code to redirect the index.html or index.php file to your existing homepage.
Note: Please do not forget to replace the homepage.html with your actual homepage name. Redirect /index.html /homepage.html
Method 5: Verify an A record from the DNS Zone
If your domain name points to the wrong IP address, where you do not have permission to view the content, you can receive the 403 forbidden error.
Therefore, you should double-check that your domain name points to the correct IP address.
You can check the IP address of your website/domain name from the DNS zone. Below are the steps for it.
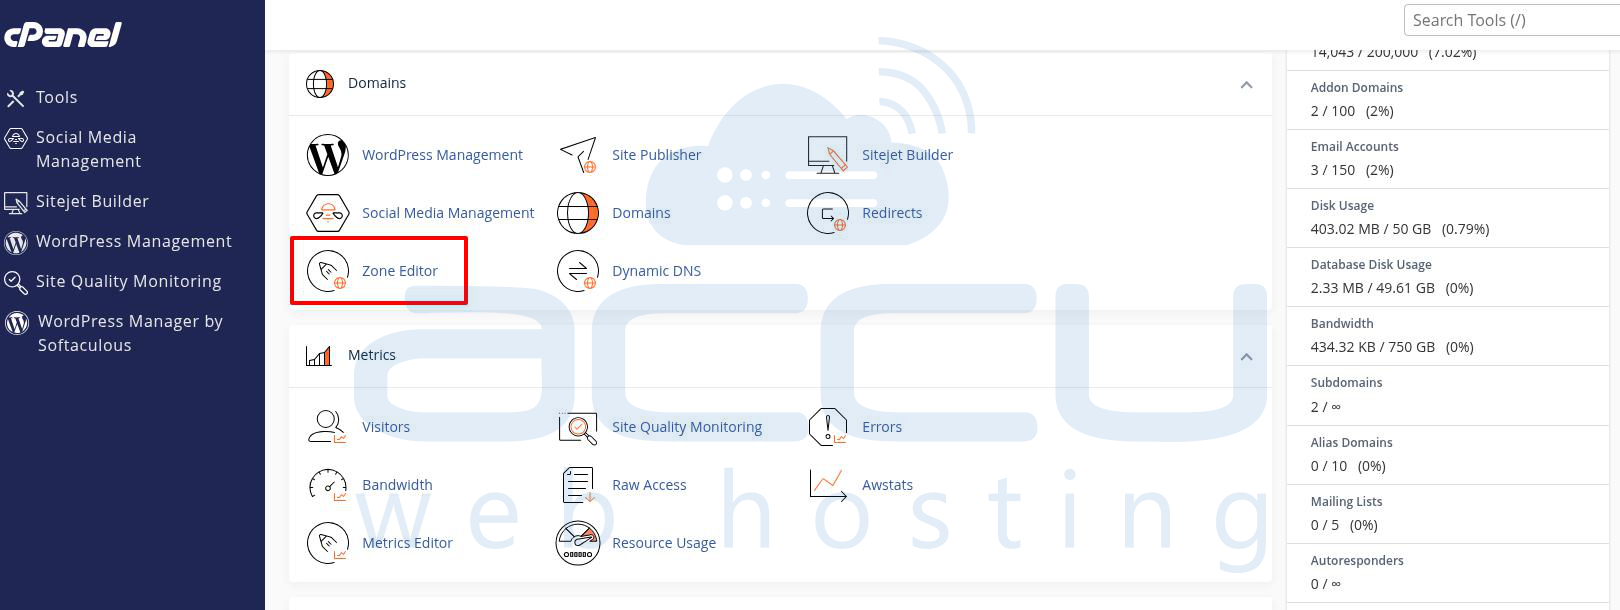
Step 1: Log in to your cPanel account.
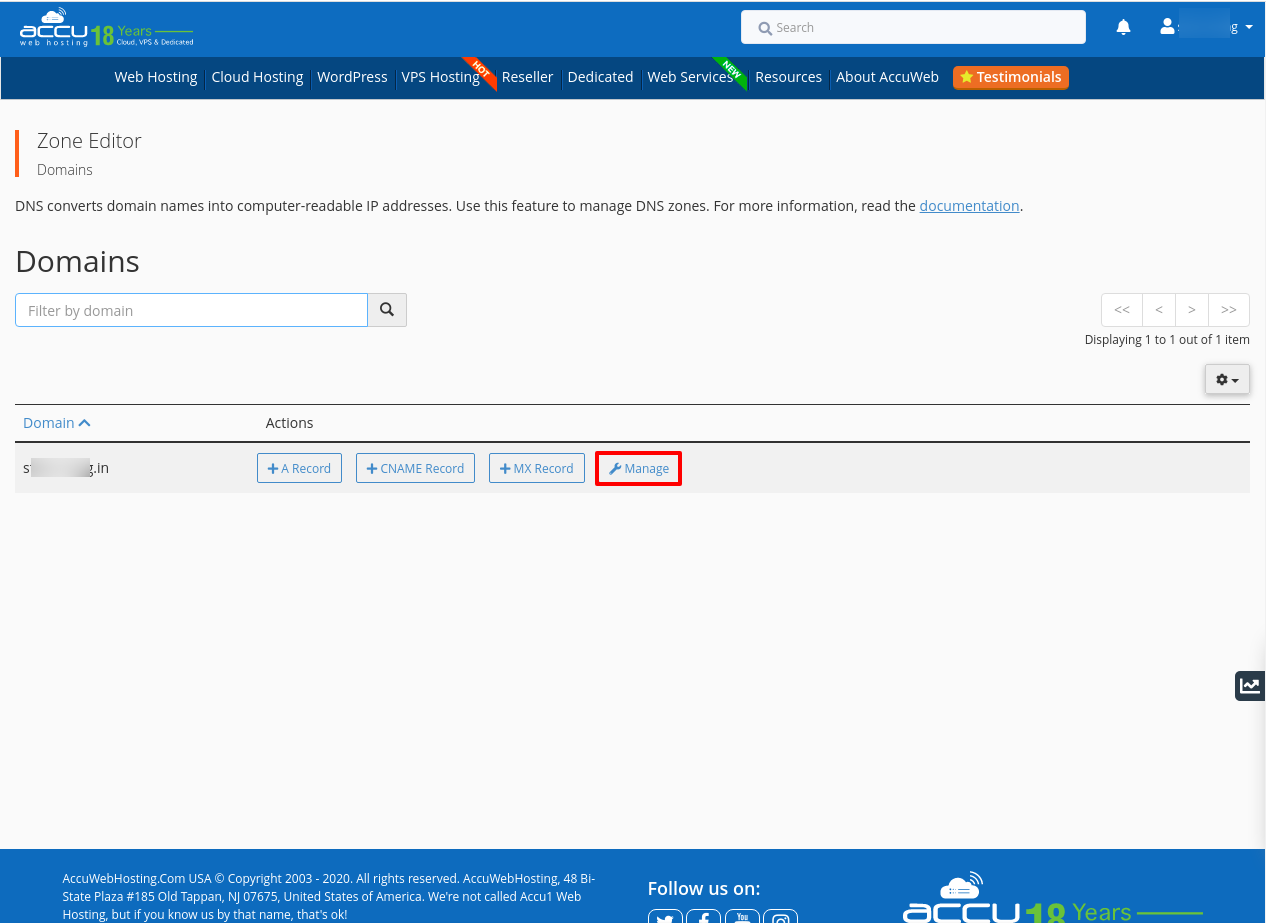
Step 2: Go to the Domain section and click on Zone Editor.
Step 3: Select the domain name of which DNS A record you want to check and click on the Manage option.
Step 4: You will get a list of DNS records. Locate a record with the label A in the Type column.

Step 5: Check the IP address of the Record column.
Step 6: If it points to the wrong IP address, you can click the Edit button to change it. Once you update it, you need to click on the Save record button to save it.
