Here, we will guide you on how to edit WordPress installation from Softaculous, for which you need to perform the following steps –
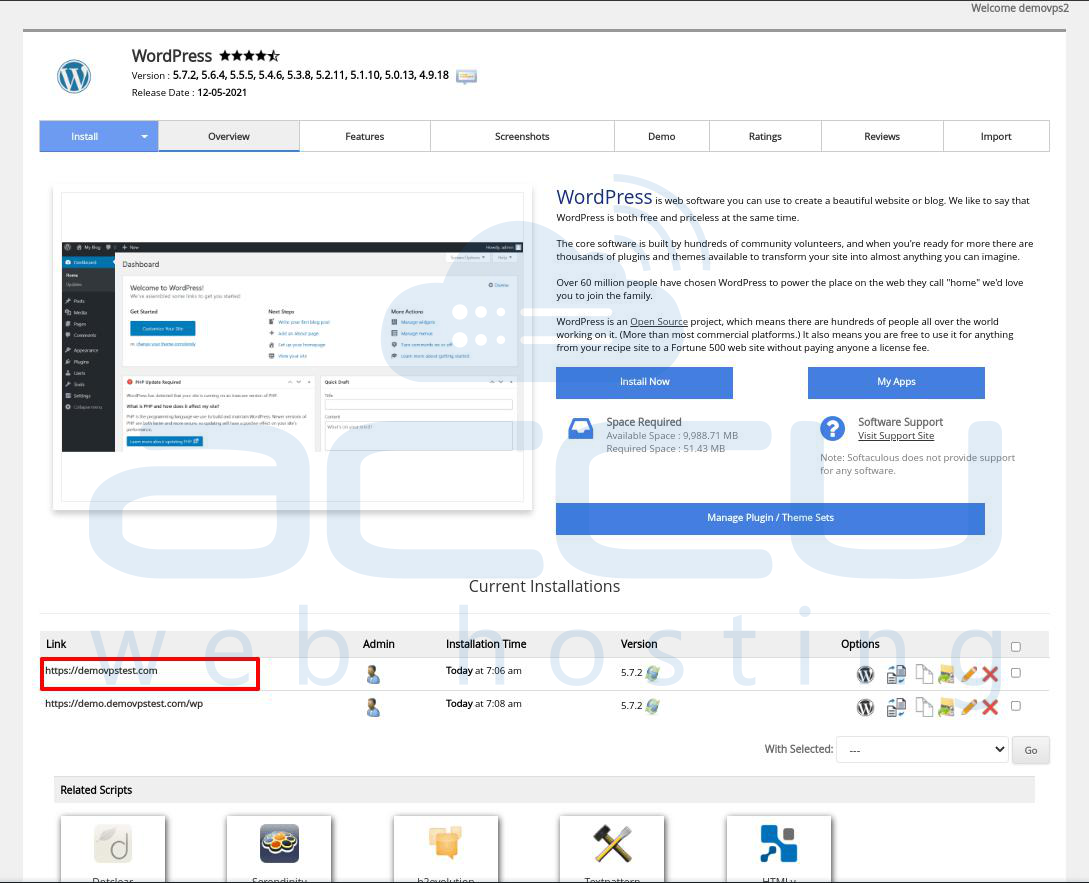
1. Go to the link section and select the website whose WordPress Installation you want to edit.
Here, we have selected demovpstest.com as an example.
2. Then go to the Options section and click the pencil icon to edit the installation.
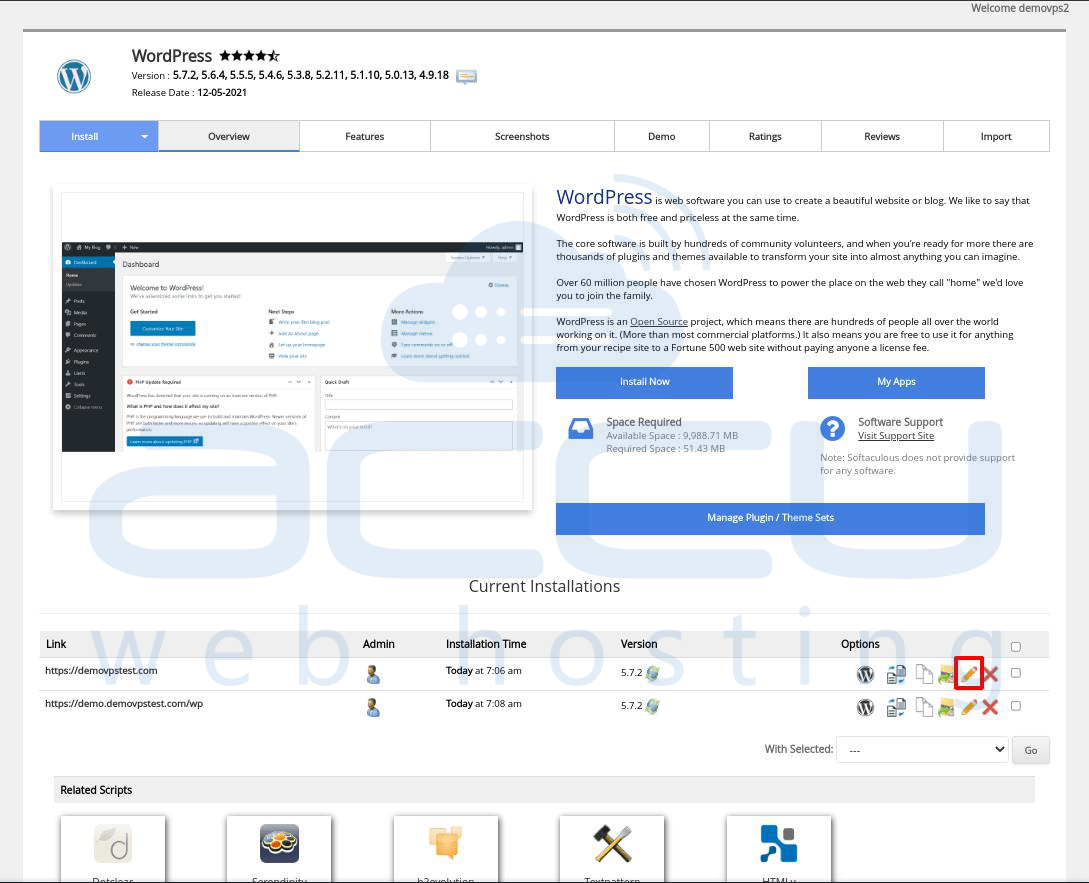
3. Once you click on it, you will be redirected to a new page where you can edit the installation.
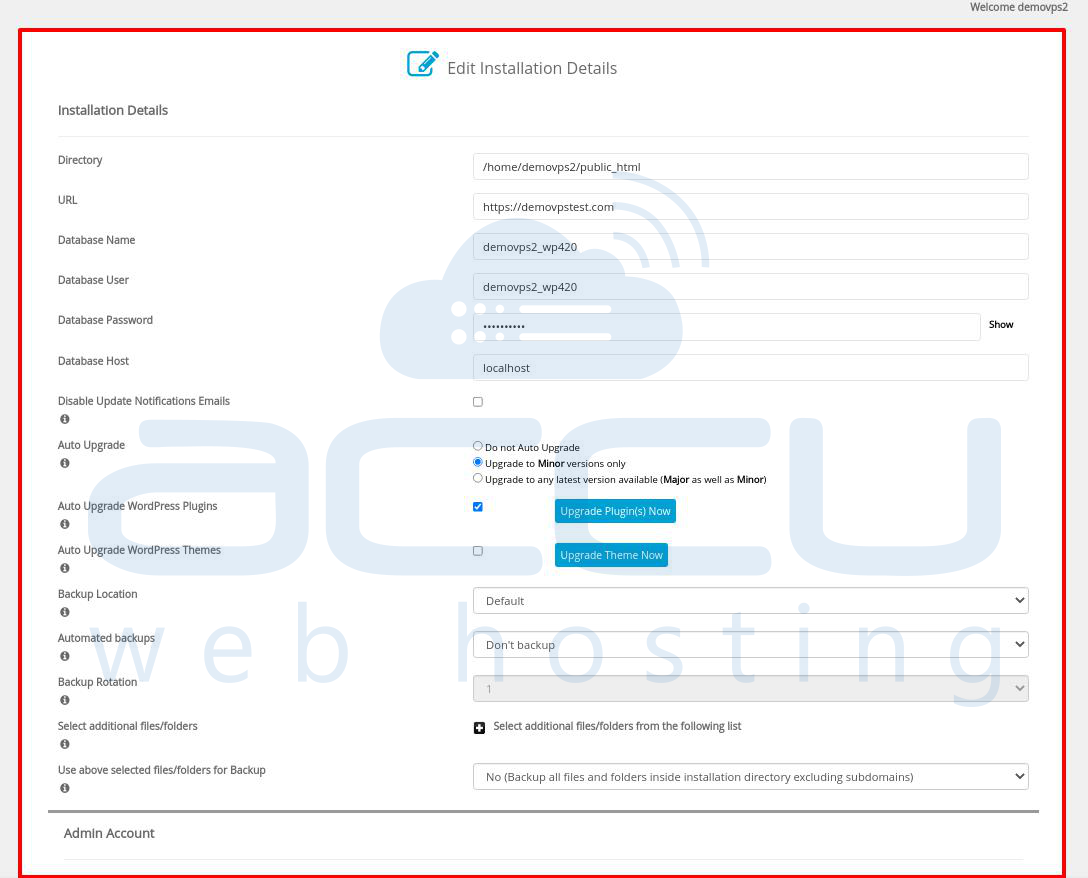
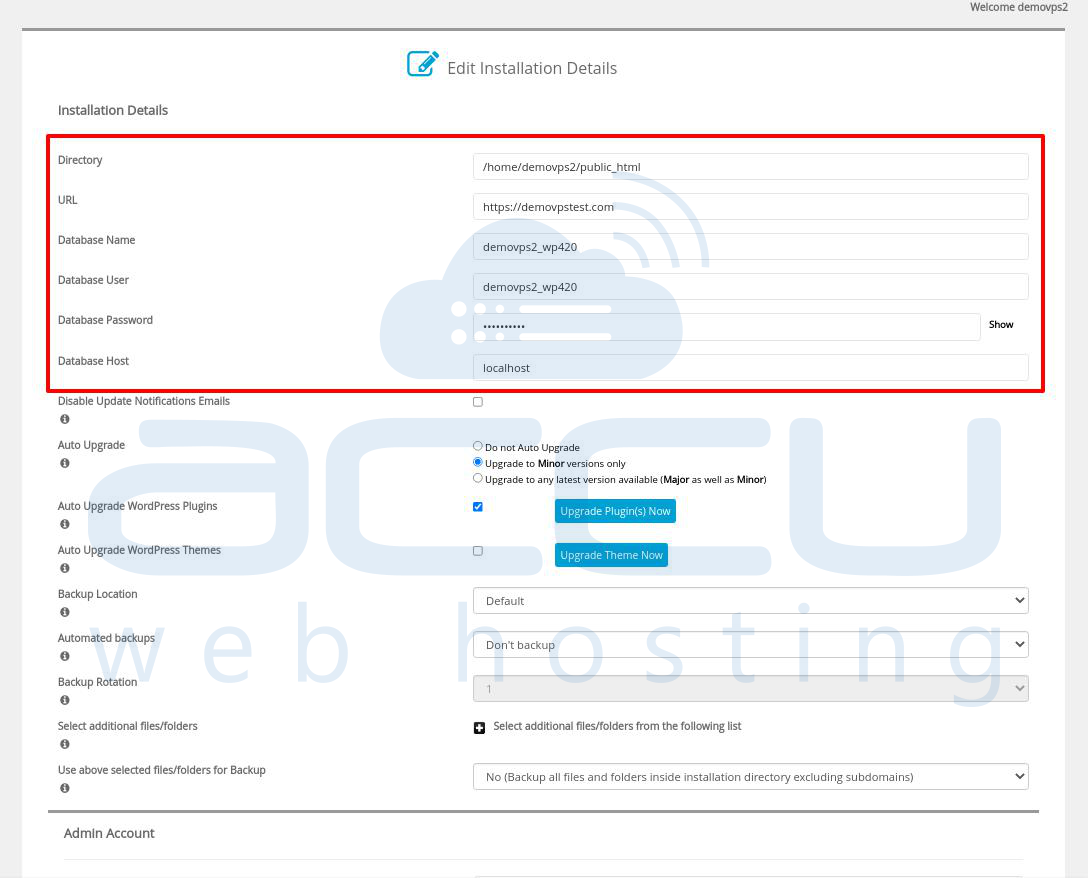
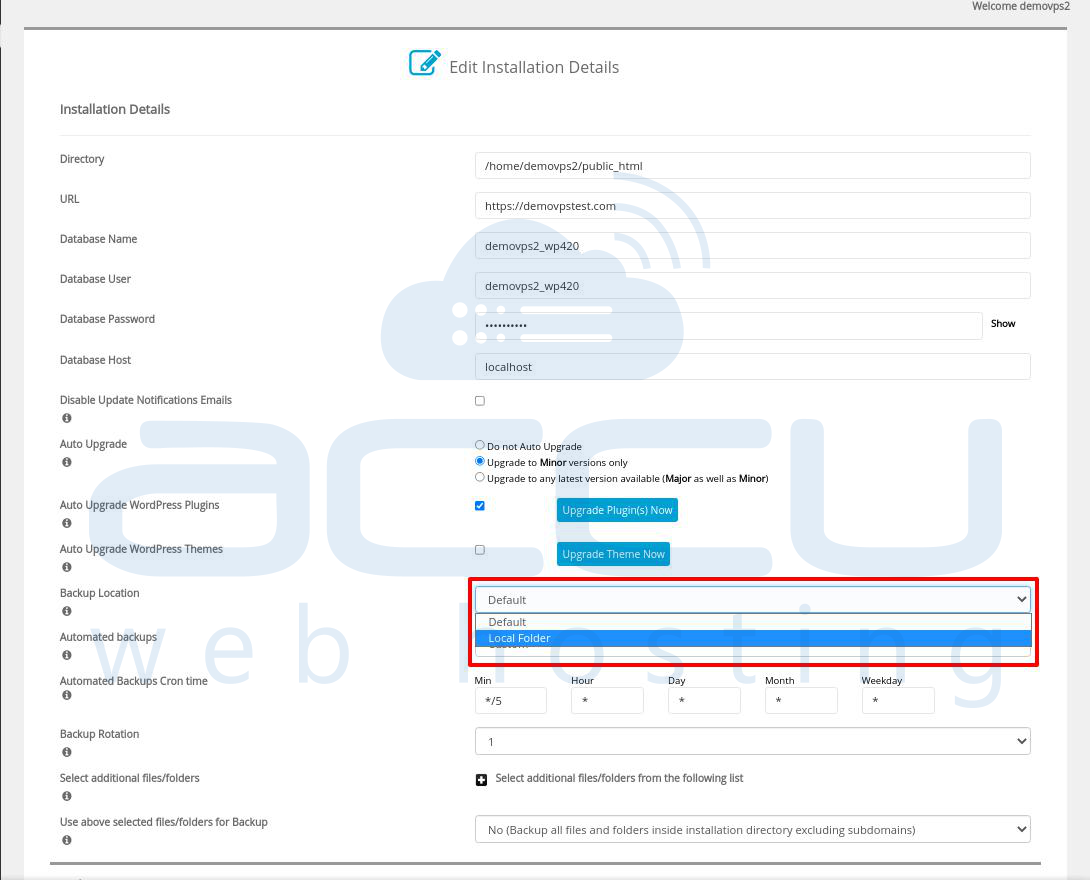
Installation Details
In the installation details section, you can update details of the Directory path, URL of the website, database user, and password.
4. Edit the details which you want to update.
Upgrade Active Plugins/ Themes
If you wish to upgrade your installation's plugin(s) or theme(s), you can do it from the Edit Installation Details section.
5. Click the Upgrade Plugin(s) Now button to upgrade the plugins.
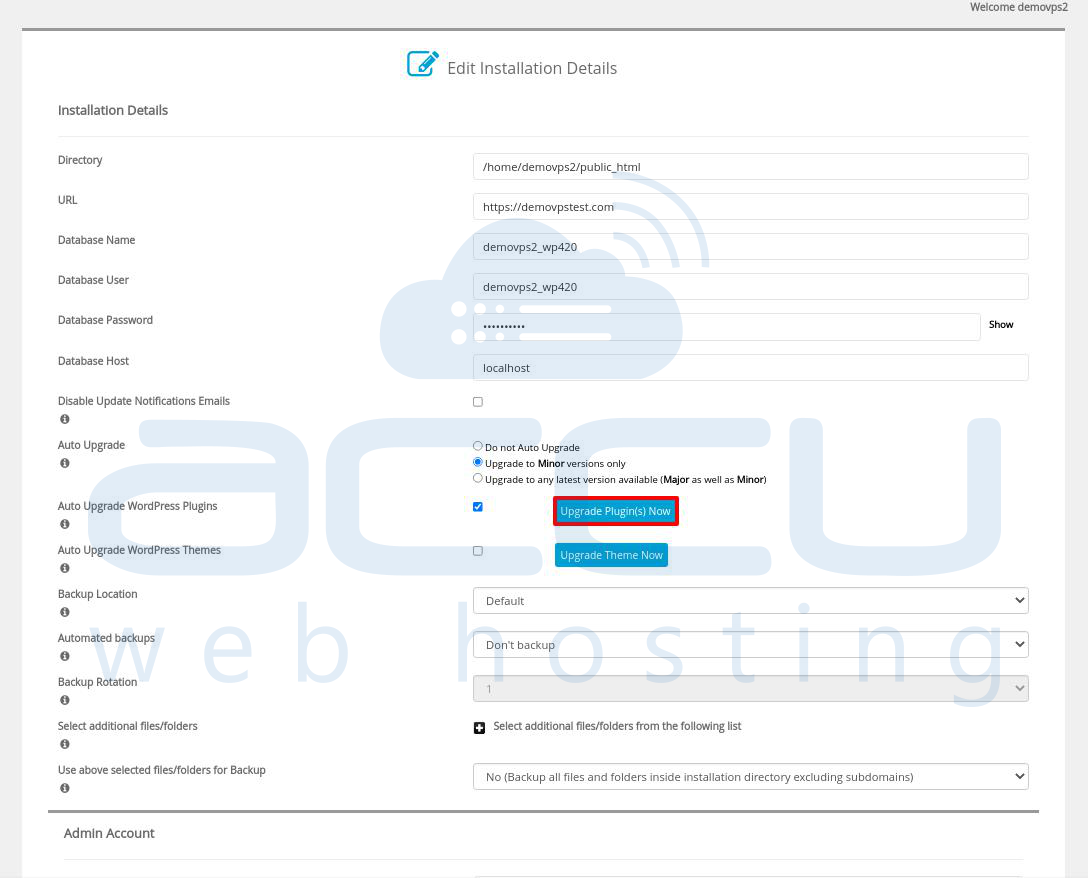
6. Click on the Upgrade Theme Now button to upgrade the theme.
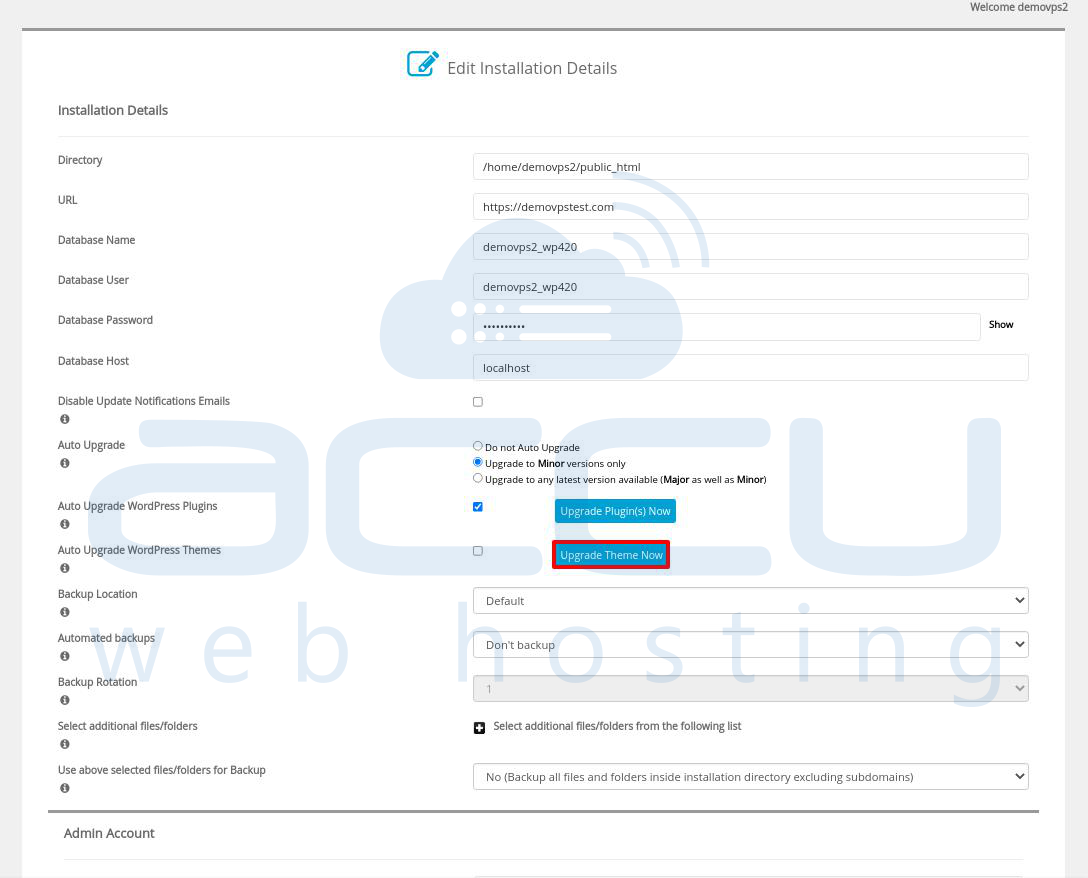
7. By clicking on the above two options, all the outdated active plugins, and themes for the installation will be upgraded to their latest version.
Custom CRON Time for Auto Backup
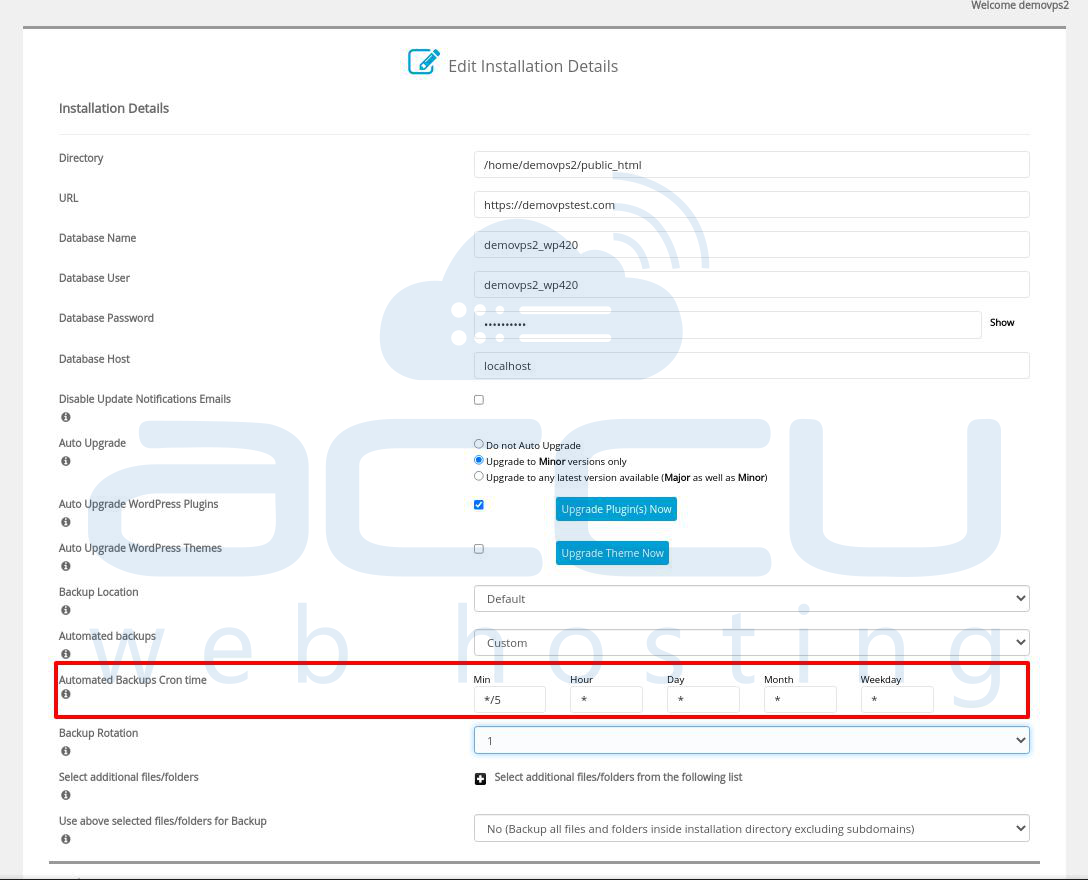
You can set a custom CRON time while setting the auto backup for the installation.
1. Go to the Automated backups option, and select the Custom option from the drop-down list.
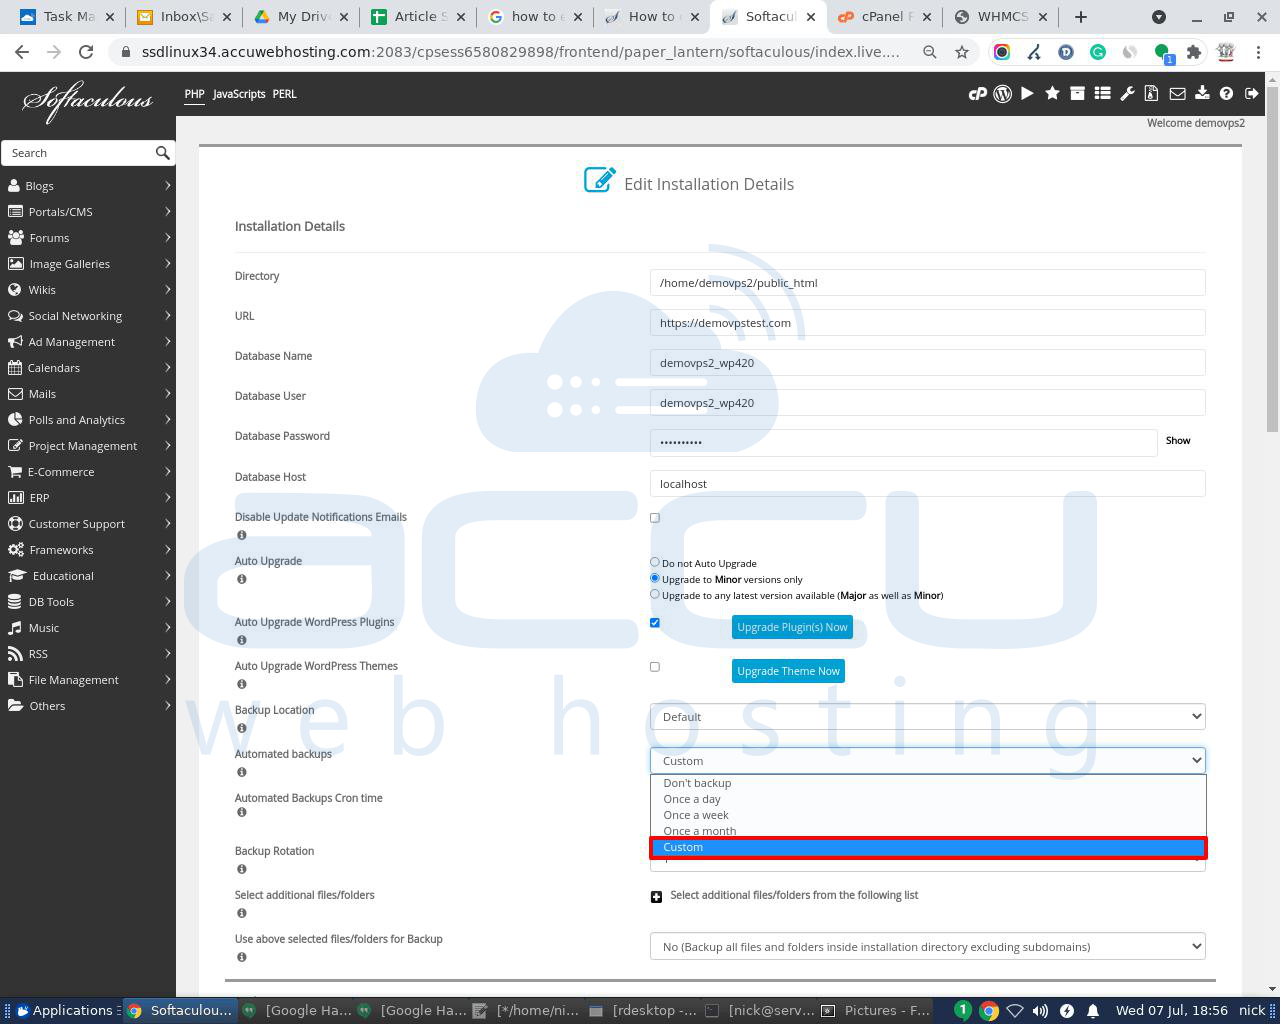
2. Once you select it, an Automated Backups Cron Time field will be displayed.
Fill in all the boxes as per your requirement.
Select a Backup Location
1. Choose the backup location where you want to store the backup of the WordPress file.
2. Select the backup location from the option given in the drop-down list.
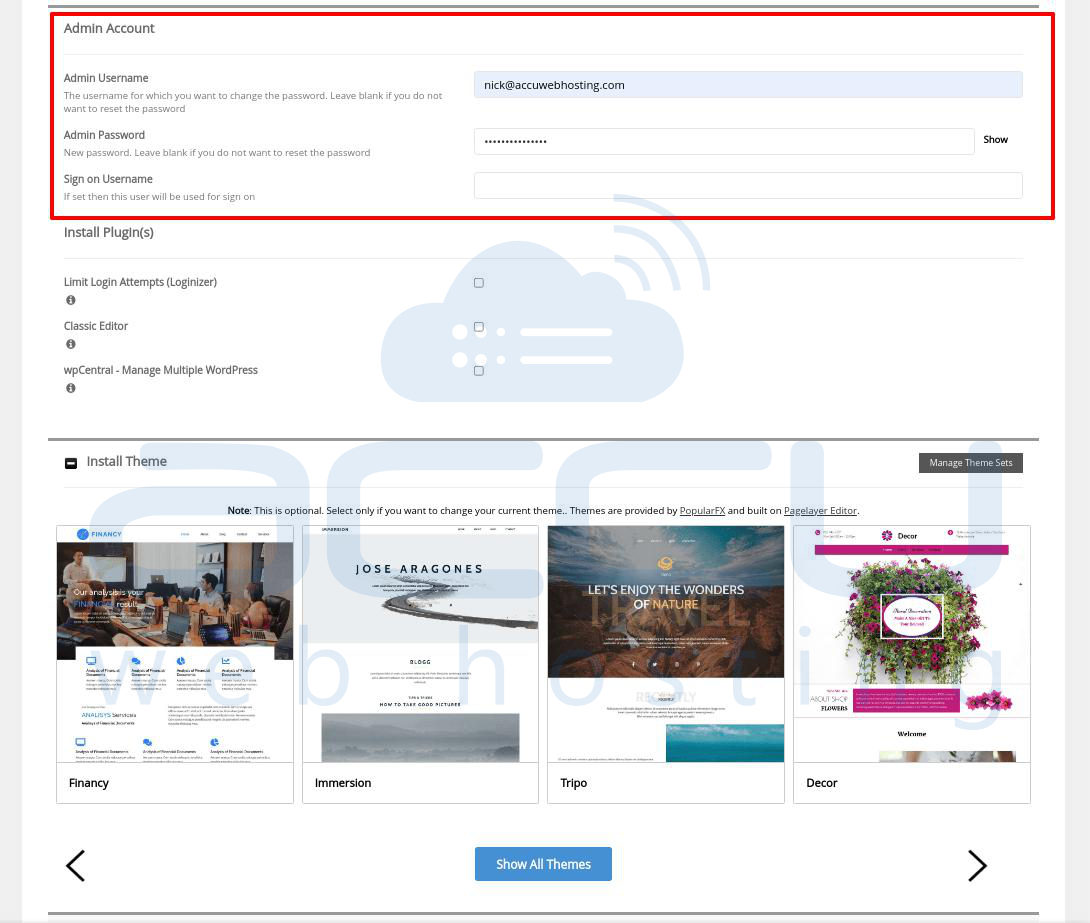
Reset Admin Password
You can reset the password of the admin user for the installation through the following steps –
1. In the Admin username field, enter the username whose password you want to change.
Leave it blank if you don't want to reset it.
2. In the Admin Password, enter the new password you want for the admin user mentioned in the admin username field. Leave it blank if you don't want to reset it.
8. When you have updated all the details, click on the Save Installation Details button.

9. By clicking on it the Save Installation Details button, all the details will be updated, and you will get a confirmation message on the screen that the installation details were edited successfully.

