You should consider taking a Backup of your cPanel data at a regular interval. cPanel provides an option to configure the Backup automatically. You can keep the backup within the server or at an external destination like Amazon, Google Drive, etc. In cPanel, Backup Configuration is an option to achieve the same task.
Note: Taking a Backup with the server will consume the Disk space of the server. Hence, it is recommended to download the backup to the local system or the External Devices.
The following are the Steps to configure the cPanel Backup.
Step 1: Log in to the WHM using the root user.
Step 2: Select the Backup >> Backup Configuration.
Step 3: Backup Status >> Enable Backup.
Step 4: In Global Settings >> Compressed
[Compressed Backup will take disk space, but take more time to create the Backup]
[Uncompressed Backup type will use more Disk, but the time to take a backup will be less.]
[Incremental Backup will save the data which changed after the last Backup took.]
Step 5: Check the Available Disk Space option, select the amount of Disk (% or MB). The backup will not run if the disk is less than the submitted Disk Space.
- Maximum Destination Backup Timeout: Set the Maximum amount of time to upload the Backup file.
- Maximum Backup Restoration Timeout: Set the Maximum amount of time to restore the Backup file.

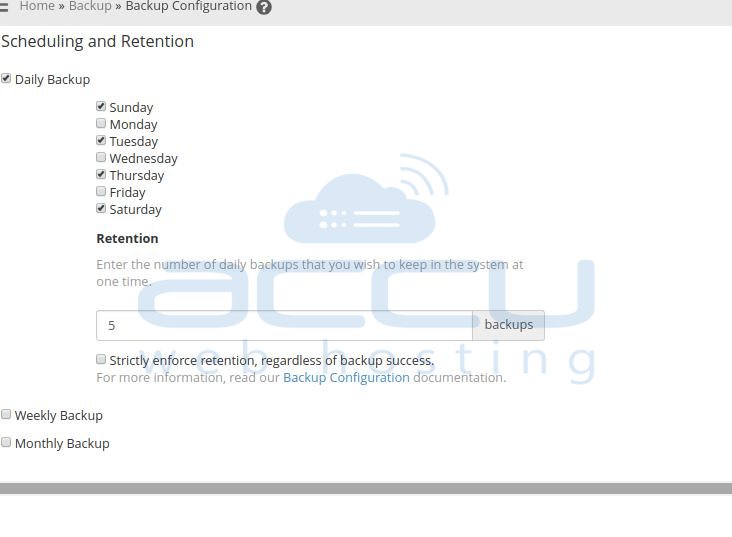
Step 6: Scheduling and Retention will provide you with an option to schedule the Backup at the selected time.
- Daily Backup: You can take a Backup Daily by selecting all the days or the days when you need the Backup.
- Weekly Backup: Select the single day of a week to schedule the weekly backup.
- Monthly Backup: Select the 1st or 15th day of a Month to schedule the weekly backup.
- Retention: Enter the number of Back-ups you need to keep in the system at one time. That will apply to Daily, Weekly, and Monthly Backups.
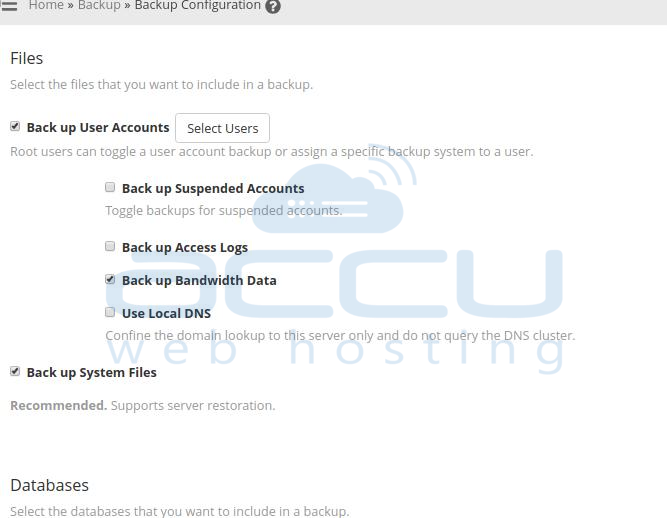
Step 7: File Preferences will provide the option to take specific files backup. Also, you can select the user-wise Backup.
- Back up User Accounts: Select the Account for which the Backup needs to be set.
- Back up Suspended Accounts: Select the suspended Account for which the Backup needs to be set.
- Back up Access Logs: Select to set the log Backup.
- Backup Bandwidth Data: It will back up the Bandwidth Data.
- Use Local DNS: It will confine the domain lookup to this server only and will not query the DNS cluster.
- Backup System Files: Select if you require the system restoration at any point in time.
Step 8: Databases:
We can select the Database that which backup needs to include.
Back up SQL Databases
- Per Account Only: Choose to take the Database backup of each account.
- Entire MySQL Directory: Choose to take the All Database Backup. It will take a backup of the var/lib/mysql/ directory.
- Per Account and Entire MySQL Directory: Choose to take the backup of all databases in each account and all databases on the server.
Step 9: Configure the Backup Directory:
We can set the Backup path for the required Backup.
- Default Backup Directory: Provide the Backup path where you want to back up your Data.
- Retain Backups in the Default Backup Directory: Tick this option to retain the Backup at the original Destination.
Unticking this option will delete the Backup from the Destination path.
Mount Backup Drive as Needed: Choose to take a Backup in a separate drive. The server will check another mount point at /etc/fstab/em
Step 10: In Additional Destination, you can select the required Destination to take your Backup. cPanel provides the option to take the Backup at Amazon S3, FTP, Google Drive, Additional Local Directory, Rsync, SFTP, WebDAV, and Custom.
Step 11: Click on the Save Configuration to save all settings.


