MIME stands for Multipurpose Internet Mail Extensions. It's a method of categorizing files on the Internet based on their nature and format.
MIME types are a way to label the types of data so that programs can process the data correctly. For example, MIME types can help a browser determine what type of content is about to be processed so the browser can use the proper protocols, media player, codec, or plugins to display the data correctly.
For example, the MIME types file maps the extensions .html and .htm to the type text/html: type=text/html exts=htm,html.
When a web server delivers a web page to a client's web browser, it also sends the MIME type of the data it is sending. If there is an attached or embedded file in a specific format, IIS also tells the client application the MIME type of the embedded or attached file. IIS can only operate on files of registered MIME types. These types could be defined both on the global IIS level and on the website or virtual directory level.
To add a MIME type for a virtual directory within a website in Plesk.
Step 1: Log in to Plesk Control Panel.
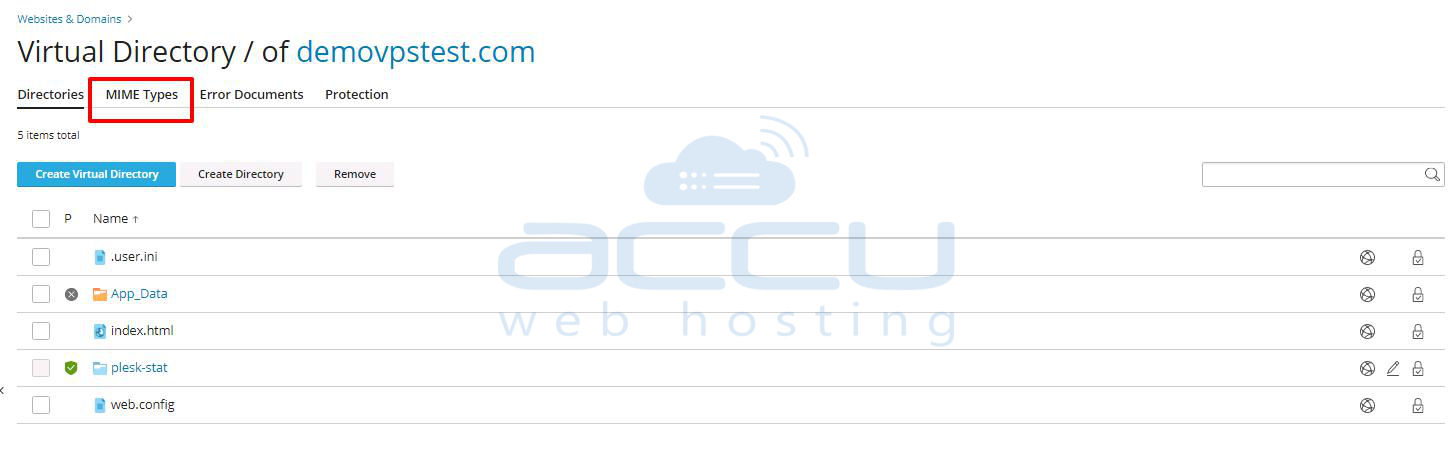
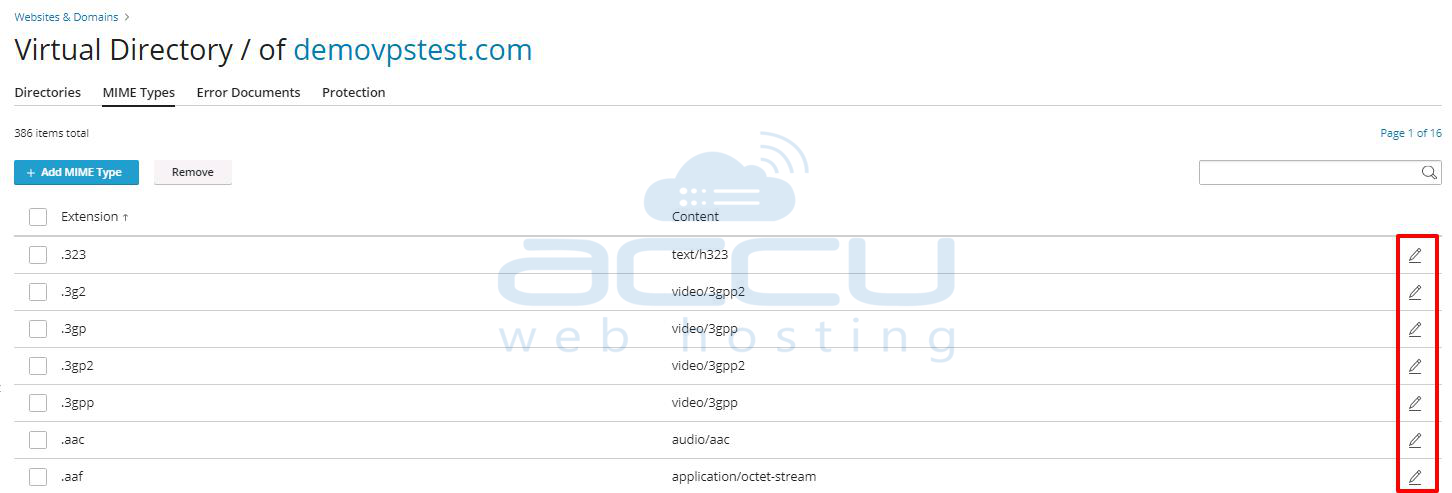
Step 2: Go to Websites & Domains and find the website's domain name. Click on Virtual Directories.

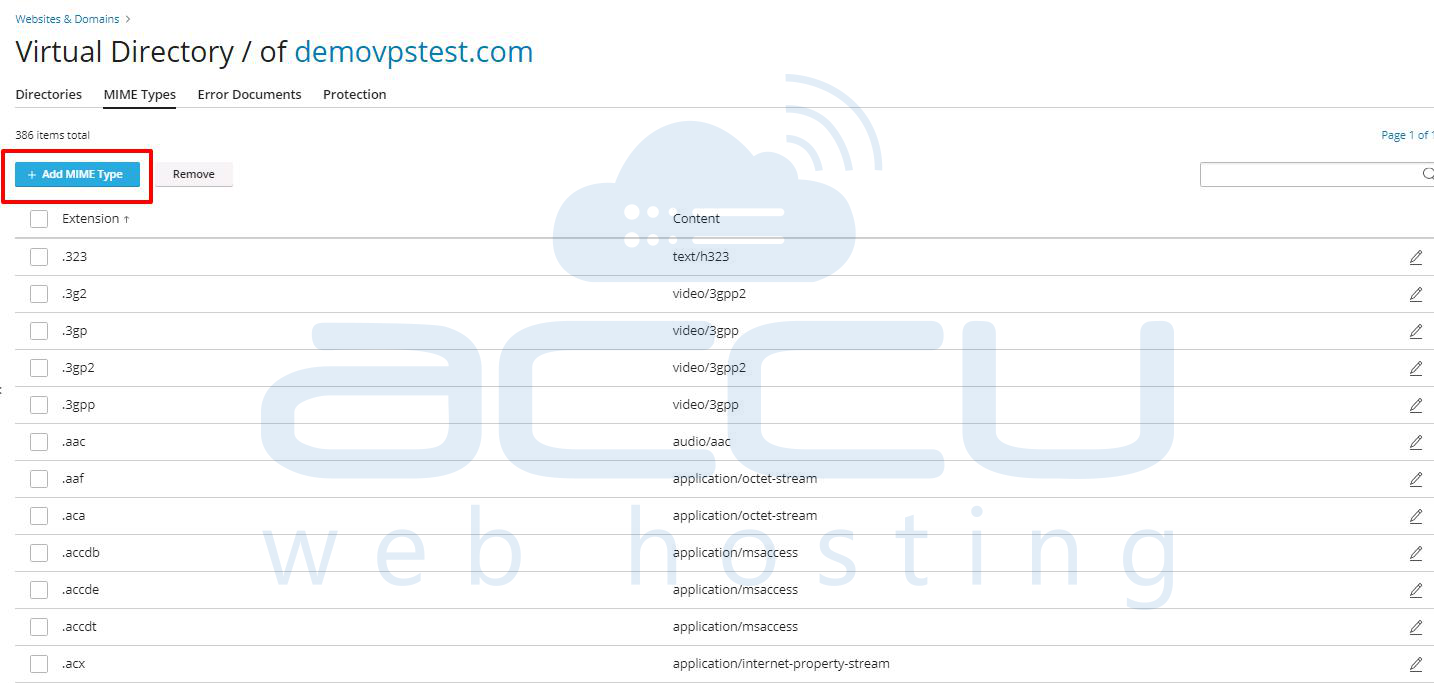
Step 3: Click on the MIME Types tab.
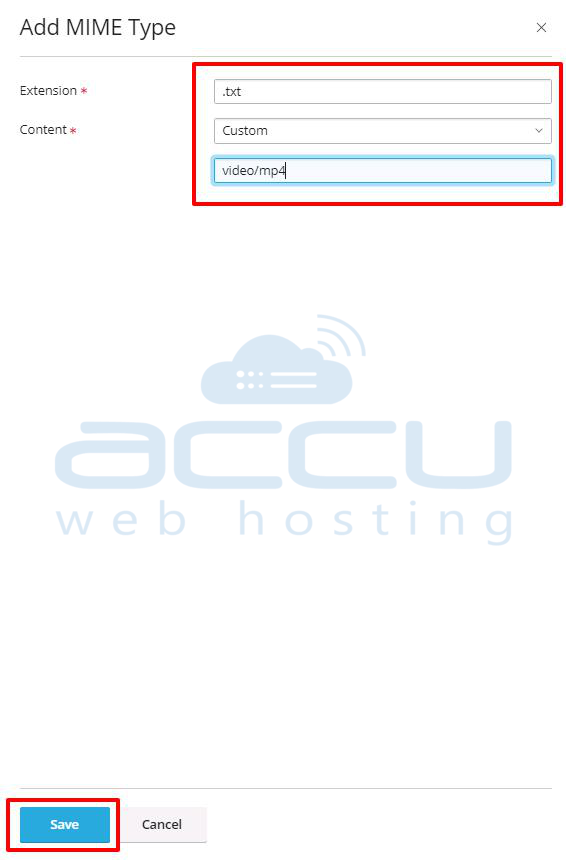
Step 4: Click on Add MIME Type.
Step 5: Specify the following:
- Type the file name extension in the Extension field. Filename extension should begin with a dot (.), or a wildcard (*) to serve all files regardless of file name extension.
- Specify the file content type in the Content field. (i.e., text/html) and click on OK to finish.
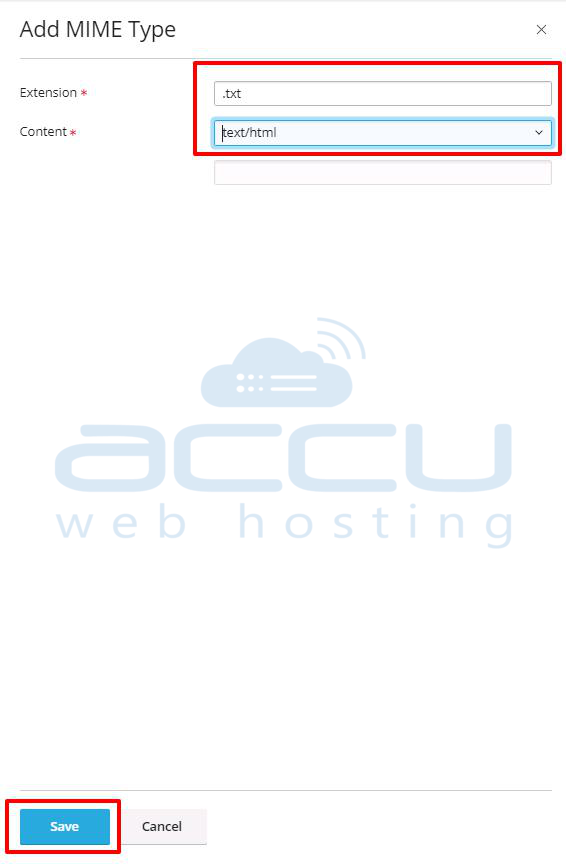
Step 6: You can either select the appropriate value from the list or define a new content type. To do this, select Custom and enter the content type in the input box provided(i.e., video/mp4). Click OK to finish.
To edit a MIME type for a virtual directory within a website
Step 1: Go to Websites & Domains and find the website's domain name.
Step 2: Click Virtual Directories.
Step 3: Select the MIME Types tab.
Step 4: Select the required MIME type in the list.
Step 5: Edit the file name extension in the Extension field. Filename extension should begin with a dot (.), or a wildcard (*) to serve all files regardless of file name extension. Specify the file content type in the Content field.
You can either select the appropriate value from the list or define a new content type. To do this, select Custom and enter the content type in the input box provided.
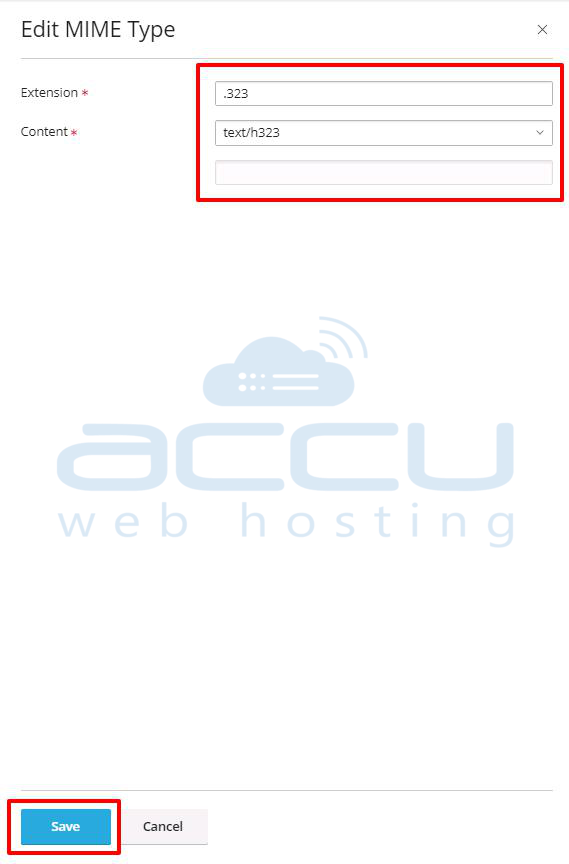
Step 6: Click OK to save changes.
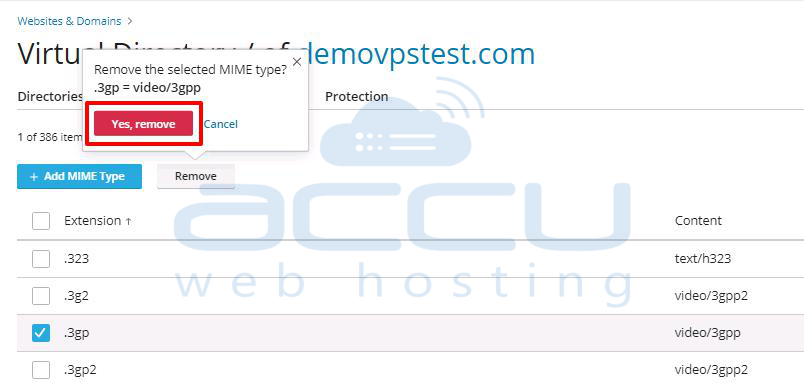
To remove a MIME type for a virtual directory within a website:
Step 1: Go to Websites & Domains and find the website's domain name.
Step 2: Click Virtual Directories.
Step 3: Select the MIME Types tab.
Step 4: Select the checkbox corresponding to the MIME type that you want to remove.
Step 5: Click the Remove button.
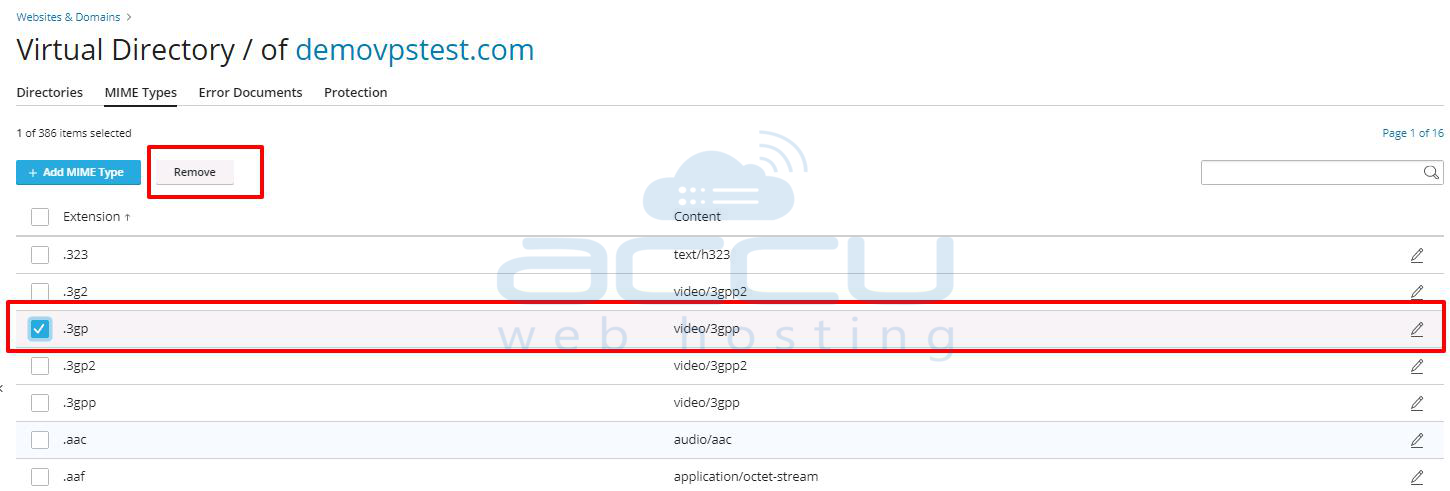
Step 6: It will ask you for confirmation, so click on "Yes, confirm" to proceed.