This article will help you to set up a Git repository in Plesk.
Git is a free and open source distributed version control system that is used to keep track of all the different changes made to a code base, in order to track things like who edited a certain file, what they changed, and how to get back to the original code if necessary.
What is a Repository?
A repository is a collection of files and folders associated with a project or website content, along with each file's revision history. There are two ways to create the repository and pull the files to your website.
Remote repository: The remote repository is used to publish your code to the world (or to some people) and allow them to read or write it. You can send the changes to the remote repository, and then Plesk pulls them from the remote repository and deploys them to your website.
Local repository: The local repository has exactly the same features and functionality as the remote repository. In the local repository, you can send the changes from your local repository to Plesk, and then Plesk deploys the changes to your website.
Setting up a Remote Repository
In the remote repository, you have to add the URL where your project or website contents are stored over the internet or network and pull the files to your website. To do this, follow the steps below.
- Log in to Plesk.
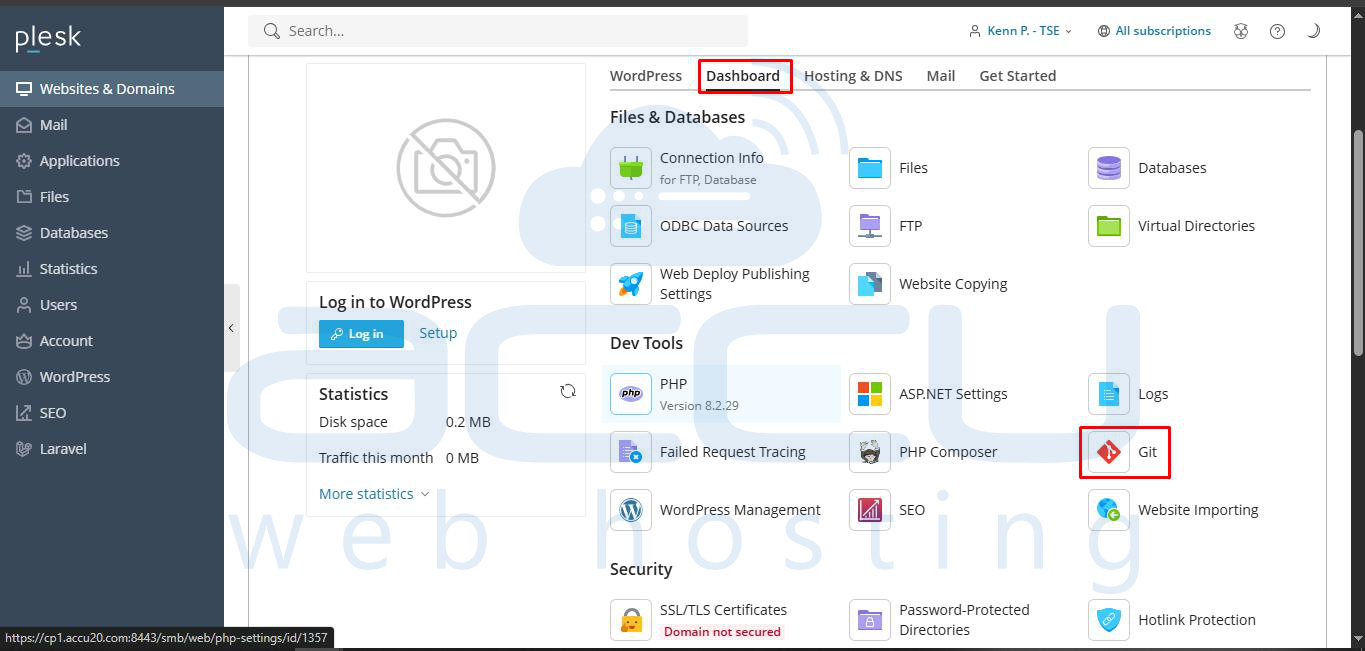
- Click on the websites & domains

- Locate the domain on which you want to configure and then click on the Git option under Dashboard.

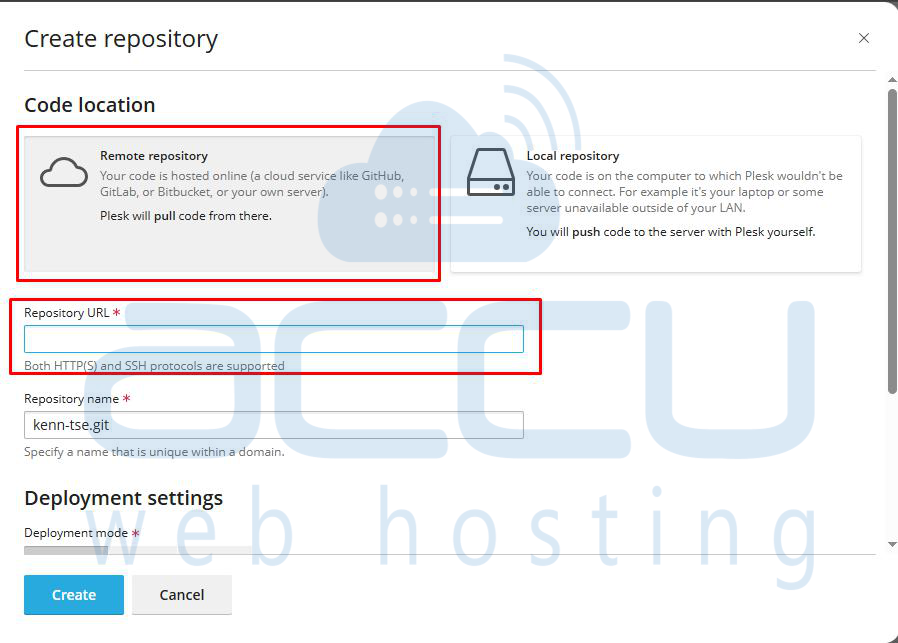
- On the Add Git Repository window, confirm the Remote Git hosting GitHub or BitBucket option is selected. In the Remote Git repository text box, type the URL where the remote repository is hosted.
- To select the deployment mode, click on automatically deployed.
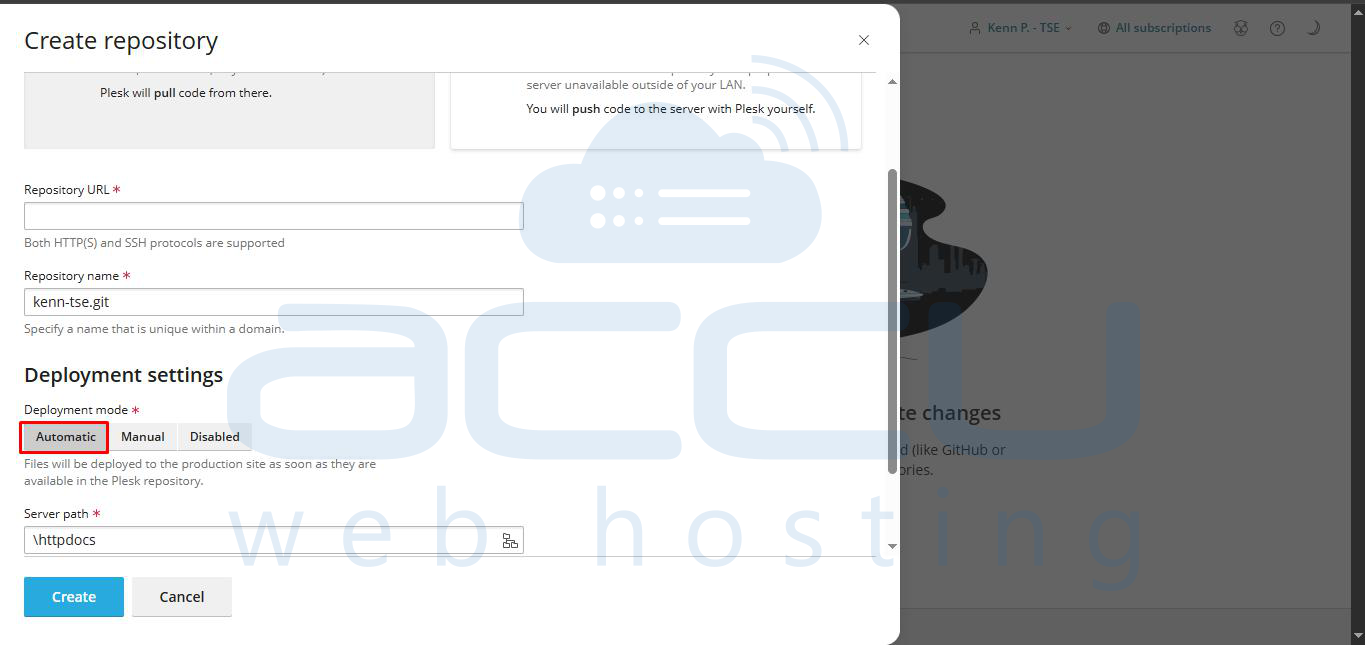
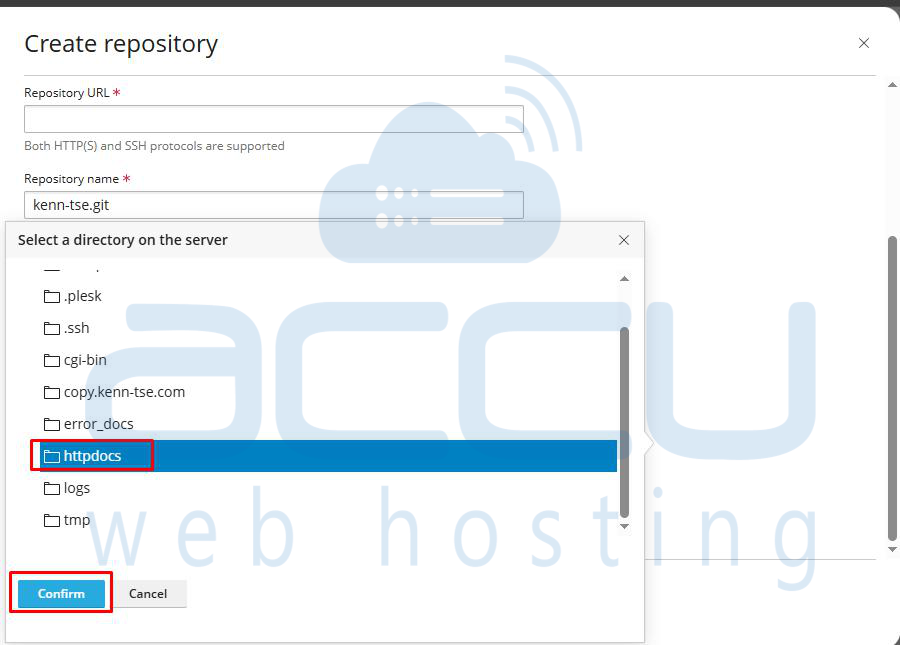
- To select the deployment directory for your website, click on /httpdocs/ select the directory that you want to use, and then click Confirm. By default, the httpdocs directory is used to deploy the website files.
- Once you select the required directory for the deployment, you have to click on the Create button.
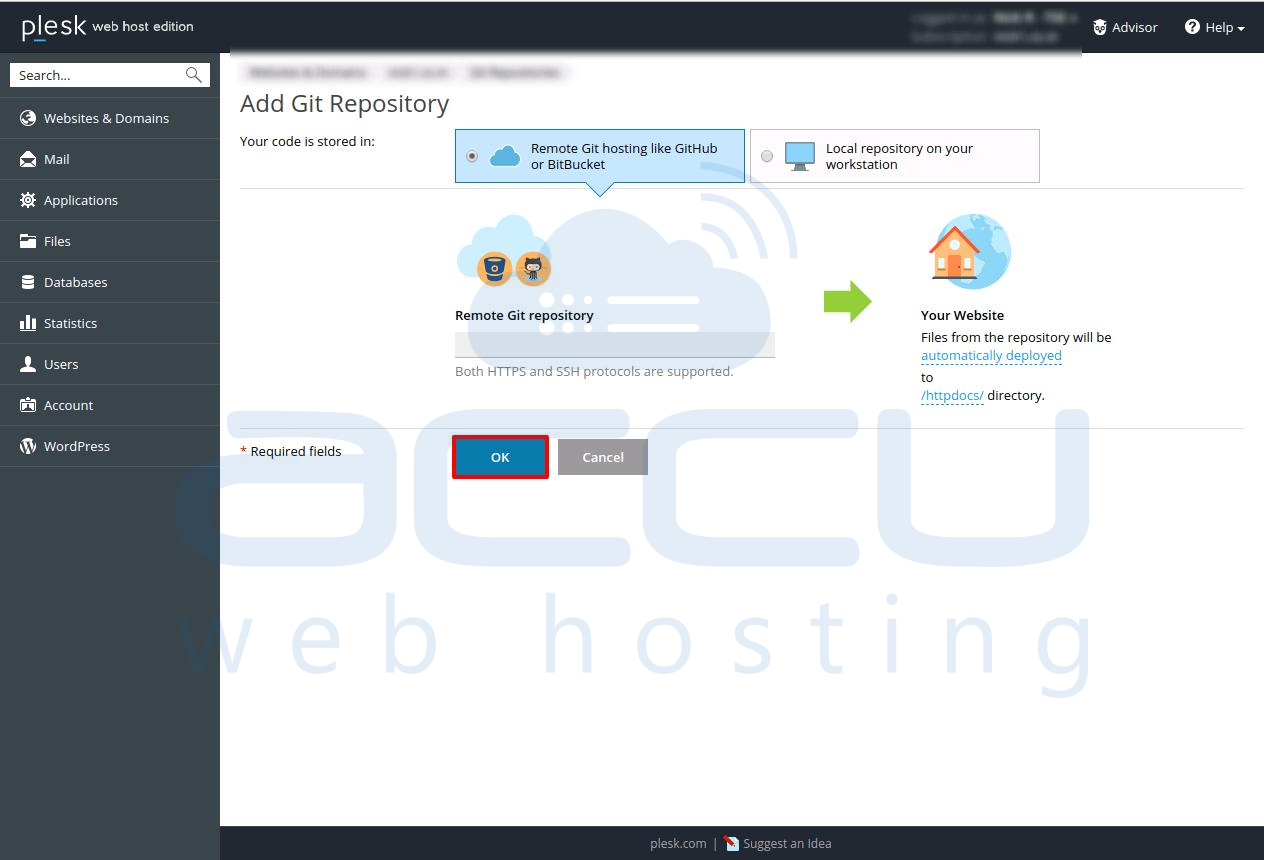
- By clicking on the Ok button. Plesk will try to connect to the remote repository and clone it. This will take a few minutes to complete.
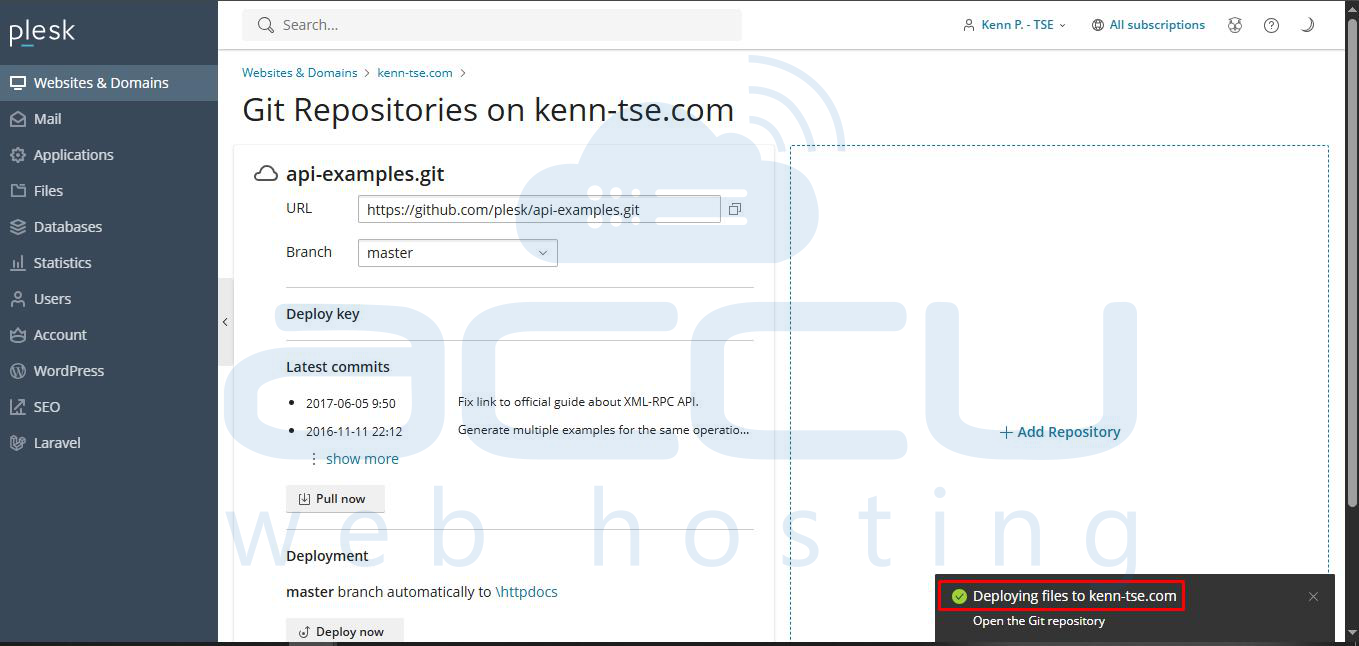
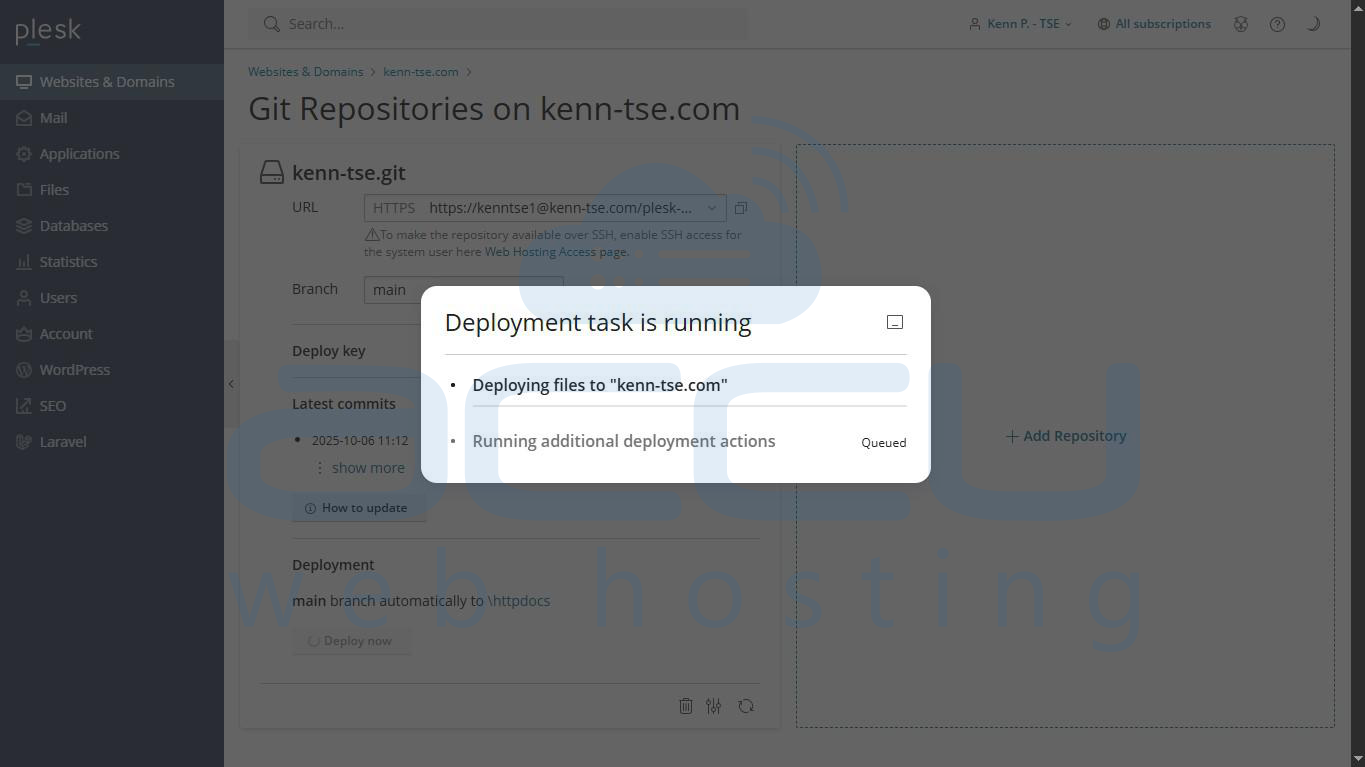
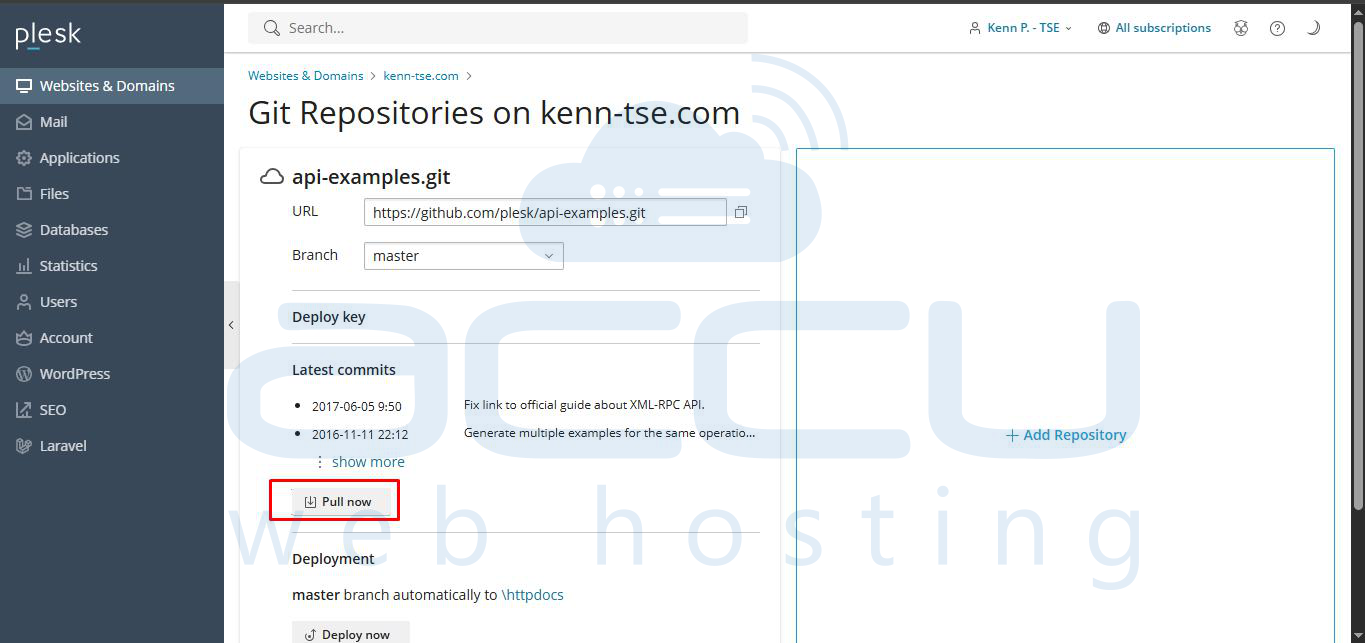
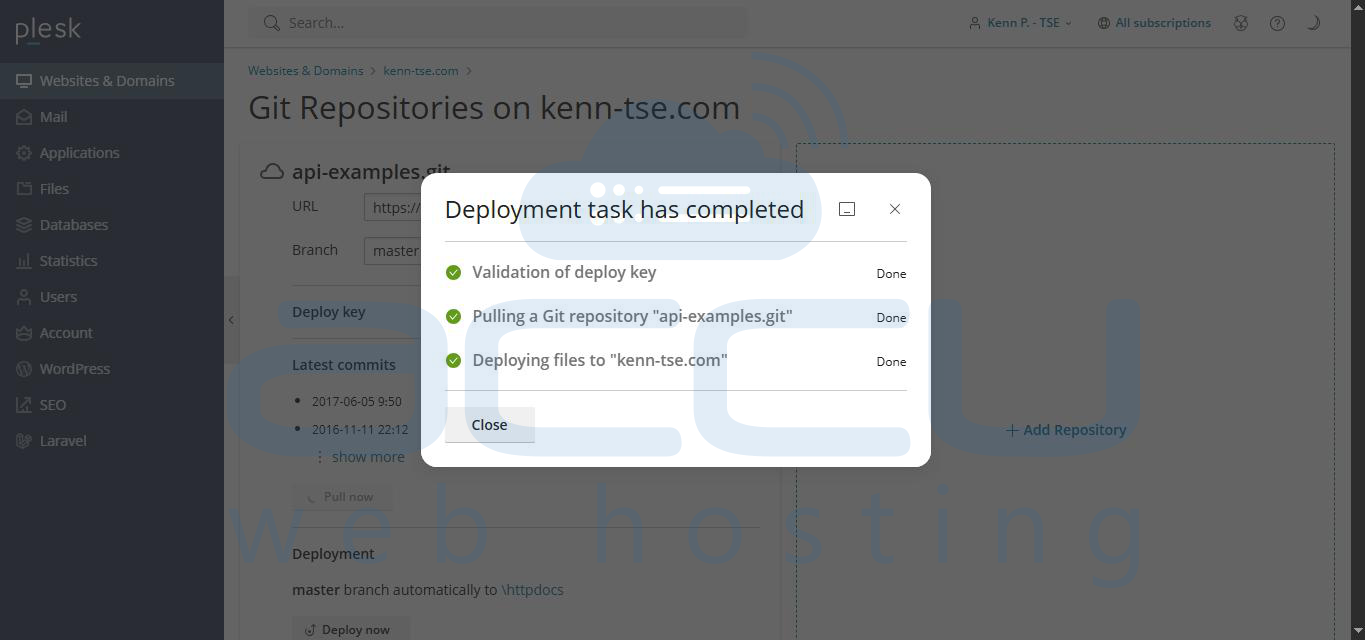
- Once the cloning process is completed, A new repository will be created. You can use the Pull now button to pull the changes from the remote repository and deploy them to the target directory, i.e /httpdocs/
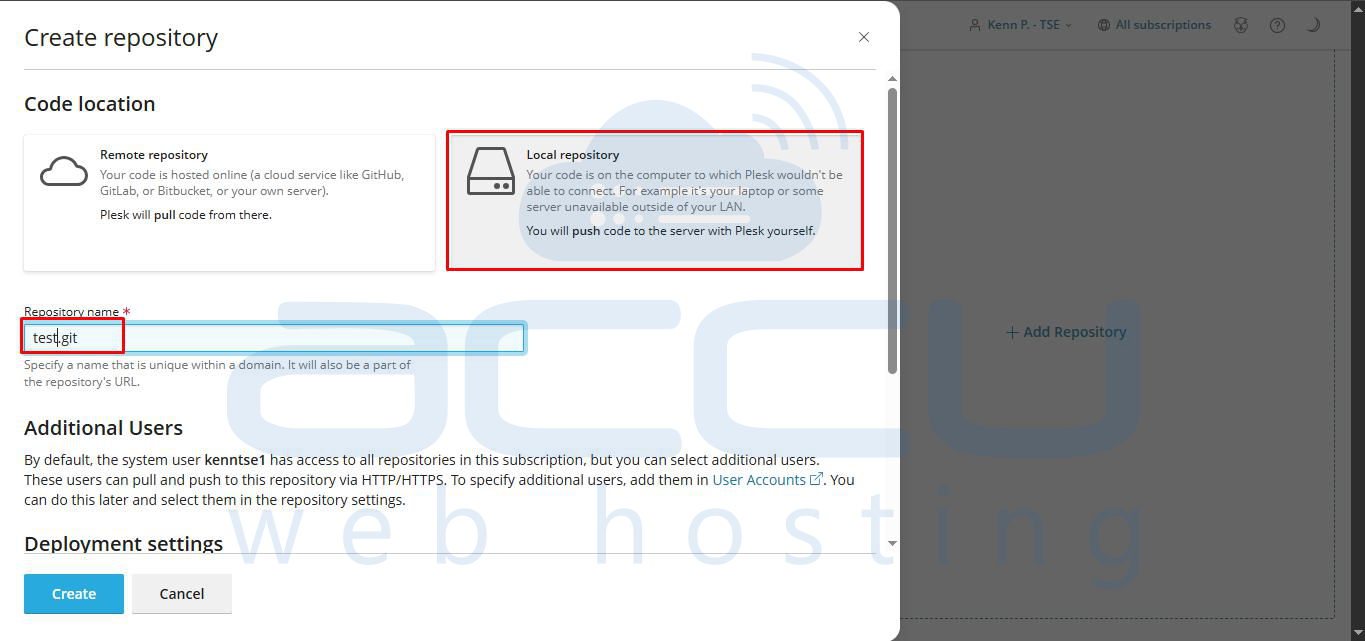
Local Repository
In the local repository, you have to create a repository on your hosting space and push the files to your website. To do this, follow the steps below.
- Log in to Plesk.
- Click on the websites & domains

- Locate the domain on which you want to configure and then click on the Git option.
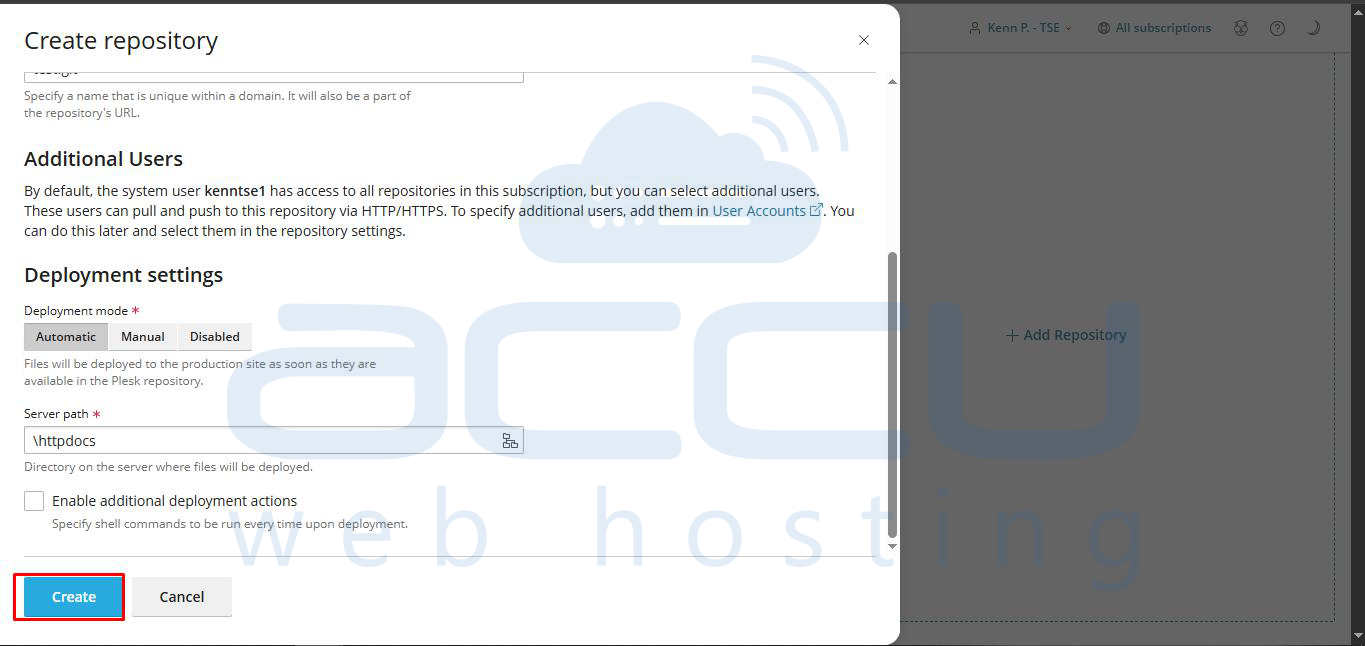
- On the Add Git Repository window, select Local repository on your workstation. In the Git Repository in Plesk text box, type the name of the new repository.
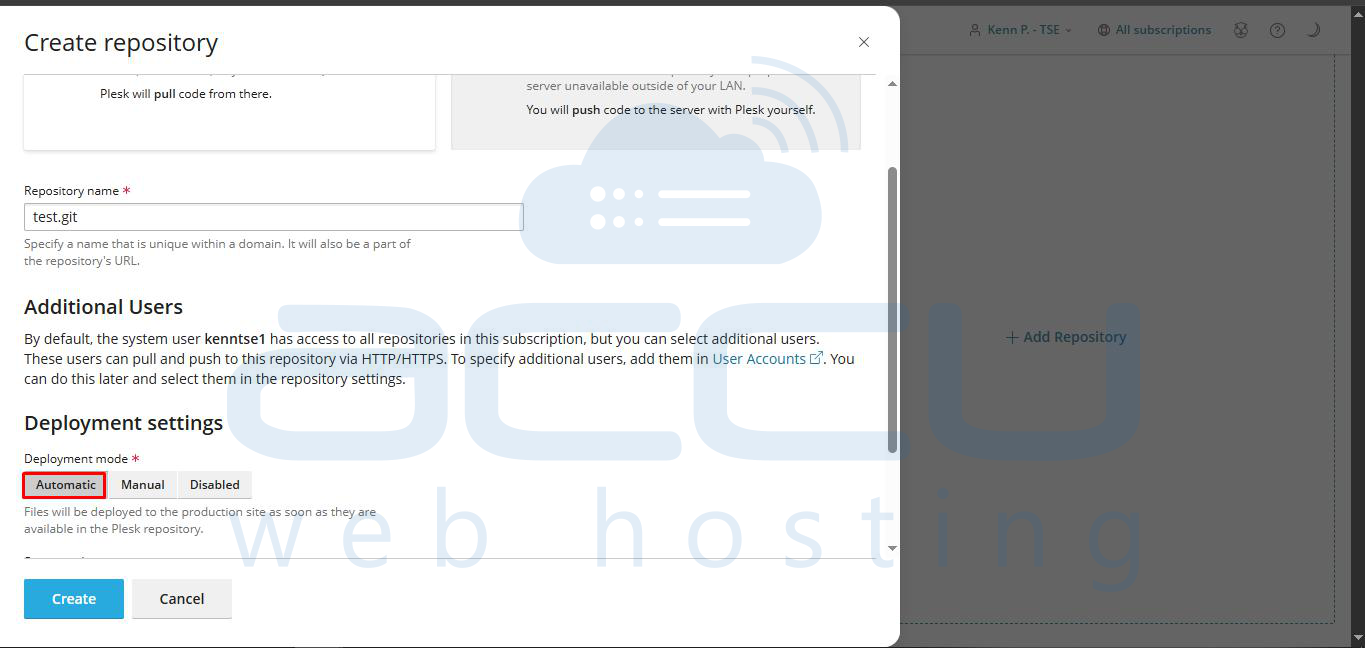
- To select the deployment mode, click on automatically deployed.
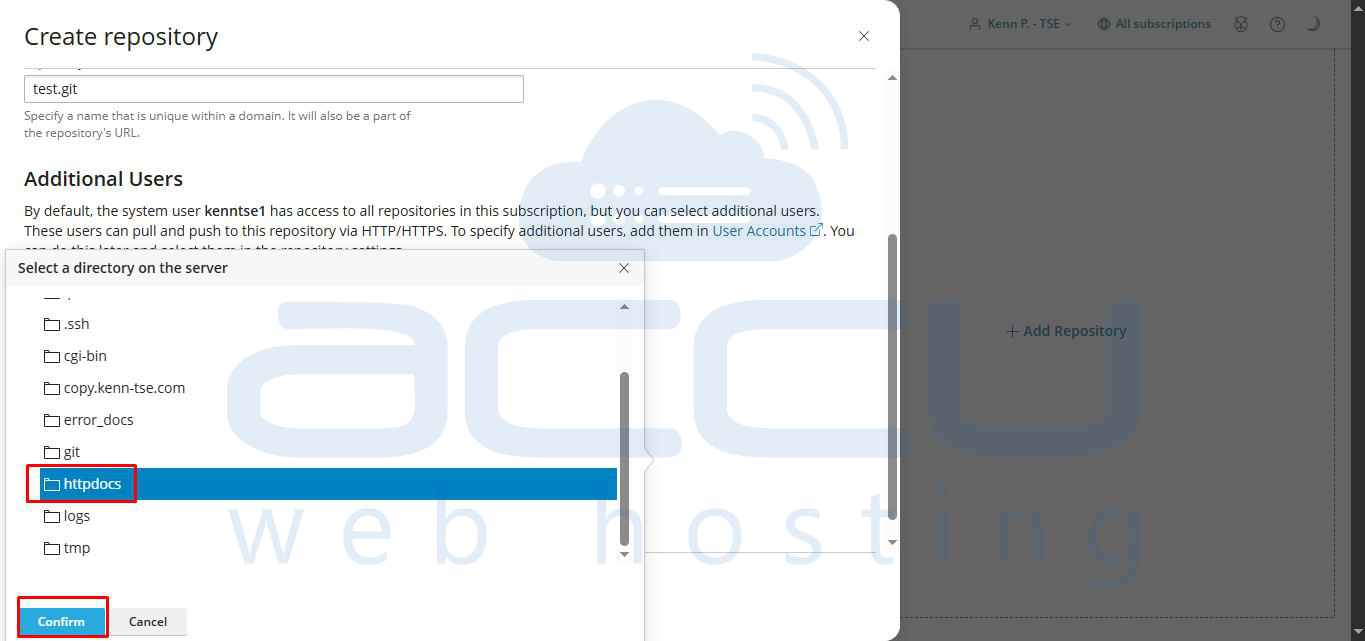
- To select the deployment directory on your site, click on /httpdocs/, select the local directory that you want to use and then click Confirm. By default, the httpdocs directory is used to deploy the website files.
- Once you select the required directory for the deployment, you have to click on the Create button.
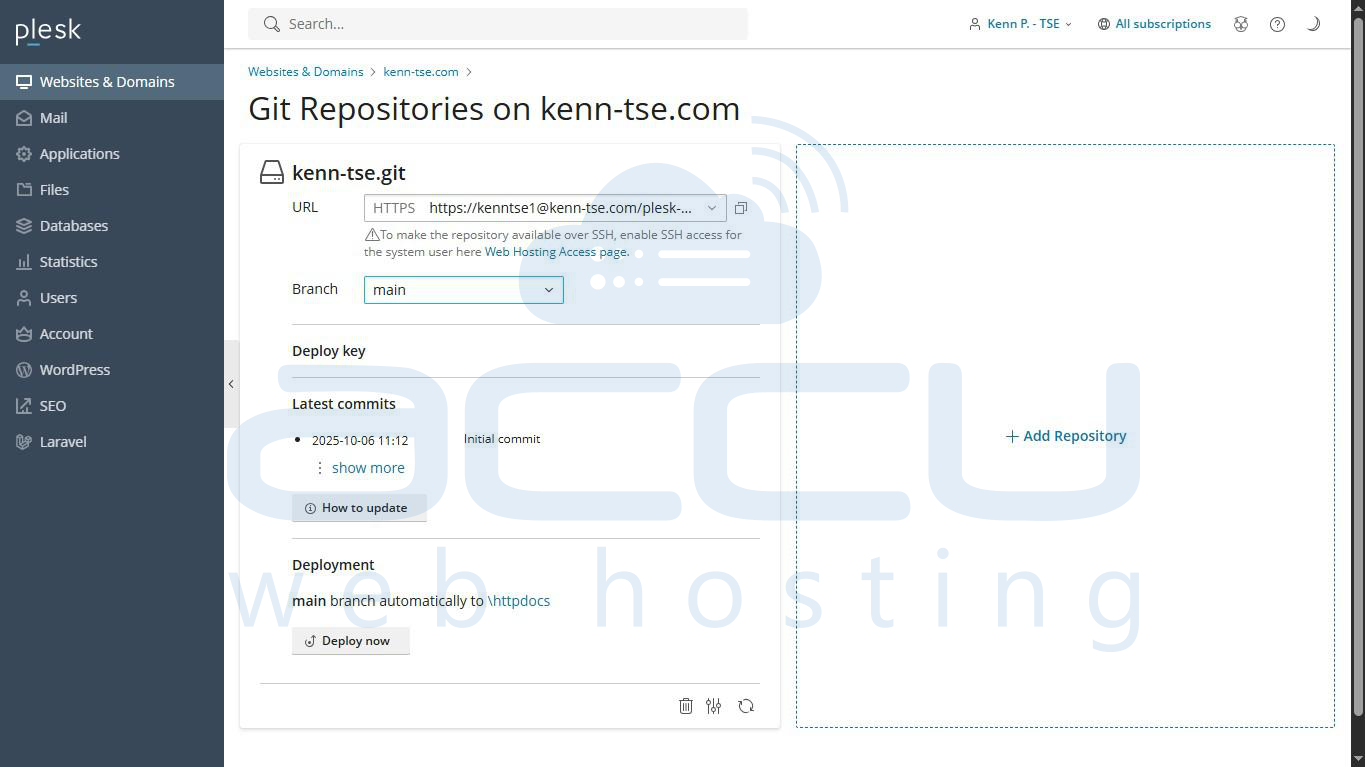
- By clicking on the Ok button. Plesk will create a repository.
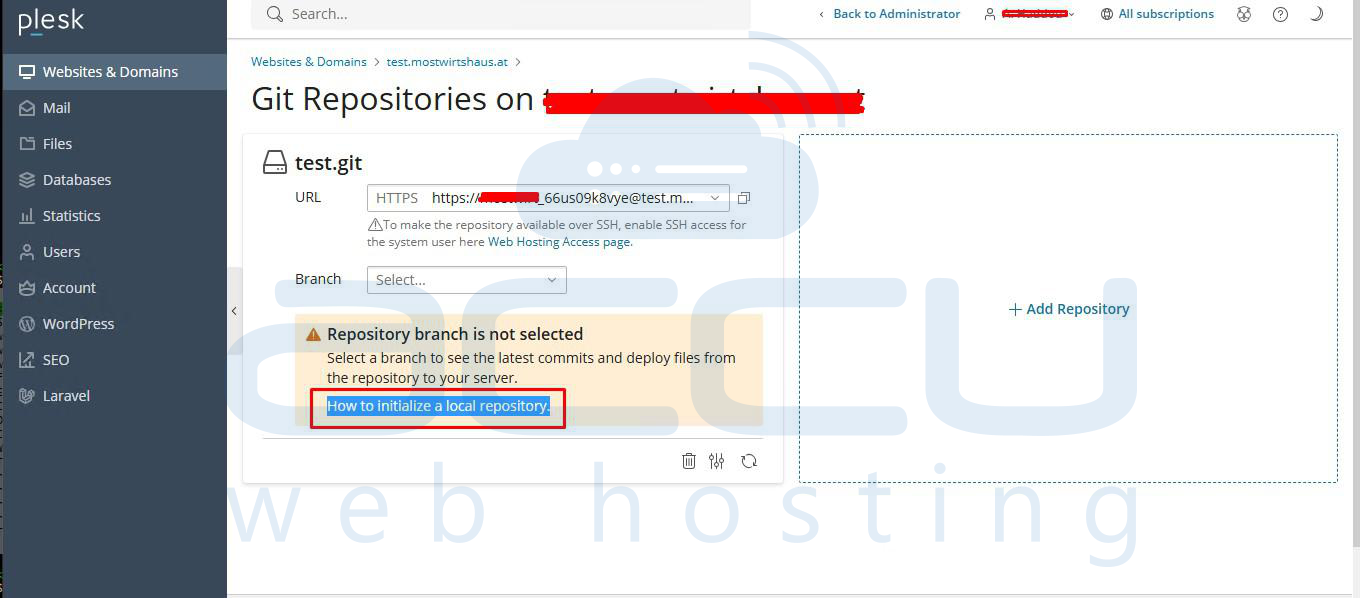
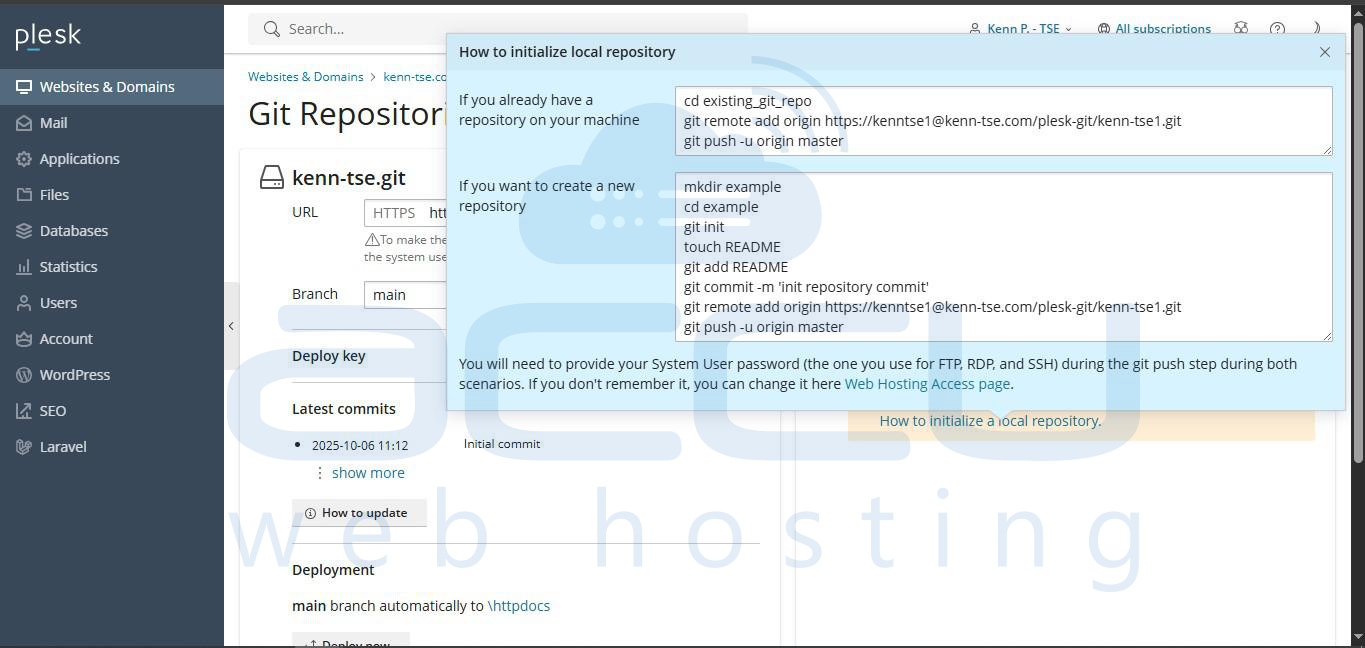
- Click on the How to initialize a local repository option to initialize the local repository.
- You will get the following windows once you click on the help button. In this window, you will get the steps on how to initiate a local repository for your website.
- Once you initialized the repository, you will see the commit information and the active branch. You can commit (Deploy now) your website files from your local repository and push them to the server repository.