SolidCP control panel allows you to manage all email operations under a single login. It enables you to add/remove email accounts, add/remove mail domains, reset mailbox passwords and increase the mailbox quota. The following tutorial will assist you in adding an email account from SolidCP.
1. Login to the SolidCP control panel.
2. Once you are logged into SolidCP, click on the All Customers link.
3. In the next screen, you will see the list of all created users. If you have not created any user yet, you'll see the default admin user there. Click the username link under an email account created.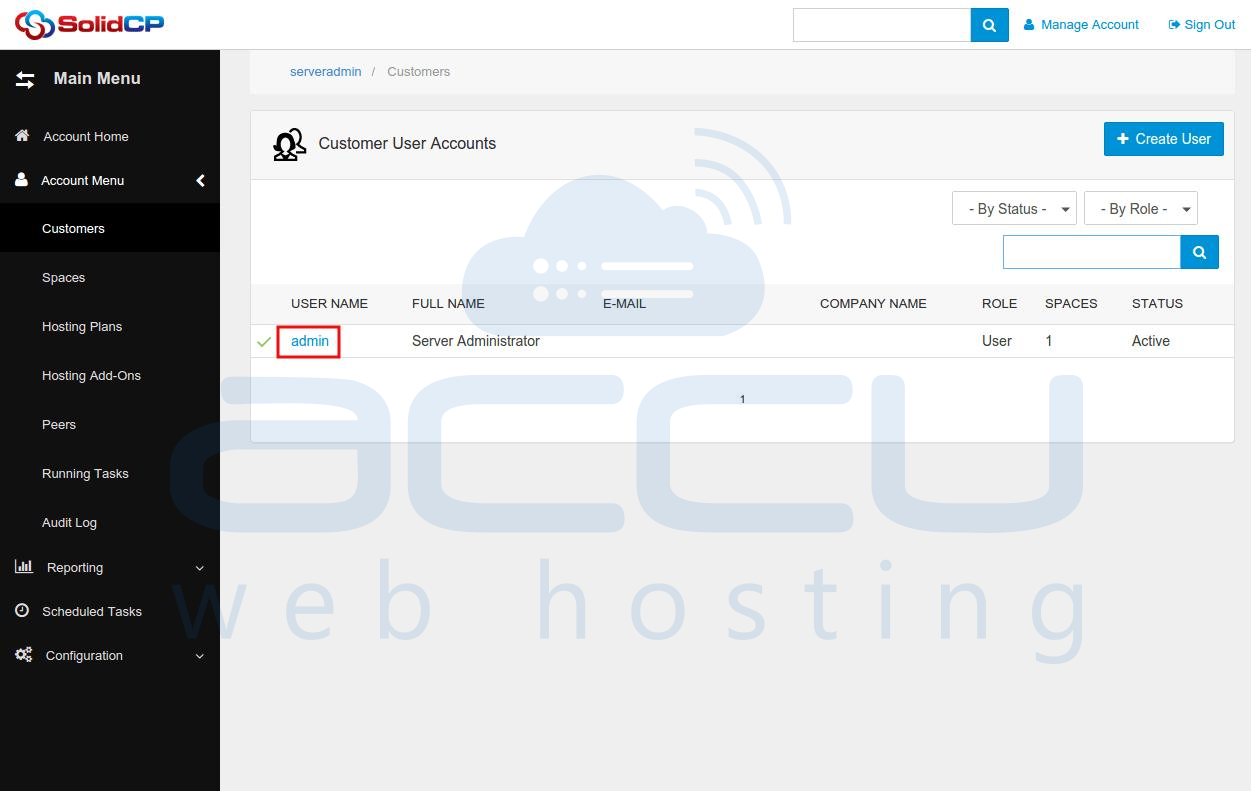
4. In the next screen, you will see icons for all services you can manage from SolidCP. Under the POP/IMAP Email section click on the Accounts icon.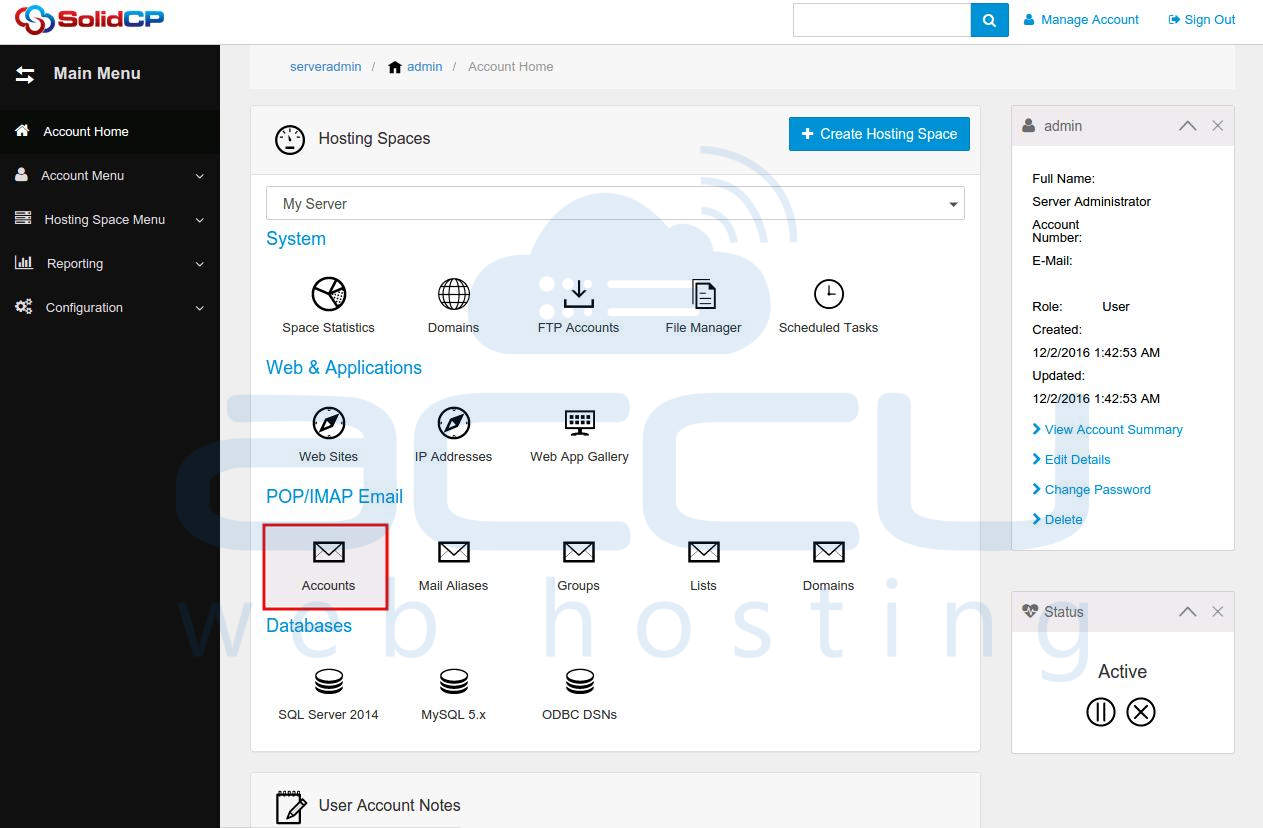
5. In the next screen, a list of previously created email accounts will be populated. To add a new email account, click on Create Mail Account button.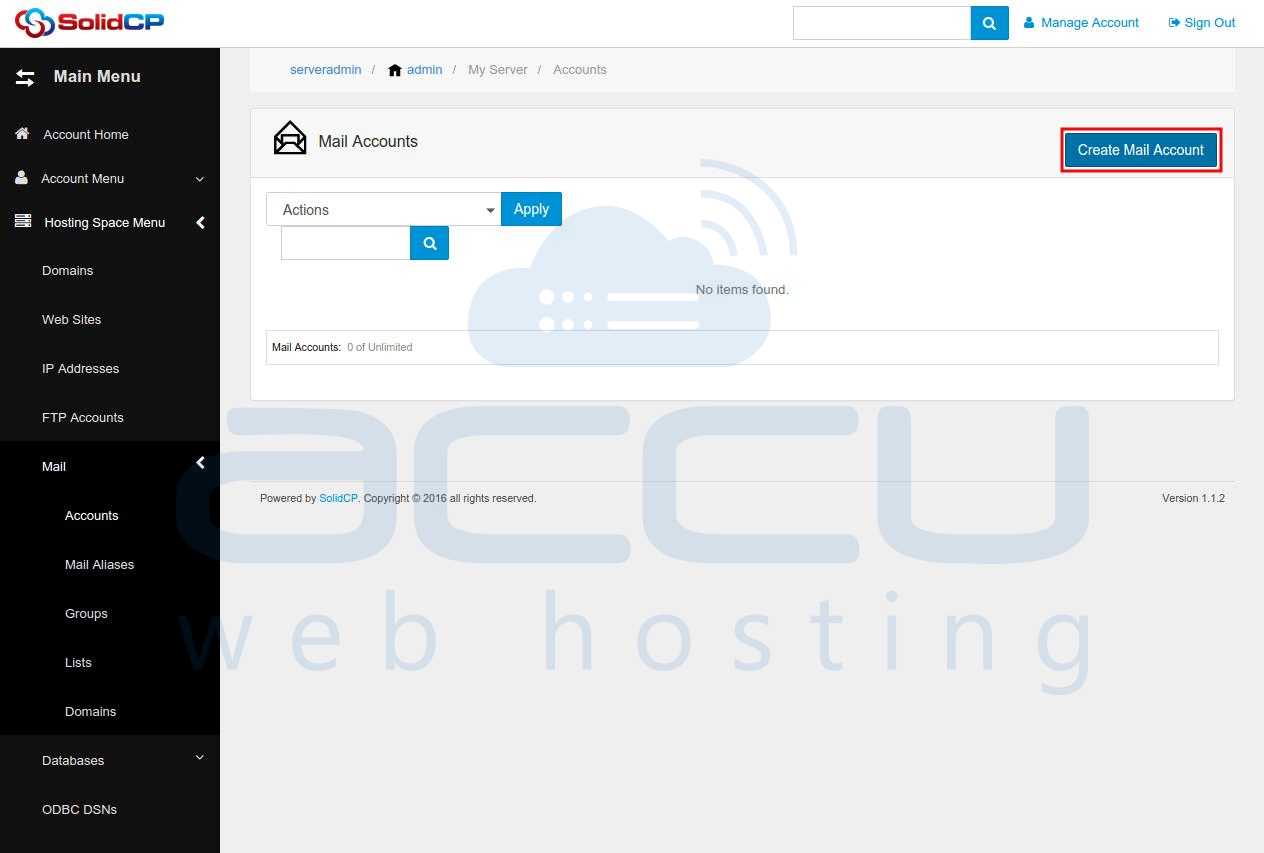
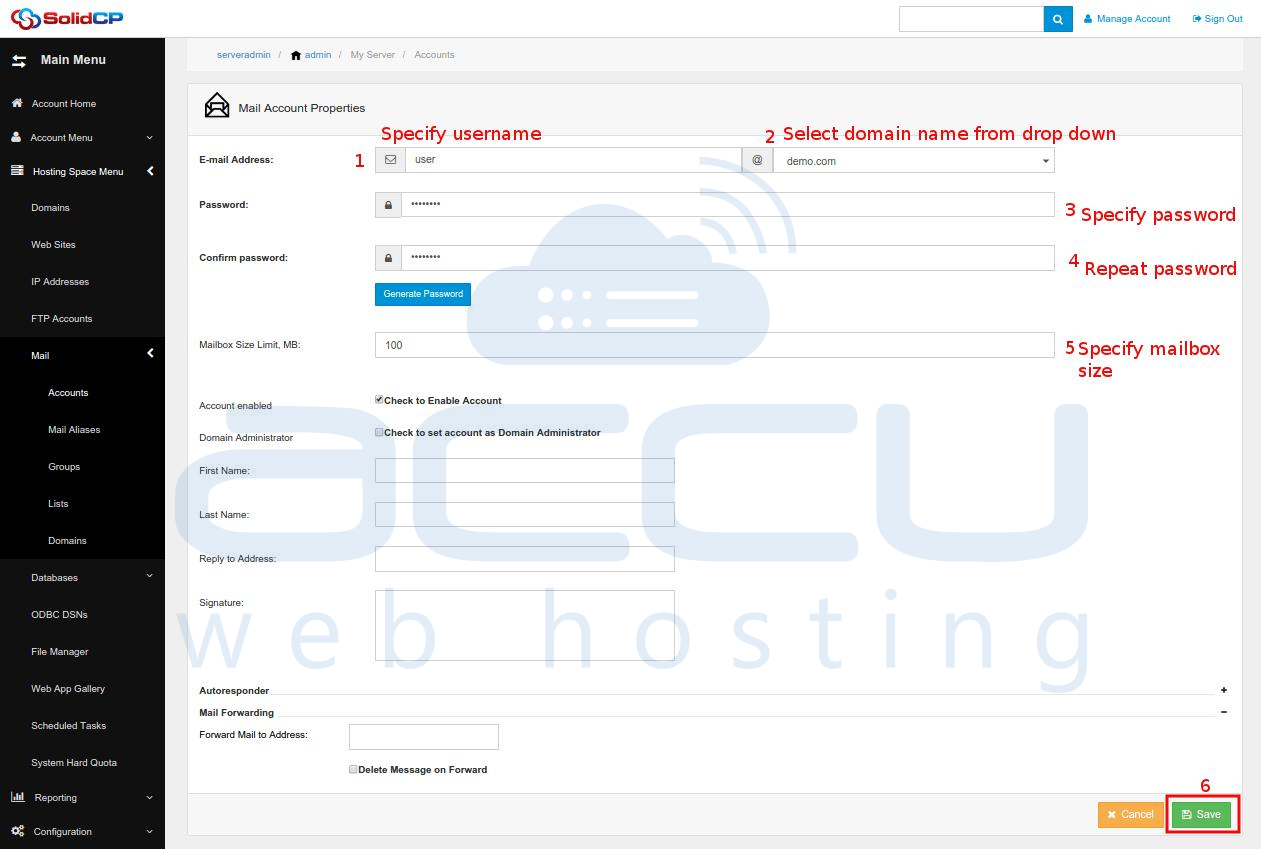
6. In the next screen, specify new mailbox information. Enter the name of the new mailbox, and select the domain name from the drop-down menu. You can use an auto-generated password by clicking Generate Password button. To see and copy the password, you'll have to point the control on the password field box.
In case you wish to use your own password, then specify your password twice, set the mailbox size limit in MBs, and keep the Check to Account enabled checkbox checked. Click on the Save button (located at bottom of the page) to add a new mailbox.
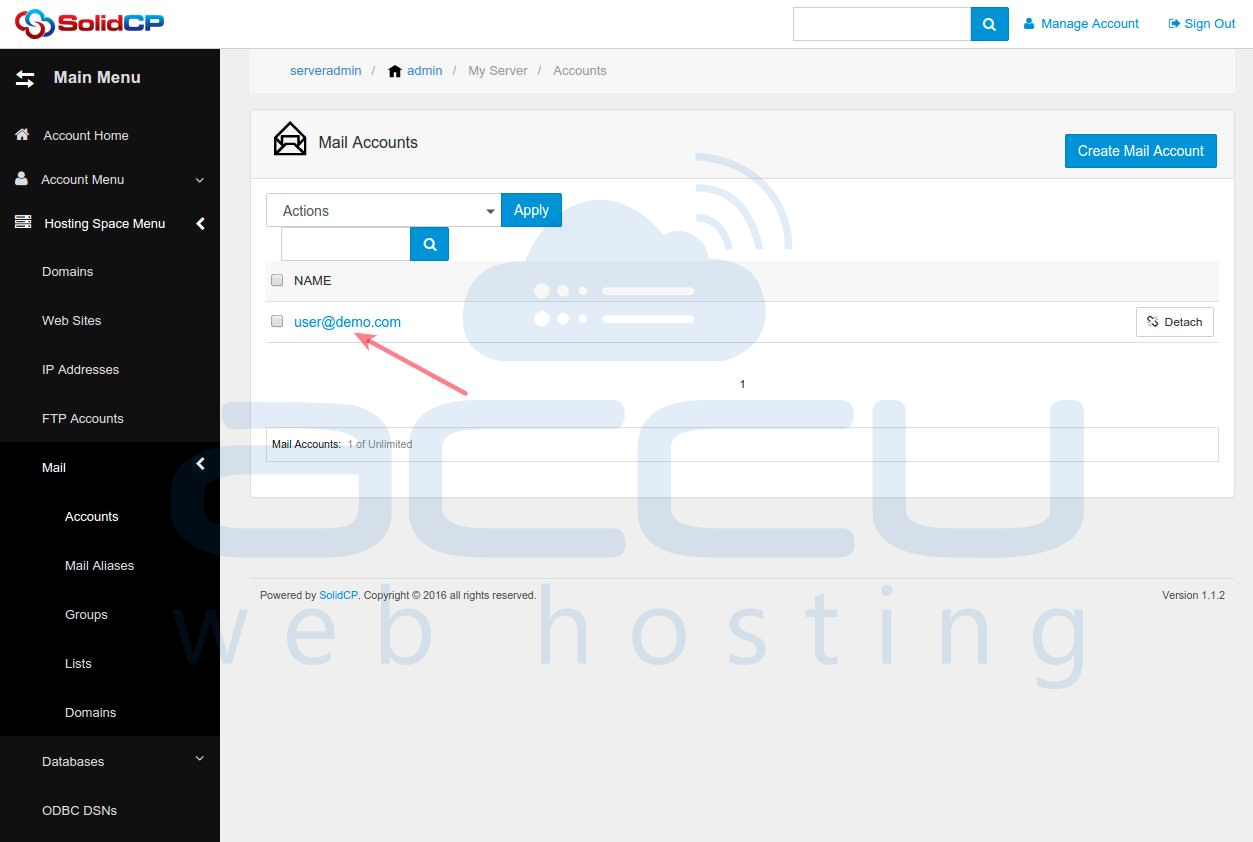
7. Once a new mailbox is created, you can see it in the list of all email accounts.