ClamAV is one of the most popular open-source antivirus plugins available for cPanel servers. ClamAV allows individual cPanel users to scan their home directory and emails against malicious files.
This article explains the steps to install the ClamAV plugin from WHM.
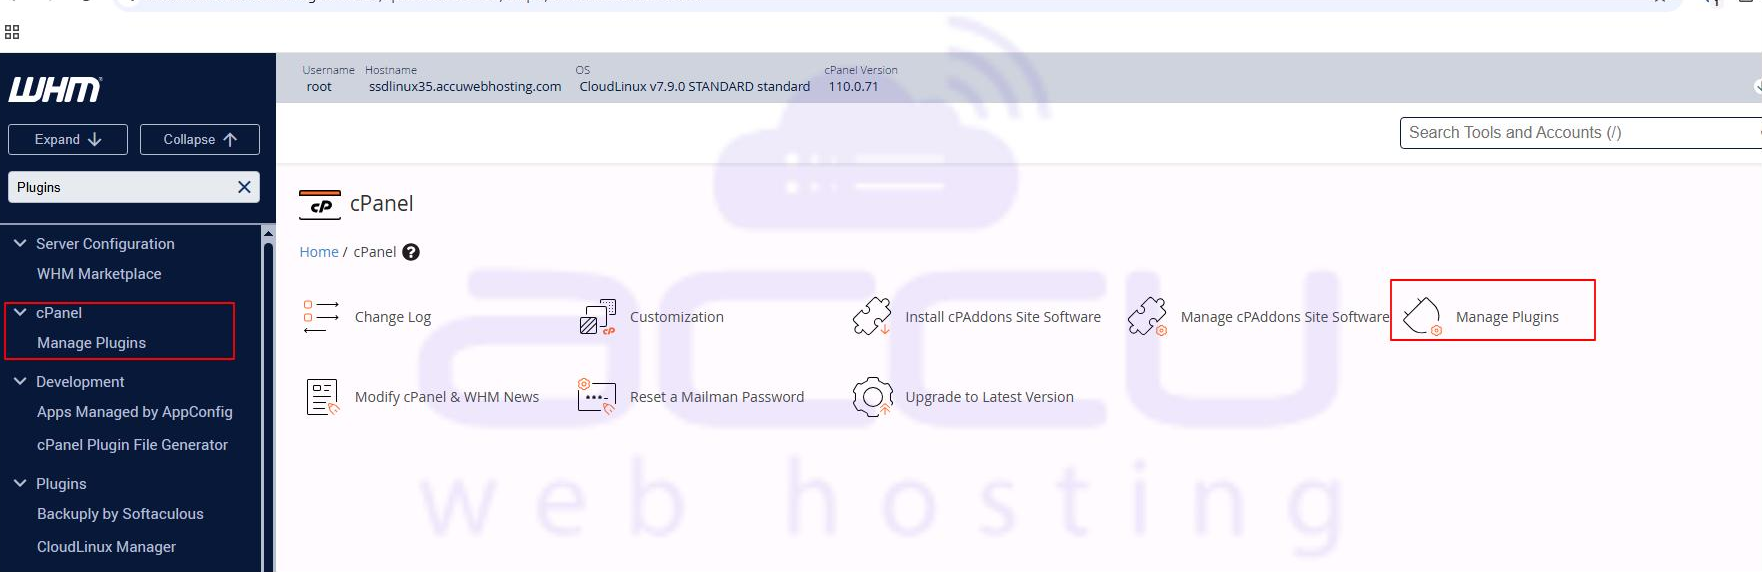
Step 1: Log in to WHM with the root user.
Step 2: Under the cPanel section, select the Manage Plugins option.
Step 3: Check the checkbox Install and keep updated beside ClamAV, and then click Save at the bottom. This will start the installation process, and it may take a few minutes. Don't close the web browser until the installation process completes. Once installation is finished, you'll receive a Process Complete message.

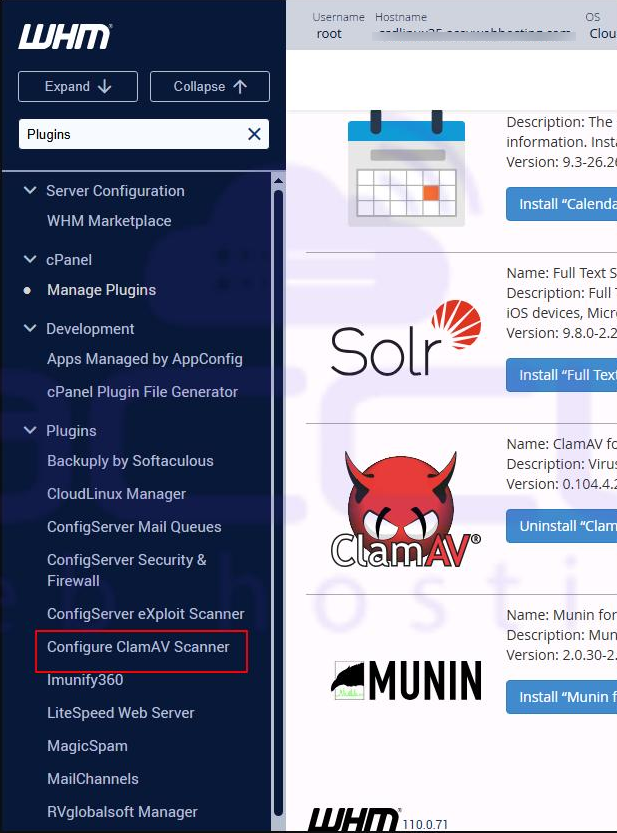
Step 4: Under the Plugins section, select the Configure ClamAV Scanner option.
Step 5: At this stage, you can set the global scan permissions. If you wish to allow all cPanel users to scan their files, then check the checkboxes Scan Entire Home Directory, Scan Mail, Scan Public FTP Space, and Scan Public Web Space. Save the changes.

Conclusion:
Installing the ClamAV plugin from WHM is a straightforward way to enhance the security of your cPanel server. By following the steps outlined above, you can ensure that your server and users’ home directories, emails, FTP, and web spaces are regularly scanned for malware. Keeping ClamAV updated through WHM helps maintain a secure hosting environment, protecting both your server and your clients from potential threats. With ClamAV properly configured, you can confidently manage and safeguard your server with minimal effort.
