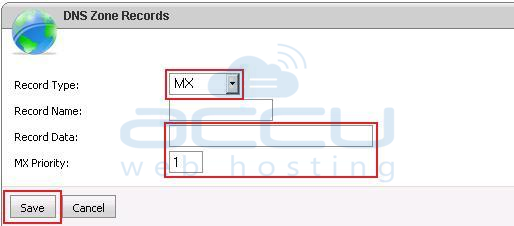
This article will provide you the steps to modify the MX record and/or to add a new MX record for a domain from the WebsitePanel:
- Login to your WebsitePanel.
- Click on Domains.

- Click on the domain name for which you wish to edit DNS zone records.

- Click on Edit DNS zone records link.

- Edit existing MX record by clicking on the pencil icon.

- Set the Record Data value as per your requirement along with its MX Priority and then click on Save.

- You can also add another MX record, by clicking on Add Record button.

- You need to provide the below mentioned details to add a new MX record:
- Record Type: Select MX from the drop down list.
- Record Data: Specify the appropriate value of MX record.
- MX Priority: Set the priority of MX record. Lowest priority record will be used first rather than higher one.

- After filling all these details click on Save.


