This article will guide you on how to do WordPress installation from Microsoft Web Application Gallery from WebsitePanel. WordPress is an open source blogging tool and publishing platform powered by PHP and MySQL. Follow the below mentioned steps to install WordPress in your website:
- Login to the WebsitePanel.
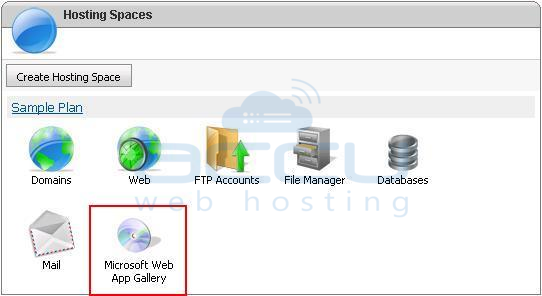
- Select Microsoft Web App Gallery.

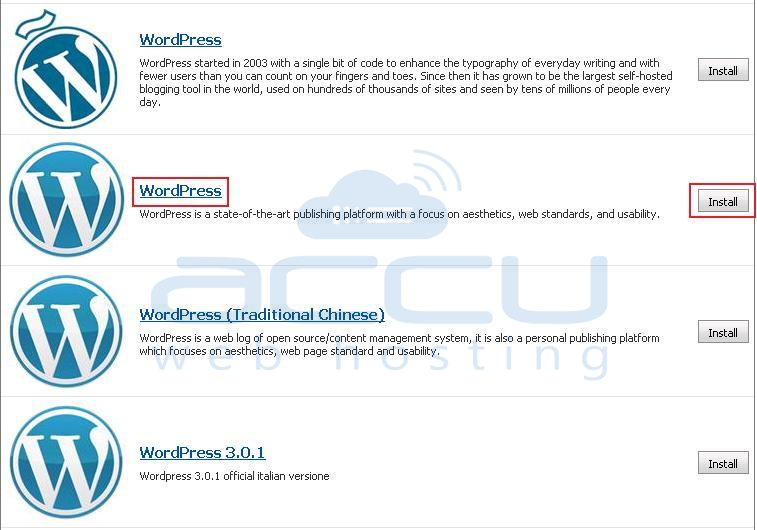
- Select appropriate version of WordPress and click on Install.

- Select Next.

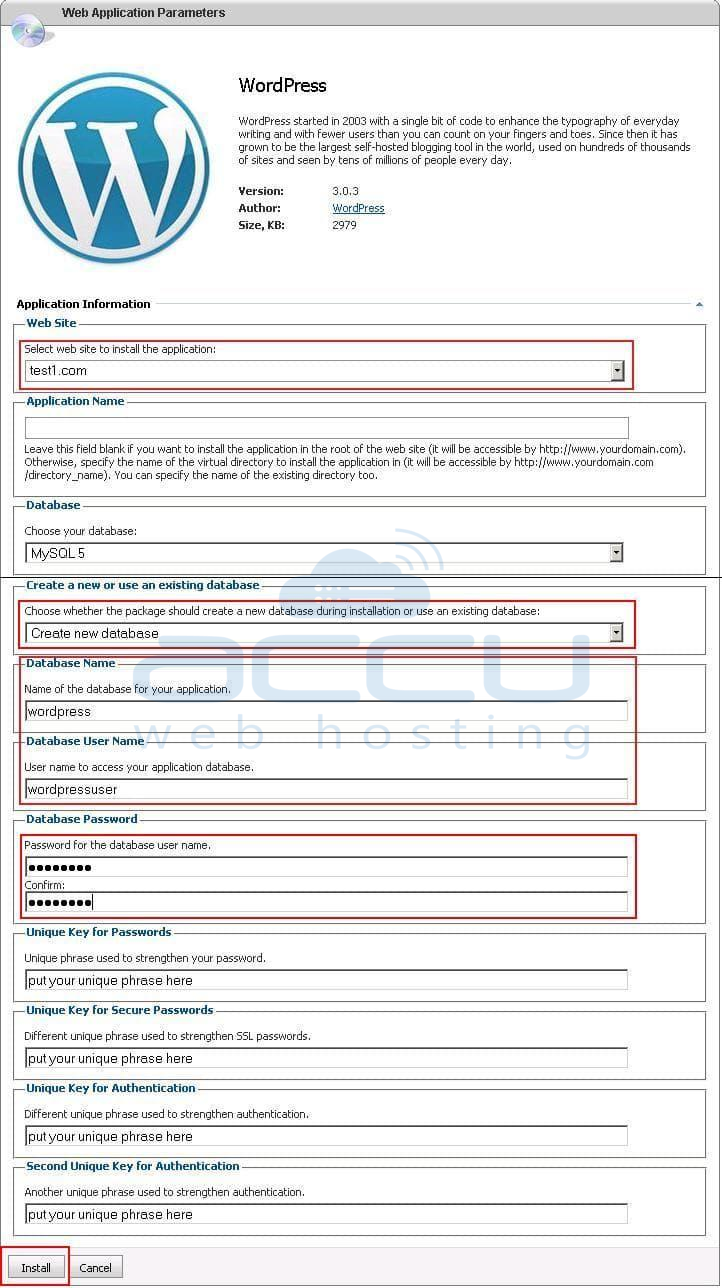
- Specify the below mentioned details to proceed with the installation:
- Select the Web Site from the drop down box in which you want the WordPress to be installed.
- Specify the Application Name in order to create the folder inside the wwwroot otherwise leave it blank.
- You can select Create a new database [if you want to create a new one] or you can select Use an existing database [if you have already created a database], in order to provide the data connection for WordPress with your Website. Type the Password for your MySQL database to provide the access to the database user.
- Thenafter, click on Install.

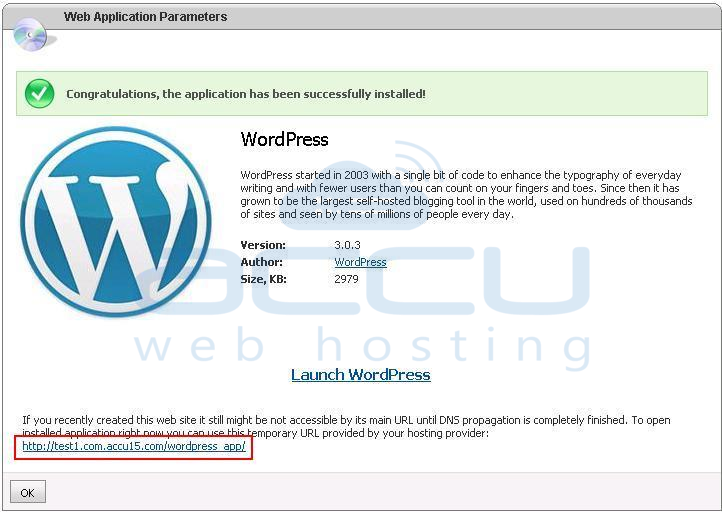
- Once the installation is completed, you can access the WordPress from your Website by browsing the URL as shown in the below screenshot:

- Here, you need to specify the Site Title, Username, Password and Email Address to create the admin user for the WordPress and then click on Install WordPress button.


