
Install Docker Using One-Click Installer in Virtualizor Linux VPS
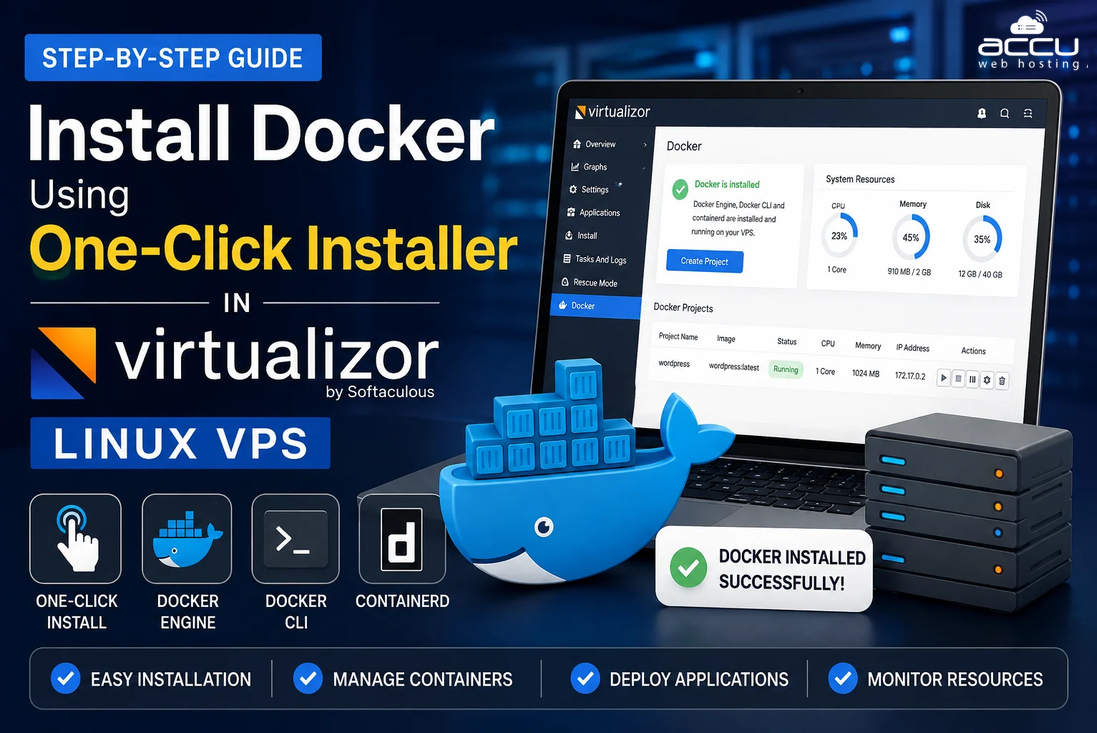
Docker has become one of the most widely used platforms for developing, packaging, deploying, and managing applications in containers. Containers allow applications and their dependencies to run in isolated environments, making application deployment more consistent and portable. Normally, installing Docker on a Linux VPS requires manually configuring repositories, installing Docker packages, setting up dependencies, and enabling the required services. However, Virtualizor simplifies this process by providing a One-Click Docker Installer directly through the Virtualizor End-User Panel.
With the One-Click installer, Virtualizor can automatically install the required Docker components, including Docker Engine, Docker CLI, and containerd. After Docker has been installed, you can use the Virtualizor interface to create Docker projects, deploy containers, allocate resources, and manage running applications without performing every operation manually from the command line. This guide explains how to install Docker using Virtualizor's One-Click installer, create your first Docker project, deploy a container, manage Docker applications, and verify that the installation is working correctly.
Prerequisites
Before installing Docker, make sure the following requirements are met:
Active Linux VPS:
You must have an active Linux-based VPS managed through Virtualizor. The VPS should be powered on and accessible.
Virtualizor End-User Panel Access:
You need valid login credentials for the Virtualizor End-User Panel. You should have sufficient permissions to manage the VPS and install Docker.
VPS Resources:
Make sure the VPS has enough available resources for Docker and the containers you plan to run. Applications such as WordPress, databases, web servers, and application stacks may require considerably more resources.
Steps to Install Docker Using One-Click Installer in Virtualizor Linux VPS
Step 1: First, open your preferred web browser. Navigate to your Virtualizor End-User Panel. Enter your Email address or username and Password. Then click Login.
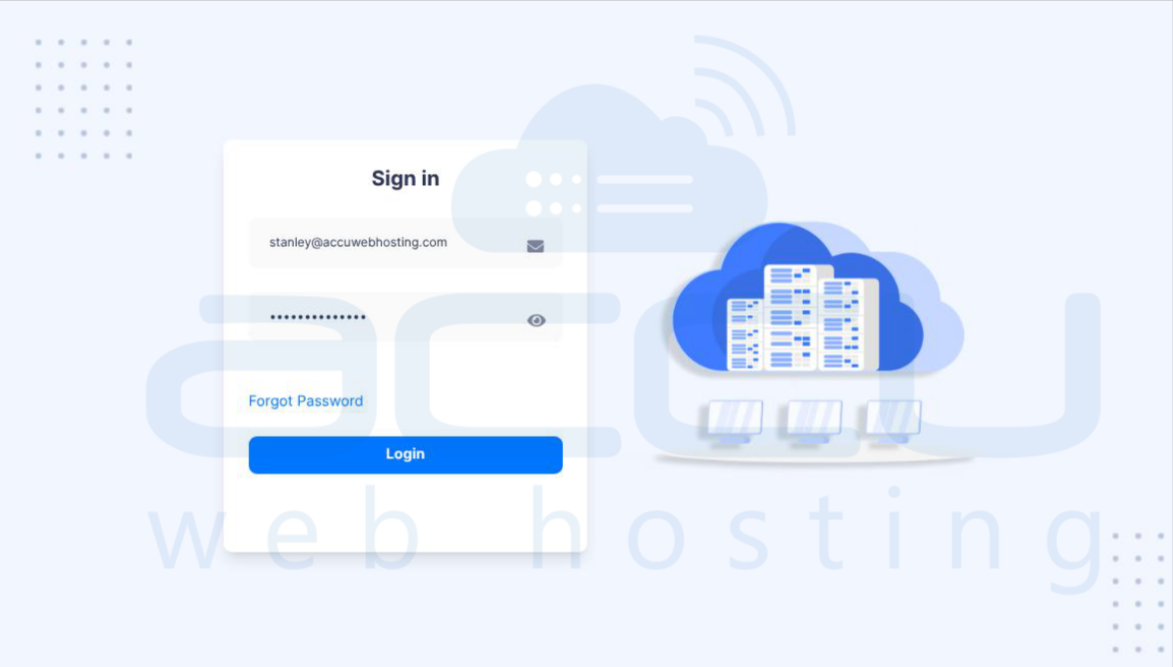
After successful authentication, you will be redirected to the Virtualizor dashboard. The dashboard provides access to the VPS instances associated with your account.
Step 2: After logging in, locate the VPS on which you want to install Docker. Depending on your Virtualizor configuration, you may see multiple VPS instances. Locate the appropriate server and look for the Action column. Click the Manage icon associated with the VPS.
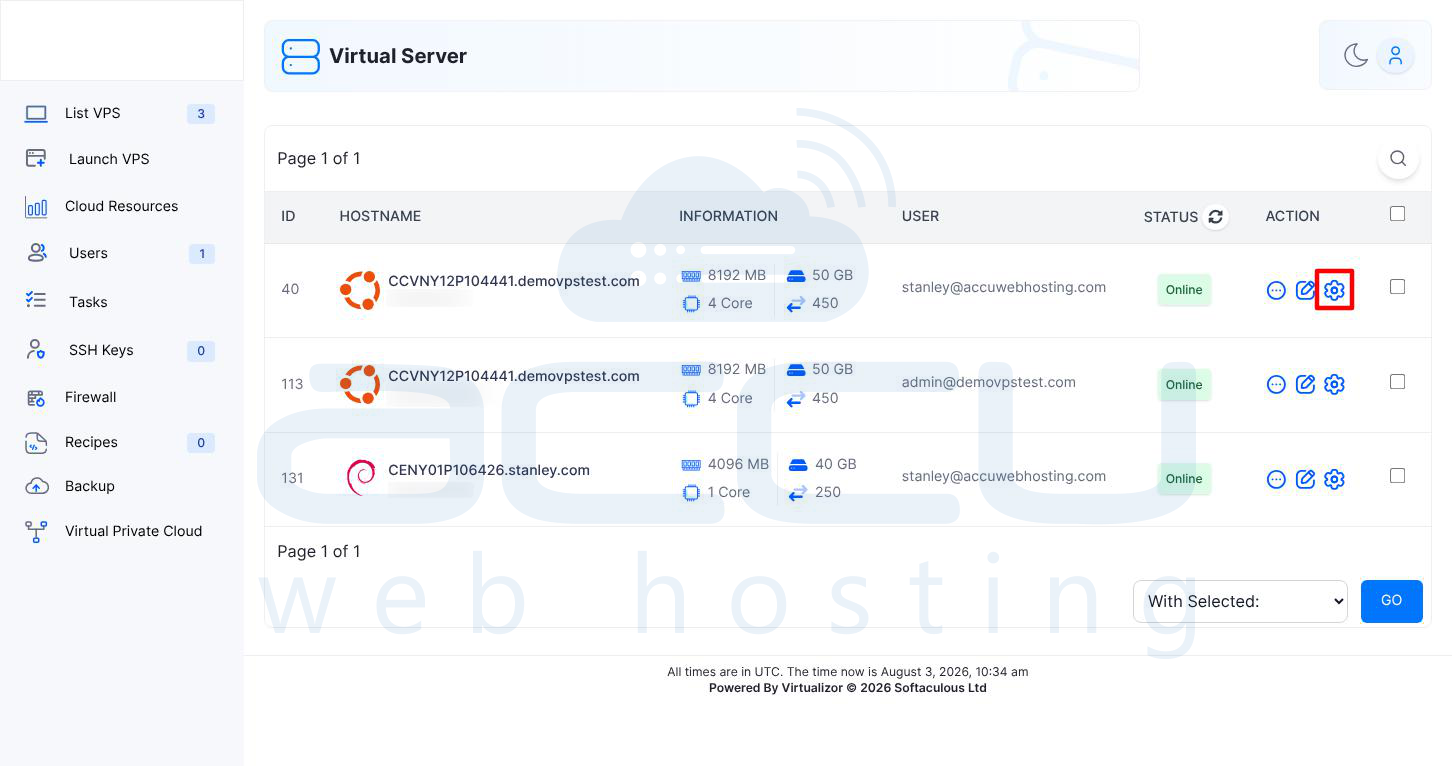
This opens the management interface for the selected VPS. Before continuing, confirm that you have selected the correct server because Docker will be installed directly on this VPS.
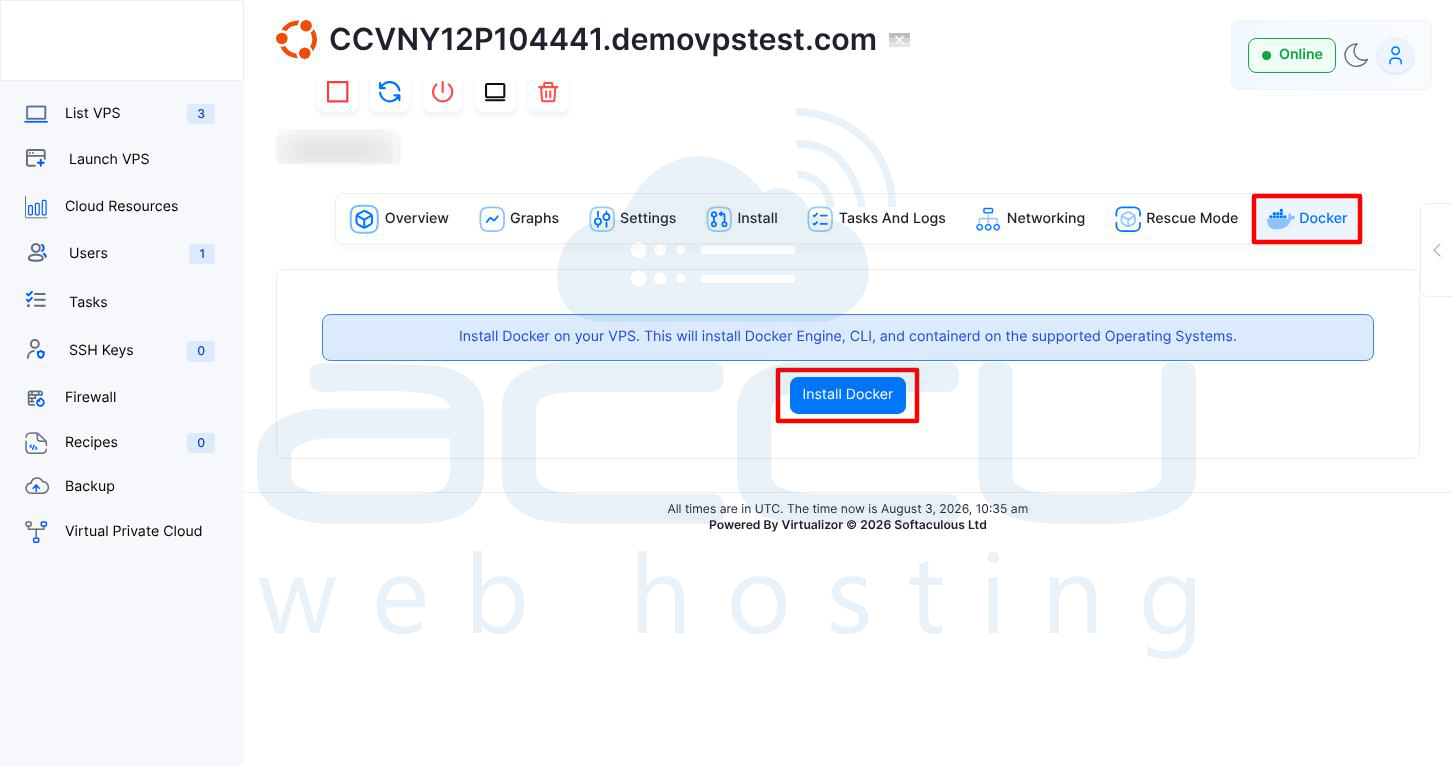
Step 3: From the VPS management interface, locate the navigation menu or tabs. Look for the Docker option and click it. The Docker section provides tools for managing Docker directly from Virtualizor.
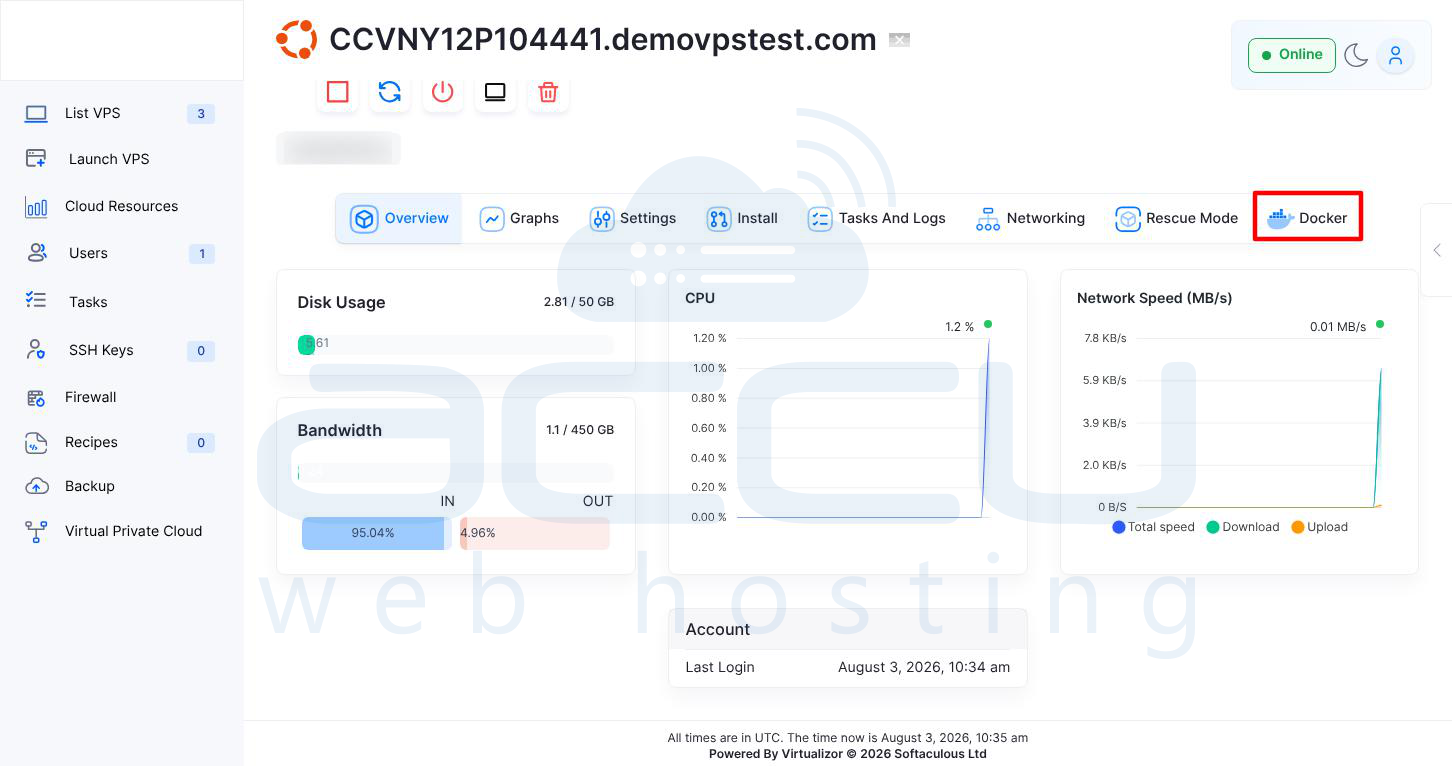
Step 4: One of the main advantages of Virtualizor's Docker integration is that you do not need to manually install Docker packages from the Linux command line. Look for the Install Docker button. Click Install Docker.
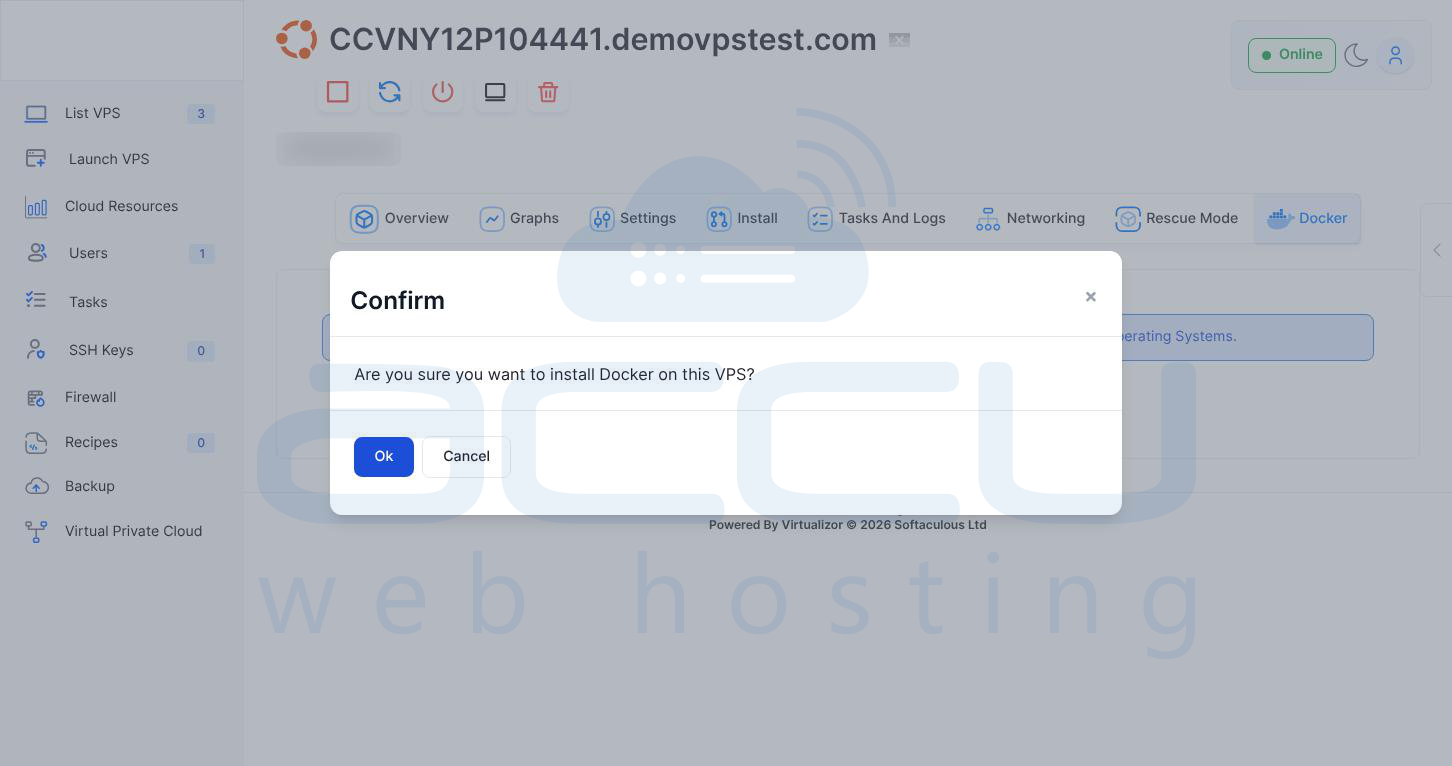
Virtualizor may display a confirmation message similar to: Are you sure you want to install Docker on this VPS? Review the confirmation and click OK or Confirm.
Virtualizor will then begin the Docker installation process. The installer automatically installs the required Docker components.
These typically include:
Docker Engine: Docker Engine is responsible for running and managing containers on the VPS.
Docker CLI: The Docker Command Line Interface allows you to manage Docker using commands such as docker ps, docker images, docker run, docker stop, and docker start.
Containerd: containerd is a container runtime component used by Docker to manage the container lifecycle.
The installation may take several minutes depending on VPS performance, Internet connectivity, Package download speed, and Operating system configuration.
Once the installation has completed successfully, Docker should be ready to use.
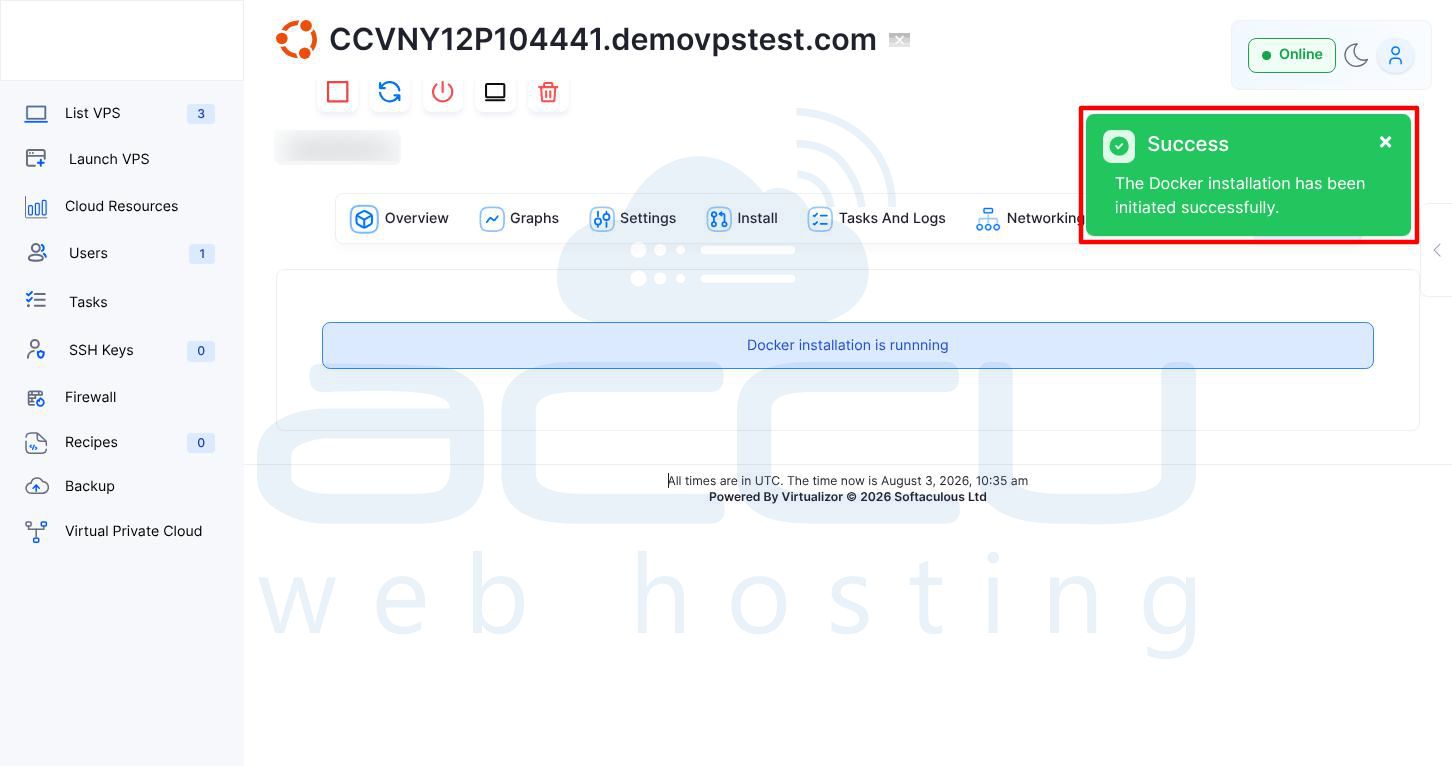
Step 5: After Docker has been installed successfully, return to the Docker section of the Virtualizor VPS management panel.
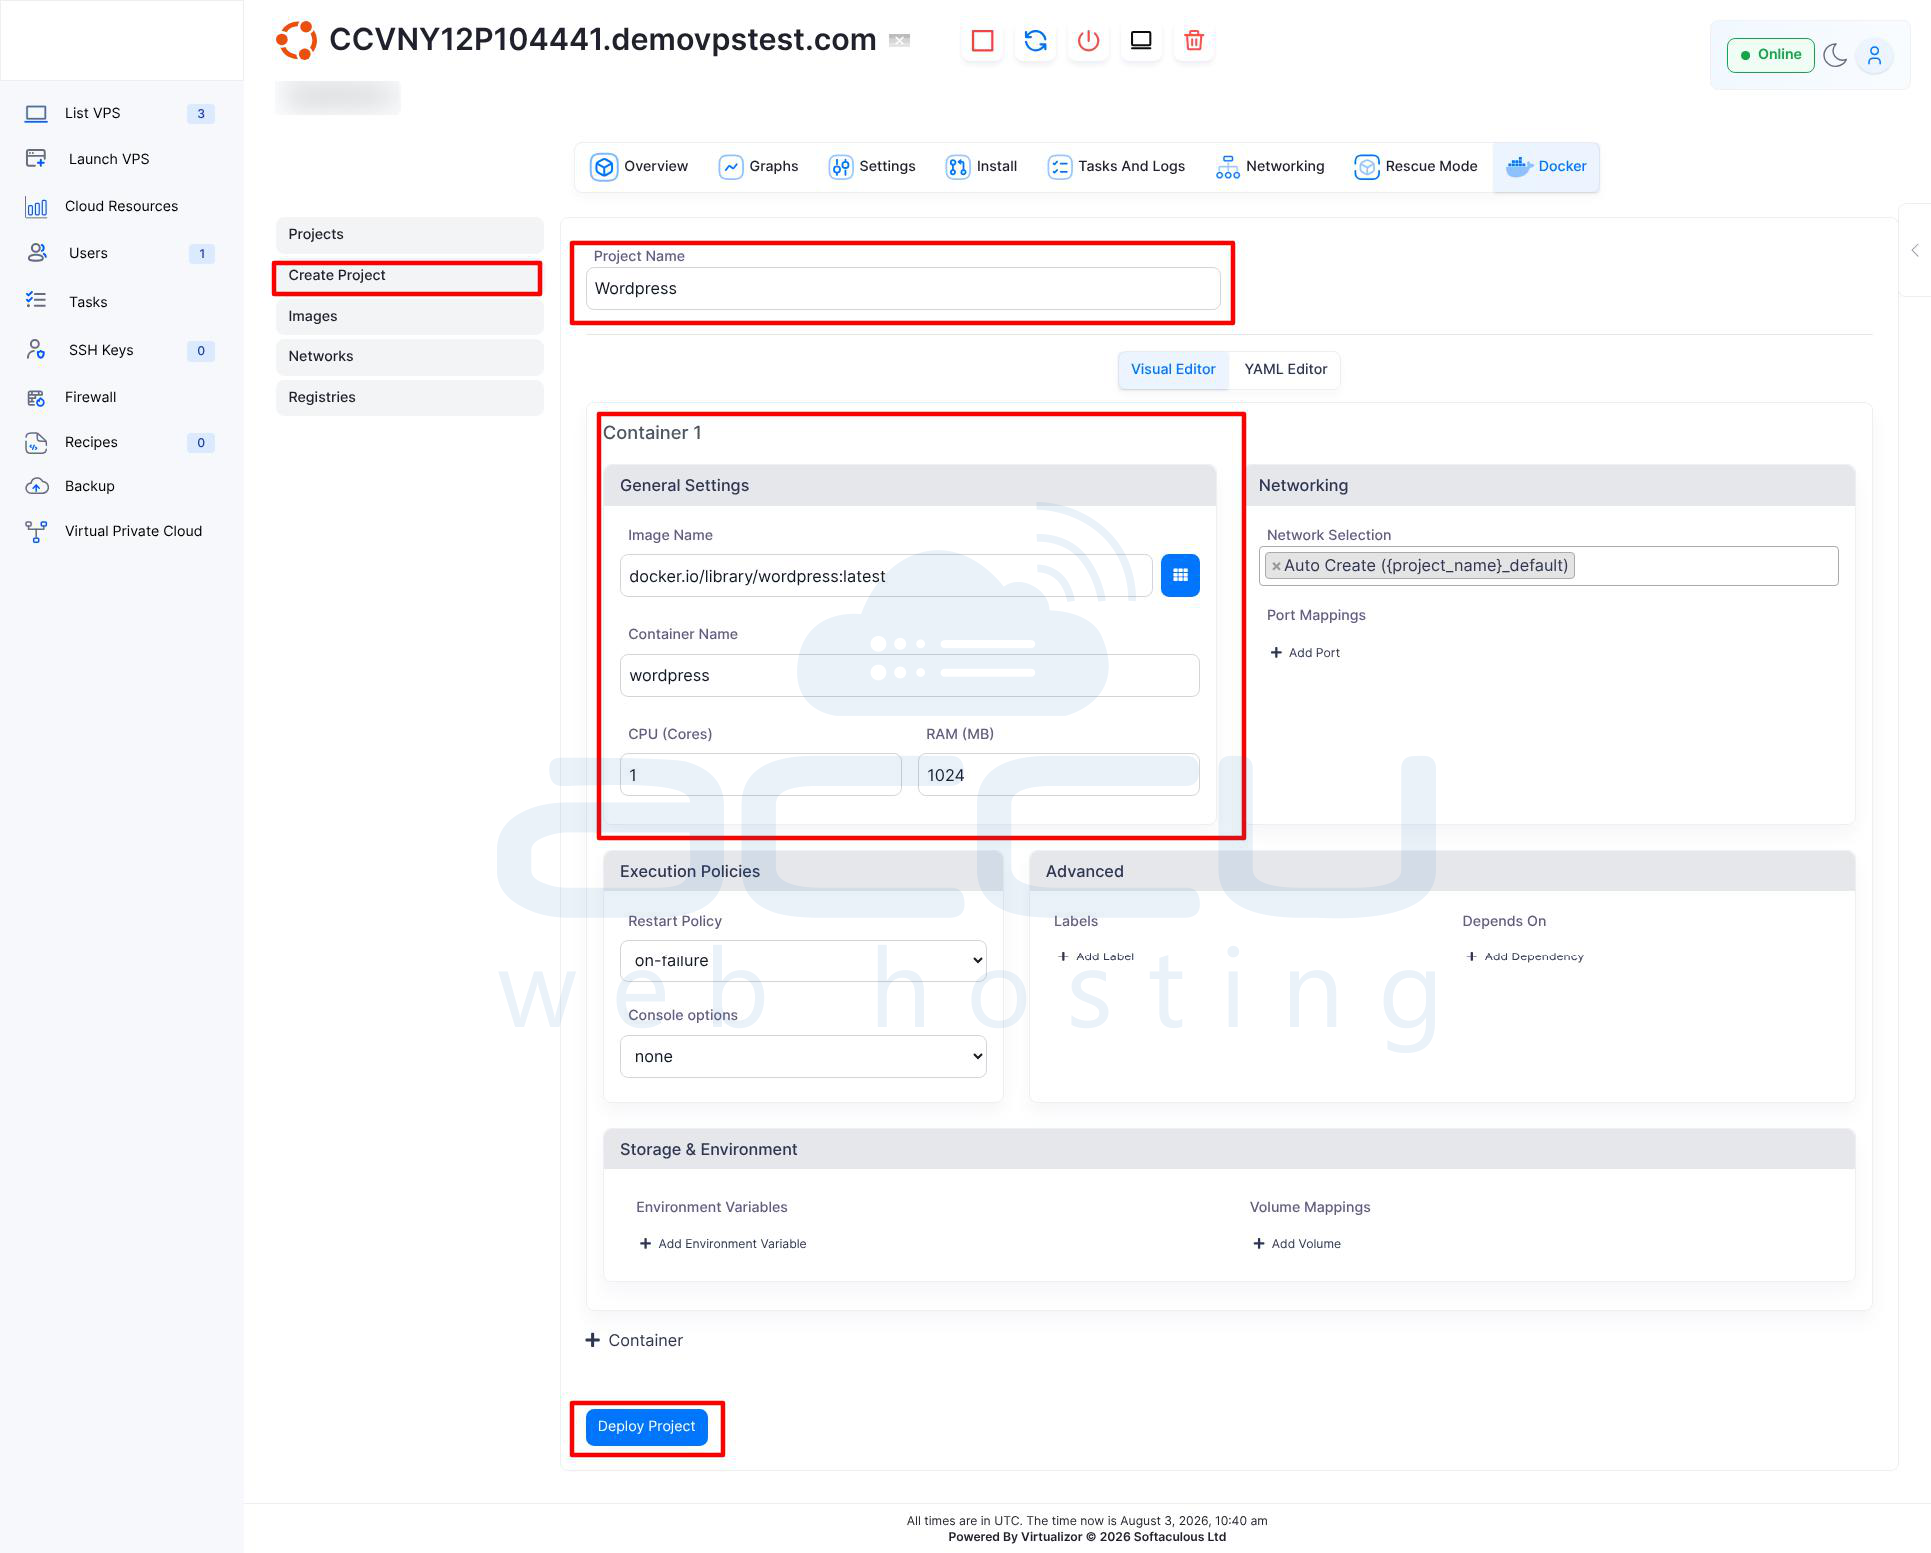
From the Docker navigation menu, click: Create Project
The Create Project page allows you to define the Docker application you want to deploy. Instead of manually executing multiple Docker commands, you can provide the required information through the Virtualizor interface.
Step 6: The exact fields available may vary depending on your Virtualizor version and Docker integration.
Project Name: Enter a descriptive name for your project.
Image Name: Specify the Docker image that should be used for the container. For example: docker.io/library/wordpress:latest
The image determines which application and software environment will be deployed.
Depending on your requirements, you may use images from Docker Hub or another supported container registry.
Examples include images for: WordPress, NGINX, Apache, MySQL, MariaDB, Redis, Node.js, Python, Ubuntu, or Debian.
Always verify that the image you intend to use is compatible with your application requirements.
Container Name: Enter a unique name for the Docker container.
For example: wordpress
Step 7: Depending on the Virtualizor interface, you may be able to assign resources to the Docker project or container.
Step 8: After entering the required project information, carefully review the configuration. Scroll to the bottom of the page. Click: Deploy Project
Virtualizor will begin the deployment process.
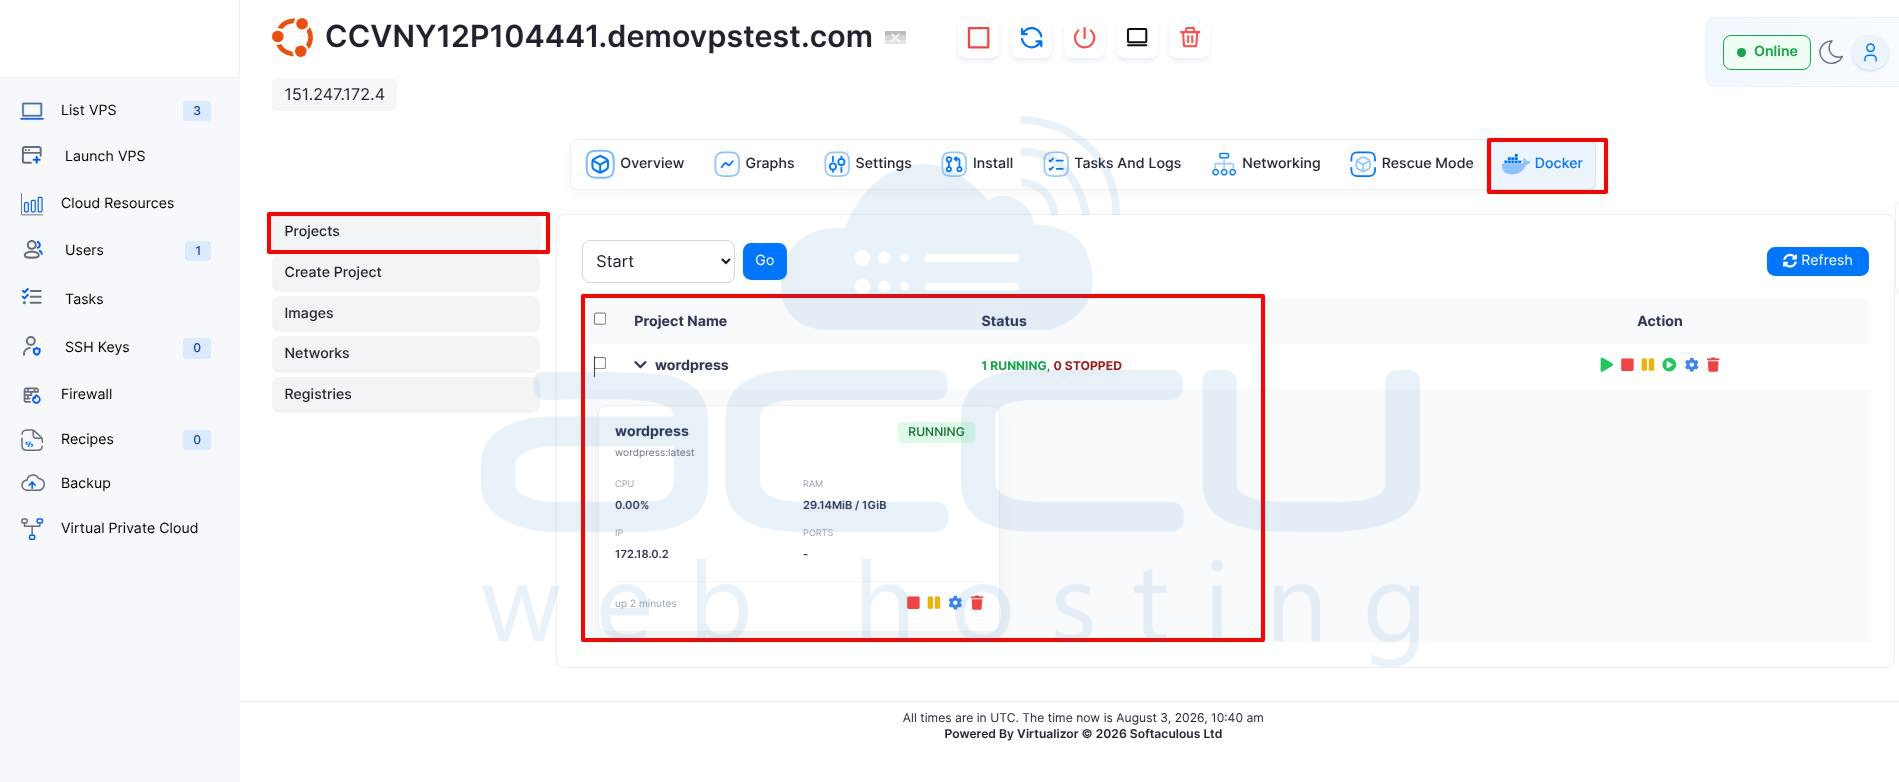
Step 9: After the project has been deployed, open the Docker section again. Click: Projects
The Projects page provides an overview of the Docker applications deployed on your VPS. Depending on your Virtualizor version, you may see information such as Project name, Container status, CPU usage, Memory usage, Container IP address, Container details, Resource allocation, and Deployment information. This allows you to manage your Docker applications from a centralized interface.
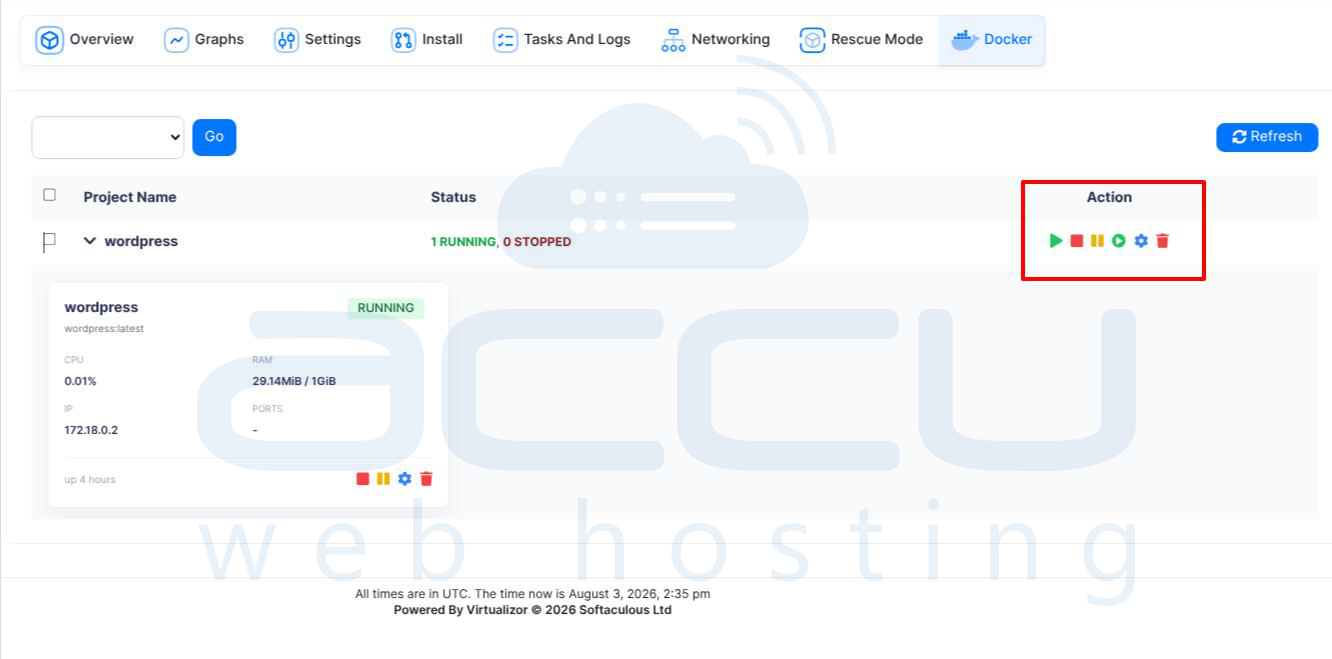
Docker Project Management Actions
Virtualizor provides several actions that can be used to manage deployed Docker containers.
Start: The Start option starts a stopped Docker container.
Stop: The Stop option stops a running Docker container.
Pause: The Pause option temporarily suspends processes inside the container without completely stopping or removing it. This can be useful for temporary resource management or maintenance scenarios.
Settings: The Settings option allows you to modify available container or project configuration.
Delete: The Delete option removes the Docker project and associated container resources.
Verify the Docker Installation
Although Virtualizor provides an automated installer, it is recommended to verify the installation from the VPS after the installation completes.
Connect to the VPS using SSH.
For example: ssh root@YOUR_VPS_IP
Once connected, perform the following checks.
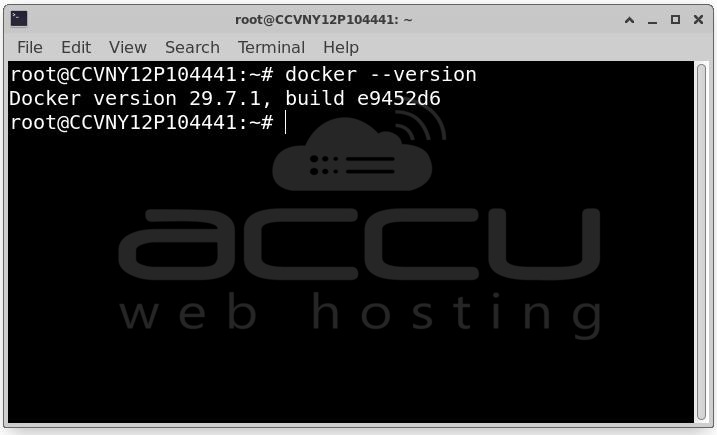
Verify Docker CLI Installation
Run: docker --version
A successful installation should return the installed Docker version.
For example: Docker version 28.3.2, build 578ccf6
The exact version may differ depending on the Docker version installed by Virtualizor.
If you receive: docker: command not found
The Docker CLI may not have been installed correctly, or the executable may not be available in the current system PATH. In that situation, review the Virtualizor installation status and check the Docker installation logs.
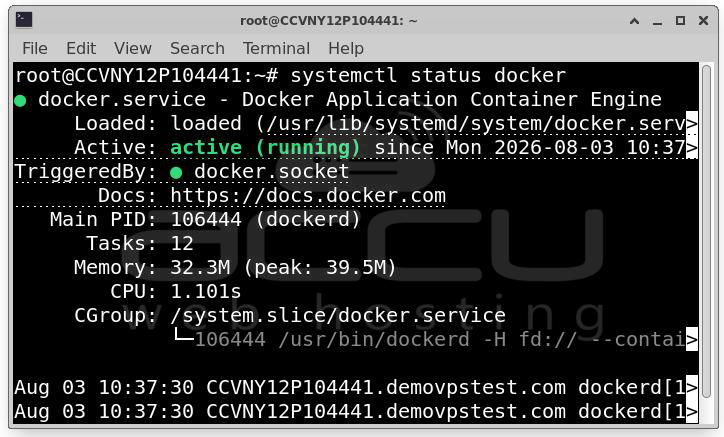
Check the Docker Engine Service
Next, verify that the Docker service is running.
Run: systemctl status docker
You can also use: service docker status
A correctly running Docker service should show a status similar to: Active: active (running)
This indicates that the Docker daemon is currently running.
Verify Docker Engine Functionality
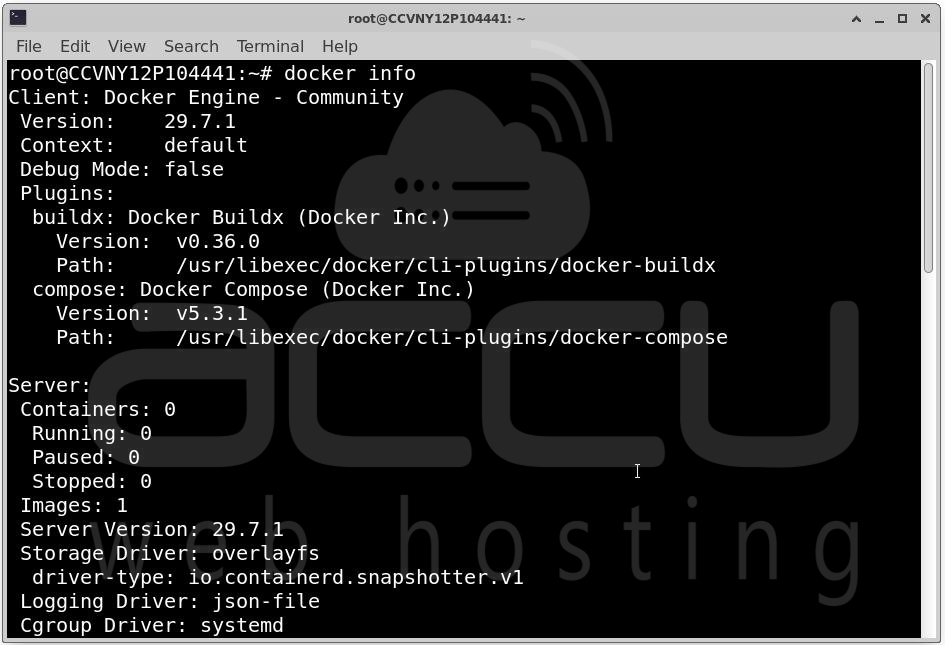
Run: docker info
This command communicates with the Docker daemon and displays detailed information about the Docker installation.
Verify containerd Installation
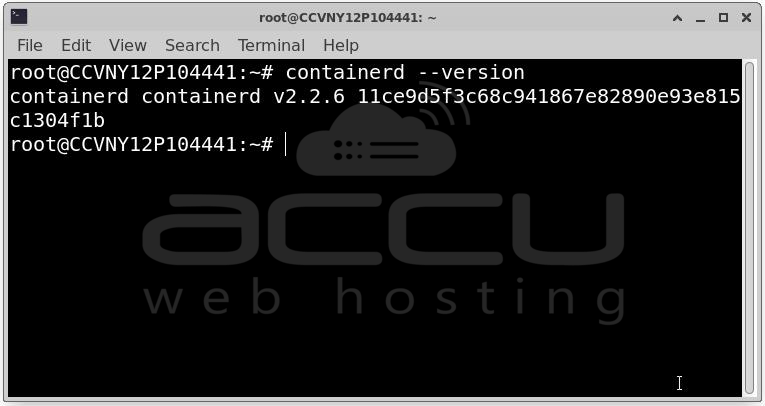
Since containerd is one of the components used by Docker, you can verify its installation separately.
Run: containerd --version
Example output: containerd github.com/containerd/containerd 2.1.3
The exact version may be different on your VPS.
A version response confirms that the containerd binary is installed and available.
Check the containerd Service
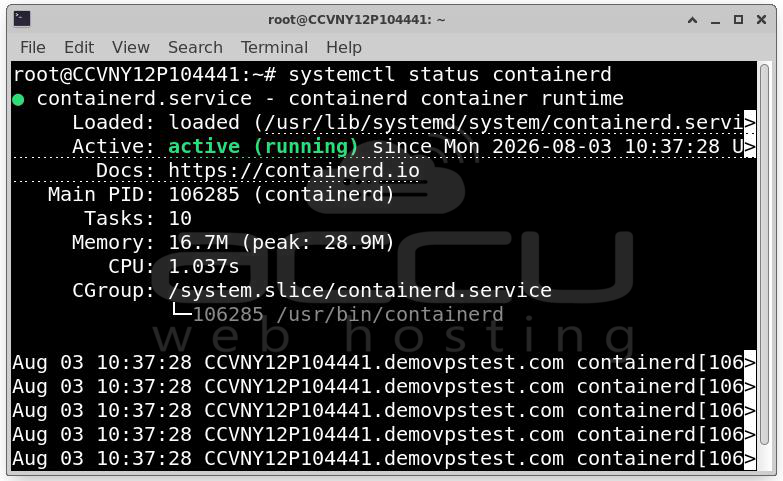
You can also verify the containerd service using: systemctl status containerd
A healthy service should show: Active: active (running)
If containerd is not running, review the service status and system logs before attempting to restart it.
Check Running Containers
After successfully running the Hello World container, you can list Docker containers.
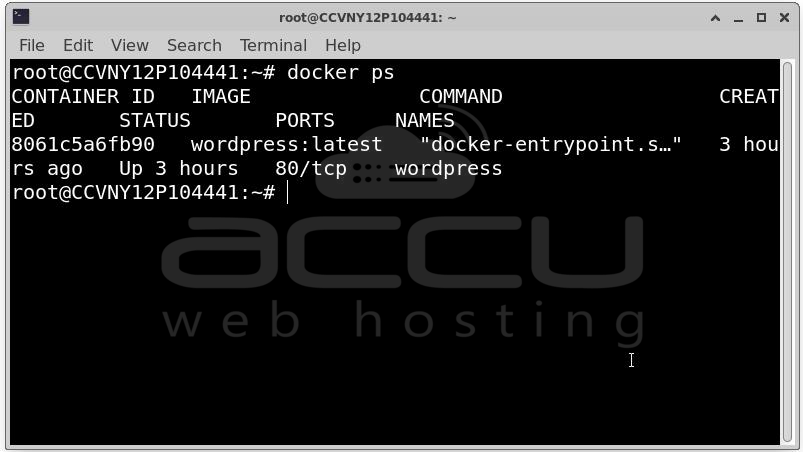
Run: docker ps
This command displays currently running containers.
Conclusion
Virtualizor's One-Click Docker Installer provides a convenient way to install Docker on a Linux VPS without manually configuring Docker repositories, packages, and dependencies.
Instead of performing a lengthy command-line installation, you can install Docker directly through the Virtualizor End-User Panel. Once installed, the Virtualizor Docker interface can be used to create projects, deploy containers, allocate resources, and manage Docker applications.
With Docker installed and verified, you can use the Virtualizor interface to simplify container deployment and management while taking advantage of Docker's portability, isolation, and efficient application deployment model.