Hestia Control Panel (HestiaCP) is a lightweight, open-source web hosting control panel designed for managing websites, email accounts, databases, and DNS from a single interface. It is widely used by system administrators and developers who need a fast and efficient alternative to heavier control panels. This guide provides a clear, step by step installation process for HestiaCP on Ubuntu 22.04 LTS, including both regular and custom installation methods.
Important Warning: HestiaCP must be installed on a fresh OS installation. Installing it on an already configured server may cause conflicts and unexpected behavior.
System Requirements
- CPU: Minimum 1 core (64-bit), recommended 4 cores
- RAM: Minimum 1 GB (without SpamAssassin and ClamAV), recommended 4 GB
- Disk: Minimum 10 GB HDD, recommended 40 GB SSD
- Operating System: Supported versions include Ubuntu 22.04 / 24.04 LTS and Debian 11/12, with the latest LTS version recommended
Regular Installation (Recommended)
This method uses the interactive installer with default settings.
Step 1: Before installation, update your server:
apt update && apt upgrade -y

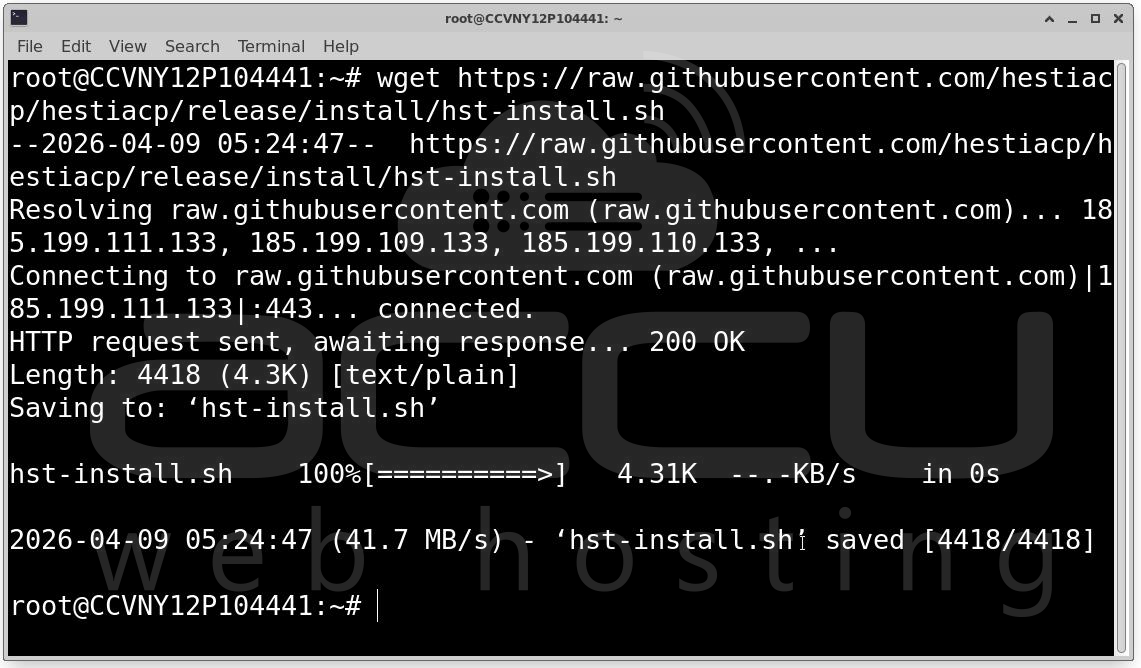
Step 2: Download the latest HestiaCP installer:
wget https://raw.githubusercontent.com/hestiacp/hestiacp/release/install/hst-install.sh
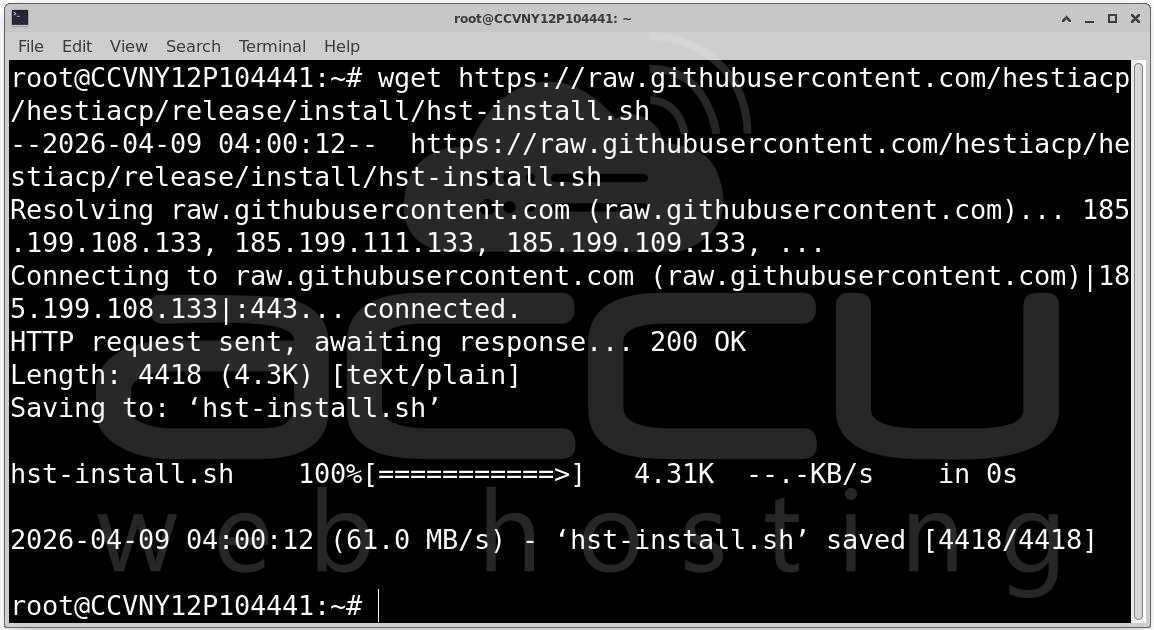
If you encounter an SSL error, install CA certificates:
apt-get update && apt-get install ca-certificates -y

Step 3: Execute the installer:
bash hst-install.sh
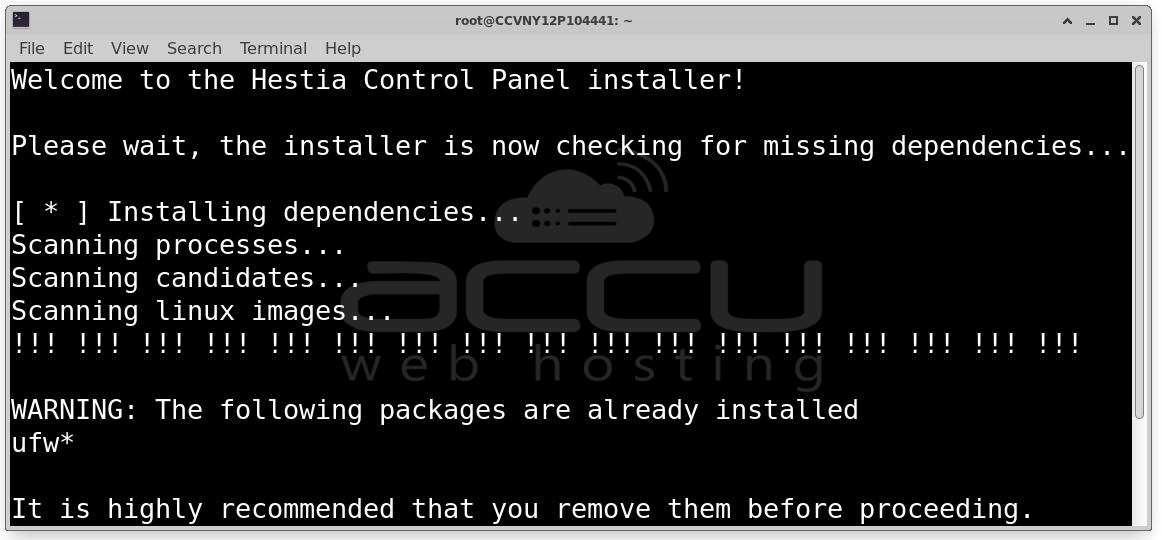
The installer will ask for your confirmation to install the following stack:
- Web Servers: NGINX & Apache (as backend)
- PHP: PHP-FPM Application Server
- DNS & Mail: Bind DNS, Exim Mail, and Dovecot POP3/IMAP
- Database: MariaDB
- Security: Firewall (iptables) + Fail2Ban
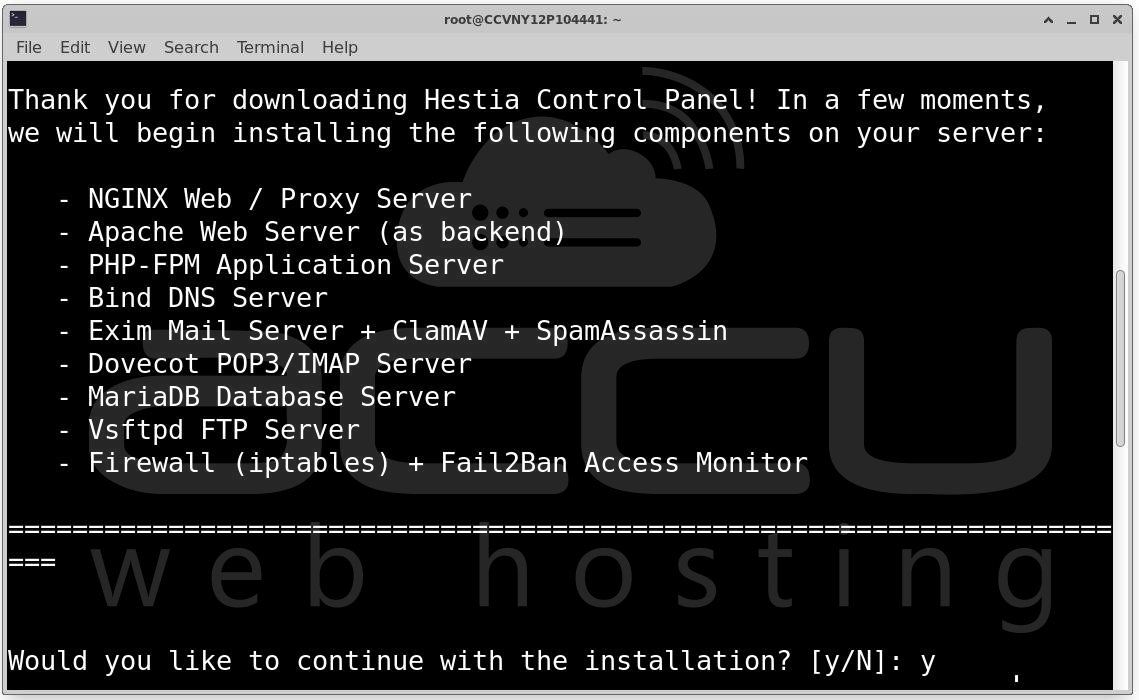
During the process, the terminal will prompt you for administrative details. Be careful here,this info is vital for your first login.
- Admin Username: Usually defaults to admin.
- Admin Password: You can enter a custom one or let the system generate it.
- Email Address: Used for system alerts and SSL notifications.
- FQDN Hostname: Your server’s Fully Qualified Domain Name.
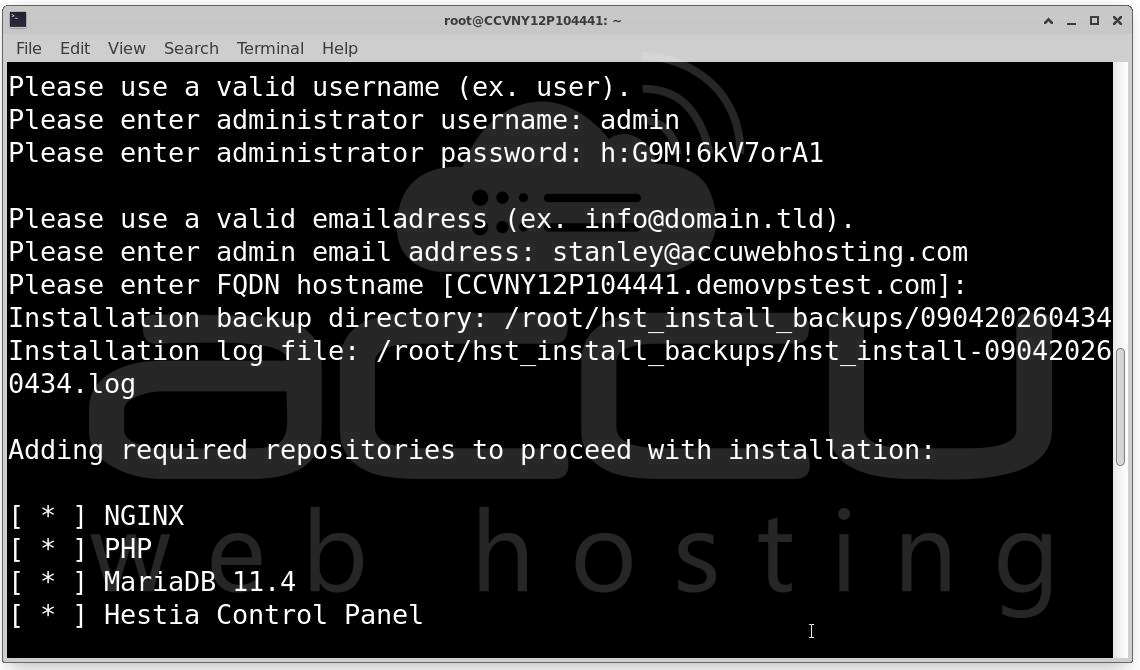
Step 4: The installer will Configure web server (Nginx + Apache), Install database server (MariaDB), Set up mail services and Configure firewall and security tools. Installation may take 10–20 minutes, depending on system performance. After the script finishes adding repositories and installing packages, you will see the Congratulations! screen.
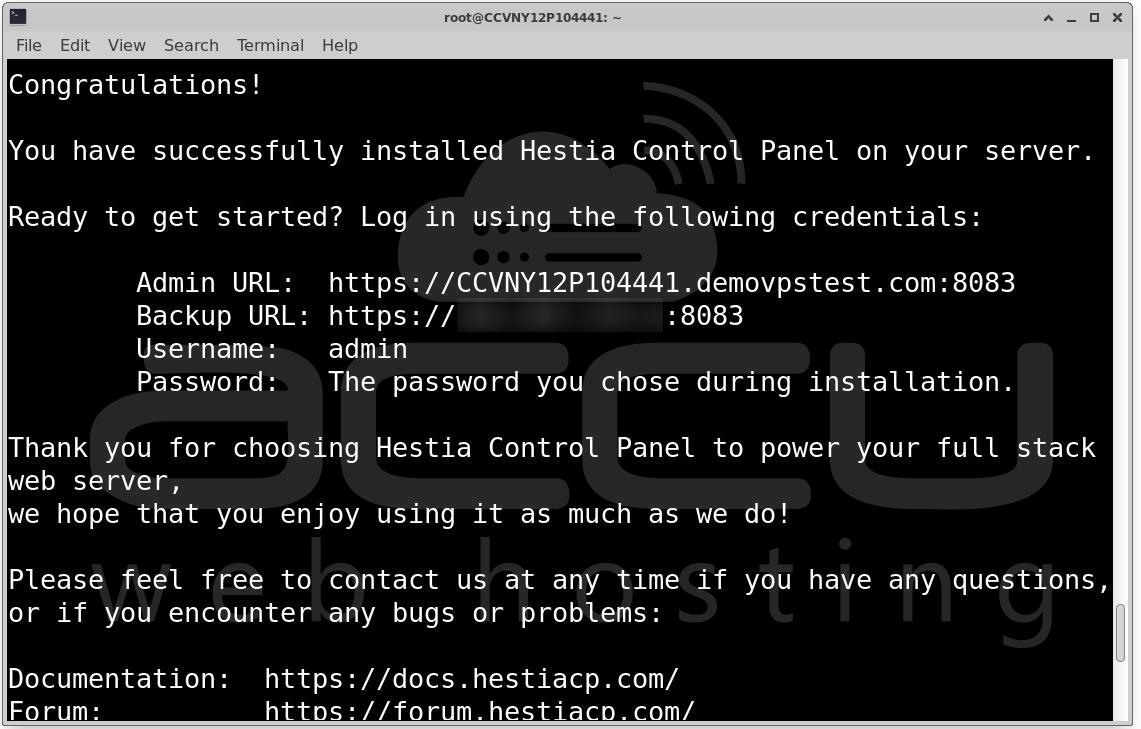
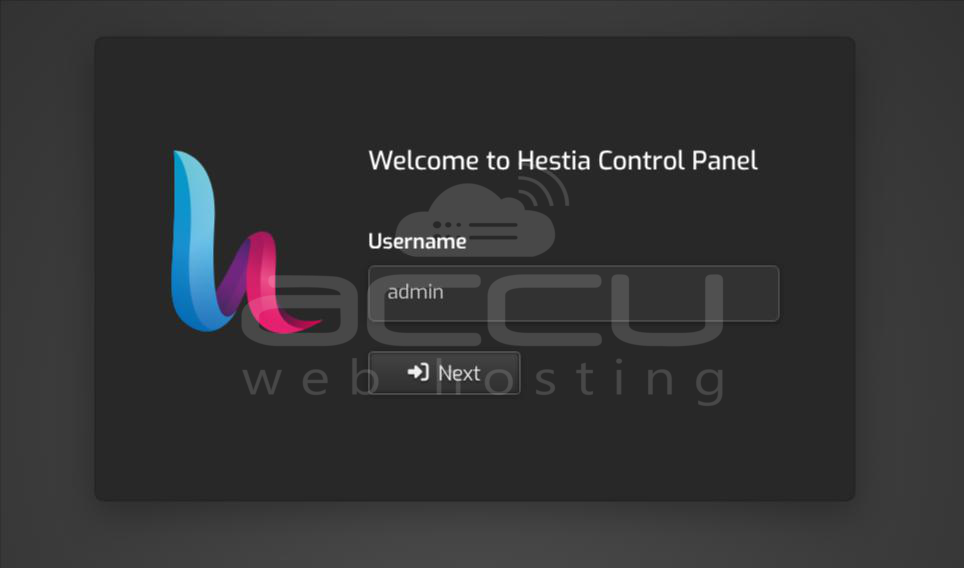
Step 5: Access Hestia Control Panel. After installation, you will see login details.
Access the panel via:
http://your-server-ip:8083 or https://your-domain:8083
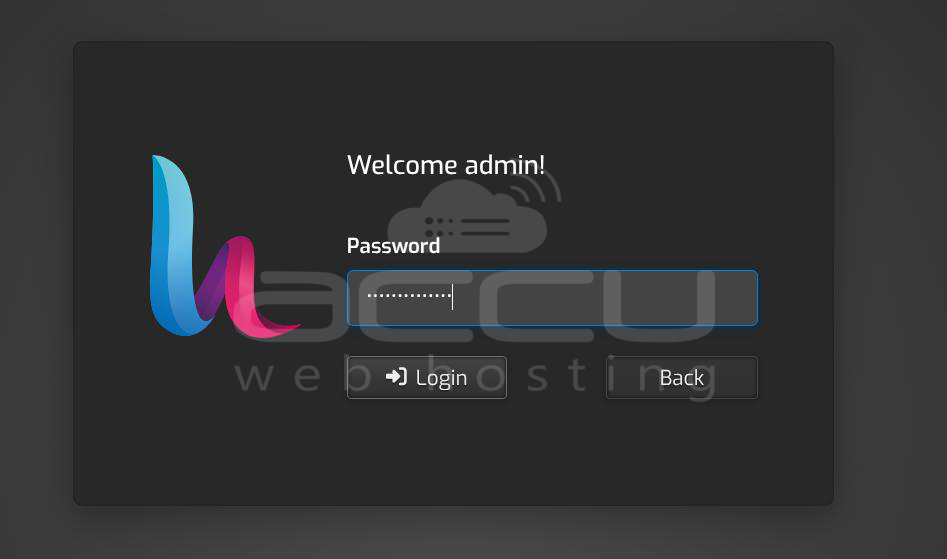
Login using: Username: admin,
Password: The one you set during installation.
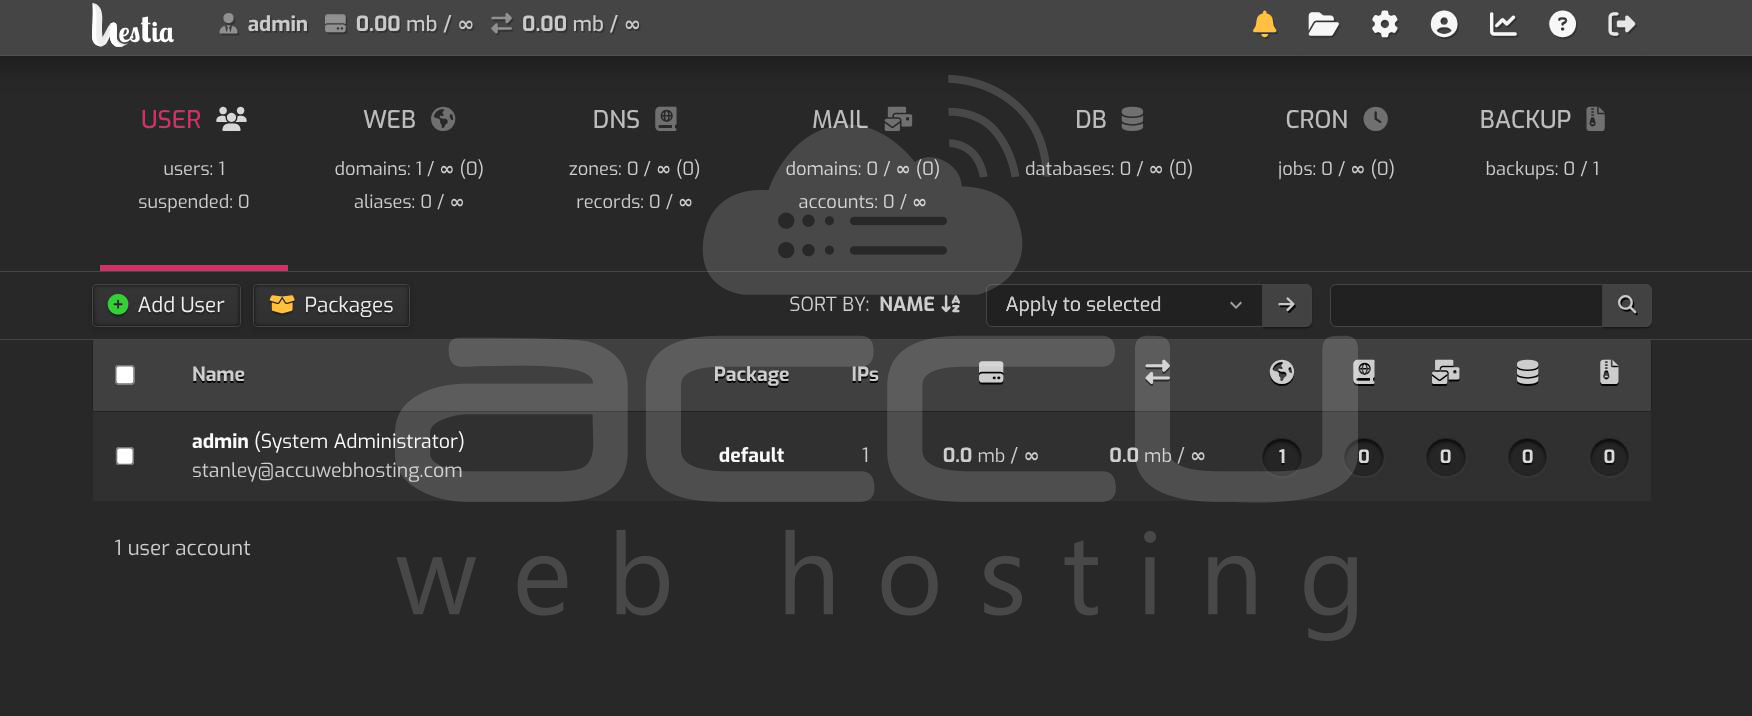
You can now access the HestiaCP web interface to start adding domains, creating databases, and setting up your mail server!
Custom Installation (Advanced)
Use this method if you want to control installed components or automate deployment.
Step 1: Log in to your server and download the installation script:
wget https://raw.githubusercontent.com/hestiacp/hestiacp/release/install/hst-install.sh
Step 2: Visit: https://hestiacp.com/install and Configure options as per your requirements.

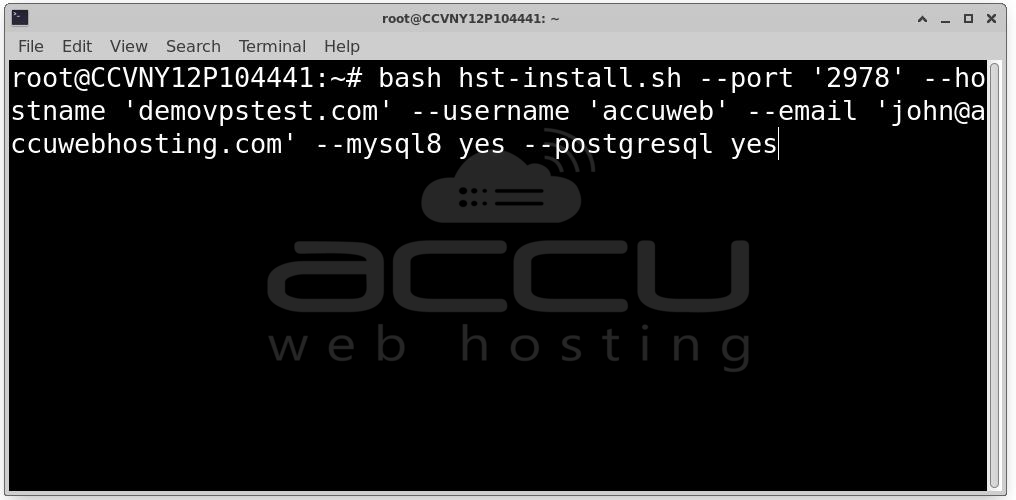
Step 3:You will see a custom command on https://hestiacp.com/install website page. Copy and paste on server terminal. Example Custom Installation
bash hst-install.sh --port '2978' --hostname 'demovpstest.com' --username 'accuweb' --email '[email protected]' --mysql8 yes --postgresql yes
Common WARNING:
While installing you may get the following common blocker during the Hestia Control Panel install on newer Ubuntu systems.
WARNING: Your network configuration may not be set up correctly. Details: The netplan configuration directory is empty.
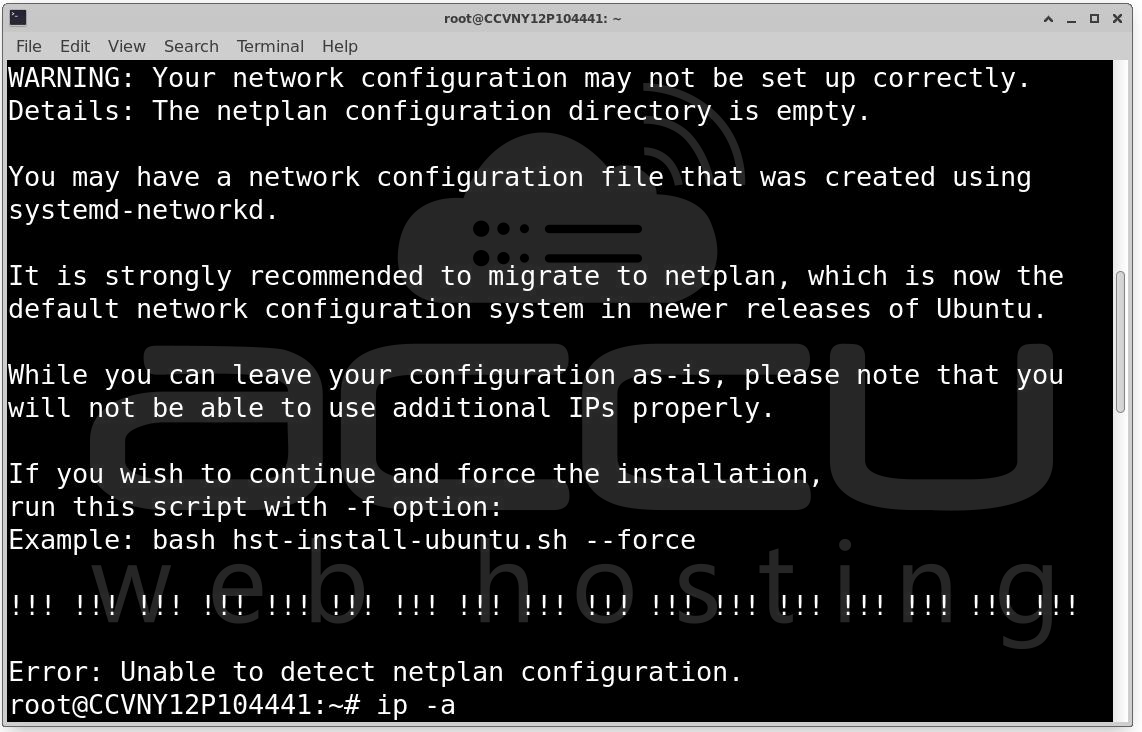
Reason: The installer is expecting Netplan configuration files (usually in /etc/netplan/), but:
- That directory is empty
- Your system is likely using systemd-networkd or another method instead
- Hestia relies on Netplan to properly manage networking (especially for multiple IPs), so it stops the install.
Solution: Create a Netplan config
First, check your network interface name: ip a
Look for something like eth0, ens3, enp0s3, etc.
Then create a Netplan config: nano /etc/netplan/01-netcfg.yaml
network:
version: 2
renderer: networkd
ethernets:
eth0:
addresses:
- YOUR_IP/24
gateway4: YOUR_GATEWAY
nameservers:
addresses: [8.8.8.8, 1.1.1.1]
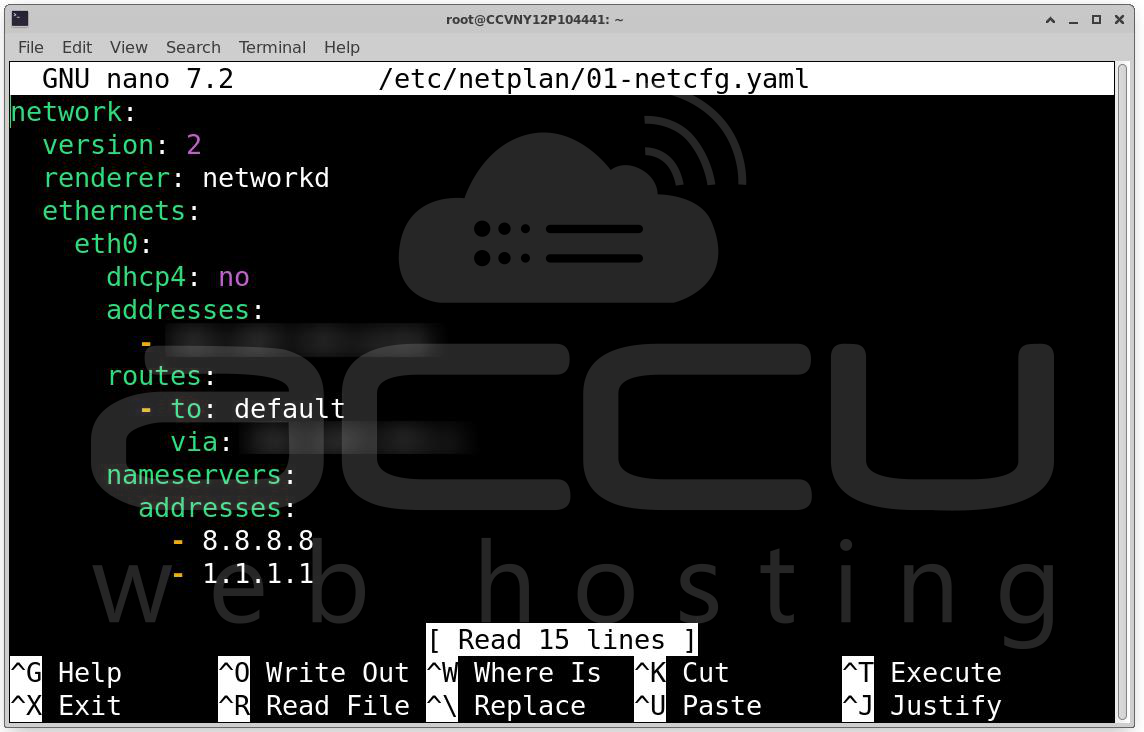
Apply config: netplan apply
Re-run installer: bash hst-install-ubuntu.sh
Once Netplan exists, the installer will proceed normally.
Congratulations! Hestia Control Panel Installed Successfully. Your server setup is now complete, and Hestia Control Panel (HestiaCP) has been installed successfully.
VPS Hosting for Hestia: To host your own Hestia Control Panel, consider a AccuWeb Hosting Linux VPS: https://www.accuwebhosting.com/vps-hosting/linux
Conclusion
Installing Hestia Control Panel on Ubuntu 22.04 is a straightforward process when performed on a clean system. The interactive installer is ideal for beginners, while the custom installation provides flexibility for advanced users.
With HestiaCP, you get a powerful yet lightweight hosting control panel capable of managing multiple websites, databases, and email services efficiently. Proper planning of system resources and installation options ensures optimal performance and scalability.
Once installed, you’re ready to deploy and manage your hosting environment with ease.
