How to Install 2FAuth on Ubuntu 24 VPS?
Introduction:
Setting up secure two-factor authentication is an important step in protecting your online accounts and sensitive data. 2FAuth is a simple and user-friendly self-hosted solution that allows you to manage your 2FA tokens in one place.
In this article, we will walk you through the step-by-step process of installing 2FAuth on an Ubuntu 24 VPS using Docker. The instructions are designed to be clear and beginner-friendly, so even if you are new to server management, you can follow along with ease.
Prerequisites:
Before you begin, make sure you have:
-
Ubuntu 24 VPS
-
Root or sudo access
Step 1: Update Your Server
Start by updating your system packages:
sudo apt update && sudo apt upgrade -y
Step 2: Install Required Dependencies
Install necessary packages:
sudo apt install ca-certificates curl gnupg lsb-release -y
Step 3: Install Docker
Add Docker GPG Key:
sudo install -m 0755 -d /etc/apt/keyrings

curl -fsSL https://download.docker.com/linux/ubuntu/gpg | \
sudo gpg --dearmor -o /etc/apt/keyrings/docker.gpg

sudo chmod a+r /etc/apt/keyrings/docker.gpg
Add Docker Repository:
echo \
"deb [arch=$(dpkg --print-architecture) signed-by=/etc/apt/keyrings/docker.gpg] \
https://download.docker.com/linux/ubuntu \
$(lsb_release -cs) stable" | \
sudo tee /etc/apt/sources.list.d/docker.list > /dev/null
Update Package List:
sudo apt update
Install Docker and Compose:
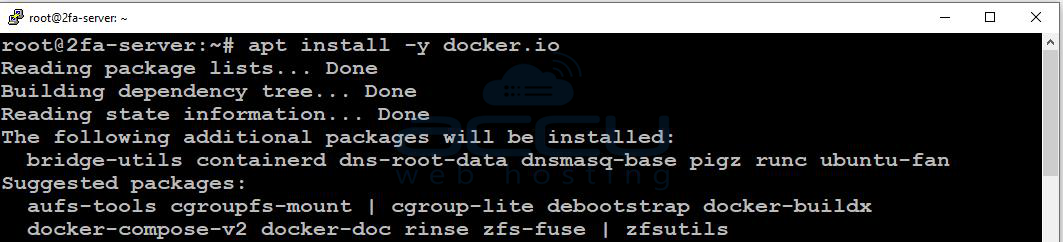
sudo apt install -y docker.io
sudo apt install docker-compose-plugin -y
Start and Enable Docker Service:
sudo systemctl enable docker
sudo systemctl start docker
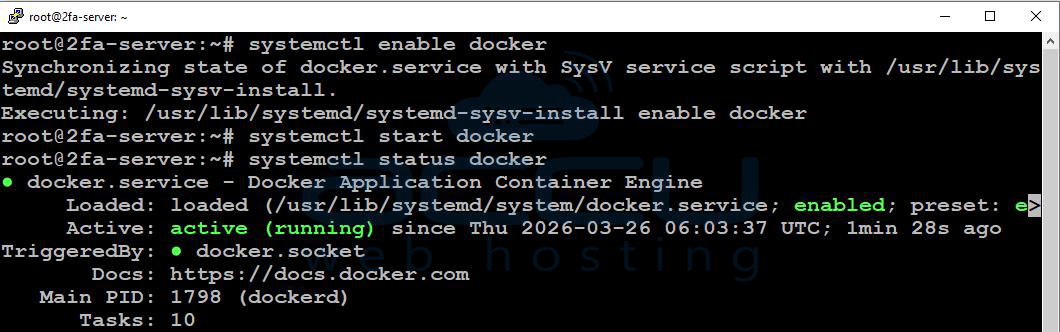
Step 4: Verify Installation
docker --version
docker compose version

You should see output similar to:
Docker version 26.x.x
Docker Compose version v2.x.x
Step 5: Create Project Directory
mkdir -p /opt/2fauth/data
cd /opt/2fauth
Step 6: Create Database File
touch /opt/2fauth/data/database.sqlite
chmod -R 775 /opt/2fauth/data
Step 7: Generate APP_KEY
Run the following command:
openssl rand -base64 32
Example output:
base64:xxxxxxxxxxxxxxxxxxxxxxxxxxxxxxxxxxxx
👉 Copy and save this key. You will use it in the next step.
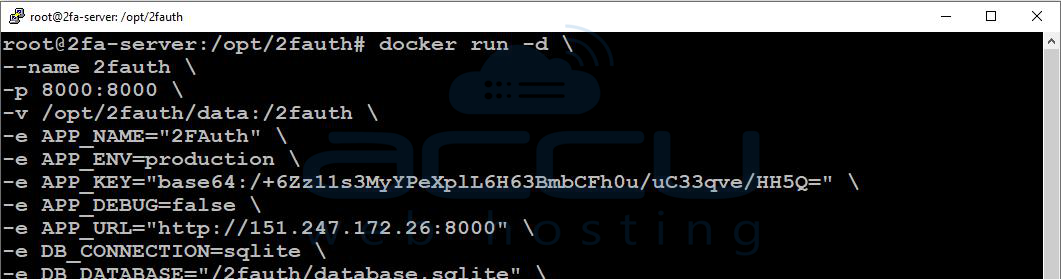
Step 8: Run 2FAuth Container
docker run -d \
--name 2fauth \
-p 8000:8000 \
-v /opt/2fauth/data:/2fauth \
-e APP_NAME="2FAuth" \
-e APP_ENV=production \
-e APP_KEY="base64:YOUR_GENERATED_KEY" \
-e APP_DEBUG=false \
-e APP_URL="http://YOUR_SERVER_IP:8000" \
-e DB_CONNECTION=sqlite \
-e DB_DATABASE="/2fauth/database.sqlite" \
--restart unless-stopped \
2fauth/2fauth:latest
👉 Replace:
-
YOUR_GENERATED_KEYwith your generated APP_KEY -
YOUR_SERVER_IPwith your VPS IP address
Step 9: Verify Container Status
Check if the container is running:
docker ps
You should see:
0.0.0.0:8000->8000/tcp
Access 2FAuth
Open your browser and visit: http://YOUR_SERVER_IP:8000
You should now see the 2FAuth setup or login page.
1. Click on the Register link to create a new account.

2. On the next page, enter the username, email account, and password, and click on the Register button to create an account.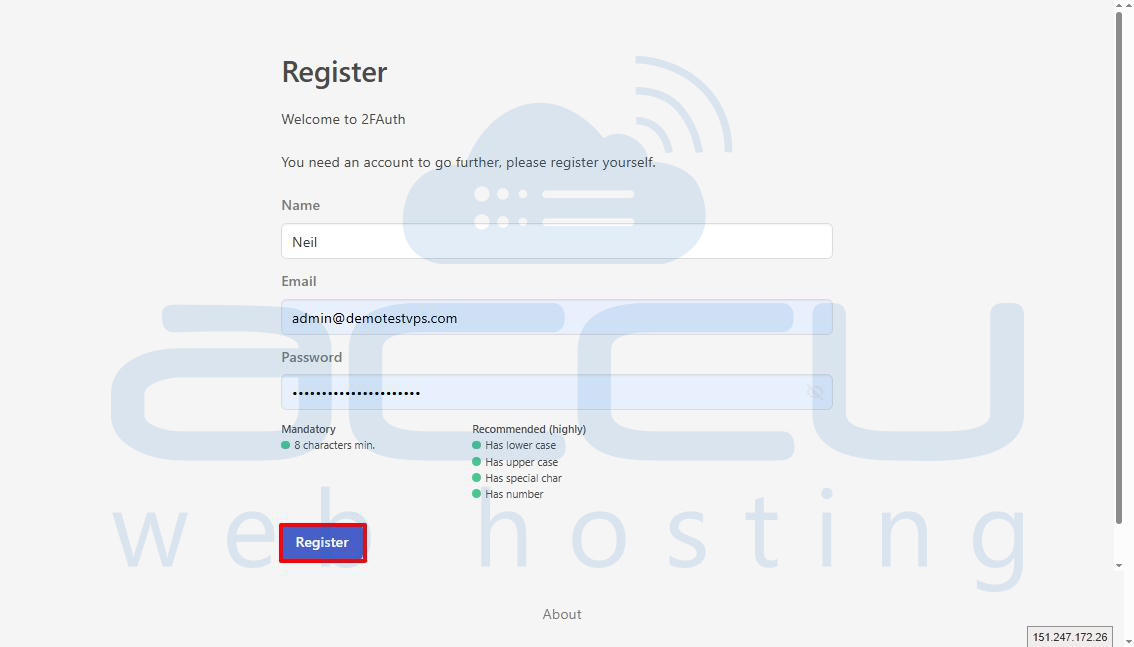
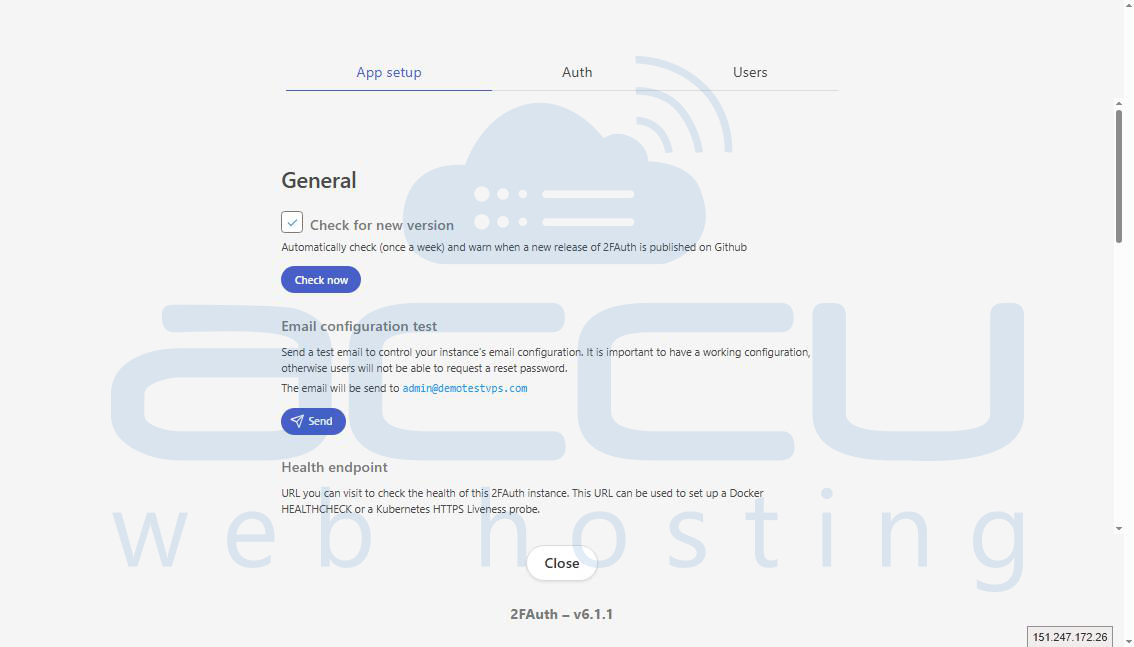
You will be redirected to the 2FA admin dashboard from where you can manage the Auth and User settings.
Conclusion:
By following the steps in this guide, you can install 2FAuth on your Ubuntu 24 VPS. This setup is ideal for testing or personal use.
If you encounter any issues during installation, please feel free to contact us via chat or support. Our support team will assist you with the installation process.
