Introduction:
Cloning a VPS refers to creating an identical copy of an existing virtual server, including its configuration and data. With Virtualizor, this process is made easy through a simple wizard in the admin panel, eliminating the need for manual file transfers or specialized technical expertise.
What is VPS Cloning?
When you clone a VPS, you:
-
Duplicate the server’s disk, settings, and data
-
Have the option to place the clone on the same or a different server
-
Let Virtualizor handle everything automatically
VPS cloning is especially helpful for:
-
Testing changes without affecting the original VPS
-
Creating staging or backup environments
-
Quickly deploying multiple similar VPS instances
Requirements:
For the cloning process to work, both the source and destination servers must be part of the same Virtualizor cluster. Additionally, Virtualizor will power off the VPS during the cloning process, so be sure to save your work beforehand.
Note: Currently, the VPS Clone feature in Virtualizor is only available from the Admin panel (Root or Admin user) and is not accessible to resellers or end users.
However, if you need to clone a VPS, you can simply contact the support team through Live Chat or submit a Support Ticket. They will be happy to assist and perform the cloning process for you quickly.
Step-by-Step Guide: How to Clone a VPS in Virtualizor
Step 1: Log in to the Virtualizor Admin Panel
Step 2: Navigate to the Clone VPS Section
From the left sidebar, go to: Virtual Server → Clone VPS 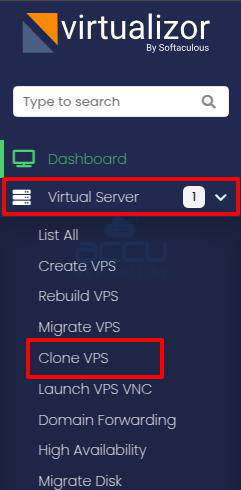
This will open the Clone VPS wizard.
Step 3: Select the Source Server
In the “From Server” dropdown, choose the server that currently hosts the VPS you want to clone. This tells Virtualizor where to copy the VPS data from.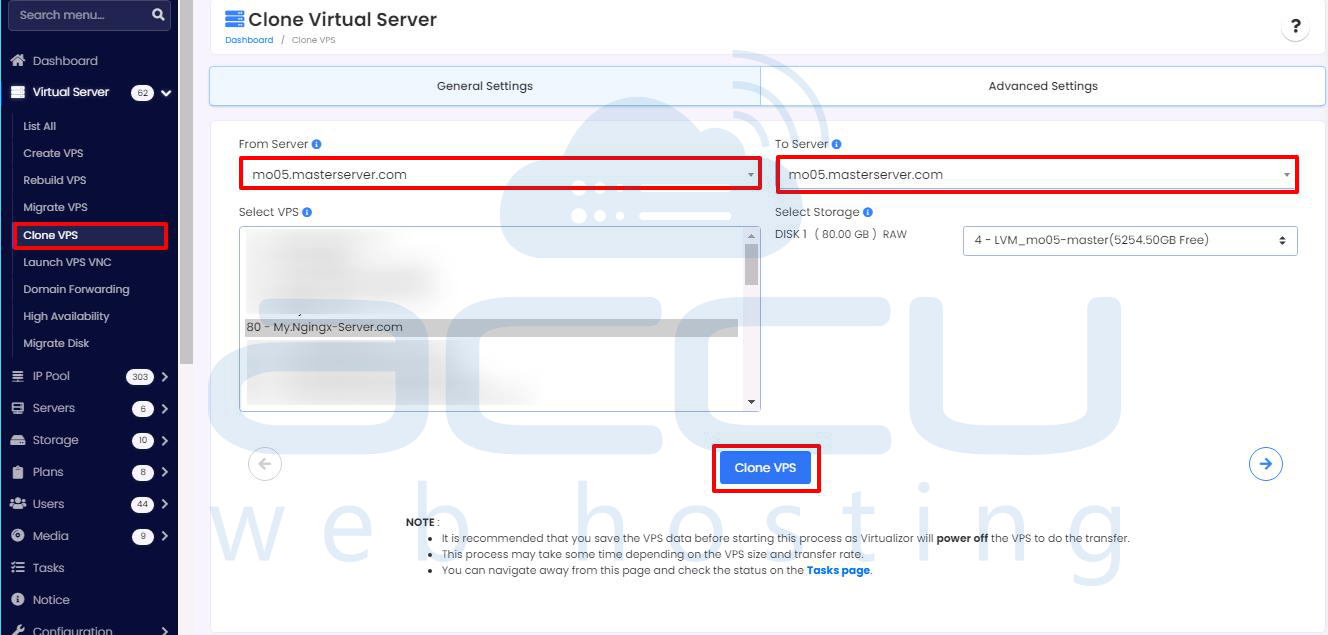
Step 4: Choose the VPS to Clone
After selecting the source server, you will see a list of VPSs hosted on that node. Click on the VPS you wish to clone.
Step 5: Choose the Destination Server
In the “To Server” dropdown, select where the clone should be created. This can be the same server or a different one within your cluster.
Step 6: Set Transfer Options (Optional)
You can adjust some settings to suit your needs:
Speed Limit: Set a data transfer speed if you want to limit the clone performance.
Ignore Domain Forwarding Conflicts: Enable this option if you expect any hostname conflicts.
Disable Compression: Optional, may help improve speed if you’re using a local network.
If you don’t specify a speed limit, Virtualizor will default to 100 Mbps.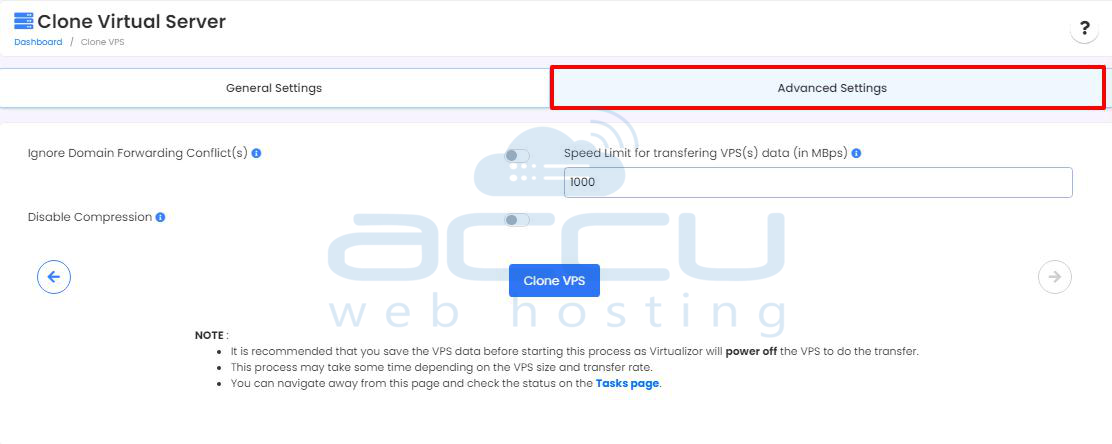
Step 7: Start the Clone
Once everything is set, click on “Clone VPS.” Virtualizor will then:
-
Power off the source VPS
-
Copy its entire configuration and disk data
-
Recreate the VPS on the destination server
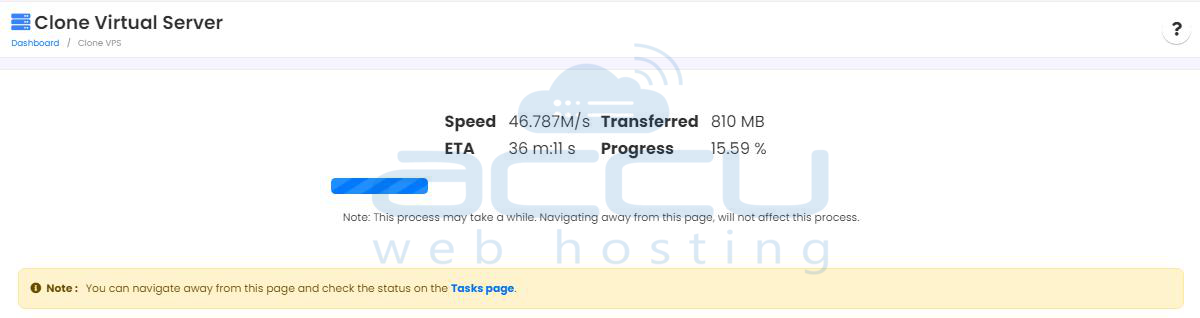
Step 8: Monitor the Progress
You can stay on the page to watch the progress, or navigate to the Tasks page to monitor the task logs and status until the clone is finished.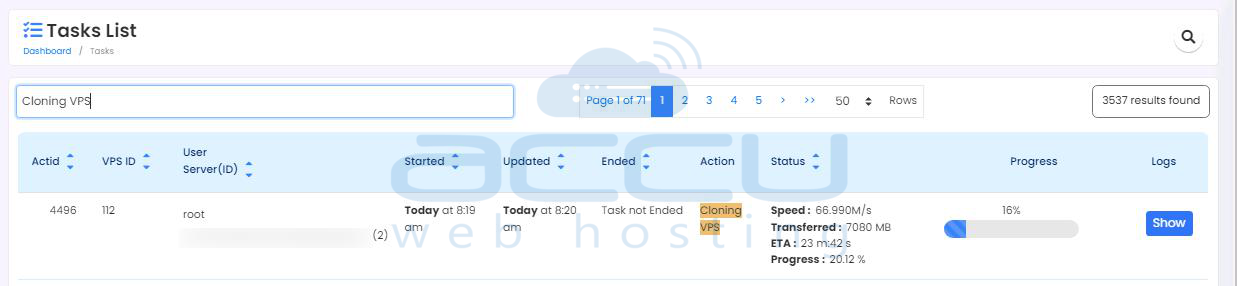
Step 9: Check the New VPS
After the cloning process completes, go to the List Virtual Servers section. Find the newly created VPS, start it up, and ensure that all services and settings are correct.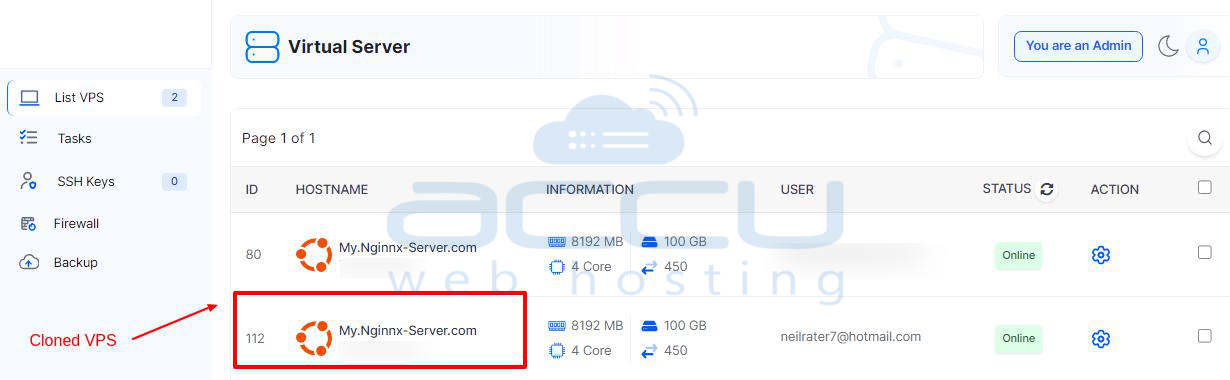
Conclusion:
Cloning a VPS in Virtualizor is a straightforward process that enables you to easily create an exact copy of an existing server. Whether you're testing changes, setting up backup environments, or deploying multiple similar instances, Virtualizor’s user-friendly interface ensures the process is smooth and automated.
By following the simple steps outlined above, you can quickly and safely clone your VPS as needed.
