A Virtual Private Network (VPN) is essential for securing remote access, protecting data, and enabling safe site-to-site communication. OpenVPN Access Server is a powerful and user-friendly VPN solution that integrates seamlessly with Debian Linux systems. In this guide, we’ll walk you through setting up an OpenVPN Access Server on Debian using the official installation method.

OpenVPN Access Server offers a complete, self-hosted VPN solution with enterprise-grade features. It fits perfectly with Debian and provides the Self-hosted VPN solution for full control and privacy, Quick and simplified deployment for remote access and site-to-site VPNs, Web-based administration interface for easy management.
OpenVPN Access Server officially supports the following Debian operating systems:
- Debian 13
- Debian 12
- Debian 11
Steps to Set Up an OpenVPN Server on Debian
Step 1: Before installing OpenVPN Access Server, it’s important to update your system and ensure the correct time zone is configured.
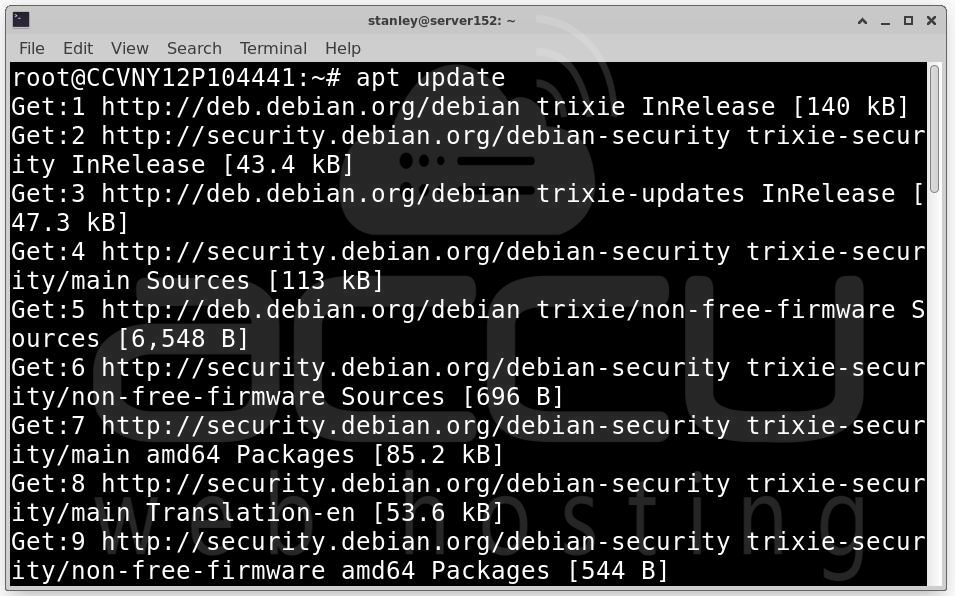
Log in to your Debian server via console or SSH, then switch to the root user or use sudo. Run the following commands to update your system packages:
apt update
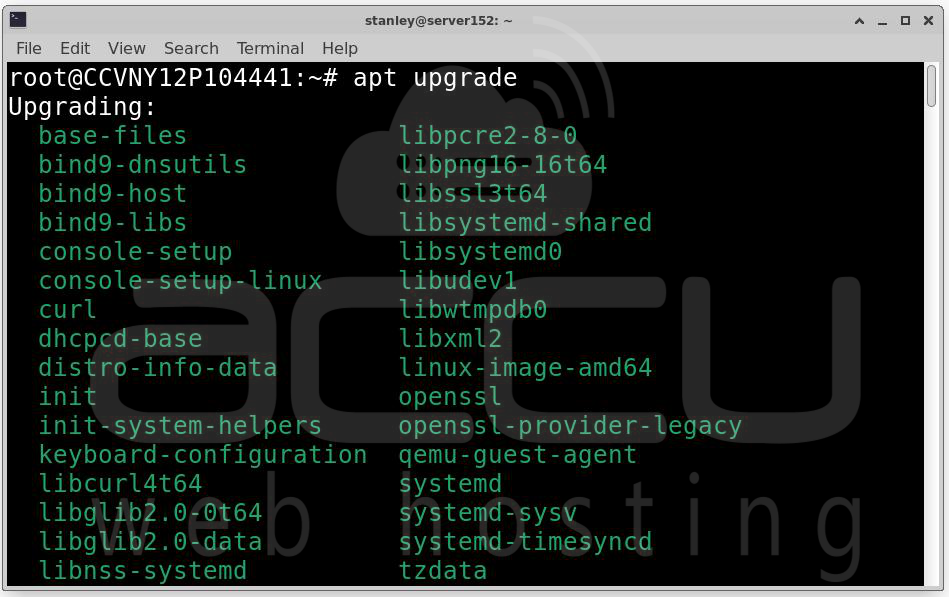
apt upgrade
Step 2: Correct time settings are essential for VPN authentication and certificates.
apt install tzdata
dpkg-reconfigure tzdata
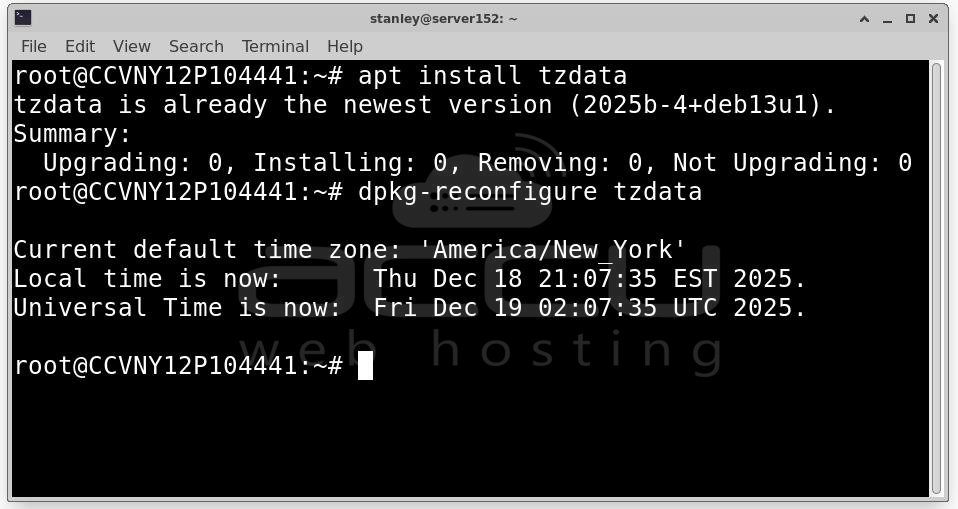
Follow the prompts to select your correct time zone.
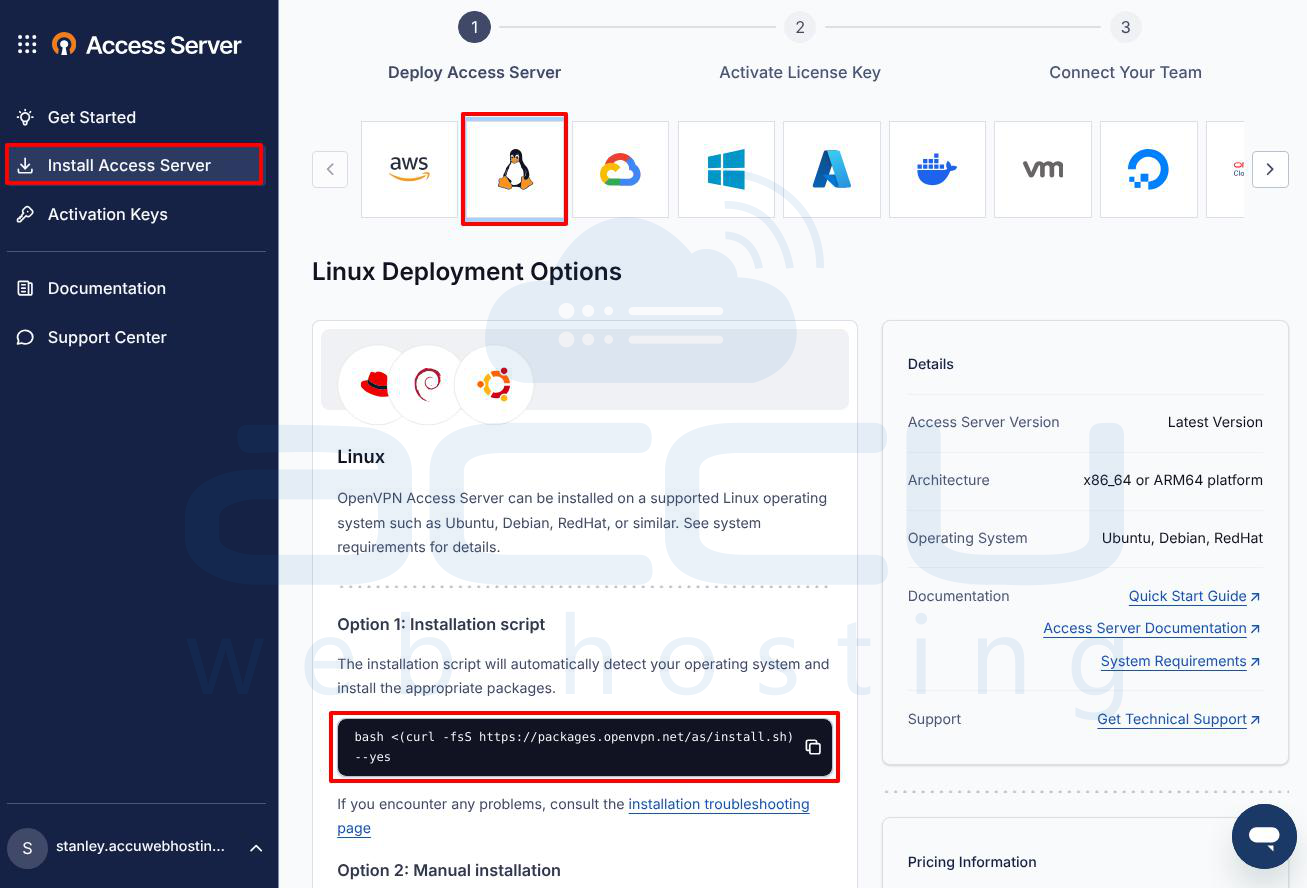
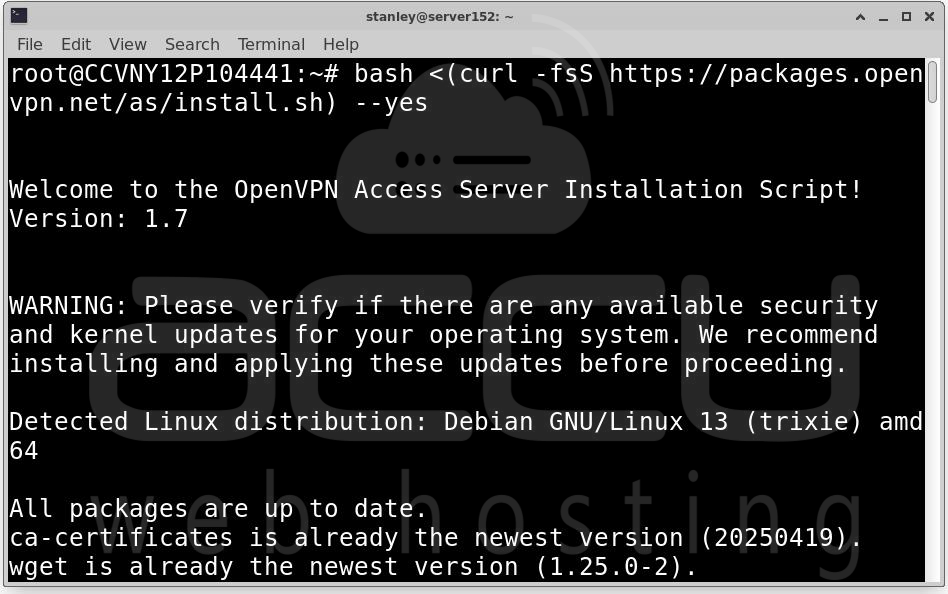
Step 3: OpenVPN provides an official install script that makes deployment fast and straightforward. Visit the OpenVPN website and sign in to your account. Navigate to Get Access Server. Under Install on Linux OS, copy the provided bash command.
Step 4: From your server’s console or SSH session, paste and run the copied command.
The installer will automatically download required packages, Install OpenVPN Access Server and configure default services.
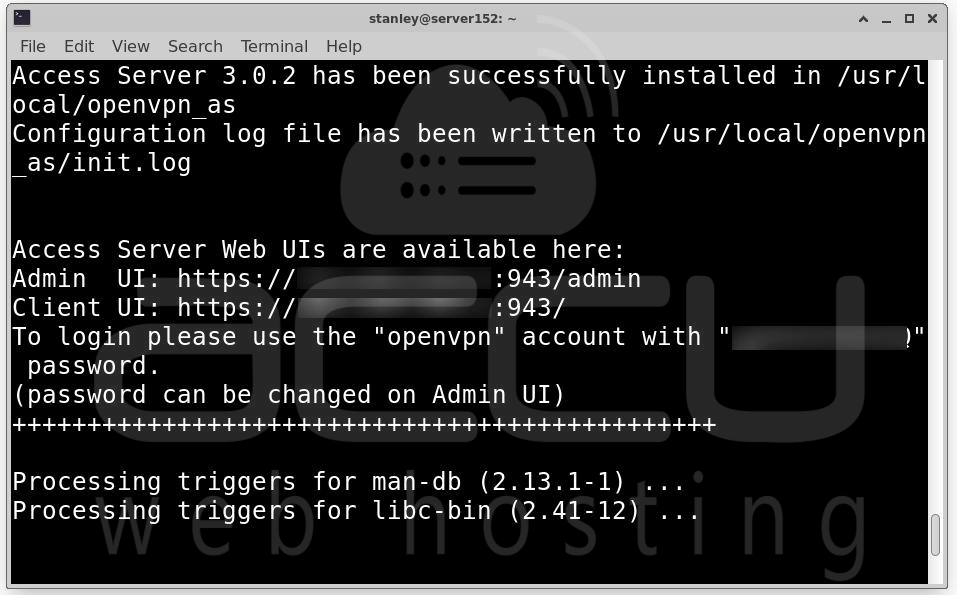
Step 5: Once the installation completes, important information will be displayed on the screen. Make sure to save it.
You will see details similar to the following:
- Admin Web UI URL
- Client Web UI URL
- Randomly generated password for the administrative user openvpn
These details are required for the next configuration steps.
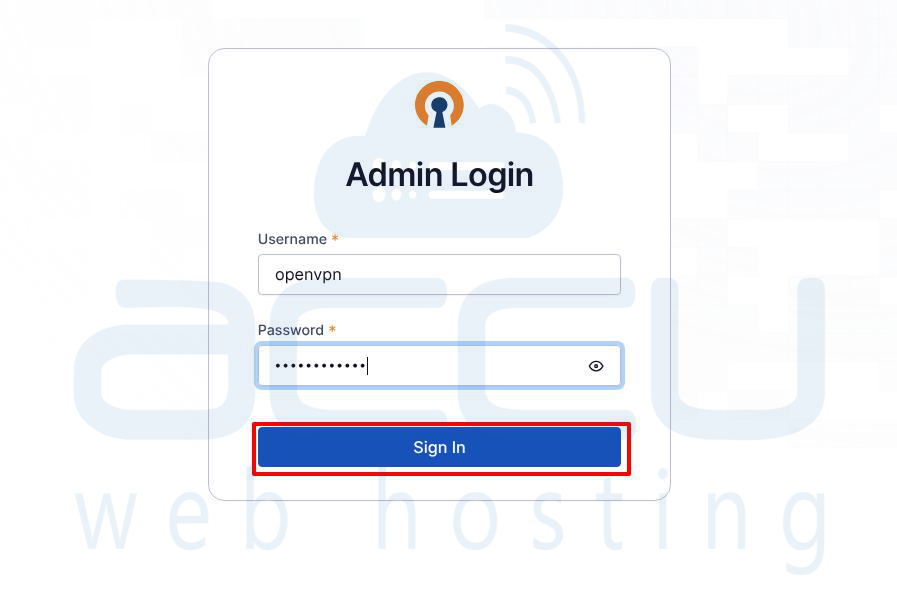
Step 6: Activate Your Subscription and Finish Configuration. Open your browser and navigate to: https://[server-address]/admin/
Replace [server-address] with your server’s public IP address or DNS hostname.
Security Warning: You may see a browser warning about an insecure connection. This is normal because Access Server uses a self-signed SSL certificate by default. Proceed to the site to continue.
Log In with Username: openvpn and Password: (generated during installation).
Step 7: Carefully review the End User License Agreement displayed on the screen. Once you have read and understood the terms and conditions, accept the EULA to proceed with the activation process.
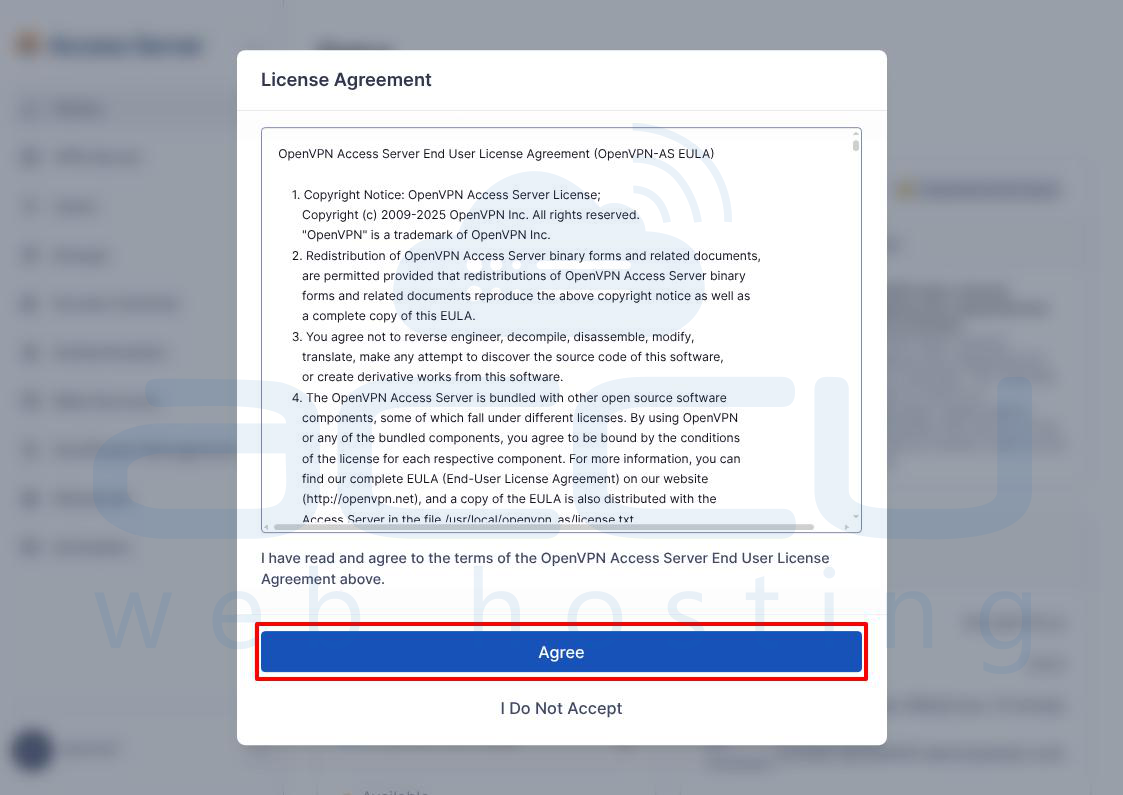
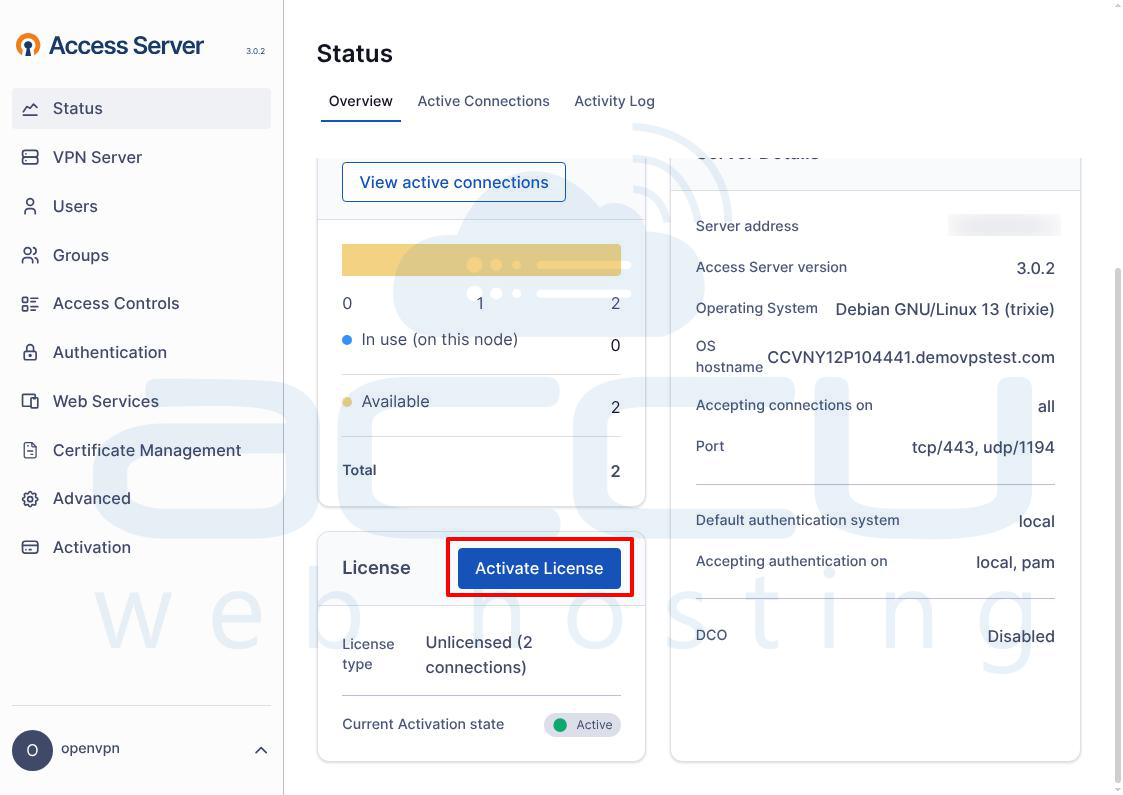
Step 8: After accepting the EULA, click the Activate License button to begin the license activation process for OpenVPN Access Server.
Step 9: Log in to your OpenVPN account on the official OpenVPN website. Navigate to your Access Server licenses section and copy the activation license key provided there.
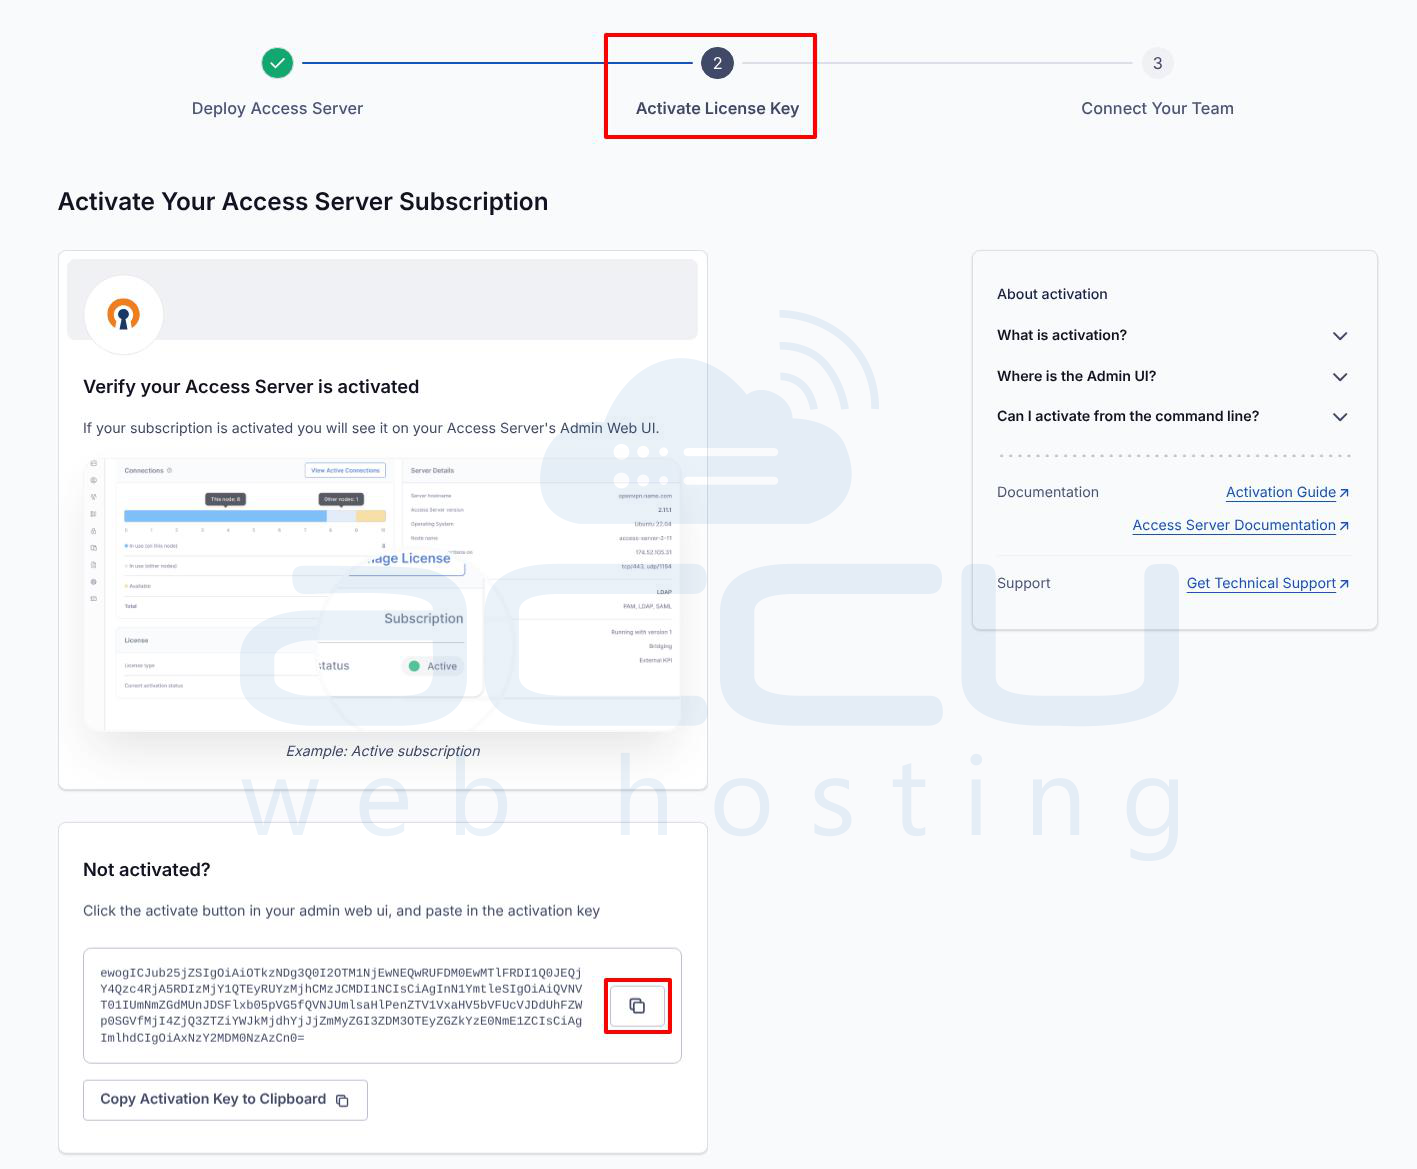
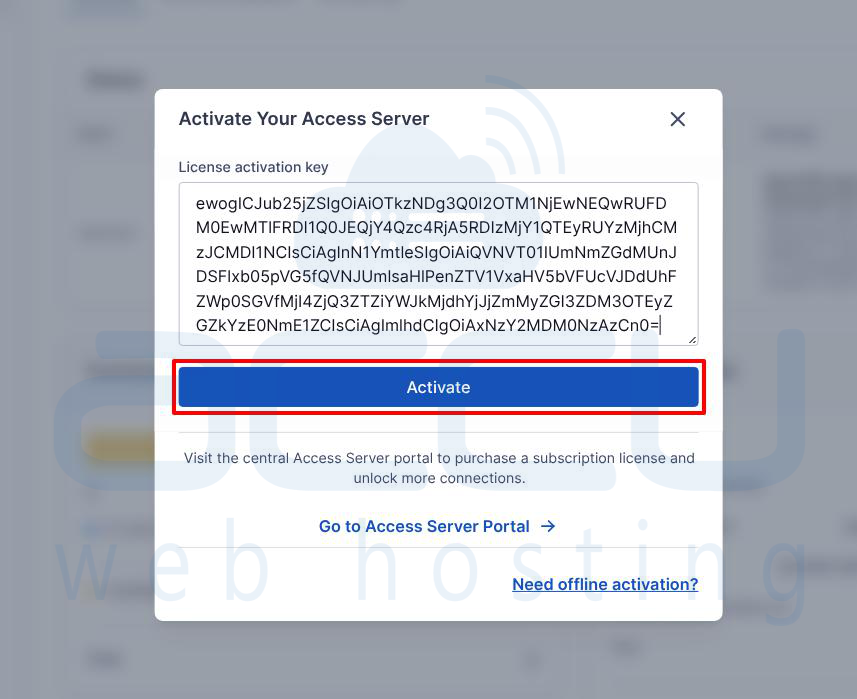
Step 10: Return to the OpenVPN Access Server Activation page. Paste the copied activation key into the designated field and click Activate. This will complete the license activation and finalize the setup.
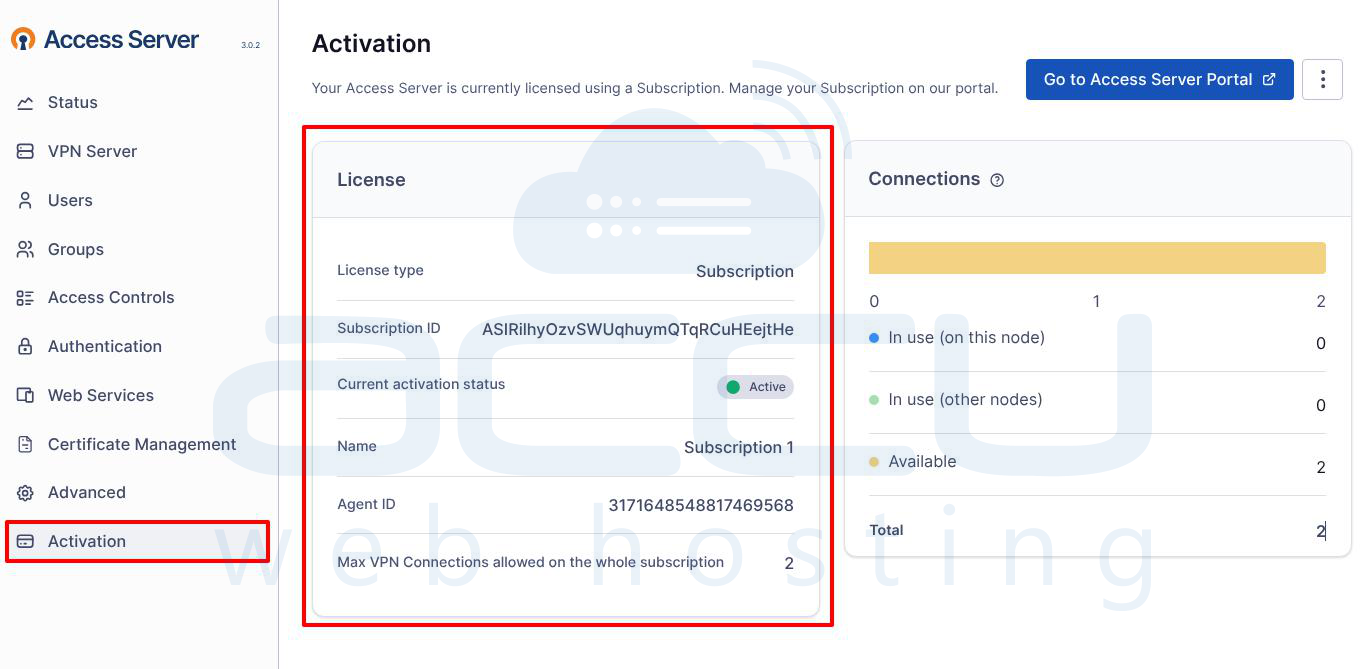
Step 11: Once the activation is complete, go to the Activation tab in the Admin Web UI and verify that the license status shows as active and valid, confirming that OpenVPN Access Server has been successfully activated.
Set Up an OpenVPN Connection
Setting up an OpenVPN connection involves three essential components: your .ovpn configuration profile, the OpenVPN Connect client, and your account credentials.
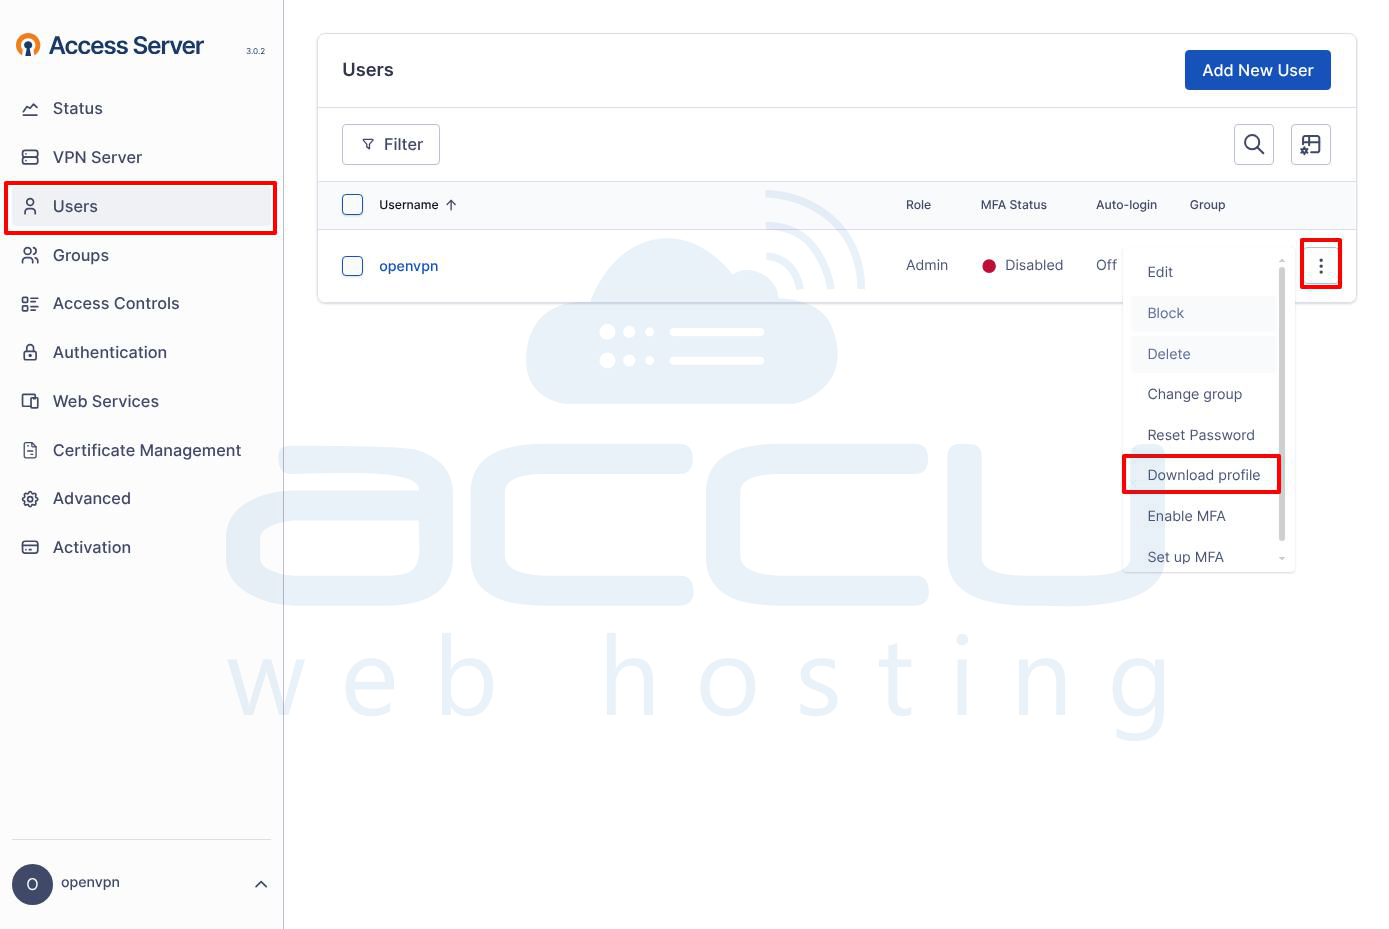
Step 1: The .ovpn file is a configuration file that instructs the OpenVPN client which server to connect to and which security keys to use. Log in to the Client/admin Web UI and look for a Download Profile or Yourself (user-locked profile) button and click on it.
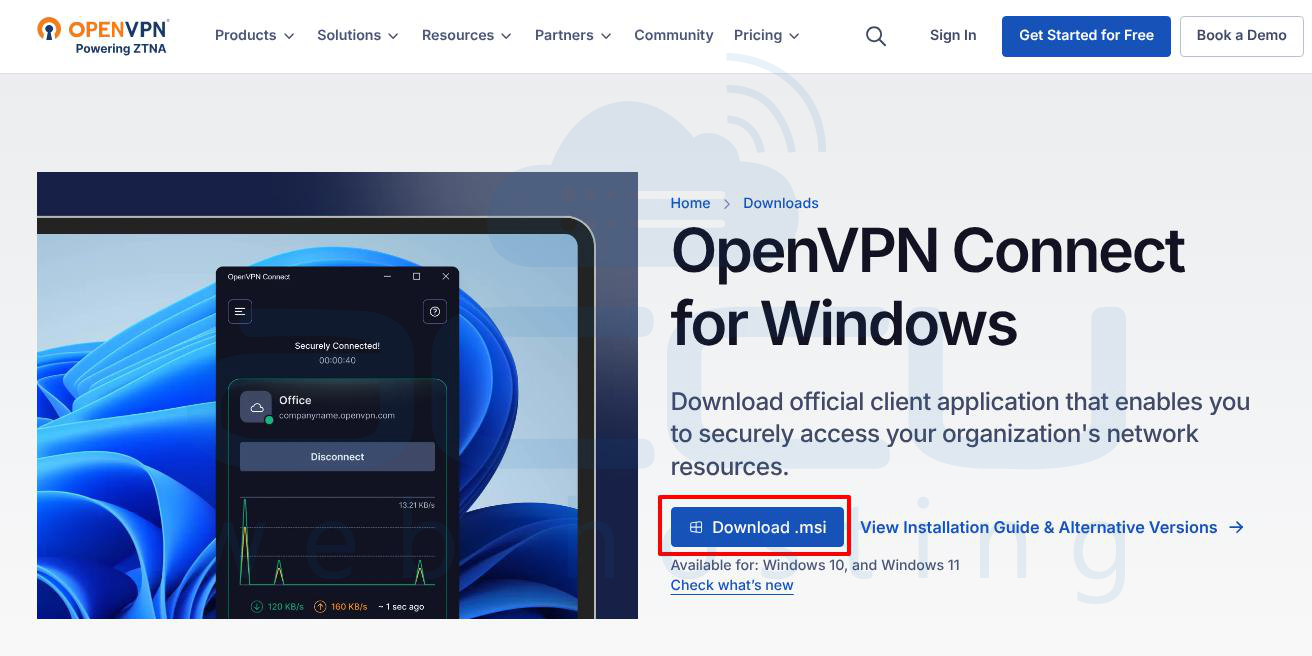
Step 2: The OpenVPN Connect client is the official software required to establish the VPN connection. Choose the version that matches your operating system.
Visit the https://openvpn.net/client/ download page. Click Download .msi or Download .exe. Run the installer and follow the on-screen instructions, click Next, accept the license agreement, and then click Install.
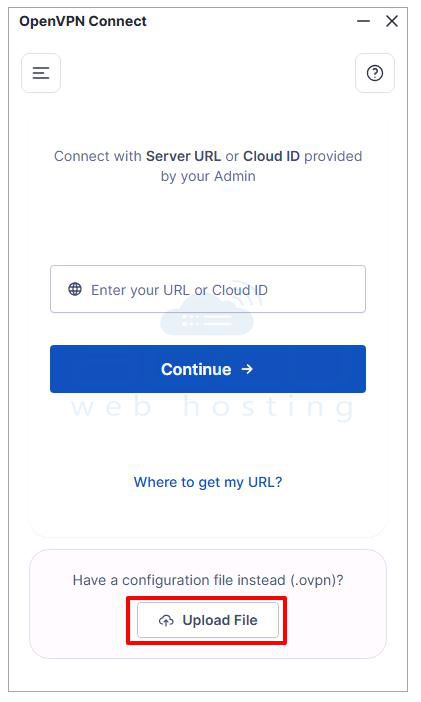
Step 3: Once the OpenVPN Connect app is installed, the next step is to import your .ovpn configuration file so the app knows which server to connect to. Open the application on your device and click on the Upload File tab. Click Browse to locate your .ovpn file, or simply drag and drop the file into the application window.
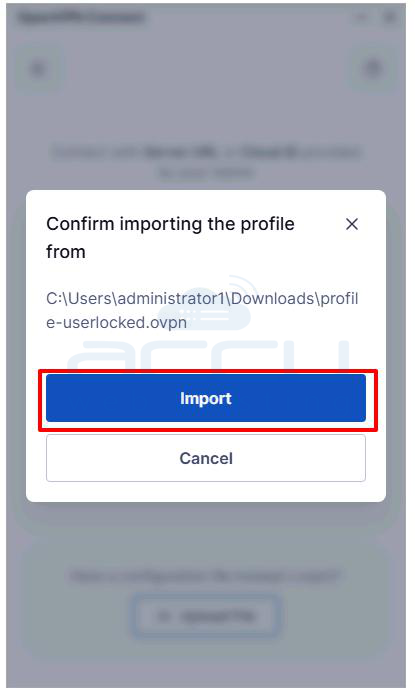
Step 4: After selecting the file, a summary of the profile will appear. Review the details and click Import to add the profile to your OpenVPN client.
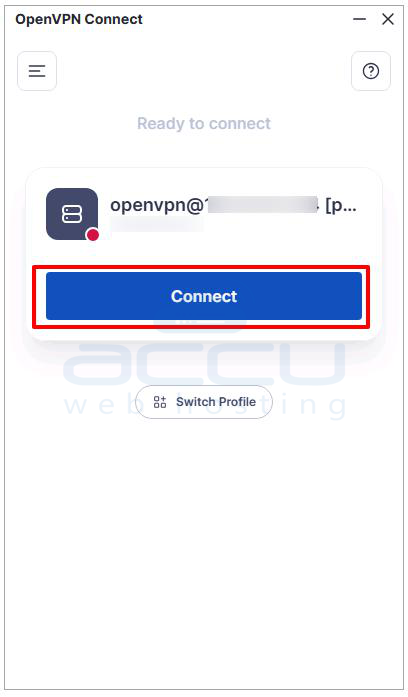
Step 5: Once the profile is imported, the app will prompt you to verify your account credentials. Ensure that the Username displayed matches the one provided by your network administrator. Click Connect to proceed to the next step.
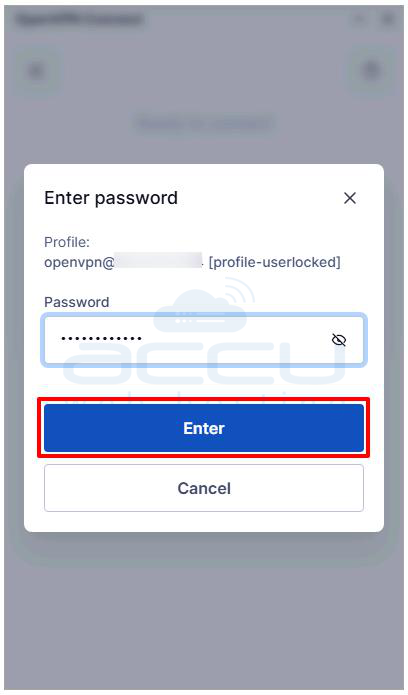
Step 6: When prompted, enter the Password associated with your VPN account. Click Enter to initiate the VPN connection.
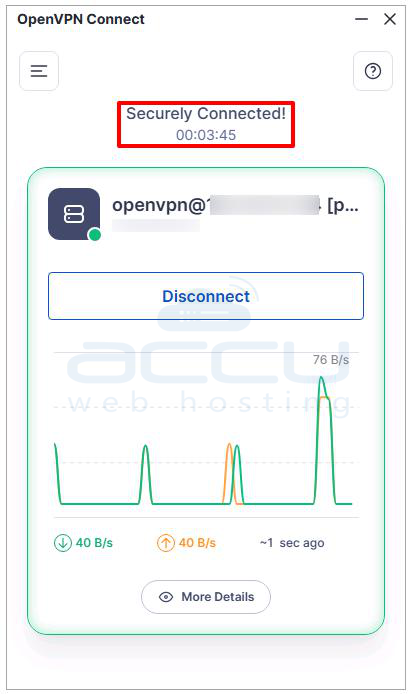
Step 7: Once the connection is established. Look for a green icon with a small graph next to your profile that indicates a successful VPN connection. The OpenVPN Connect app should display a status of “Securely Connected!”
Step 8: To ensure that all your internet traffic is being securely routed through the VPN, check your public IP address.
Open a web browser and visit https://mydns.is/. Your IP address should now reflect the location of the VPN server rather than your local network, confirming that your connection is secure.

Conclusion
Setting up an OpenVPN server on Debian using OpenVPN Access Server is a fast and reliable way to secure your network. With its web-based management, built-in client support, and compatibility with Debian 11, 12, and 13, it’s an excellent choice for both beginners and advanced users. You’re now ready to start using a secure, self-hosted VPN solution on Debian.
