ISPmanager is a powerful and user-friendly hosting control panel designed to simplify server and website management. Whether you are setting up a new VPS or managing existing web projects, ISPmanager allows you to configure essential services like the Web Server, Database Server, and FTP Server through an intuitive interface.
In this article, we’ll walk you through the steps to configure each of these services, ensuring your hosting environment is properly set up and secure.
1. Configuring the Web Server
ISPmanager supports multiple web server types such as Apache, Nginx, and Nginx + Apache. You can install and configure these servers depending on your hosting requirements.
Step 1: Install or Configure Web Server
1. Log in to your ISPmanager Control Panel.
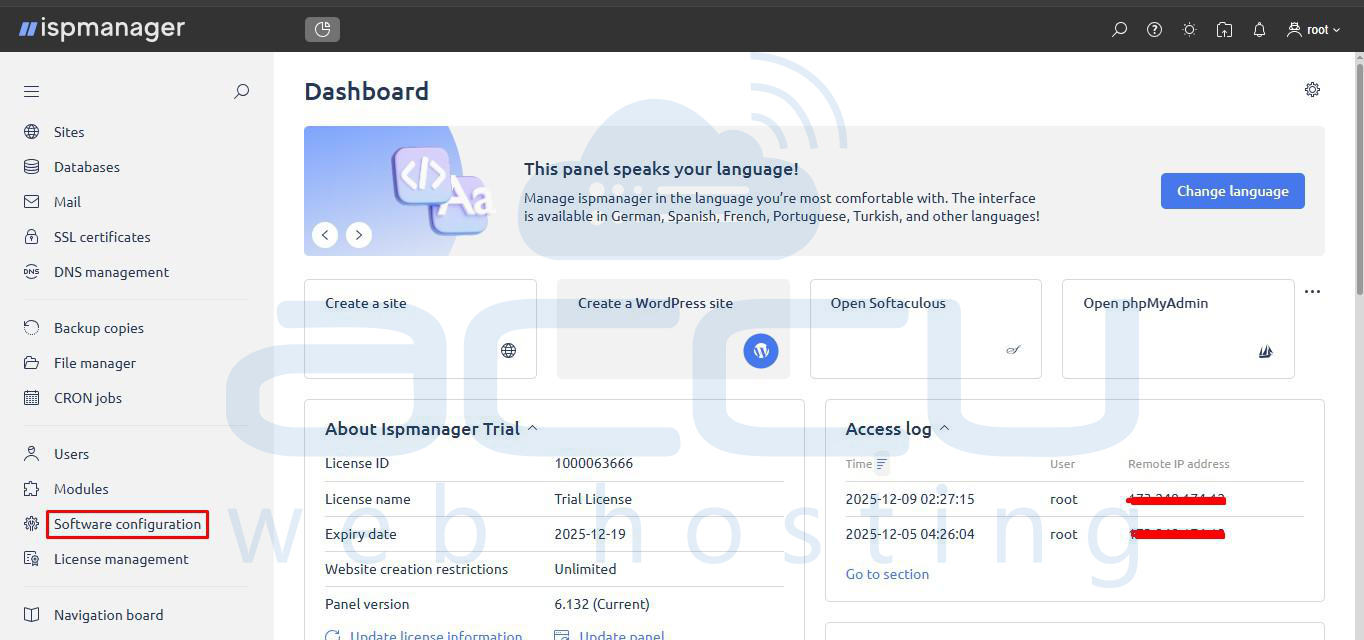
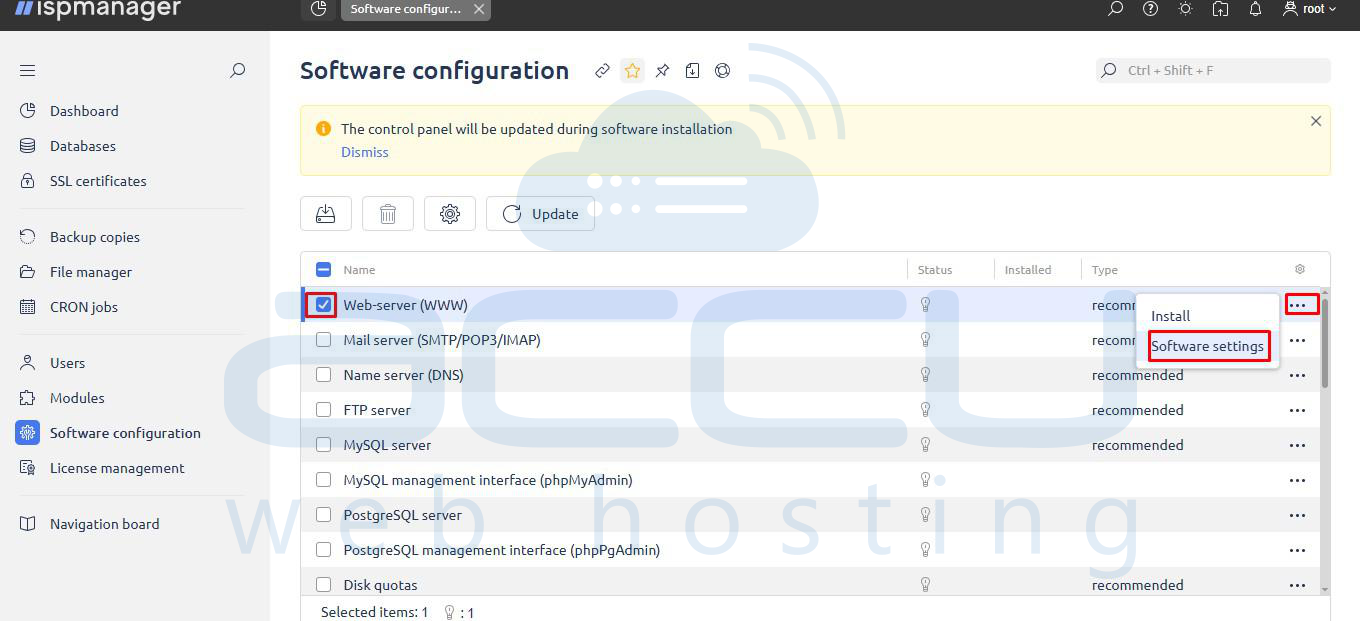
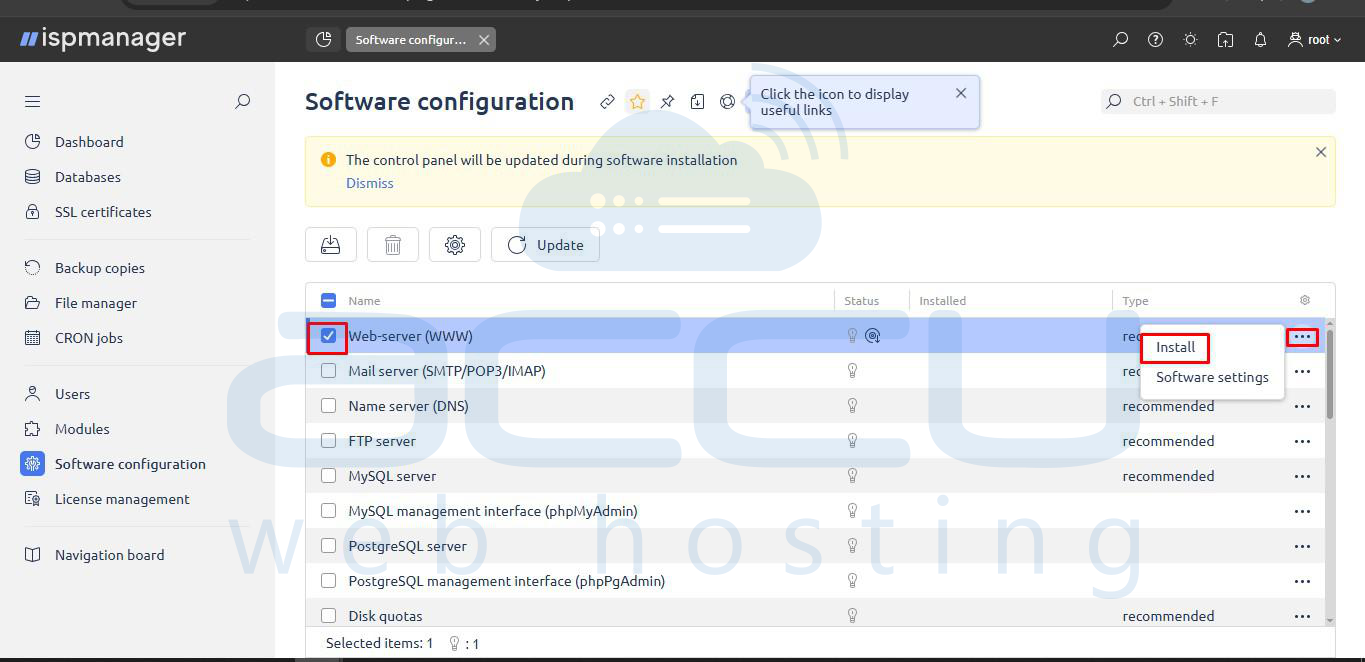
2. In the left-hand navigation menu, click Software configuration. On the Software configuration page, select the checkbox next to Web-server (WWW).
3. If the Web-server is not installed, click the … button(3 dots) button on the far right and select Install. If it is already installed, click … button(3 dots) and select Software settings.
Step 2: Select and Configure Web Server Components
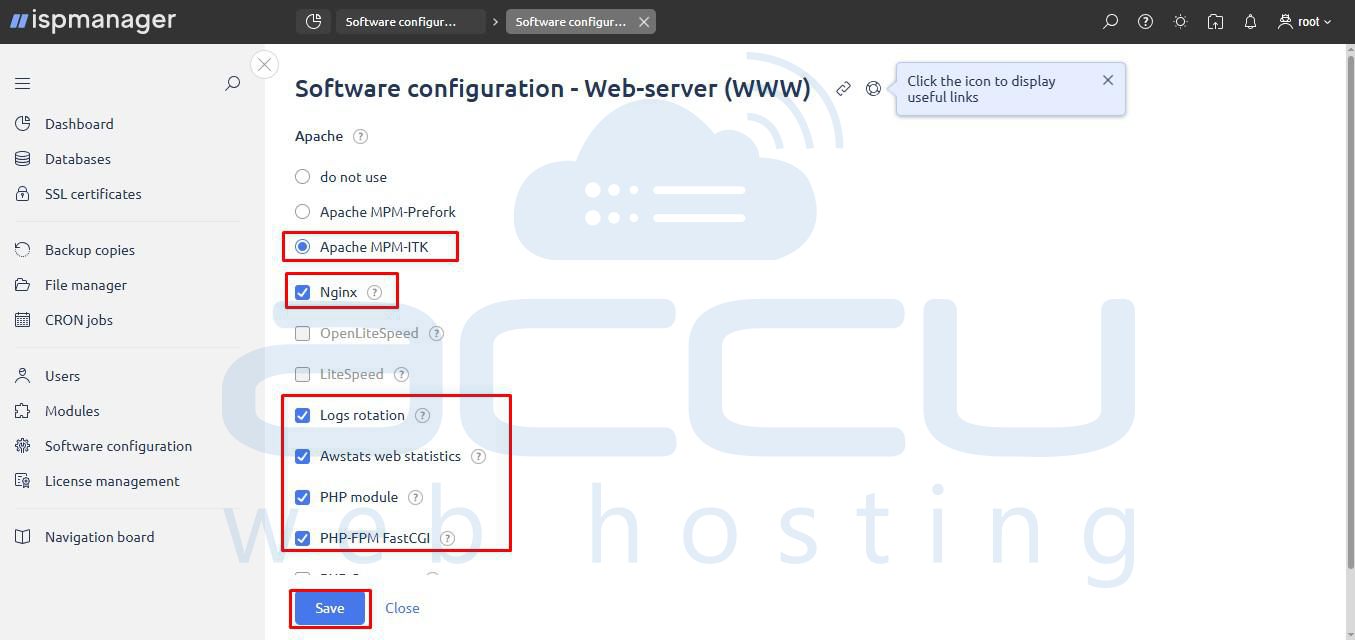
1. If you choose Software settings, the Web Server configuration window will open.
2. Select your preferred web server setup. Based on your screenshot, Apache MPM-ITK is selected.
3. Ensure the following recommended components are checked to meet the needs of a modern dynamic website:
- Nginx (Acts as a high-performance reverse proxy).
- Logs rotation
- Awstats web statistics
- PHP module
- PHP-FPM FastCGI
4. Click Save.
Step 3: Confirm Installation
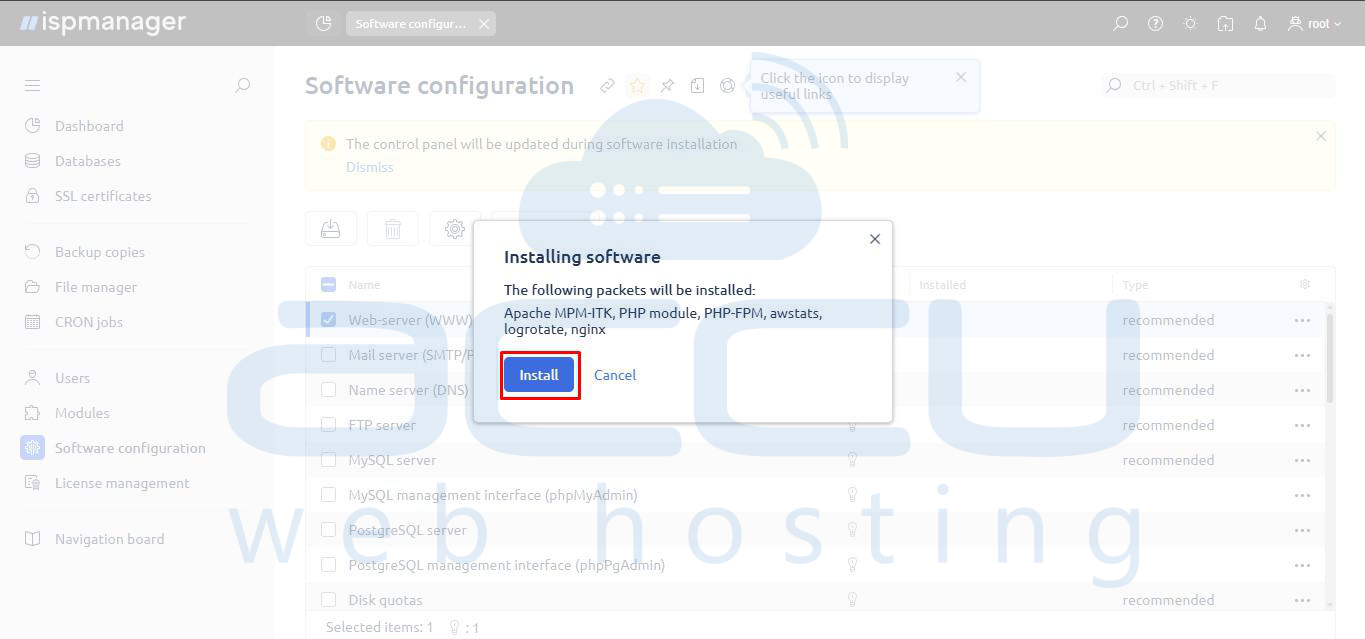
1. A pop-up window titled "Installing software" will appear, listing all the required packages for your configuration (e.g., Apache MPM-ITK, PHP module, PHP-FPM, awstats, logrotate, nginx).
2. Click Install to proceed.
Step 4: Verify Installation Status
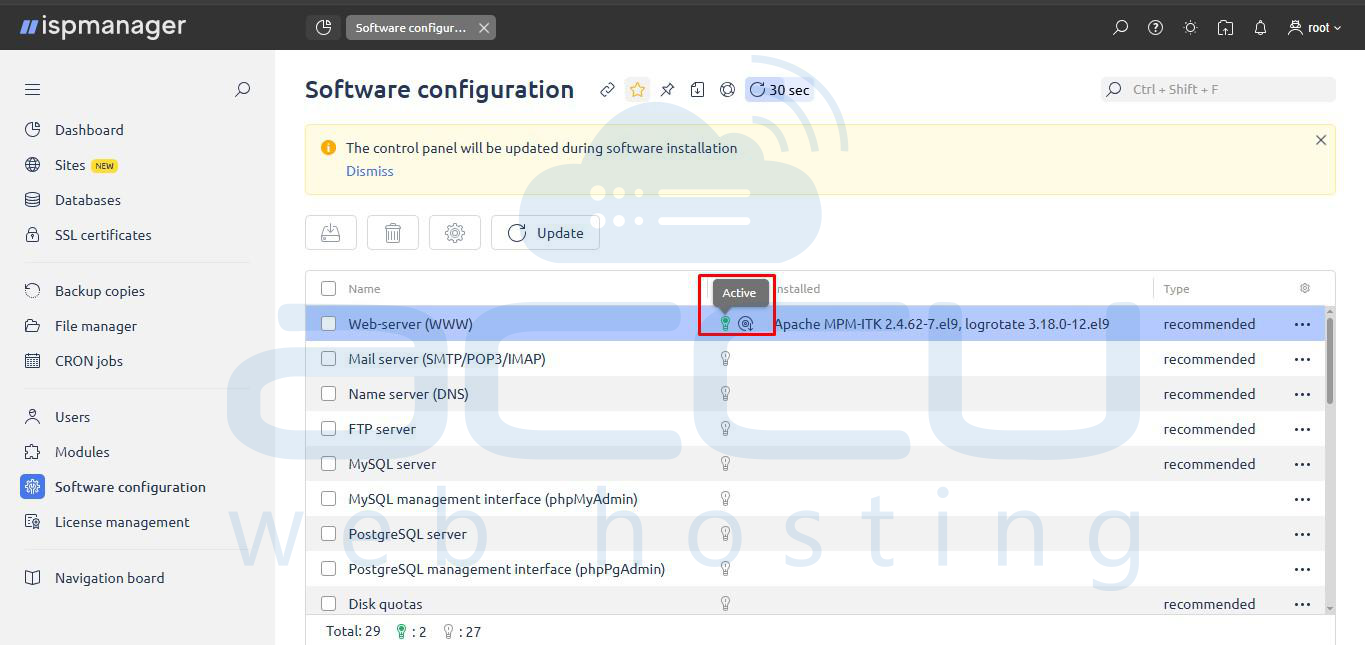
1. Once the installation is complete, you will return to the Software configuration page.
2. The Web-server (WWW) row should now show its Status as Active and list the installed software packages (e.g., Apache MPM-ITK, PHP module, PHP-FPM, nginx) in the Installed column.
2. Configuring the Database Server
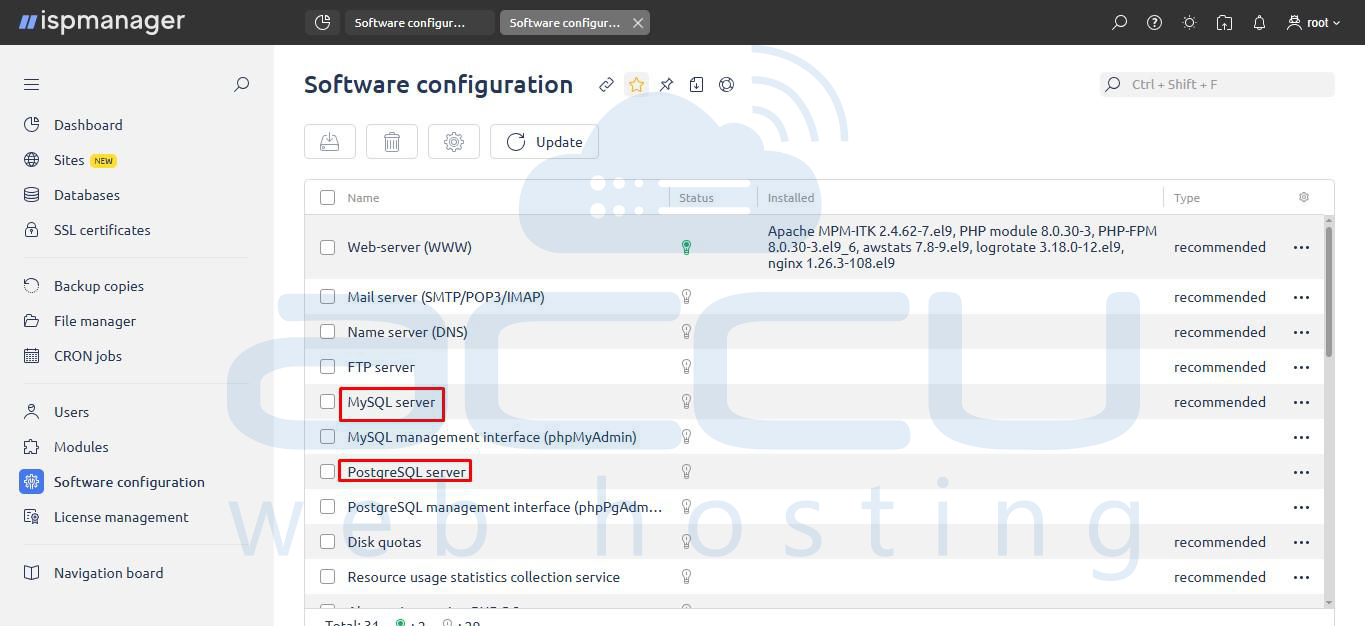
ISPmanager supports MySQL/MariaDB and PostgreSQL. You can install, manage, and configure these database servers easily.
Step 1: Install the Database Server
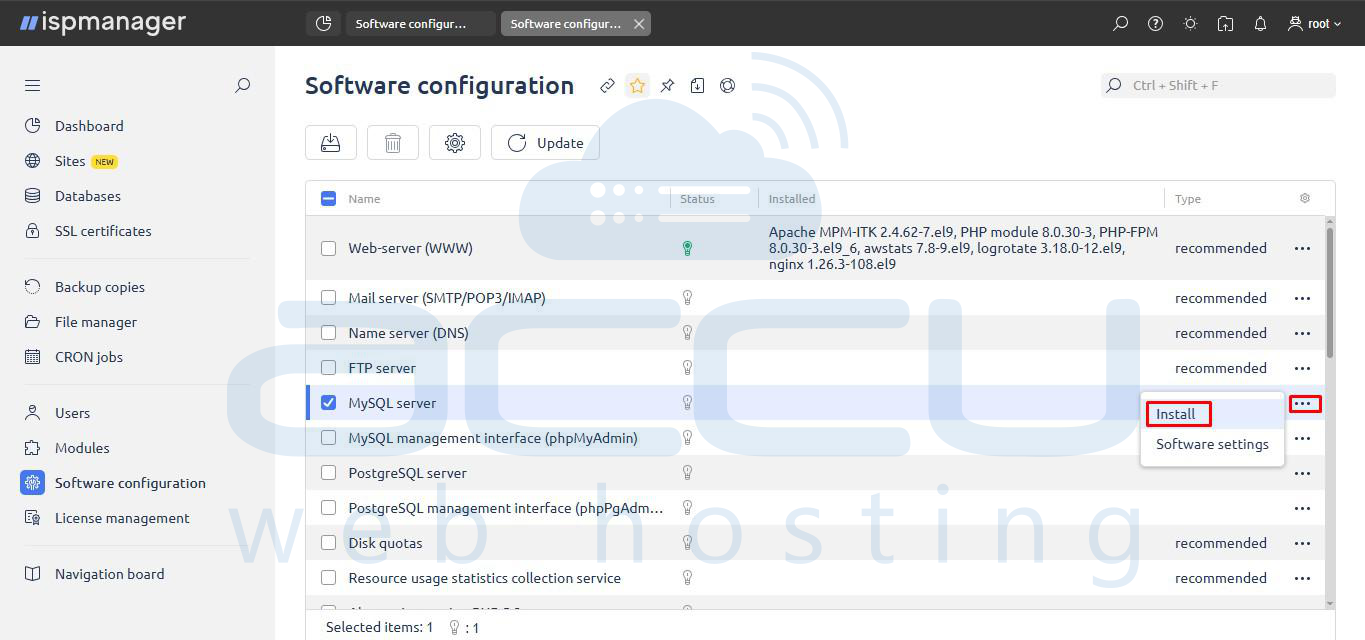
1. Go to Software Configuration from the main menu. Look for MySQL server and/or PostgreSQL server in the list. Select the checkbox next to MySQL server.
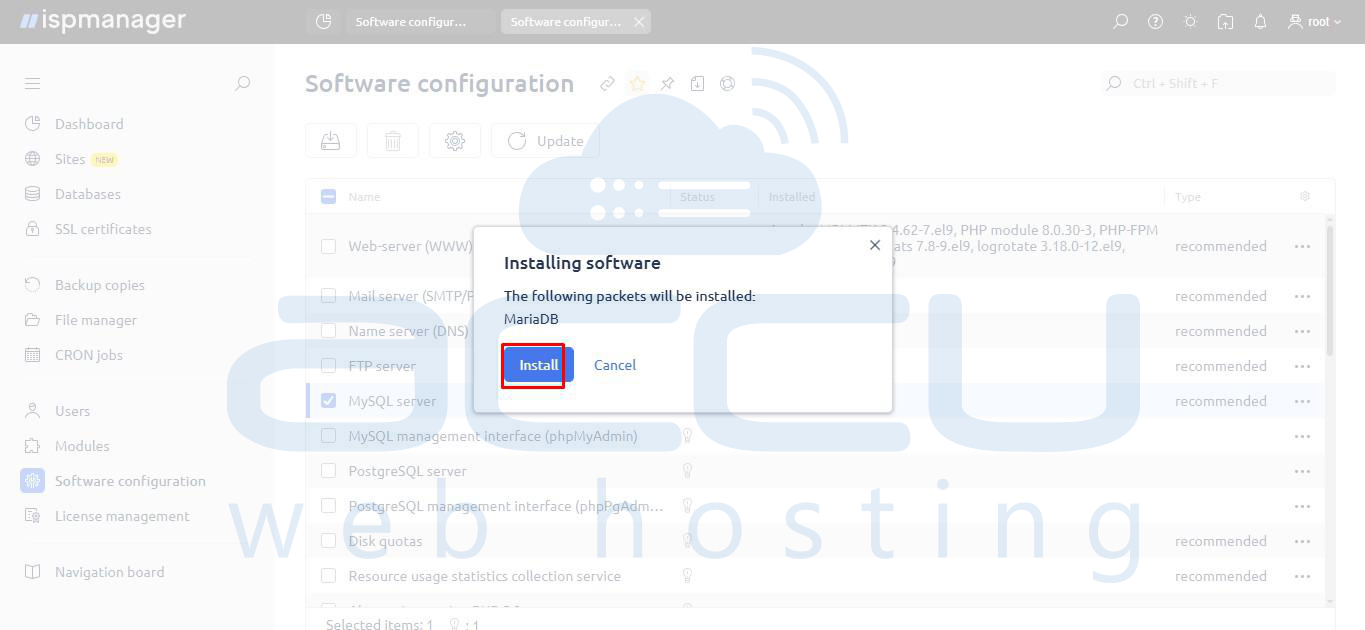
2. Click the … button(3 dots) on the far right and select Install from the dropdown menu. A pop-up window titled "Installing software" will appear, showing that the MariaDB package will be installed.
3. Click Install to proceed with the installation.
Step 2: Verify Installation Status
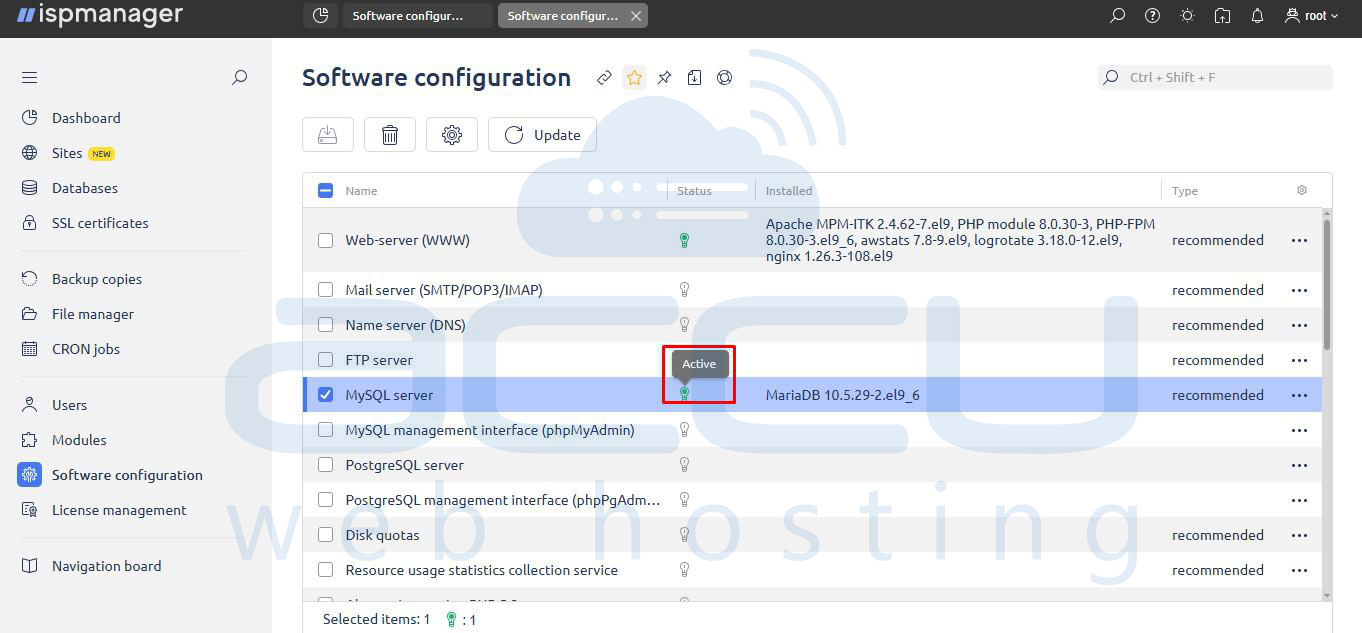
1. Once the installation is complete, the MySQL server row will show its Status as Active and list the installed software package (e.g., MariaDB) in the Installed column.
Step 3: Create Databases and Users
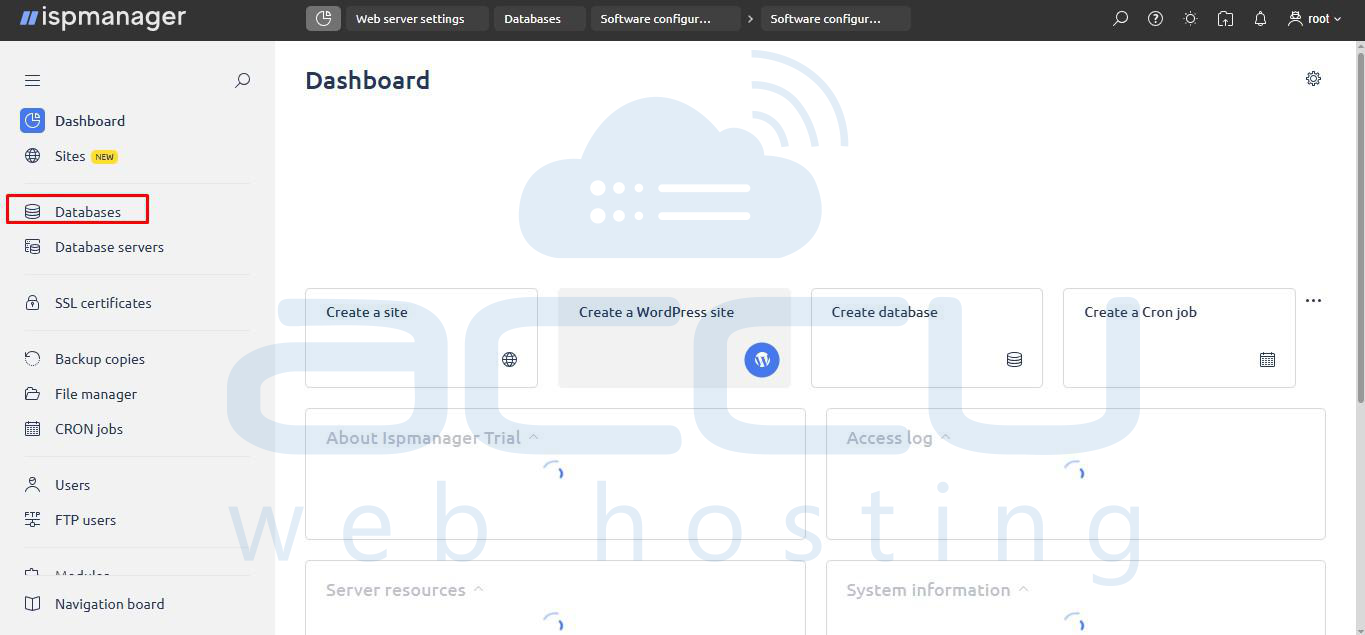
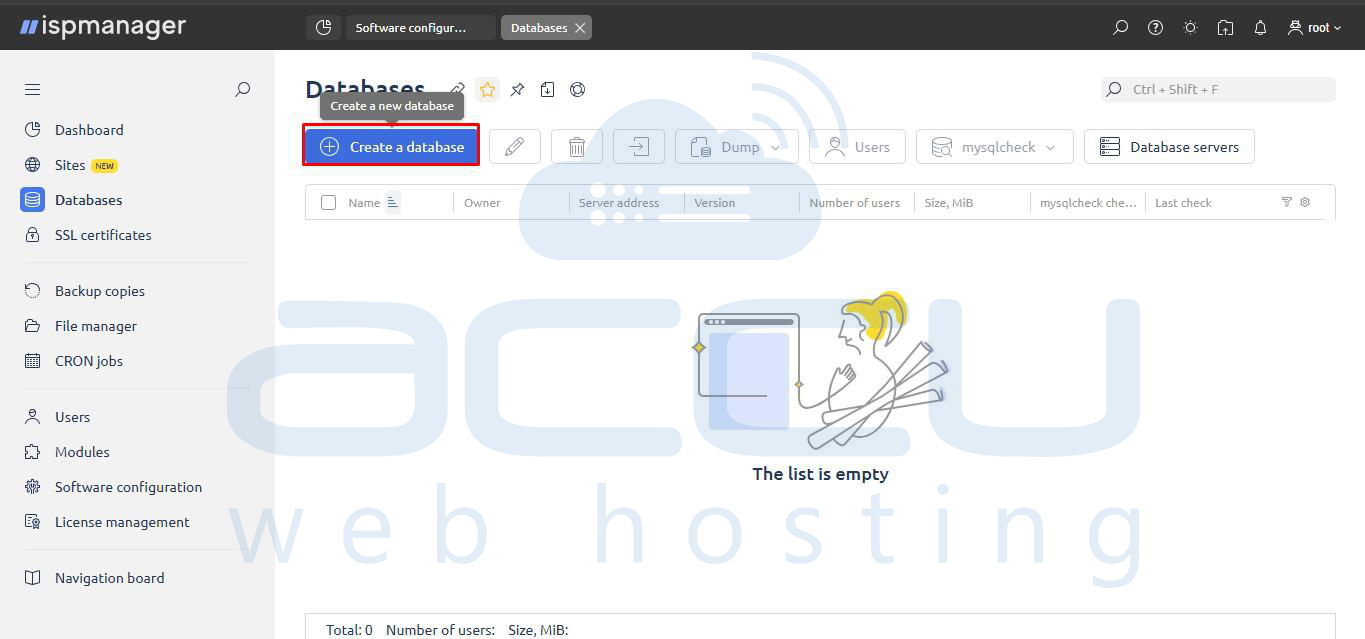
1. In the left-hand navigation menu, click Databases.
2. On the Databases screen, click the Create a database button.
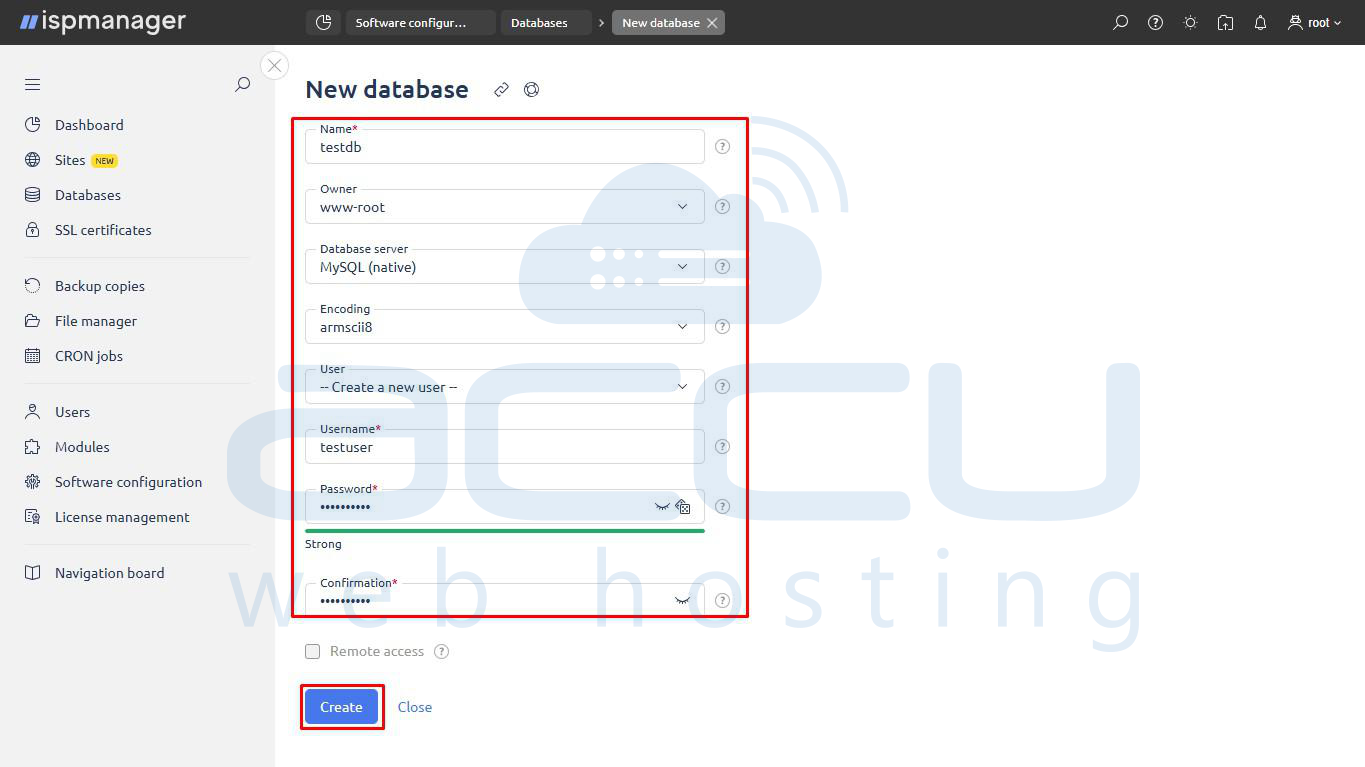
3. A New database window will appear. Fill in the required fields:
- Name*: Enter the desired name for your database (e.g., testdb).
- Owner: The default www-root is usually appropriate.
- Database server: Select MySQL (native).
- User: Select Create a new user.
- Username*: Enter a username for the database (e.g., testuser).
- Password*: Enter a strong password.
- Confirmation*: Re-enter the password.
4. Click Create.
Step 4: Verify Database Creation
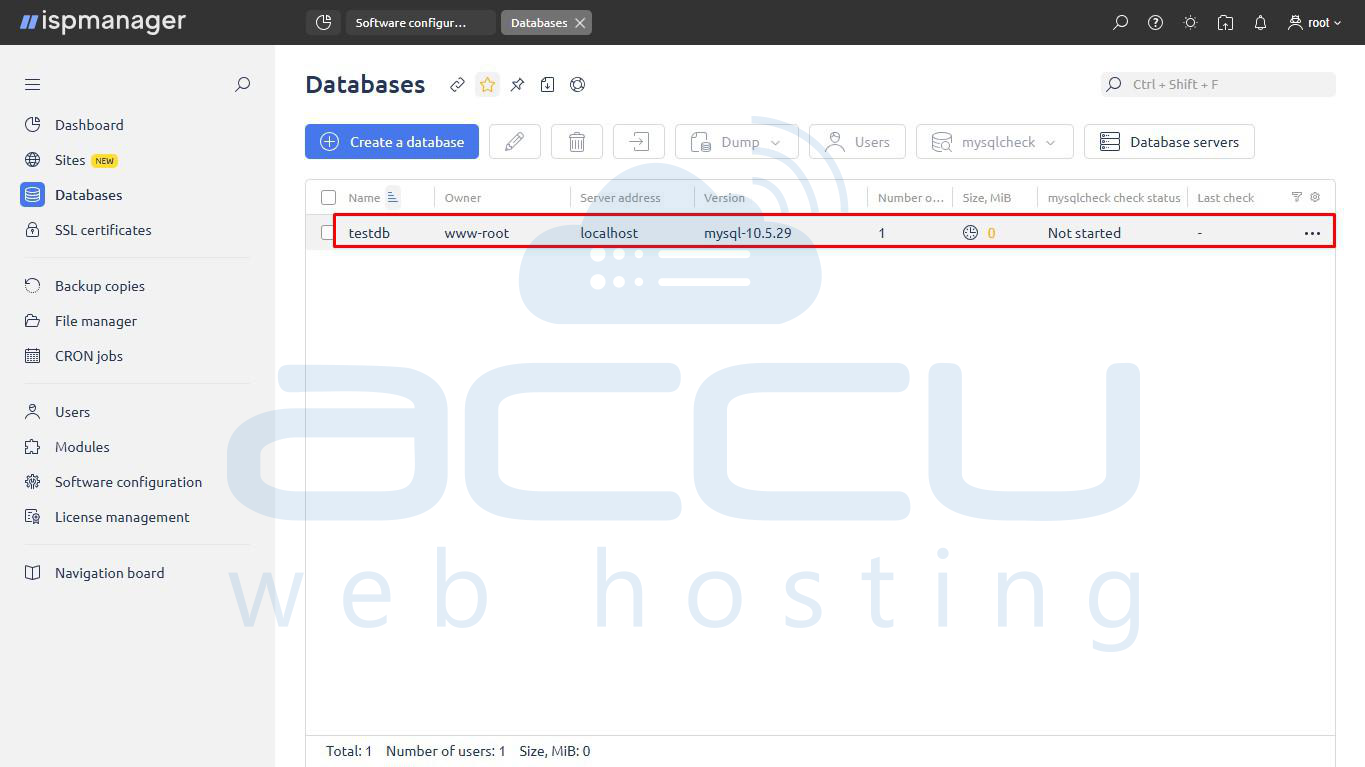
1. The newly created database (e.g., testdb) will now appear in the list on the Databases screen, showing its Owner, Server address, Version, and other details.
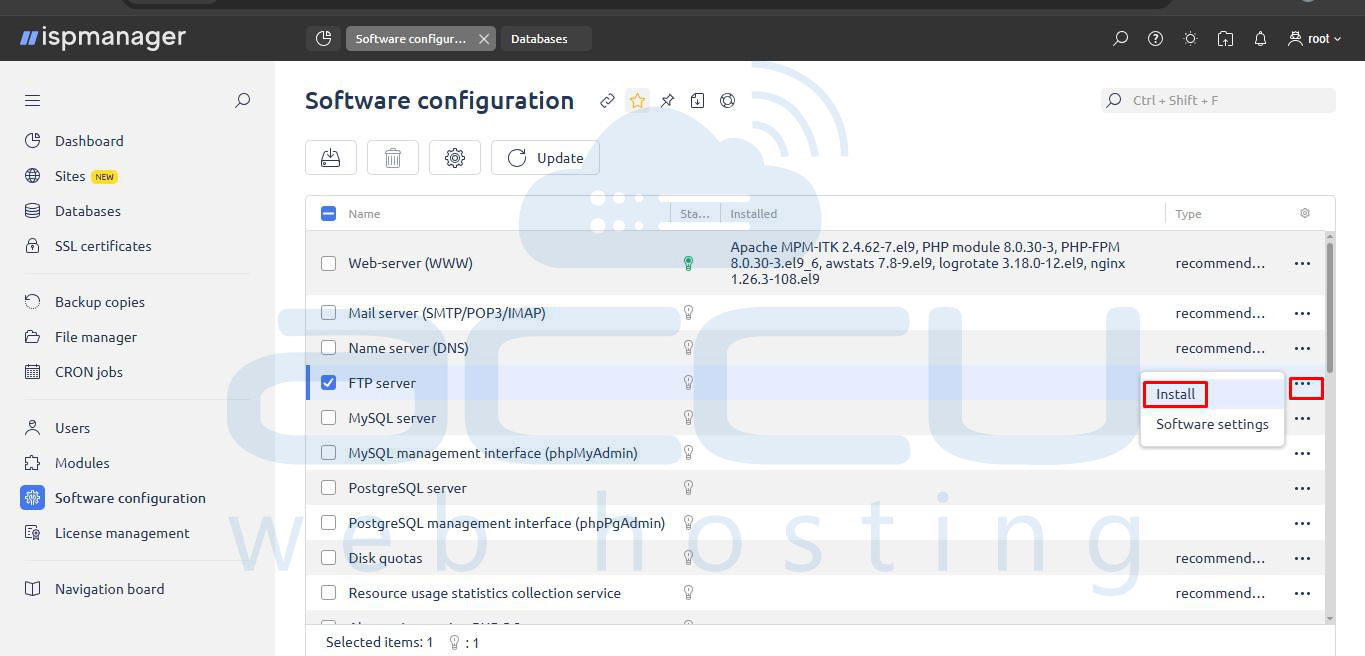
3. Configuring the FTP Server
FTP allows users to upload/manage website files using FTP clients such as FileZilla.
Step 1: Install the FTP Server Module
1. Navigate to Software configuration.
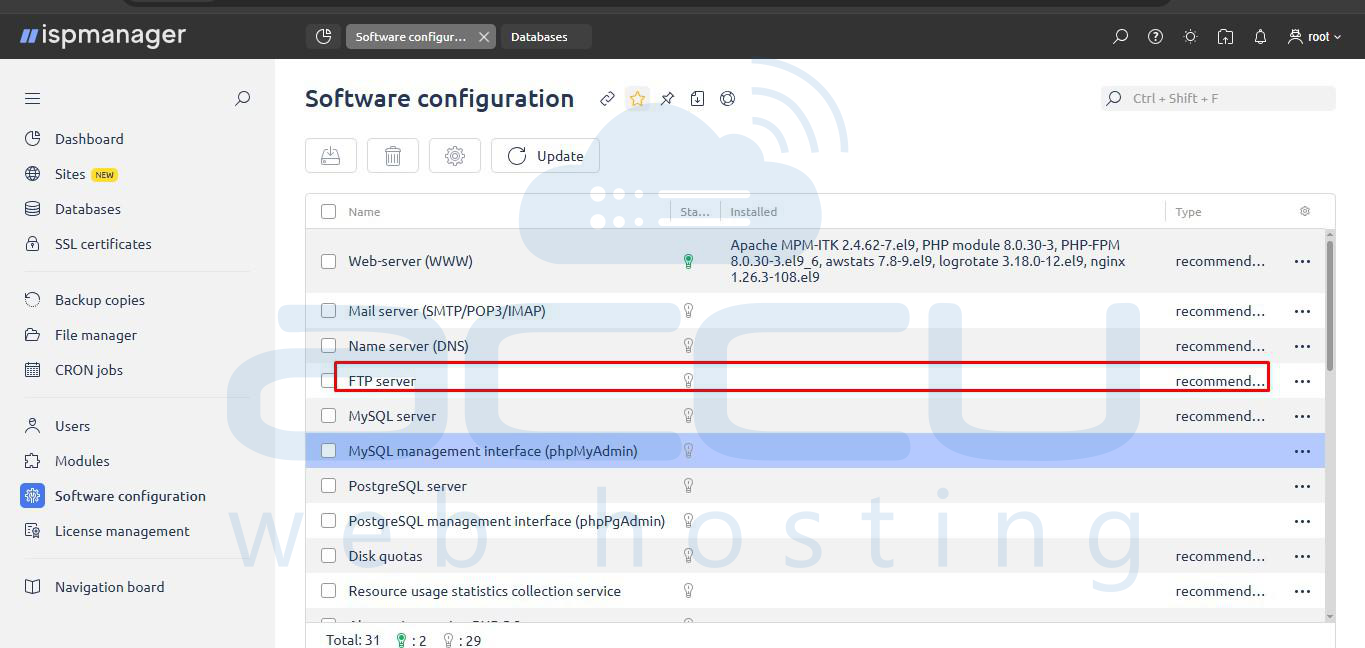
2. Find the FTP server module in the list. Select the checkbox next to the FTP server.
3. Click the … button(3 dots) on the far right and select Install.
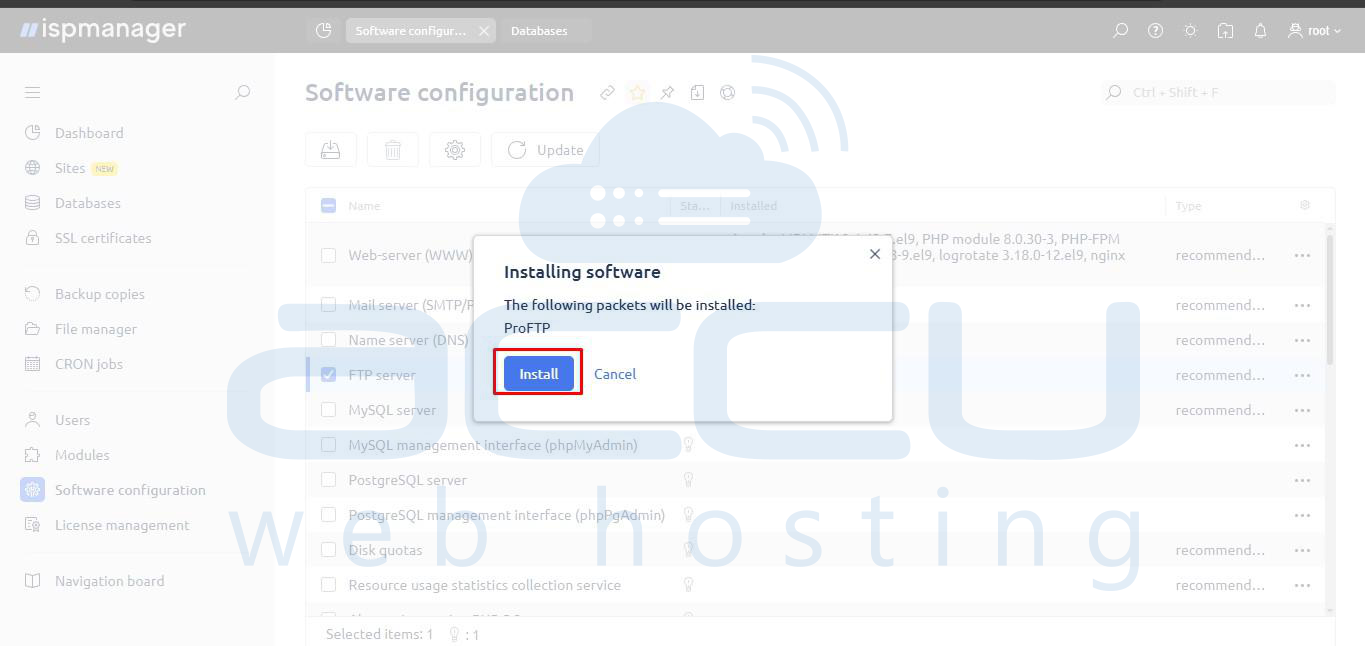
4. A pop-up window titled "Installing software" will appear, showing that ProFTP will be installed. Click Install.
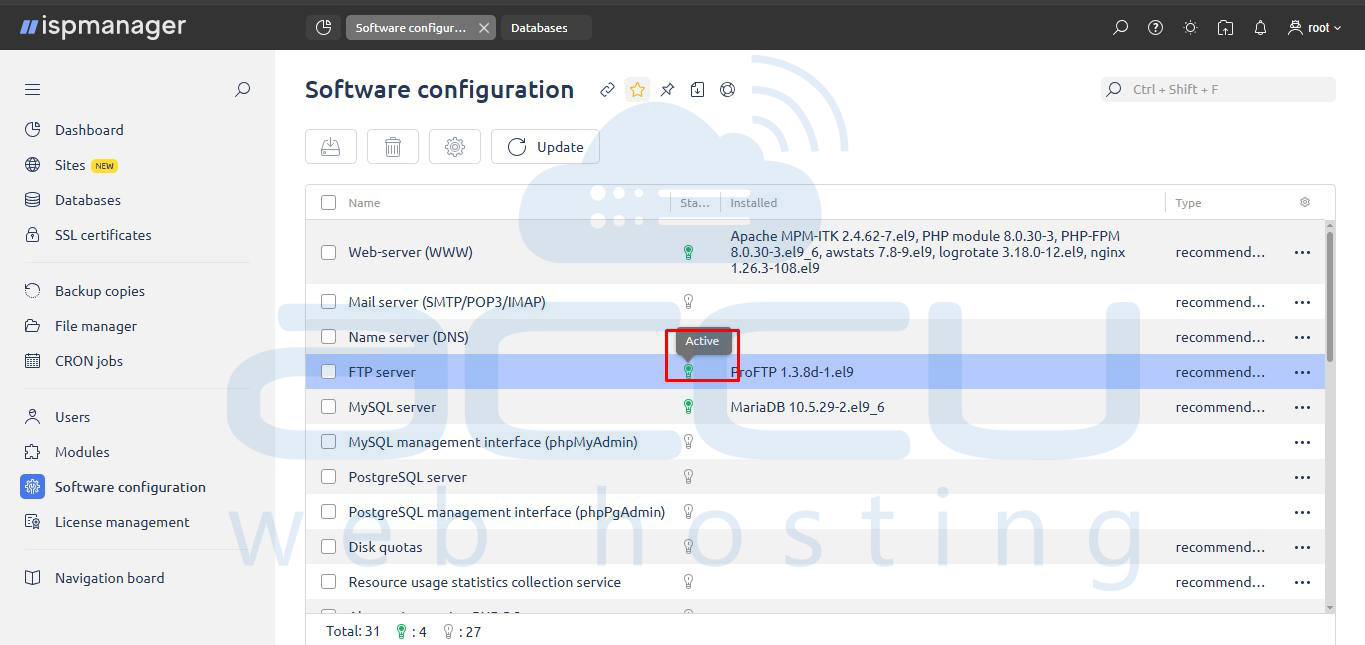
5. Once the installation is finished, verify that the FTP server row shows its Status as Active.
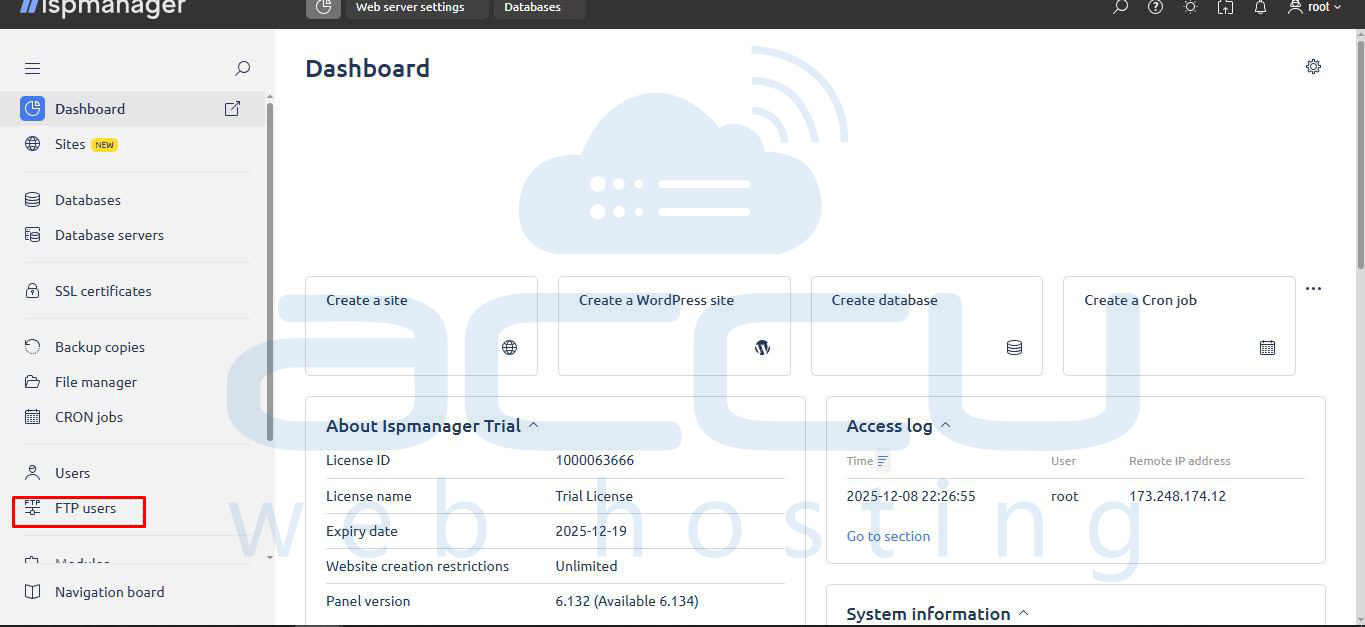
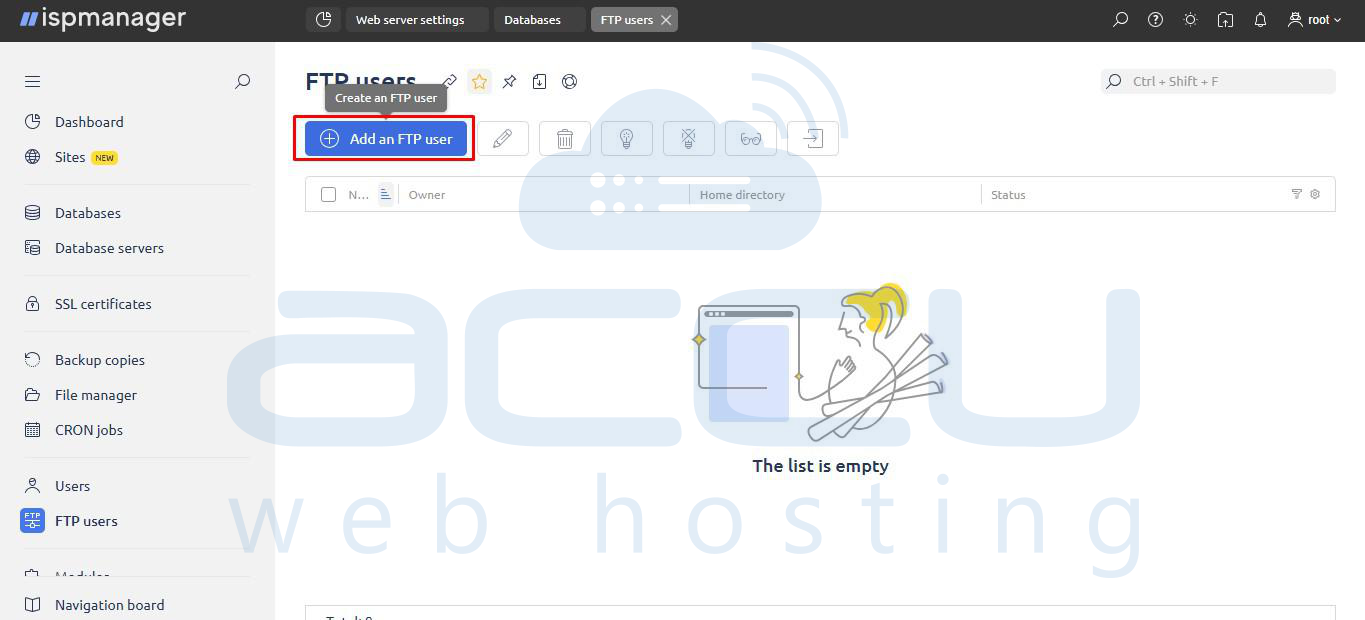
Step 2: Create FTP Users
1. In the left-hand navigation menu under Users, click FTP users.
2. On the FTP users screen, click the Add an FTP user button.
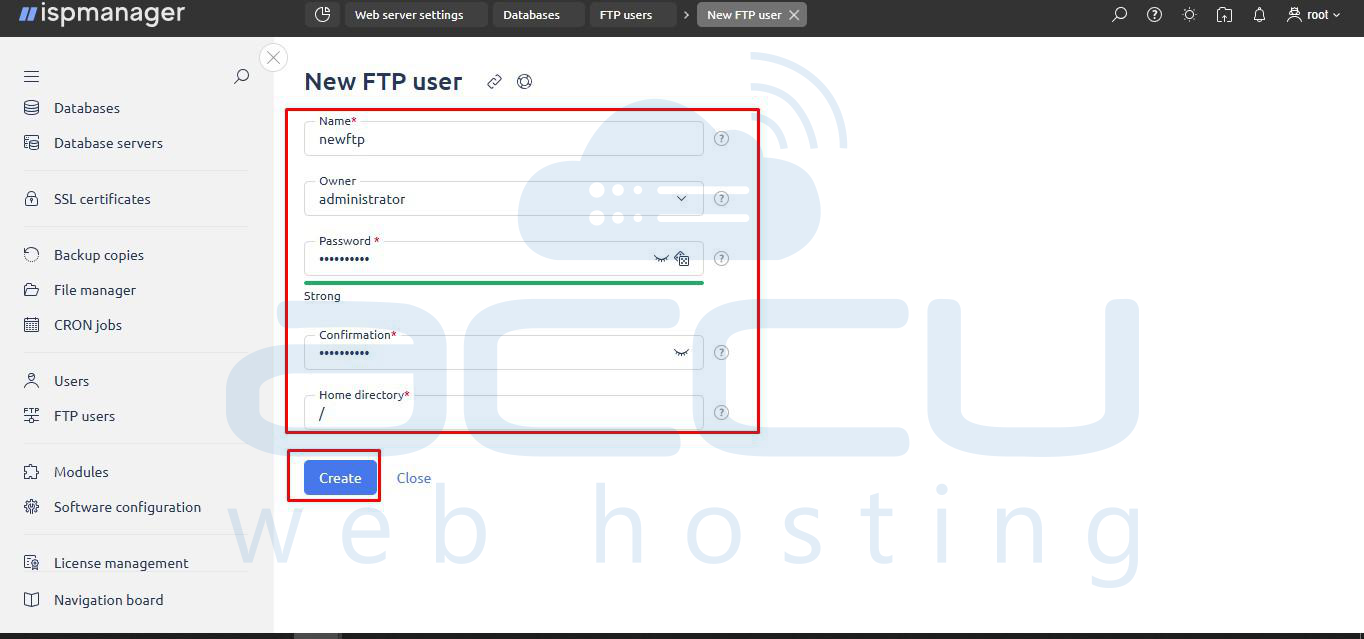
3. The New FTP user window will appear. Assign the following:
- Name*: Enter the desired username (e.g., newftp).
- Password* and Confirmation*: Enter a strong password.
- Home directory*: Specify the directory the user should access (e.g., / for the root of the site).
4. Click Create.
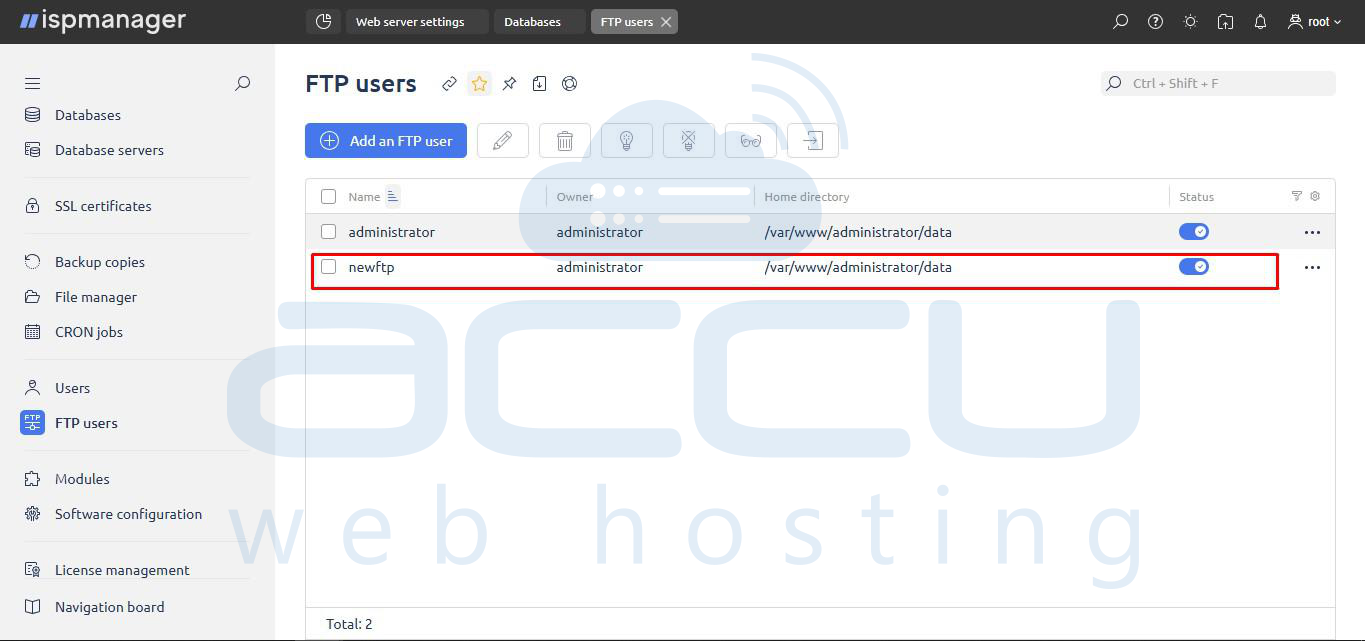
5. The new FTP user (e.g., newftp) will now appear in the FTP users list and be Active.
Step 3: Connect via FTP Client
1. Provide the user with the following details to log in via a client like FileZilla:
- Host/Server IP
- FTP username
- FTP password
- Port: Typically 21
2. Once connected, the client should display a Status of Logged in and successfully retrieve the remote directory listing.

Conclusion
Configuring your Web Server, Database Server, and FTP Server in ISPmanager is straightforward thanks to its well-structured interface and modular design. By following the steps outlined above, you can ensure your hosting environment is properly set up for optimal performance, security, and ease of management.
