FastPanel is a powerful and user-friendly web hosting control panel that simplifies many aspects of server management, including email services. By default, FastPanel uses a built-in mail server system (Exim/Dovecot) to allow users to create mailboxes directly within the panel for their domains. These mailboxes are accessible via the Roundcube webmail interface, giving users a simple solution for managing their email accounts.
In this guide, we will walk you through the process of installing and configuring an email server with FastPanel. This includes setting up the necessary DNS records, creating mailboxes, and testing the email system to ensure everything works smoothly.
Step 1. Installing FastPanel on Your Server
Before we get started with the email configuration, you first need to install FastPanel on your server. FastPanel requires a VPS or a dedicated server with root access. The server hardware needs to meet the minimum system requirements, which are RAM: 1GB, Free Space: 5GB, CPU: 1 core, 1 GHz
Supported operating systems for FastPanel (64-bit architecture only) include:
- Debian: 9, 10, 11, 12
- Ubuntu: 18.04, 20.04, 22.04, 24.04
- CentOS: 7
- AlmaLinux: 8
- Rocky Linux: 8
Steps to Install FastPanel
Step 1: To connect to your server, use SSH with the root password. Open your terminal and run: ssh [email protected]
Step 2: wget is a utility needed to download the FastPanel installation script. If it's not already installed, you can install it using the following commands depending on your server’s operating system:
For Debian/Ubuntu:
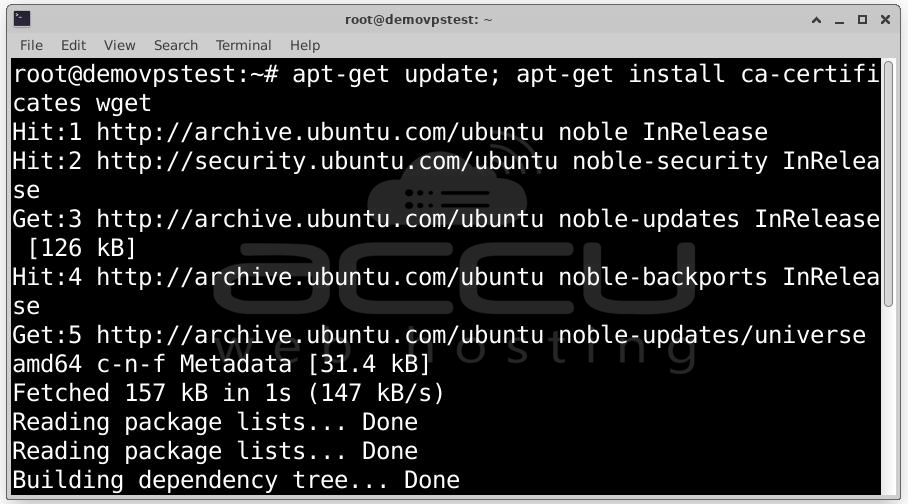
For CentOS/AlmaLinux/Rocky Linux: yum makecache; yum install ca-certificates wget
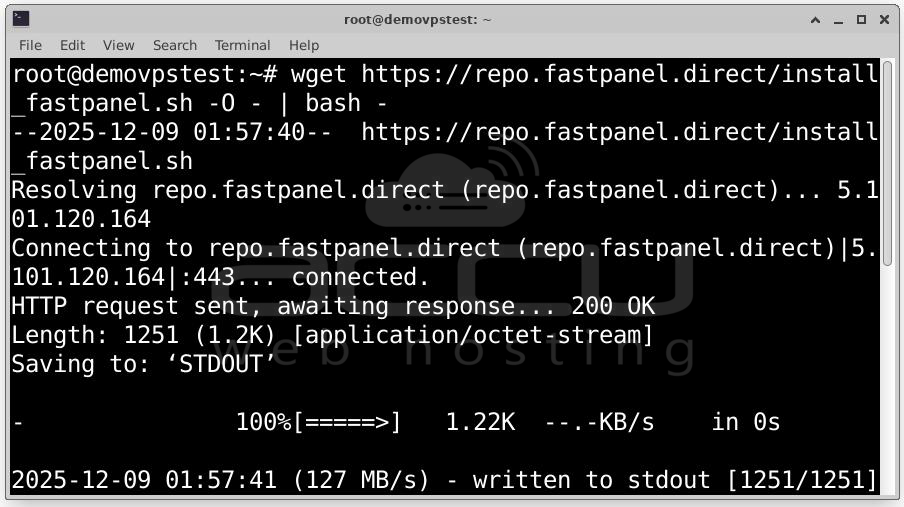
Step 3: After ensuring wget is installed, execute the following command to install FastPanel:
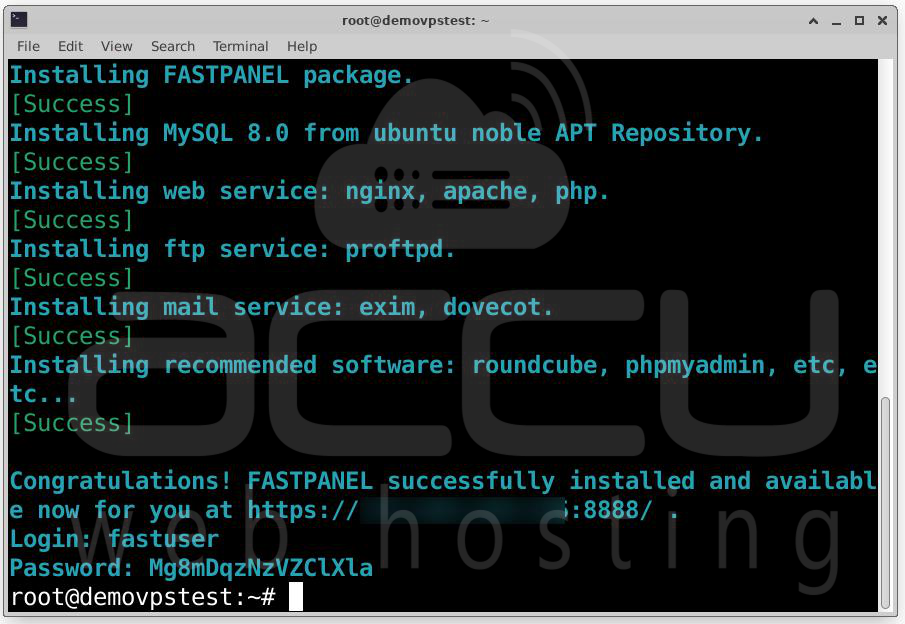
Step 4: Once the installation is complete, you will see a message with the access details for the panel:
Congratulations! FastPanel successfully installed and available for you at https://1.2.3.4:8888
Login: fastuser
Password: password
Step 2. Configuring Email Server in FastPanel
Once FastPanel is installed, you can begin setting up your email server. Follow these steps:
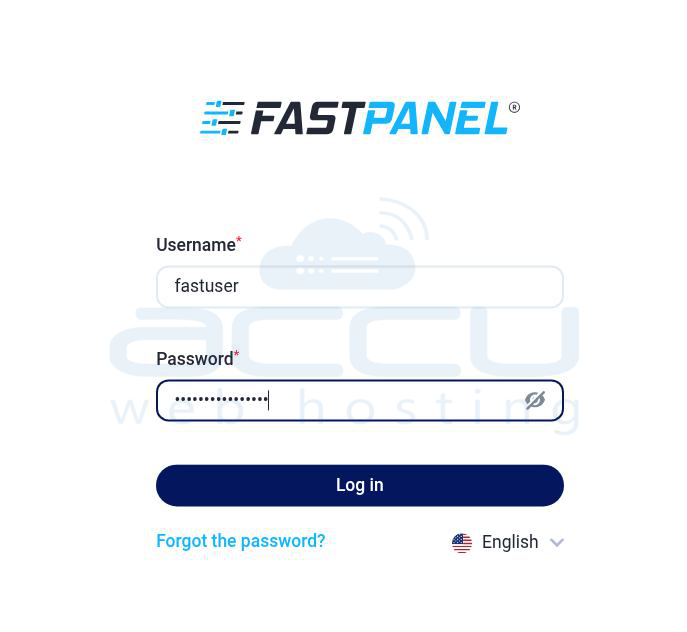
Step 1: Log into FastPanel. Open your browser and go to https://1.2.3.4:8888 (replace the IP with your server’s IP). Log in using the credentials provided after installation.
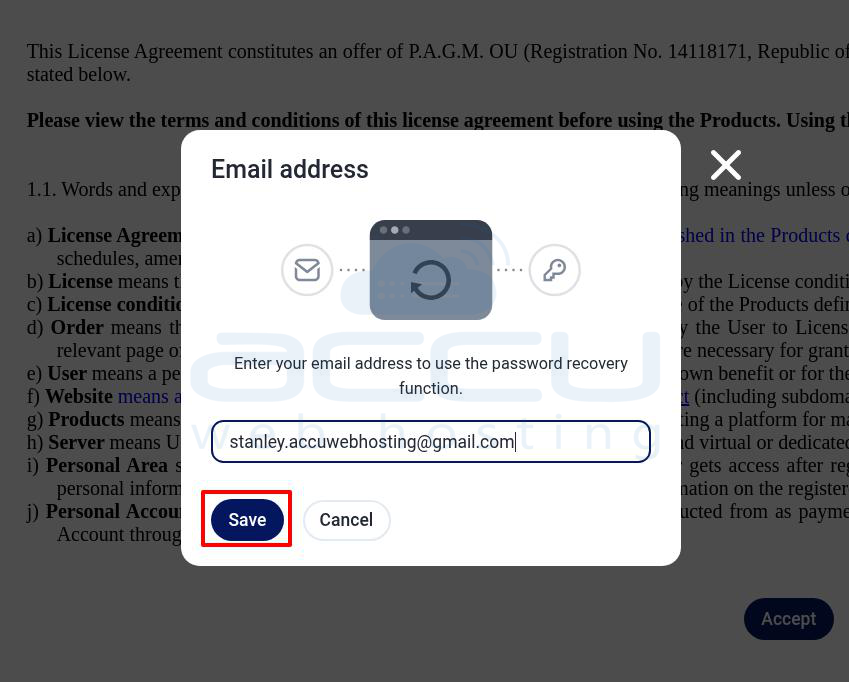
Step 2: Enter the email for password recovery purposes.
Step 3: Accept the terms and conditions.

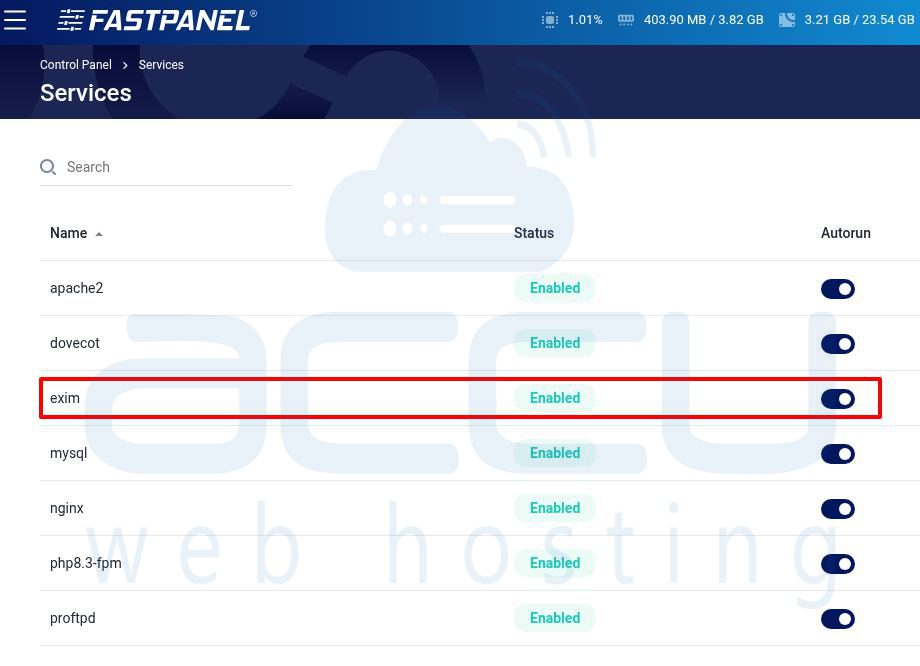
Step 4: Verify Exim Service is Active. Go to Control Panel > Services. Check whether the Exim service is active and enabled. Exim is the mail transfer agent (MTA) that will handle email sending and receiving.
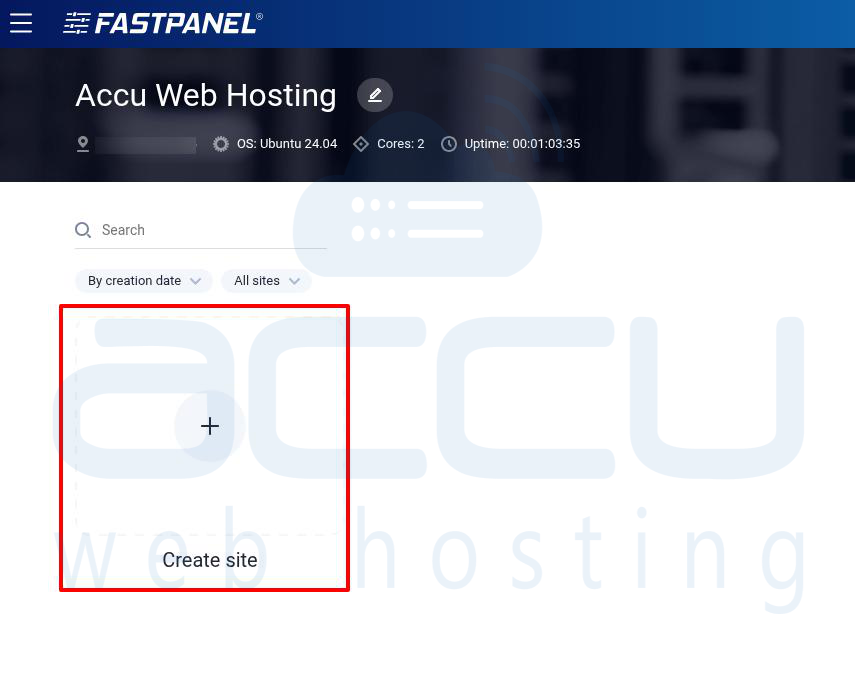
Step 5: In the main dashboard, click on the Create Website button.
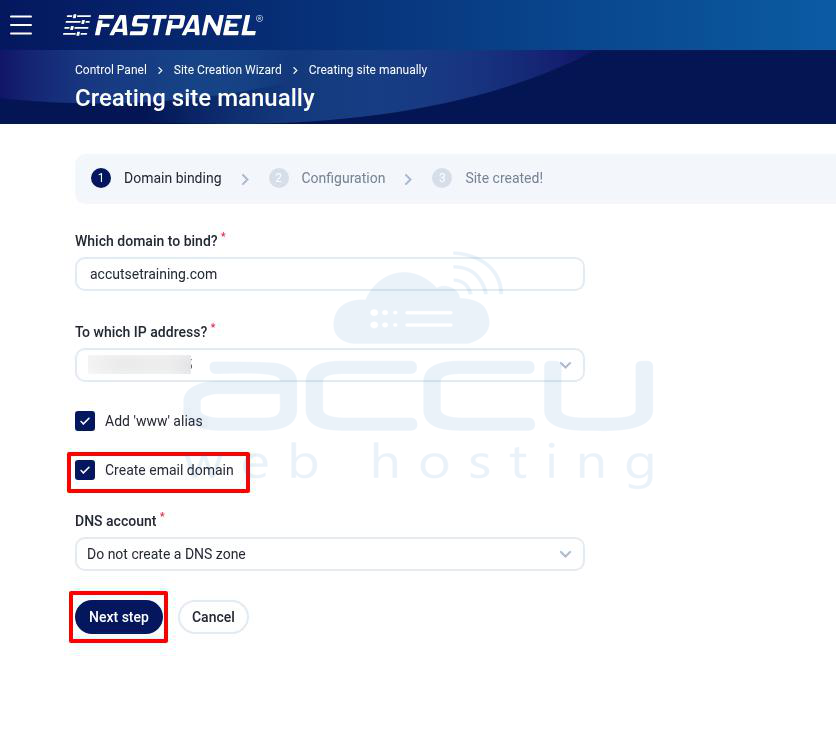
Step 6: Enter your domain name (e.g., yourdomain.com) in the "Which domain to bind" field. Select the server’s IP address for the domain.Make sure to check the option Create Email Domain. Click Next Step to proceed.
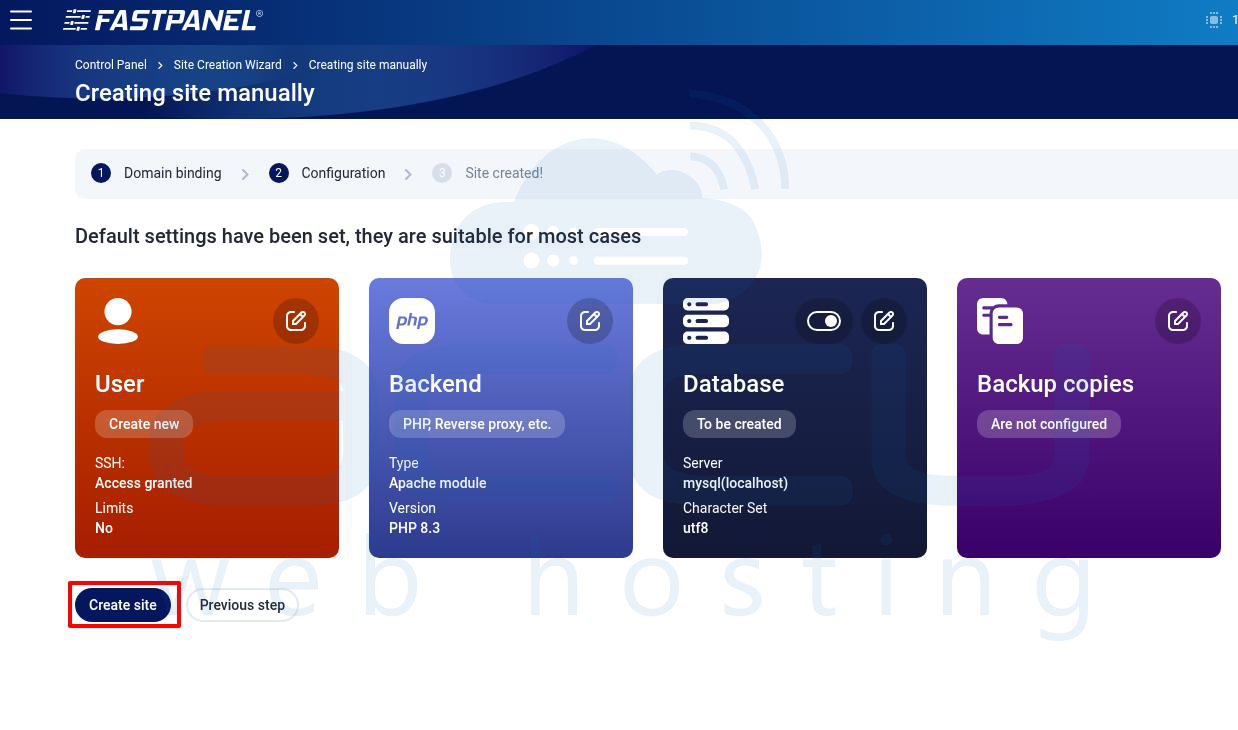
Step 7: Configure other settings such as PHP version, database creation, or FTP accounts as needed. Click Create Site.
Step 8: Update DNS Records at Your Domain Registrar
For your email server to work, you need to configure the DNS records at your domain registrar. Log into your domain registrar’s website and find the DNS settings for your domain. You will need to add or edit the following records:
- A Record: Points your domain (yourdomain.com) to the server’s IP address.
- MX Record: Specifies the mail servers responsible for receiving email for your domain.
- SPF Record: Helps prevent your email from being marked as spam.
- DKIM Record: Provides email authentication to prevent spoofing and phishing.
- DMARC Record (optional): Helps to enforce policy-based email protection.
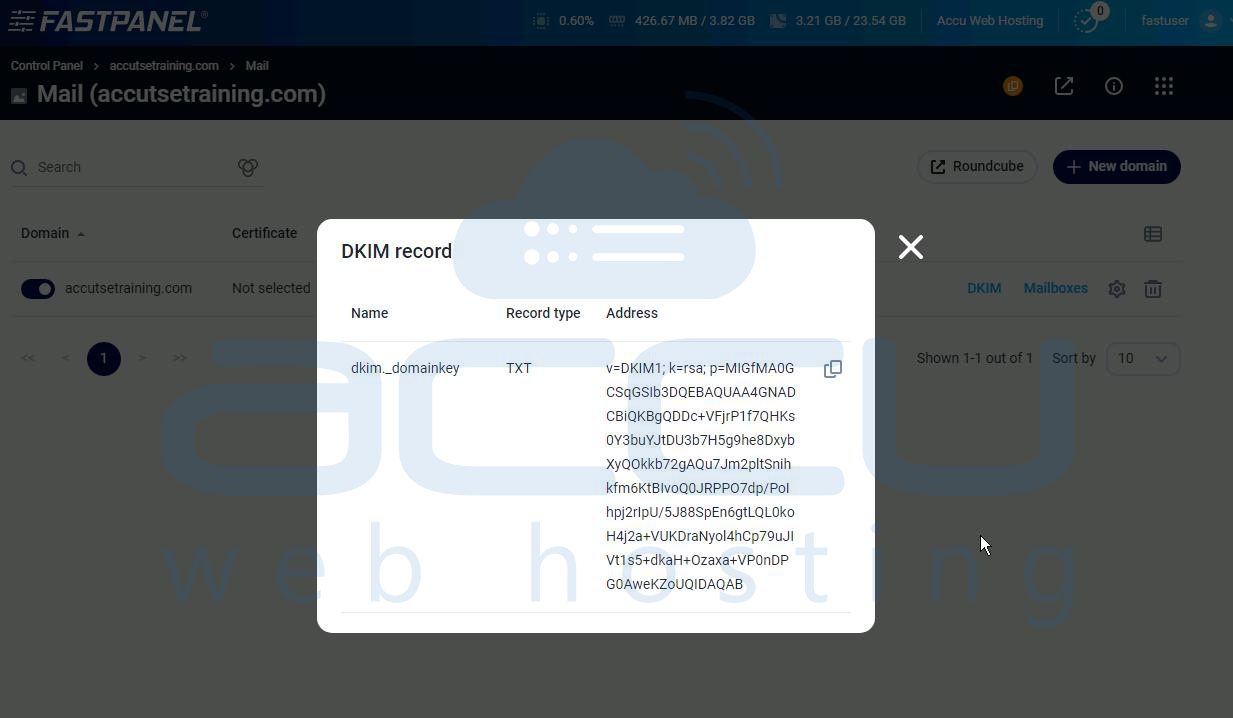
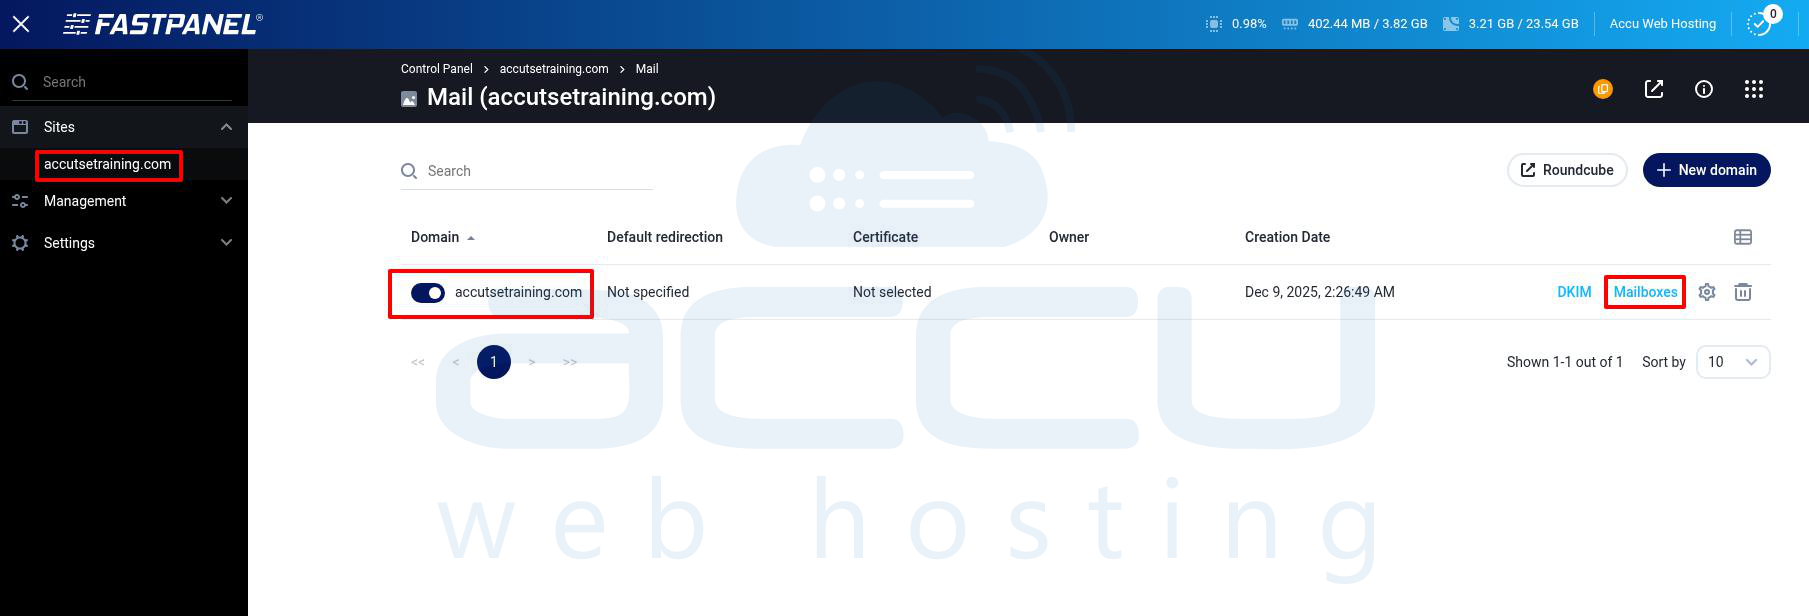
To get the DKIM record, follow these steps: Go to Control Panel > Domain Name > Mail. Click on DKIM to generate the DKIM record.
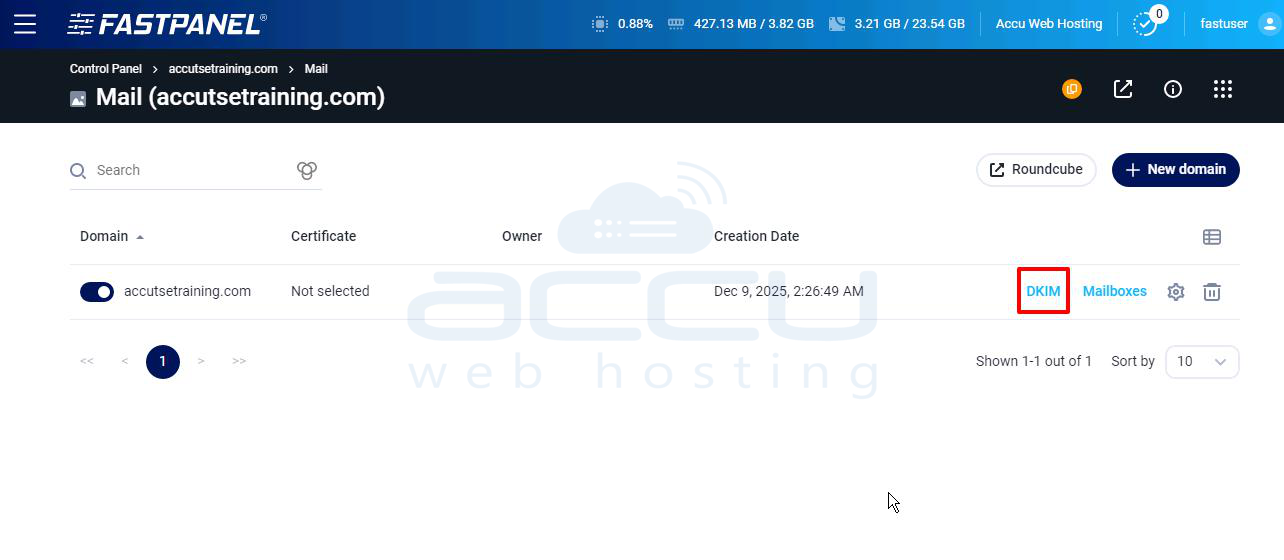
Copy the name, record type, and value. Add this information to your DNS zone.
Step 9: Once your DNS records are set up, go to the Mail section in the FastPanel dashboard.
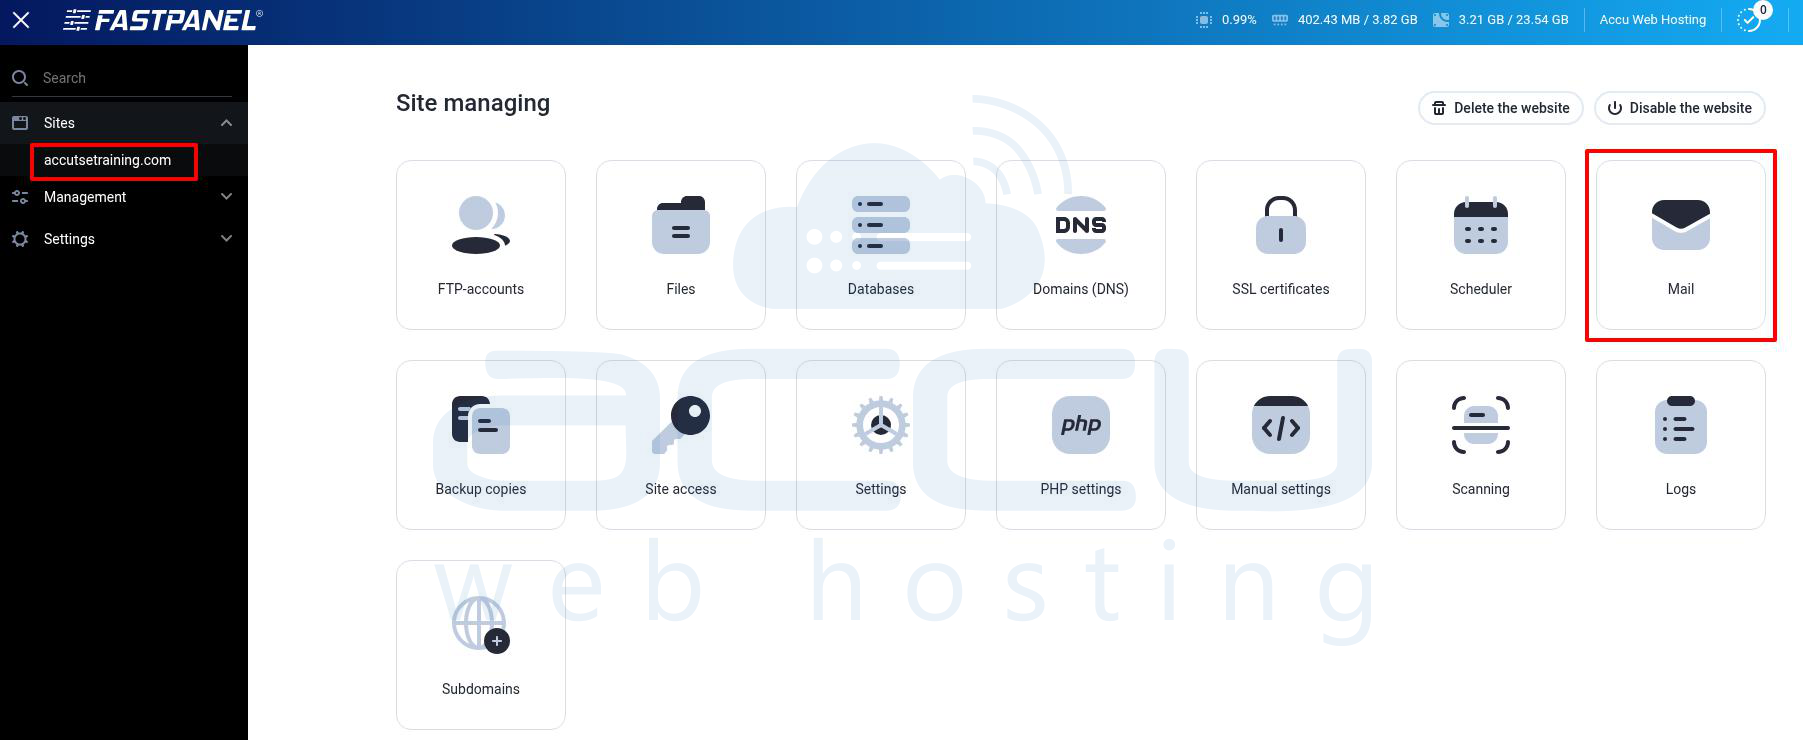
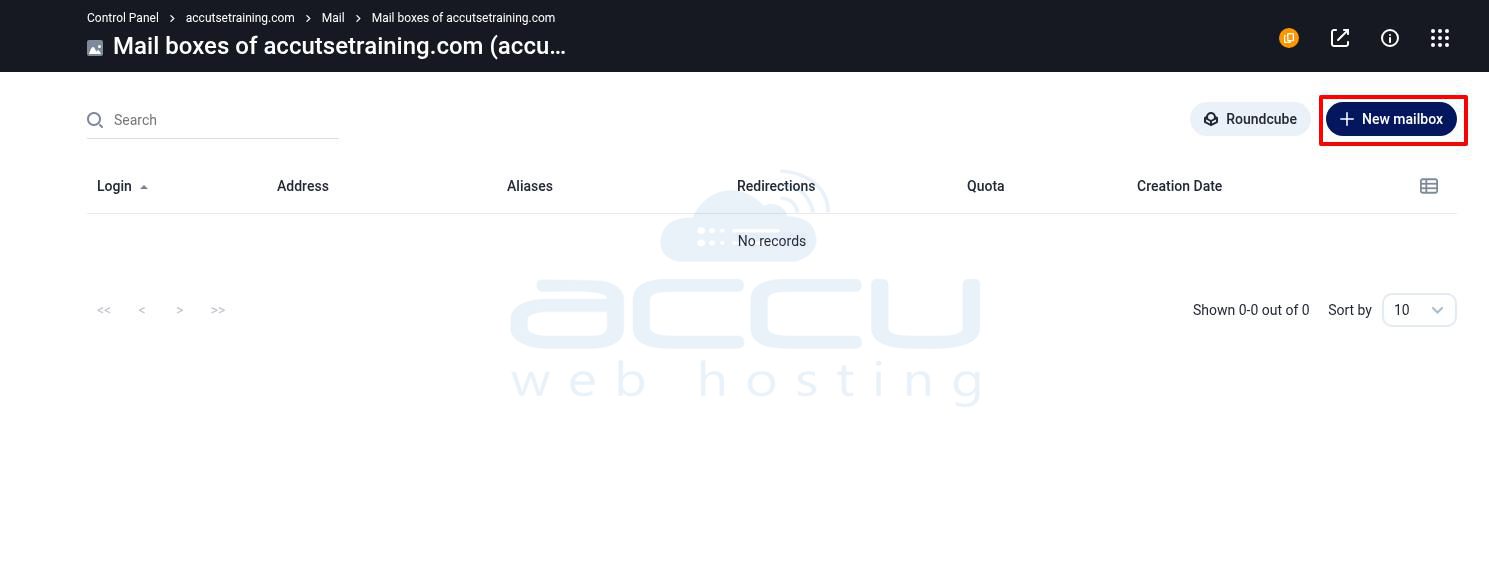
Step 10: If your domain isn’t listed in the mail section, click New Domain, enter your domain name, and save. Click on the Mailboxes button.
Step 11: Click New Mailbox.
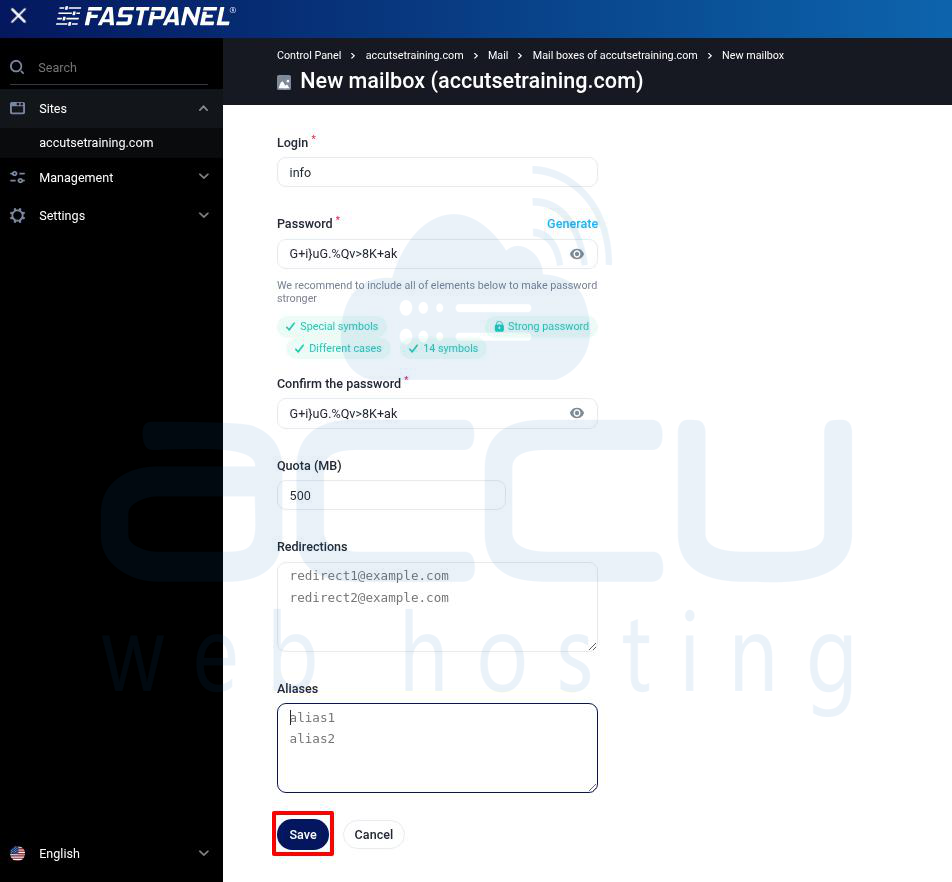
Step 12: Configure Mailbox Details.
For each mailbox you want to create, fill out the following details:
- Login: Enter the part before the "@" symbol (e.g., info for [email protected]).
- Password: Create a strong password or use the "Generate" button.
- Quota (MB): Set a size limit or set it to 0 for unlimited.
- Aliases: Add alternative email addresses that forward to this mailbox (click "Add").
- Redirects: Forward emails to another address (click "Add").
Click Save to create the mailbox.
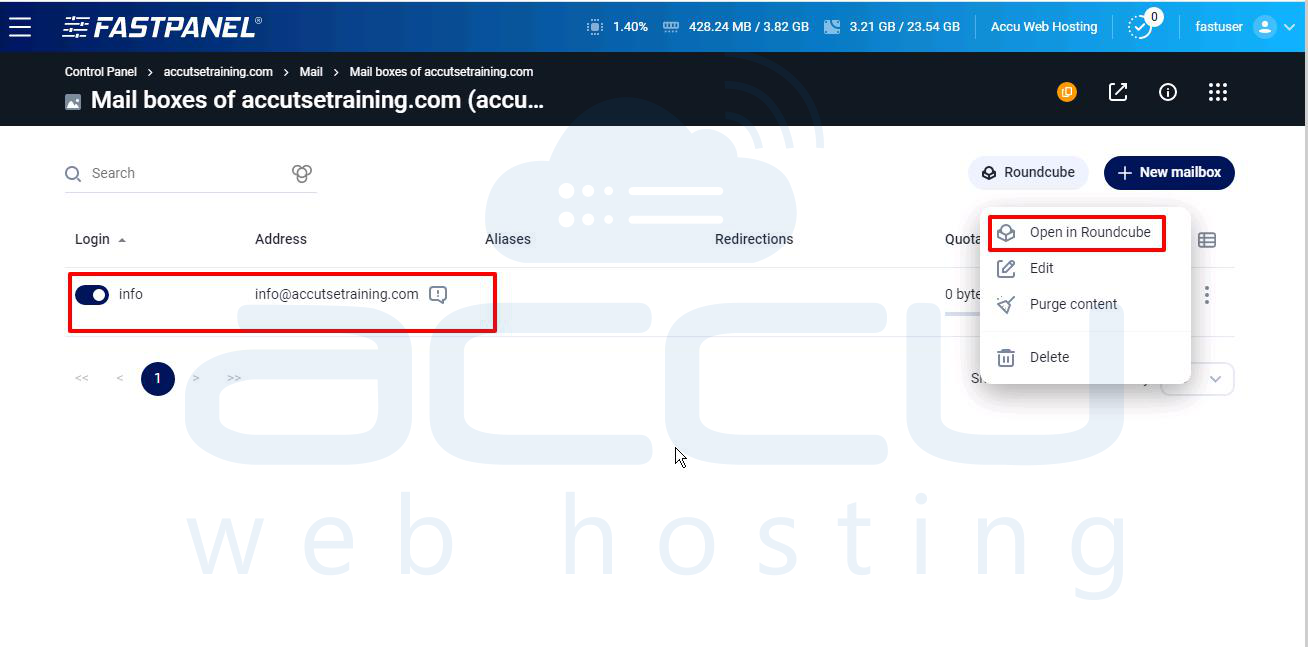
Step 13: Accessing Your Email Account via Roundcube.To access your email, click the Open Roundcube icon next to the mailbox.
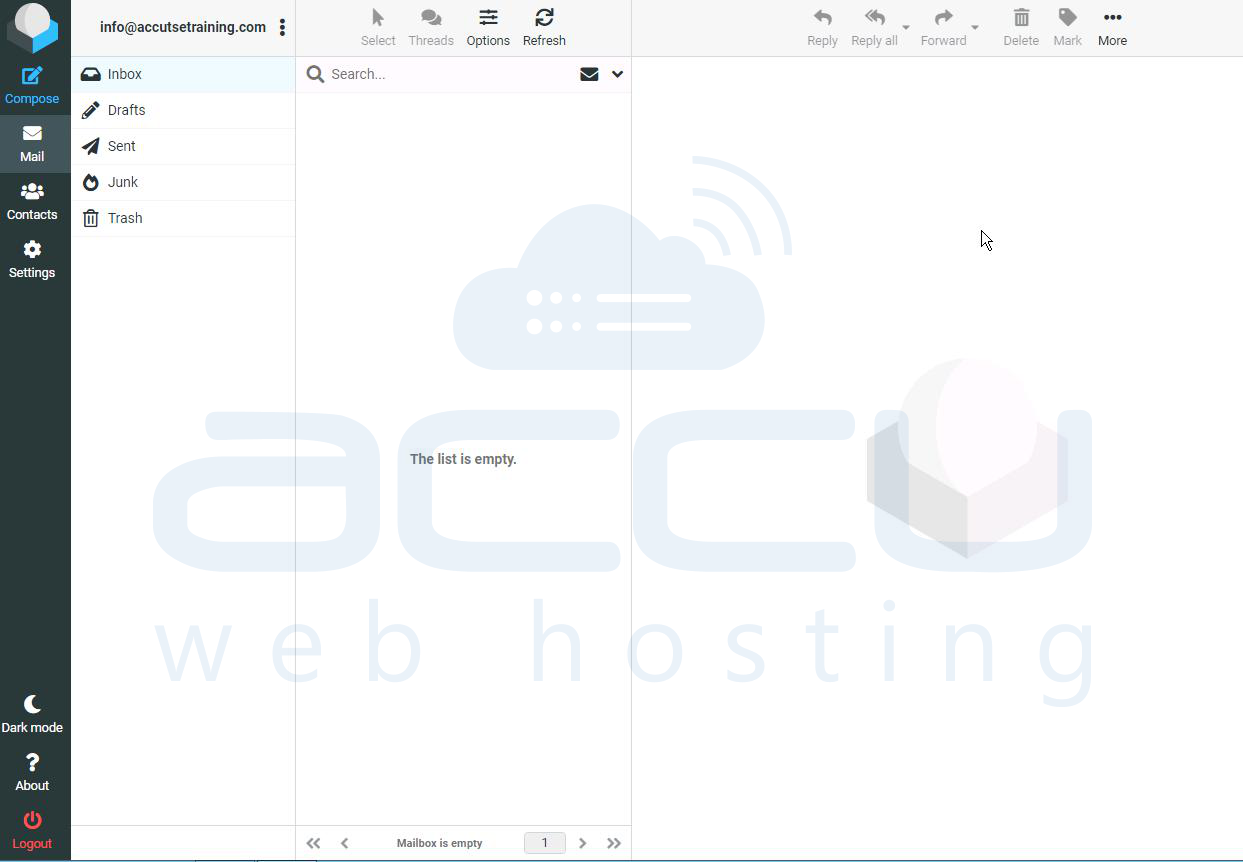
Step 14: Roundcube will open without requiring you to enter your access credentials again.
Step 15: You can now compose and send test emails from Roundcube. Compose a test email within Roundcube and send it to another email address (e.g., your personal Gmail account).
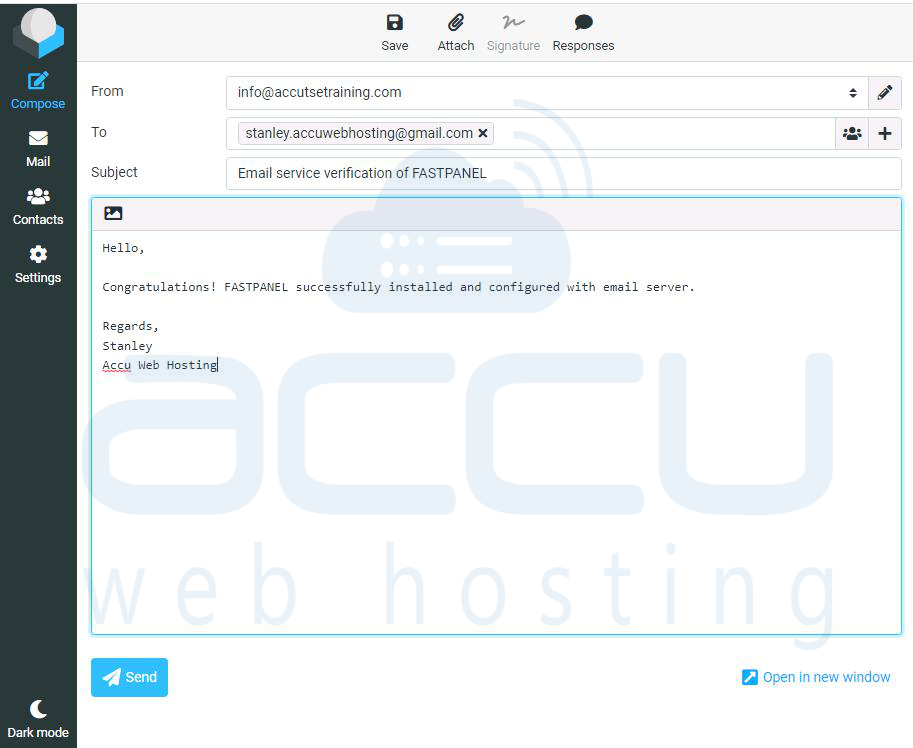
Step 16: Check the recipient’s inbox to verify that the email was received. If the test email is received, your email server is properly configured.

Conclusion
Configuring an email server with FastPanel is a fairly straightforward process, but it does require careful attention to DNS settings and mail server configuration. By following the steps outlined in this guide, you should be able to install and configure your email server with FastPanel, enabling you to send and receive emails for your domain.
