Migrating a website from cPanel to FastPanel involves several steps. FastPanel is an alternative to cPanel, and it has a different interface, but the migration process generally follows the same principles. You need to transfer files, databases, and configure DNS settings accordingly. Below are the detailed steps for migrating your website from cPanel to FastPanel.
Step 1: Prepare Your New FastPanel Hosting
Before you start migrating, ensure that your new hosting account with FastPanel is set up and you have access to the FastPanel dashboard.
Get your FastPanel login credentials, set up your website’s domain name in FastPanel, if it isn't already set up, install any necessary software (like PHP, MySQL, etc.) on the new server that your website depends on.
Step 2: Backup Website Files and Databases from cPanel
Backup Website Files:
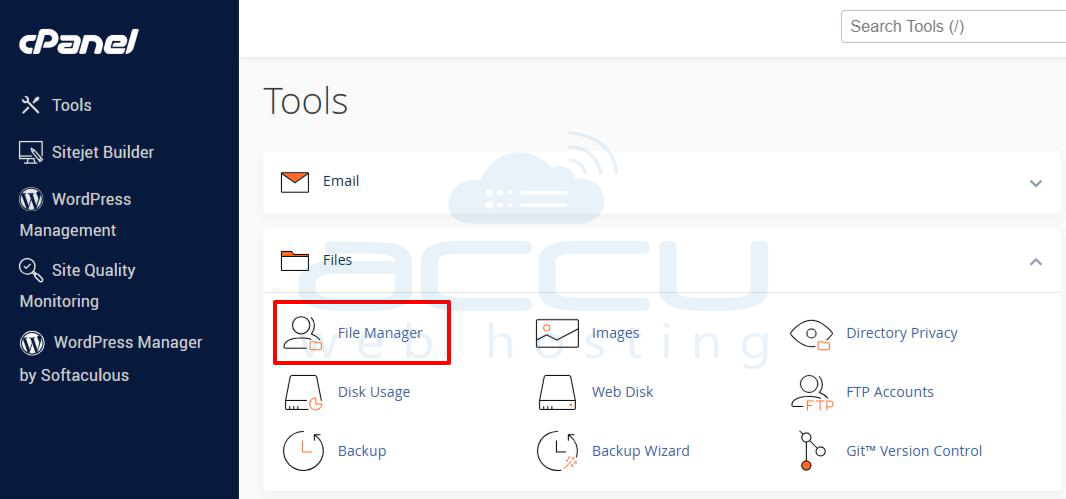
2.1 Log in to cPanel on your current hosting provider.
2.2 Go to the File Manager under the "Files" section.
2.3 Navigate to the root folder of your website, public_html.
2.4 Select all the files in the folder and compress them into a ZIP file.
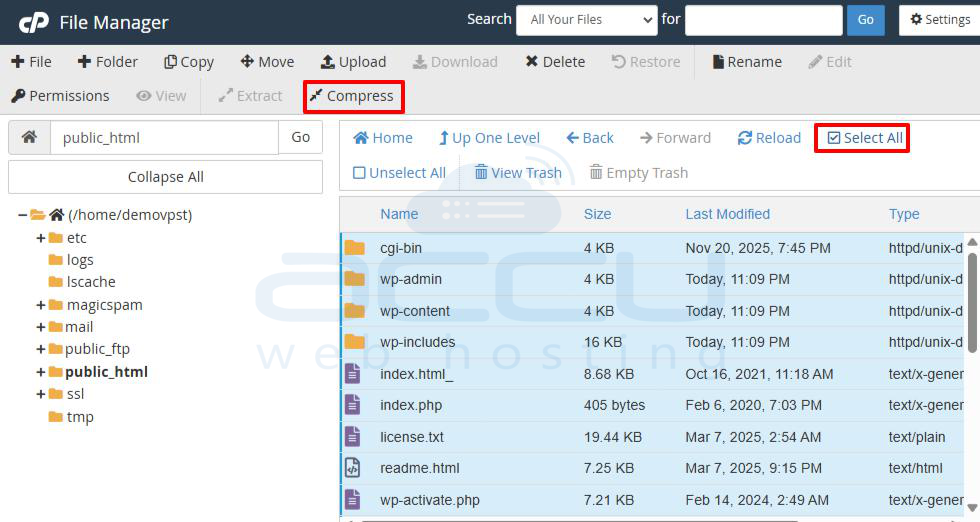
2.5 Click Compress and choose the format (ZIP is recommended).
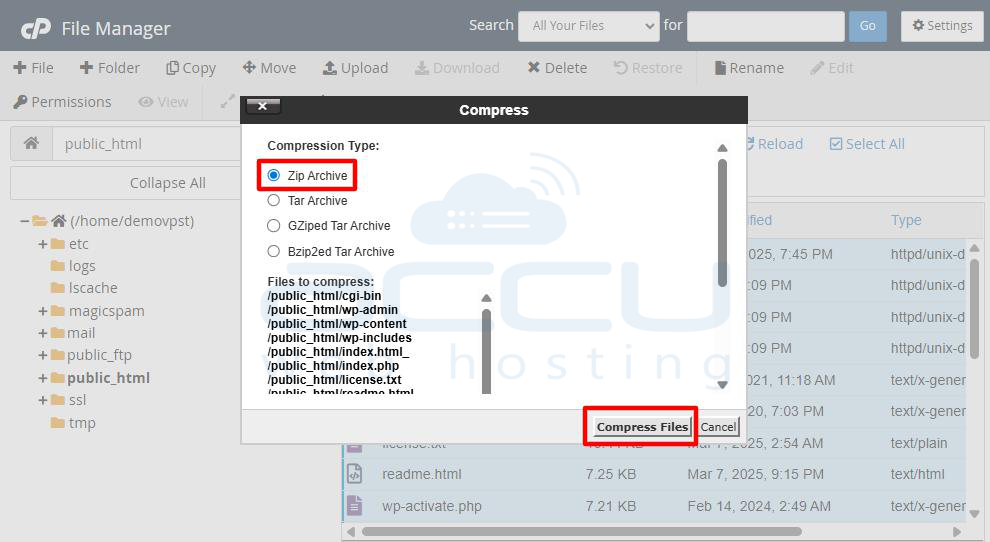
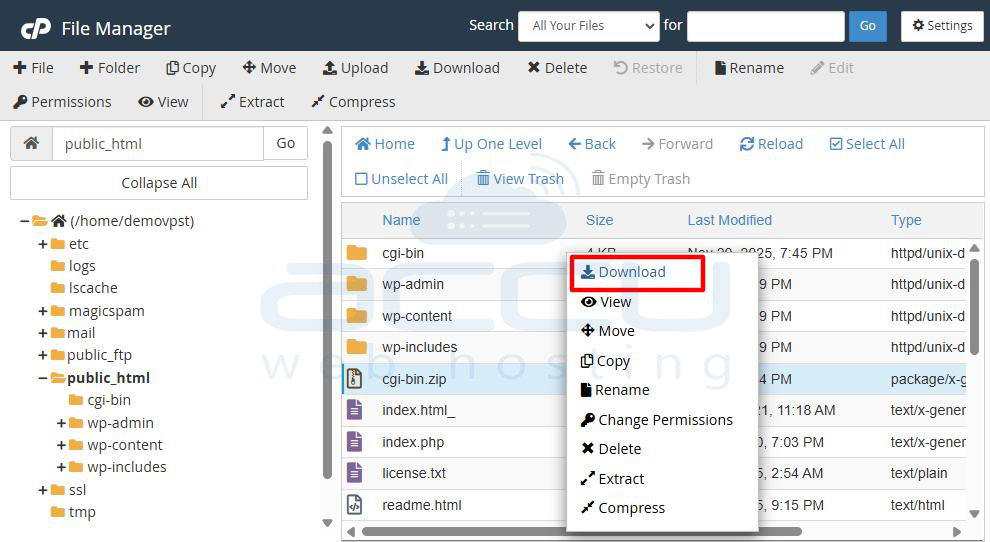
2.6 Download the ZIP file to your local computer.
Backup Databases:
2.1 In cPanel, go to phpMyAdmin under the "Databases" section.
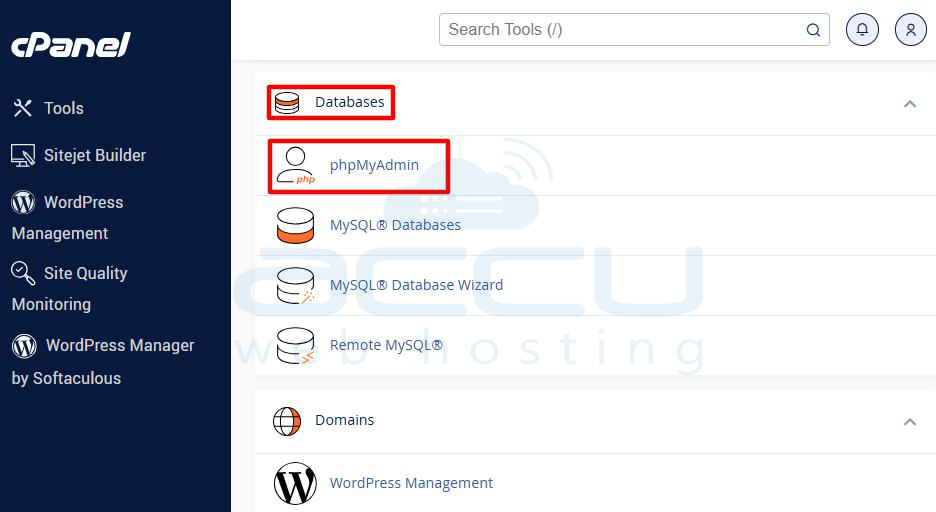
2.2 Select the database associated with your website.
2.3 Click on Export from the top menu.
2.4 Use the "Quick" export method and select the SQL format.
2.5 Click Export to download the .sql file of your database.

Step 3: Upload Website Files to FastPanel
3.1 Log in to your FastPanel dashboard.
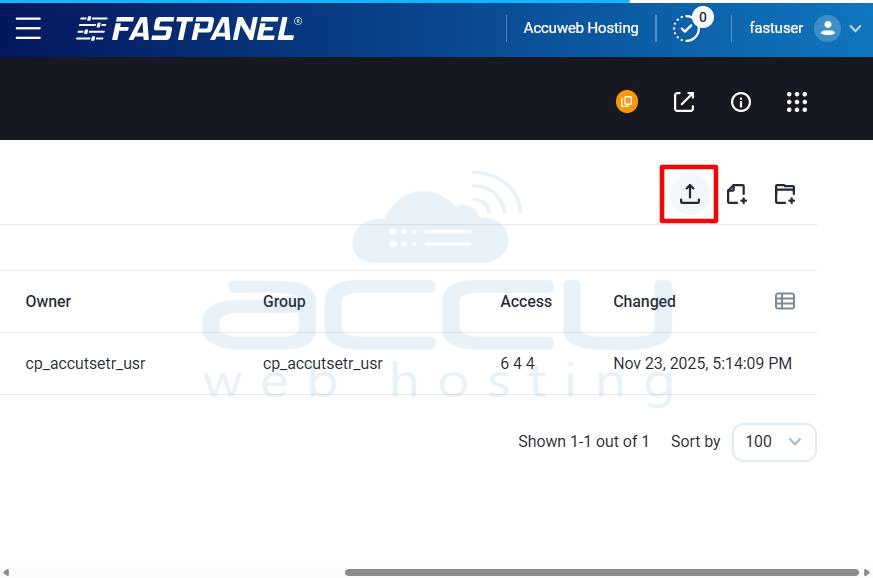
3.2 Navigate to the File Manager.
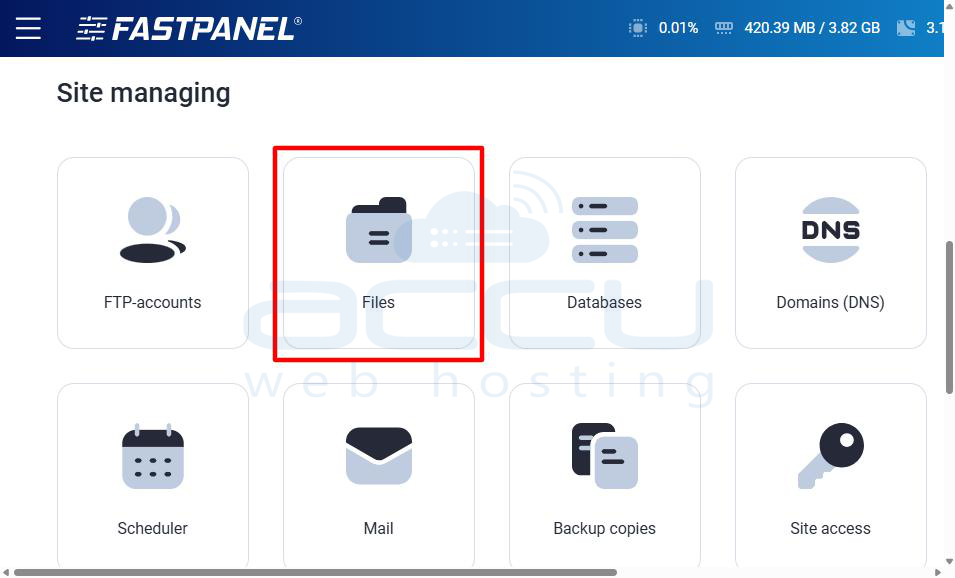
3.3 Locate the root folder for your website (typically /www).
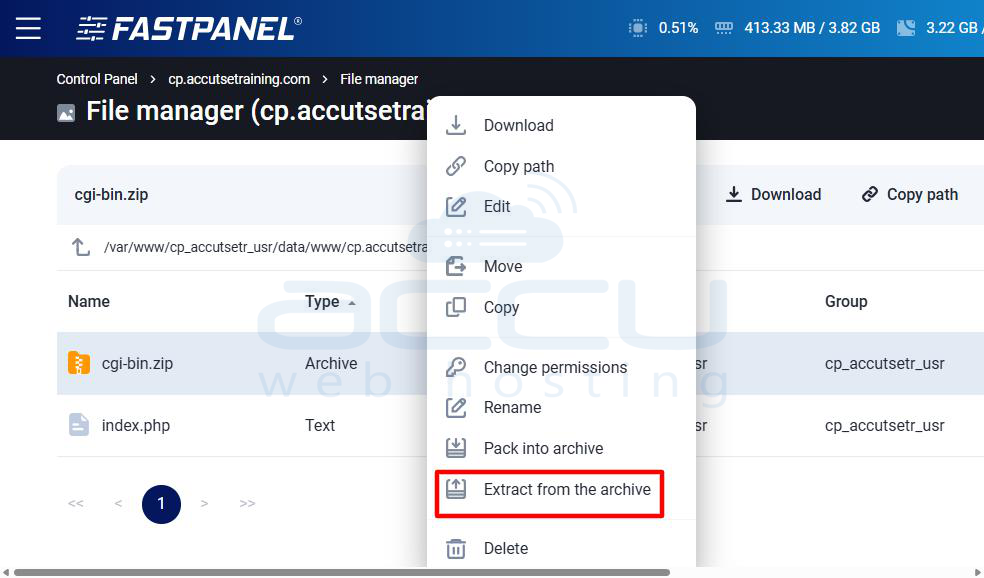
3.4 Upload the ZIP file containing your website files to this folder.
3.5 Once uploaded, extract the ZIP file into the appropriate directory.
Import Databases to FastPanel
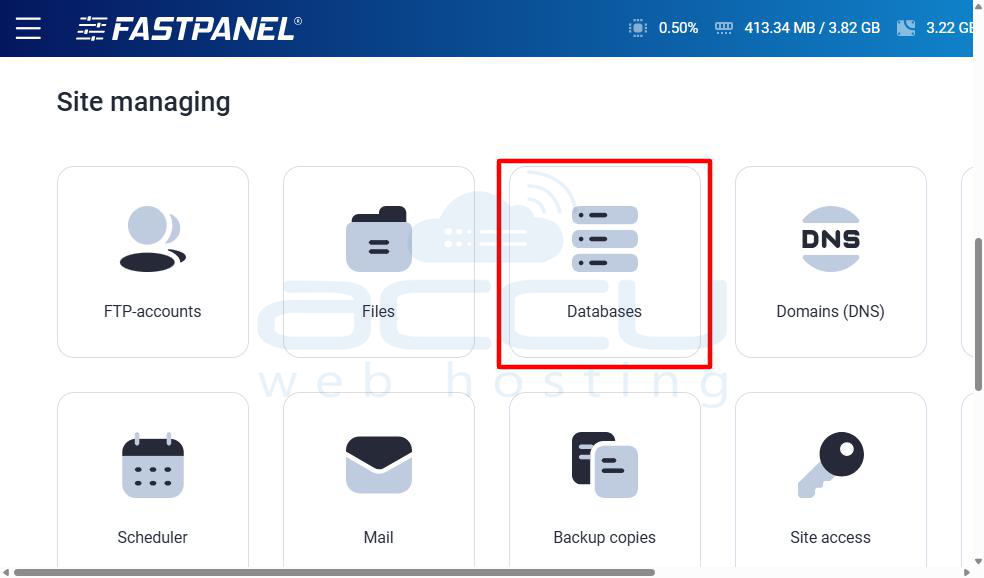
3.1 In FastPanel, go to the Databases section.
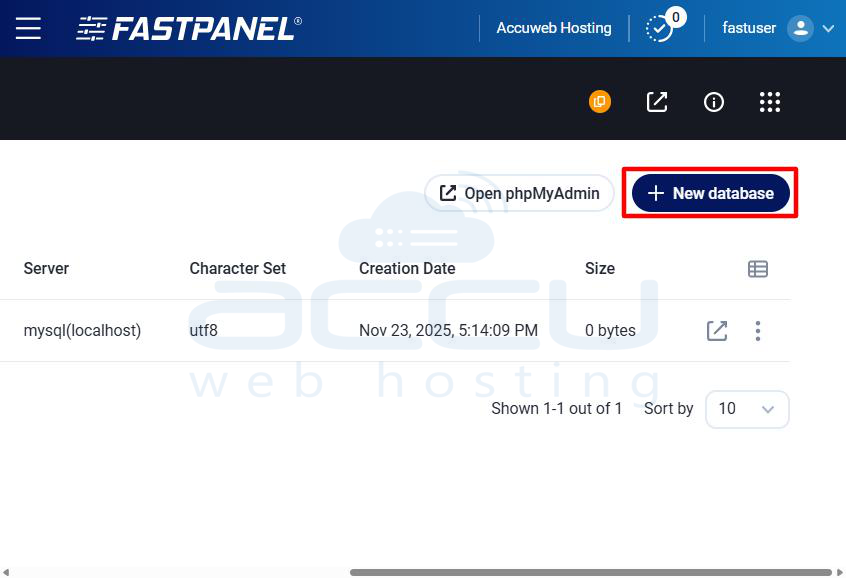
3.2 Create a new MySQL database and user (make sure to note down the database name, username, and password for later).
3.3 Go to phpMyAdmin in FastPanel.
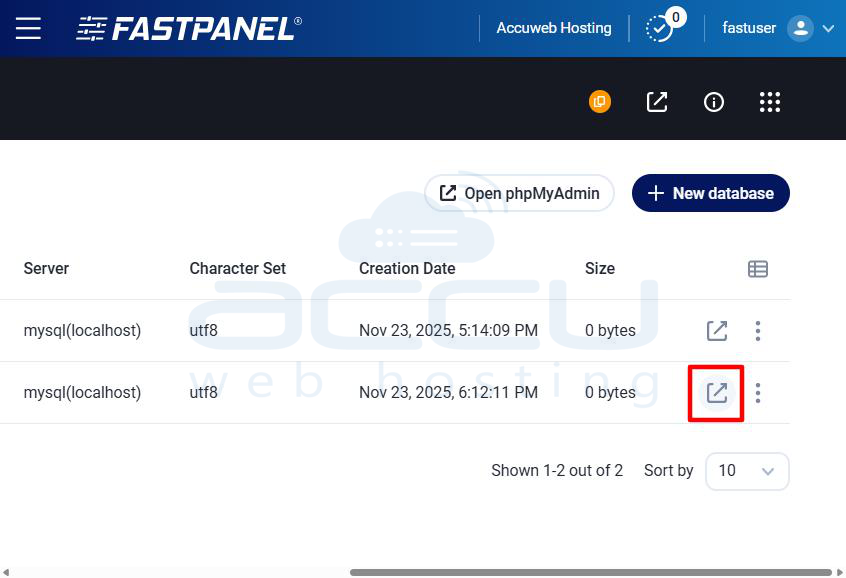
3.4 Select the newly created database, then click on Import.
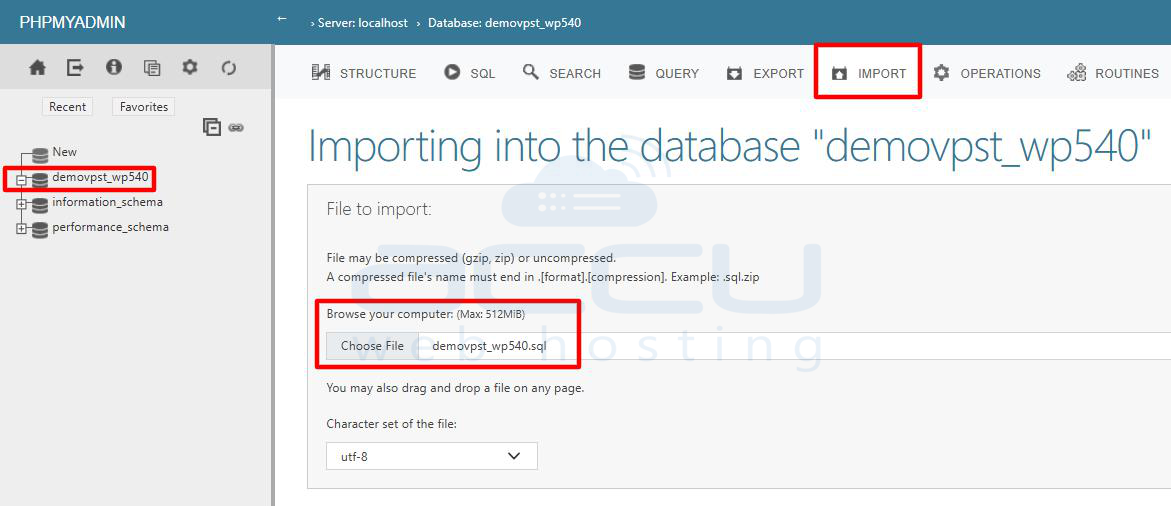
3.5 Browse for the .sql file you exported earlier from cPanel and upload it.
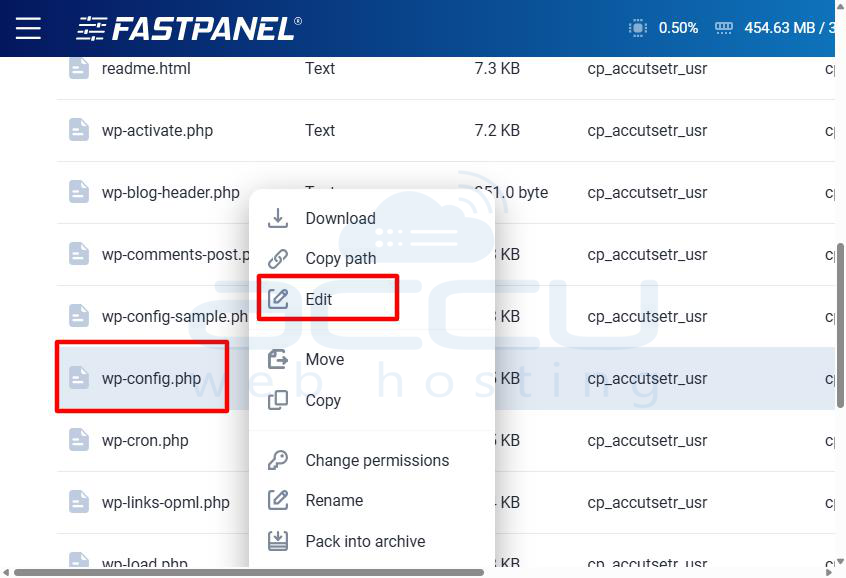
Step 4: Update Configuration Files
If your website uses a content management system (CMS) like WordPress, Joomla, etc., you might need to update the configuration files with the new database details (database name, username, password).
For example, in WordPress, you would: Edit the wp-config.php file in your website’s root folder.
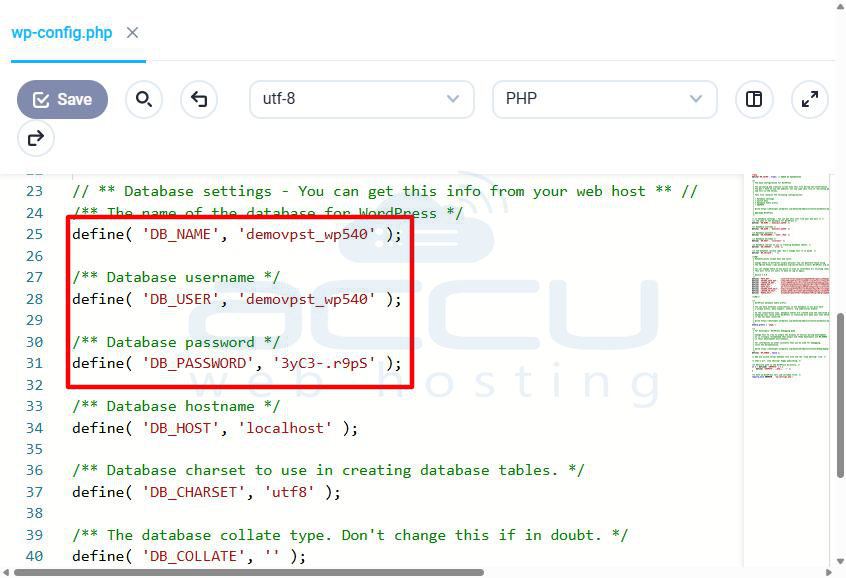
Update the following lines with your new database credentials:
define('DB_NAME', 'your_new_db_name');
define('DB_USER', 'your_new_db_user');
define('DB_PASSWORD', 'your_new_db_password');
Step 5: Set Up Email Accounts (if applicable)
If you have email accounts set up in cPanel (e.g., [email protected]), you will need to recreate them in FastPanel.
In FastPanel, navigate to the Email Accounts section. Create the same email addresses you had on the cPanel server.

Step 6: Update DNS Settings
After migrating the files and databases, you’ll need to point your domain to the new server (FastPanel).
Log in to your domain registrar’s website (where you registered your domain). Update the nameservers to the ones provided by your FastPanel hosting provider. This step is necessary to make sure that your domain points to the new server.
Typically, your hosting provider will give you the nameservers (e.g., ns1.fastpanel.com, ns2.fastpanel.com).
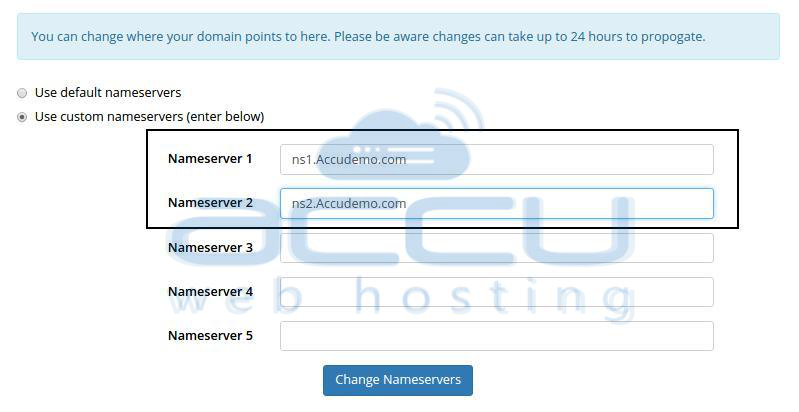
Allow some time for the DNS changes to propagate, usually 24-48 hours.
Step 7: Test the Website on FastPanel
Once DNS propagation is complete, test your website to make sure everything is working correctly:
-
Check if all website files are loading properly.
Test the database connection and ensure that all dynamic content is functioning as expected. Also, verify that emails are working correctly.
Conclusion
Migrating a website from cPanel to FastPanel is mostly about transferring your website files, databases, and adjusting configuration settings. As long as you take it step by step, you should be able to do this successfully.
