
Managing filеs bеtwееn your local computеr and a rеmotе sеrvеr is a common task for dеvеlopеrs, systеm administrators, and wеbsitе ownеrs. WinSCP is a frее, rеliablе, and usеr-friеndly filе transfеr cliеnt that supports SFTP, FTP, and SCP protocols, making it idеal for sеcurеly transfеrring filеs to and from a Windows VPS. In this guidе, wе'll walk you through thе stеps to install WinSCP on your Windows VPS.
WinSCP Requirements on Windows VPS
- WinSCP supports the following versions of Windows:
Windows Server: 2012, 2016, 2019, 2022
Windows Desktop: Windows 8, 10, 11 (if your VPS runs a desktop version)
- Your Windows VPS must have .NET Framework 4.5 or later installed.
- CPU: Any modern x86/x64 processor
- RAM: 512 MB minimum (1 GB+ recommended)
- Disk Space: ~30 MB
- A Windows VPS with Remote Desktop (RDP) access.
- Administrative privileges on the VPS.
Steps to Install WinSCP on Windows VPS
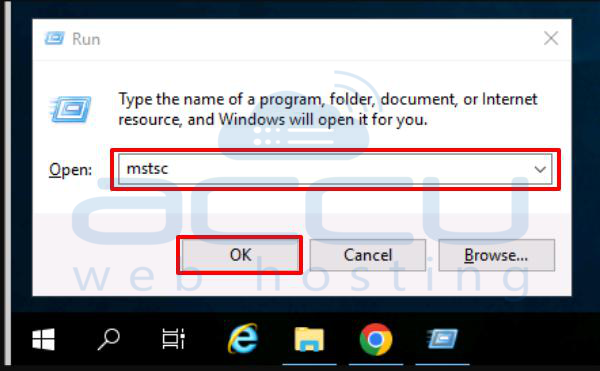
Step 1. Open the Remote Desktop Connection program on your local computer by pressing Windows + R, typing mstsc, and pressing Enter.
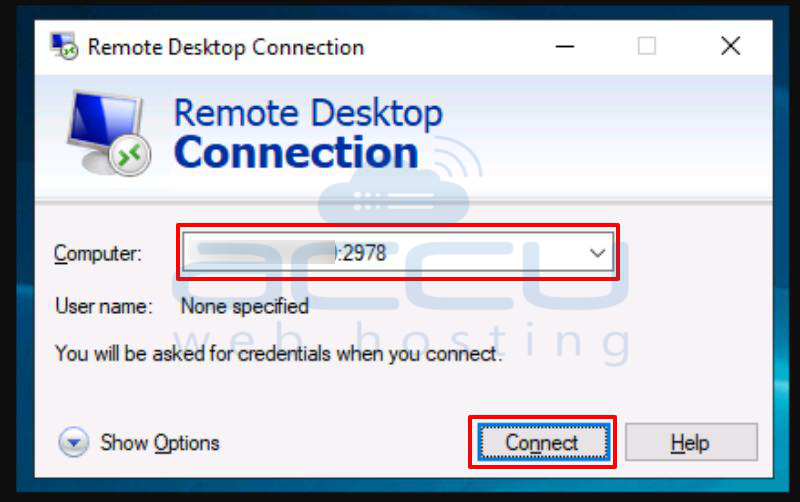
Step 2. In the Remote Desktop Connection window, enter the IP address of your Windows VPS, the port number, and click the "Connect" button.
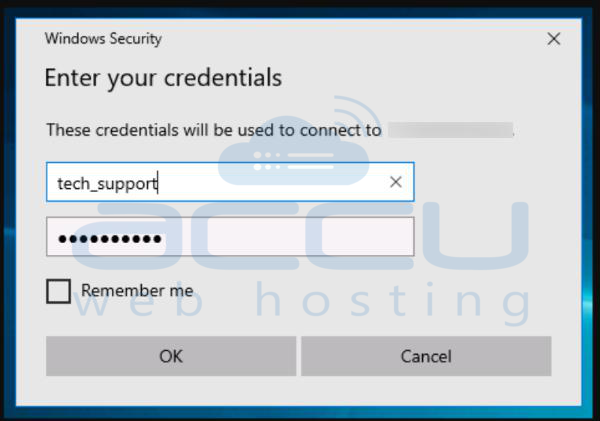
Step 3. Log in to the VPS using the username and password provided by your VPS provider.
Step 4. Once logged into the VPS desktop environment, open a web browser such as Microsoft Edge or Internet Explorer.
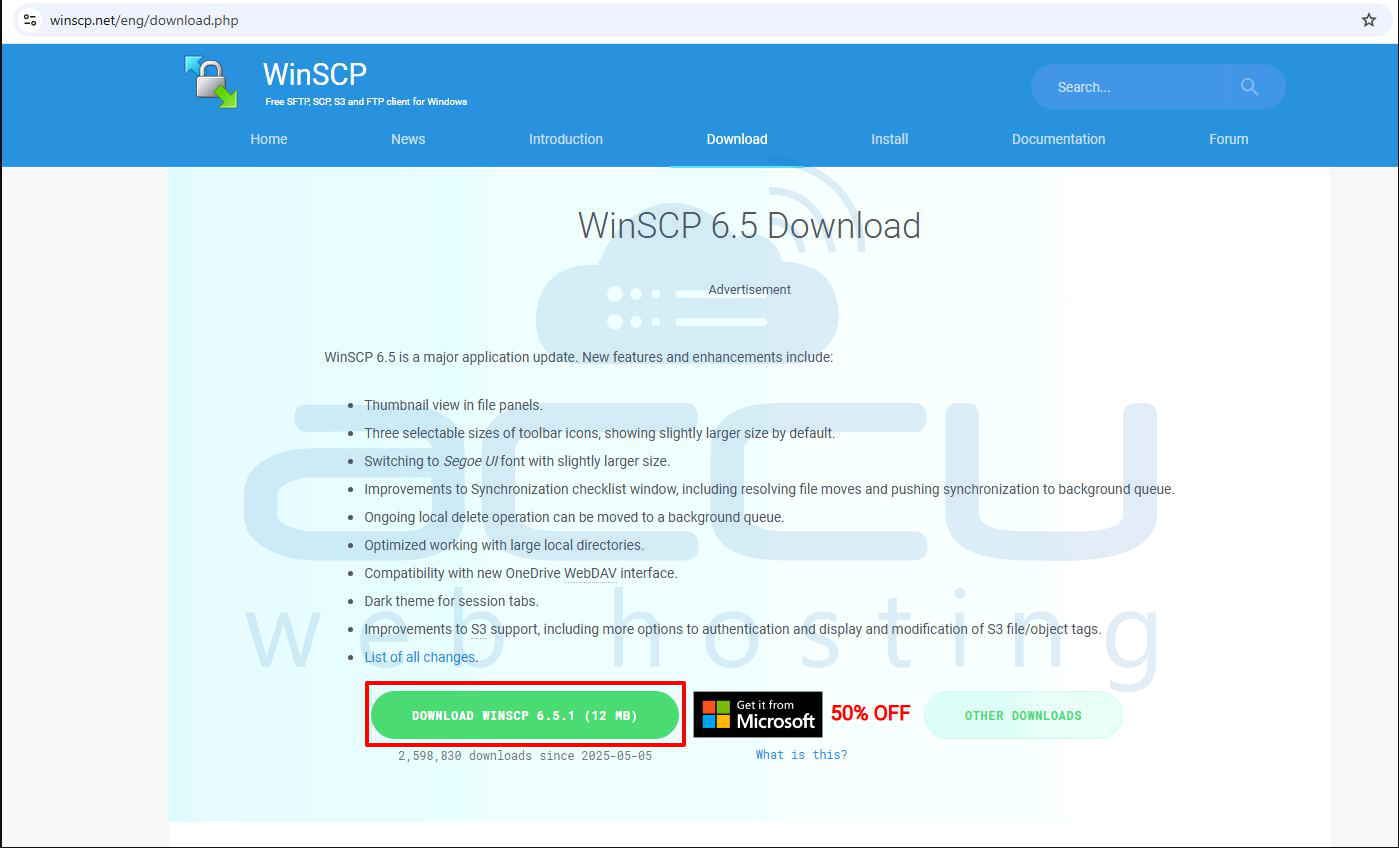
Step 5. In the browser’s address bar, go to the official WinSCP website by entering the following URL: https://winscp.net/eng/download.php.
Step 6. On the download page, click the “Download WinSCP” button to download the installation package.
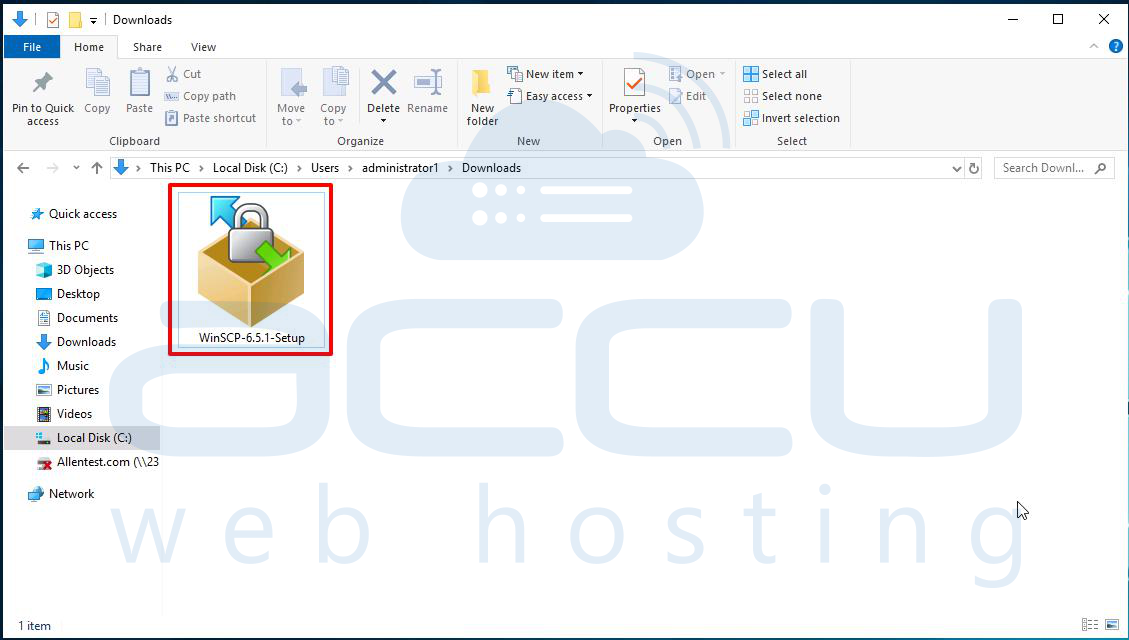
Step 7. When prompted, choose to save or run the installer file. If you save it, double-click the downloaded .exe file to begin installation.
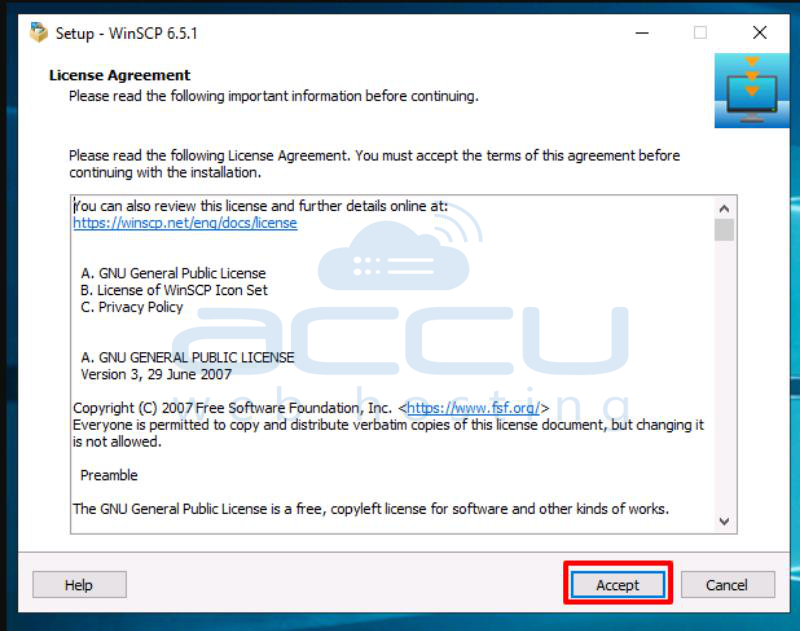
Step 8. Once the License agreement prompt appears, click "Accept" to allow the installer to continue.
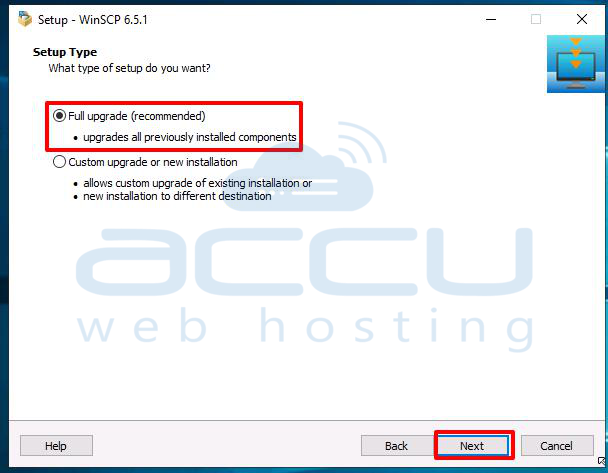
Step 9. The WinSCP installer will open. Select Full upgrade (recommended) unless you need to customize the installation. Click Next to proceed.
Step 10. Review the installation summary and click the “Install” button to begin the installation.
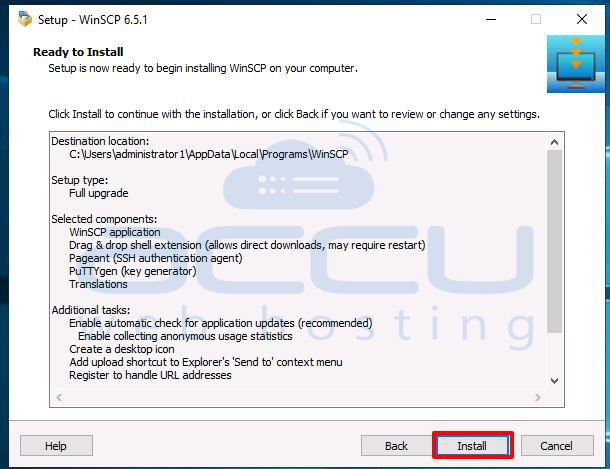
Step 11. Wait for the installation process to complete. This usually takes a few moments.
Step 12. Once installation is finished, make sure the checkbox labeled “Launch WinSCP” is selected, then click the “Finish” button.
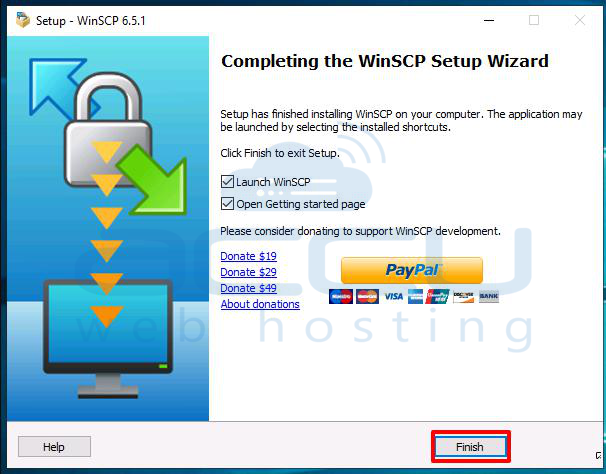
Step 13. WinSCP will launch automatically, and you’ll see the login window where you can enter your server connection details to begin transferring files.
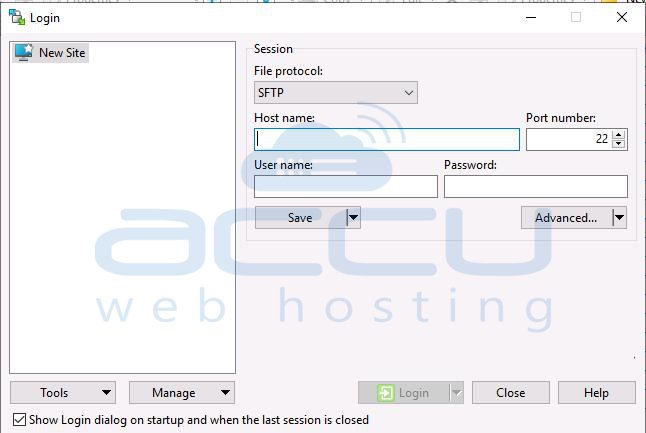
Step-by-Step: Connect to a Server Using WinSCP (SFTP/FTP)
Step 1. Launch WinSCP on your Windows VPS. You’ll see the Login window with connection fields.
Step 2. In the File protocol dropdown, choose either:
- SFTP (Secure File Transfer Protocol – recommended for security)
- FTP (File Transfer Protocol – less secure, but sometimes required)
Step 3. In the Host name field, enter the server IP address or domain name of the remote server you want to connect to.
Step 4. In the Port number field:
- For SFTP, use port 22 (default).
- For FTP, use port 21 (default).
Step 5. In the User name field, enter your server's username (e.g., root, admin, or a specific FTP user).
Step 6. In the Password field, enter the password for the server user account.
Step 7. (Optional) Click the Save button to save this session for future use. You can give it a name like "My FTP Server".
Step 8. Click the Login button to initiate the connection.
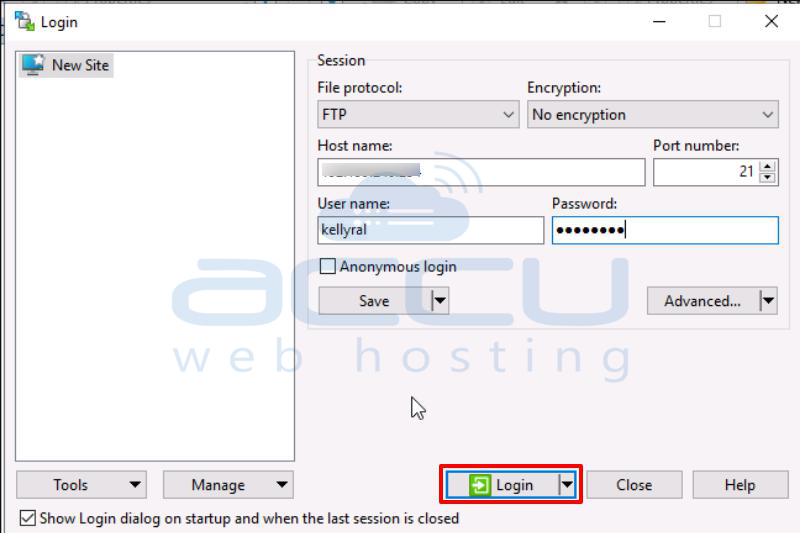
Step 9. If this is your first time connecting to the server, WinSCP may prompt you to confirm the server’s host key (for SFTP). Click Yes to trust and save the key.
Step 10. After connecting, the interface will show two panels. The left side displays files from your local computer. The right side shows files and folders from the remote server.
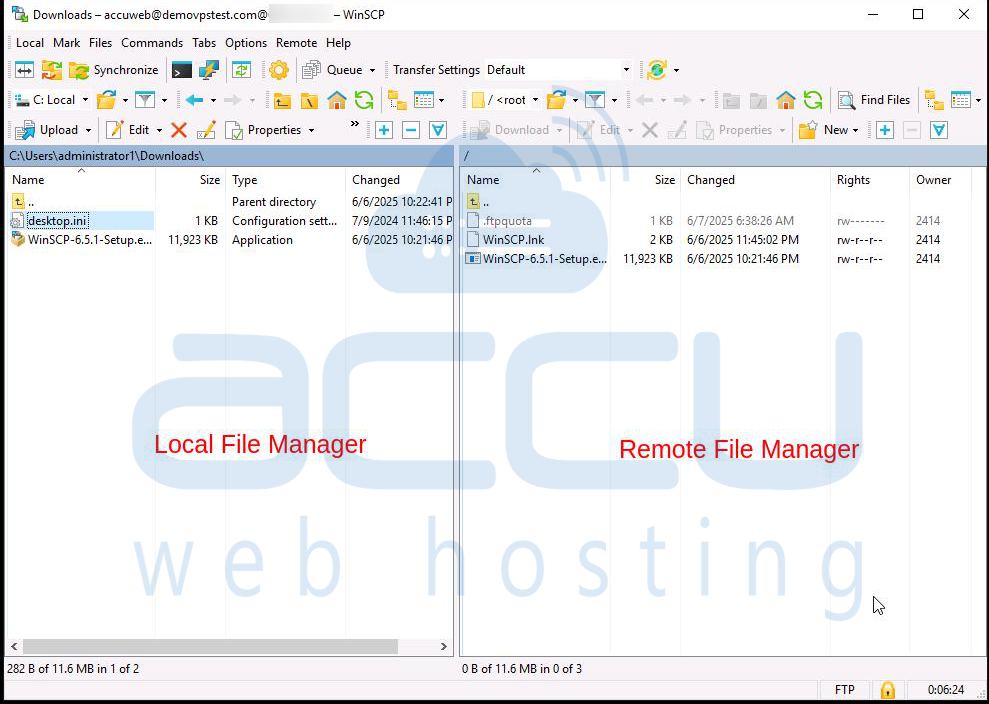
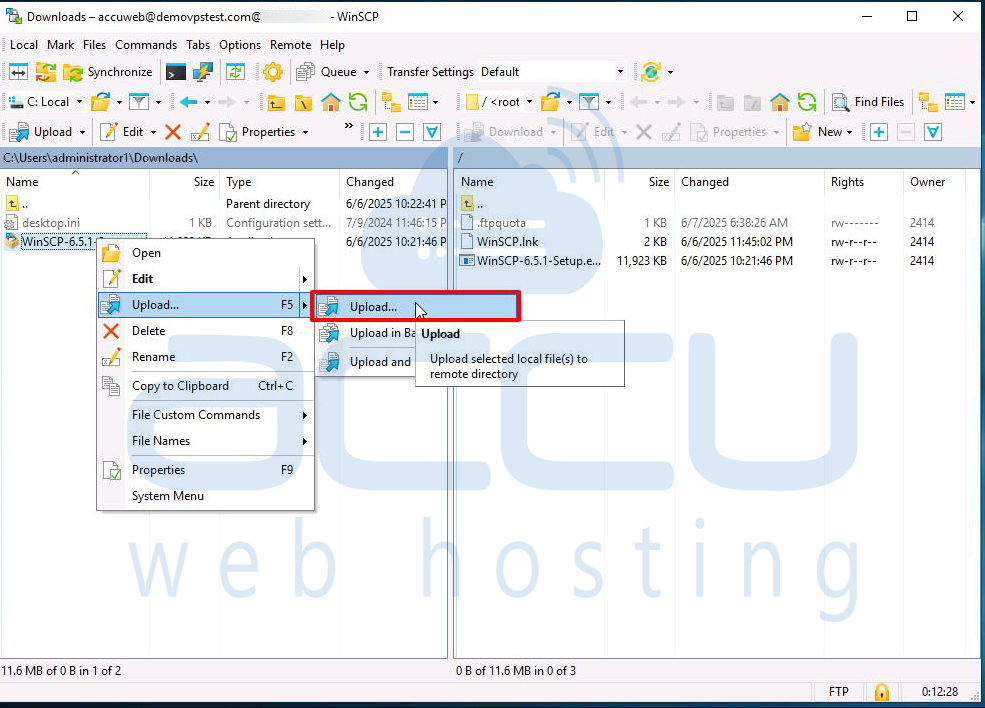
Step 11. To upload a file, browse the left panel and find the file or folder you want to upload. Then drag and drop it into the desired location on the right panel (remote server side). You can also right-click the file and select Upload.
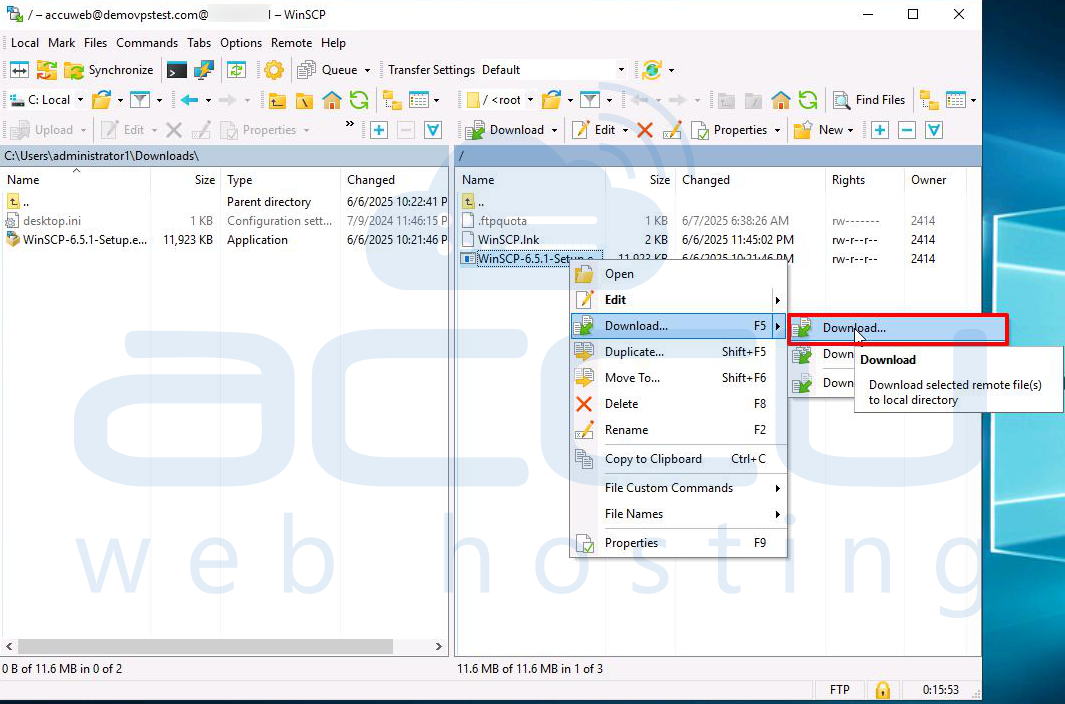
Step 12. To download a file, find the file or folder on the right panel (server side) that you want to download. Then drag and drop it into a folder on your local computer in the left panel. You can also right-click the file and select Download.
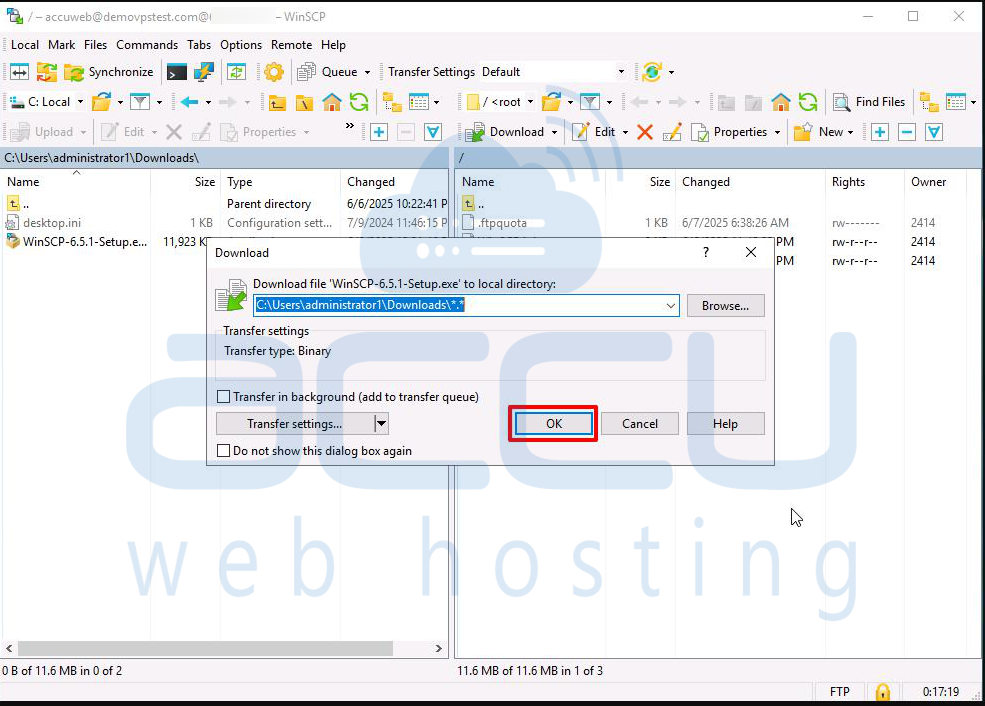
Step 13. WinSCP may show a confirmation window or transfer settings window depending on your configuration. Click OK to proceed with the file transfer.
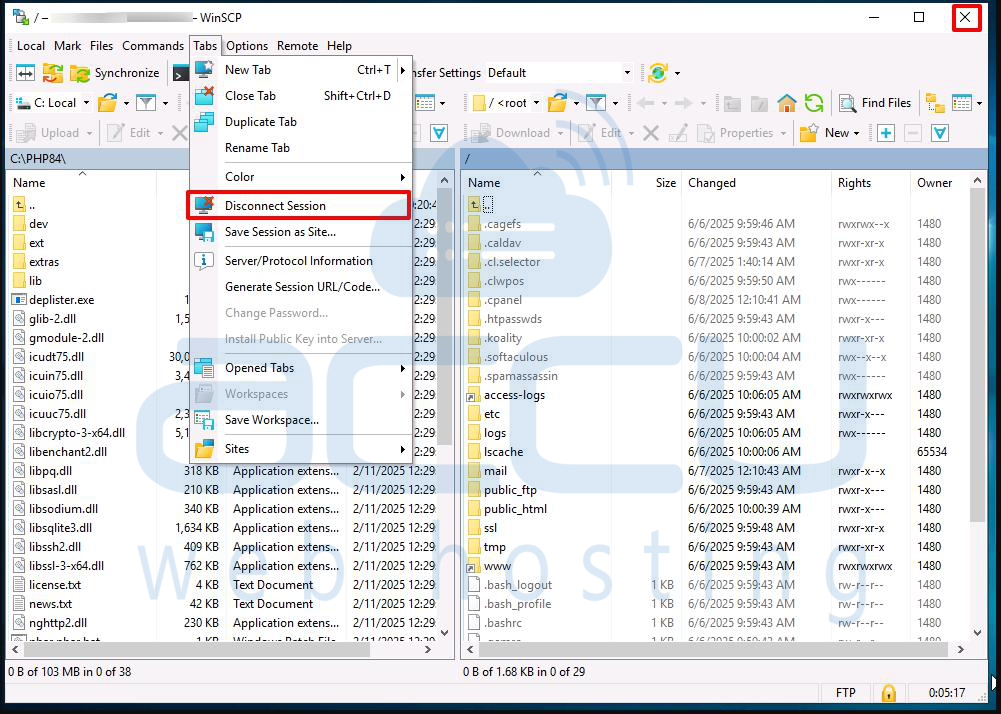
Step 14. Once you've finished transferring files, you can close the session by clicking the red "X" or going to Session > Disconnect.
Conclusion
Installing WinSCP on a Windows VPS is a straightforward procеss that еnablеs sеcurе and еfficiеnt filе transfеrs bеtwееn your local machinе and thе rеmotе sеrvеr. By following thе stеps outlinеd, downloading thе installеr, running thе sеtup, and configuring your connеction, you can quickly gеt startеd with managing filеs via SFTP or FTP. Whеthеr you'rе uploading wеbsitе filеs, downloading backups, or еditing configurations, WinSCP offеrs a usеr-friеndly intеrfacе and powеrful fеaturеs to simplify your workflow.