
VestaCP is an open-source, lightweight web control panel that makes it easy to perform server management functions for your Ubuntu VPS. This tutorial guides you through the installation and initial configuration of VestaCP on Ubuntu 18.04 (the latest compatible version) to help you deploy a budget-friendly alternative to paid control panels such as cPanel/WHM.
What is VestaCP?
VestaCP (Vesta Control Panel) is a free web control panel that enables you to control the core services of your Ubuntu VPS server from an easy-to-use interface. It's especially useful for:
- Managing websites, domains, and DNS records
- Setting up email accounts
- Creating and managing databases
- Managing FTP accounts
- Server performance and resource monitoring
Although some high-end features are only available with paid plugins, the basic functionality is entirely free and thus a great option for small business or personal websites.
Prerequisites
If you have a fully managed VPS server, you can ask our team to install VestaCP by creating a support ticket or at the time of purchase.
Before starting the installation, ensure you have:
- A clean Ubuntu VPS* server (without any pre-installed LAMP stack)
- Root access to your Ubuntu VPS
- A registered domain name (for setting up nameservers)
- At least 1GB RAM (2GB recommended)
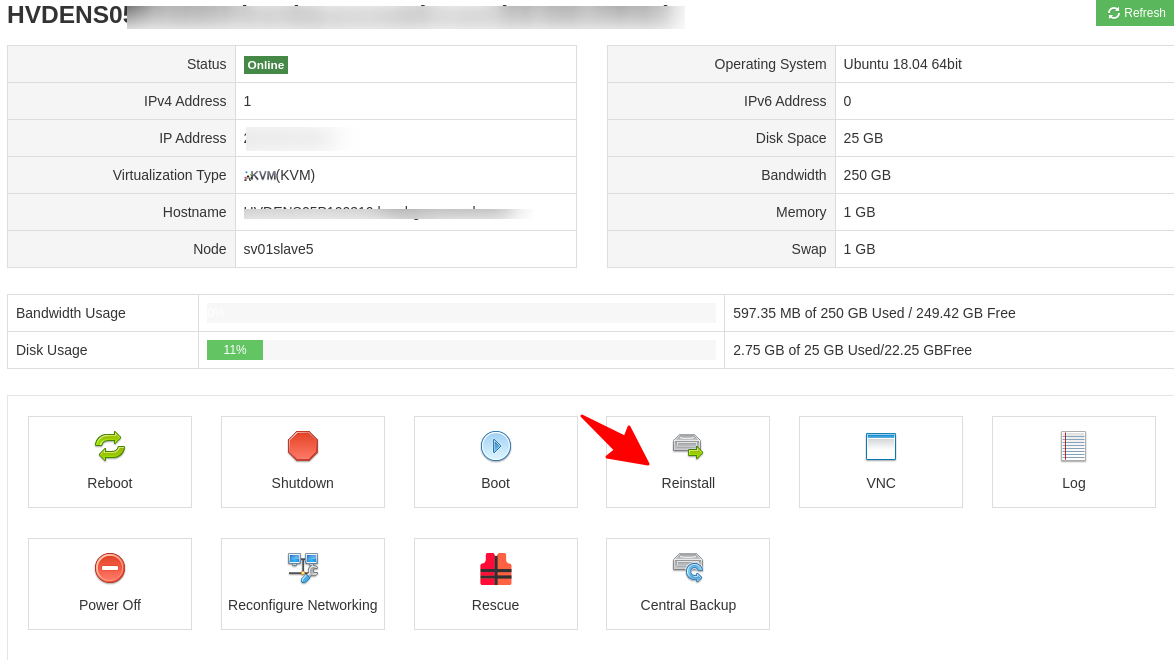
* You can use the AccuWeb VPS Management panel provided to you at the time of purchasing VPS to reinstall OS:
This step is necessary because if you don't have a clean OS, you will have to force-install VestaCP using the -f command.
Step 1: Prepare Your Ubuntu VPS
First, connect to your Ubuntu VPS via SSH as the root user:
ssh root@your_server_ip
Update your Ubuntu VPS packages:
apt update
apt upgrade -y
Since VestaCP installation requires curl, install it if it is not already present:
apt install curl -y
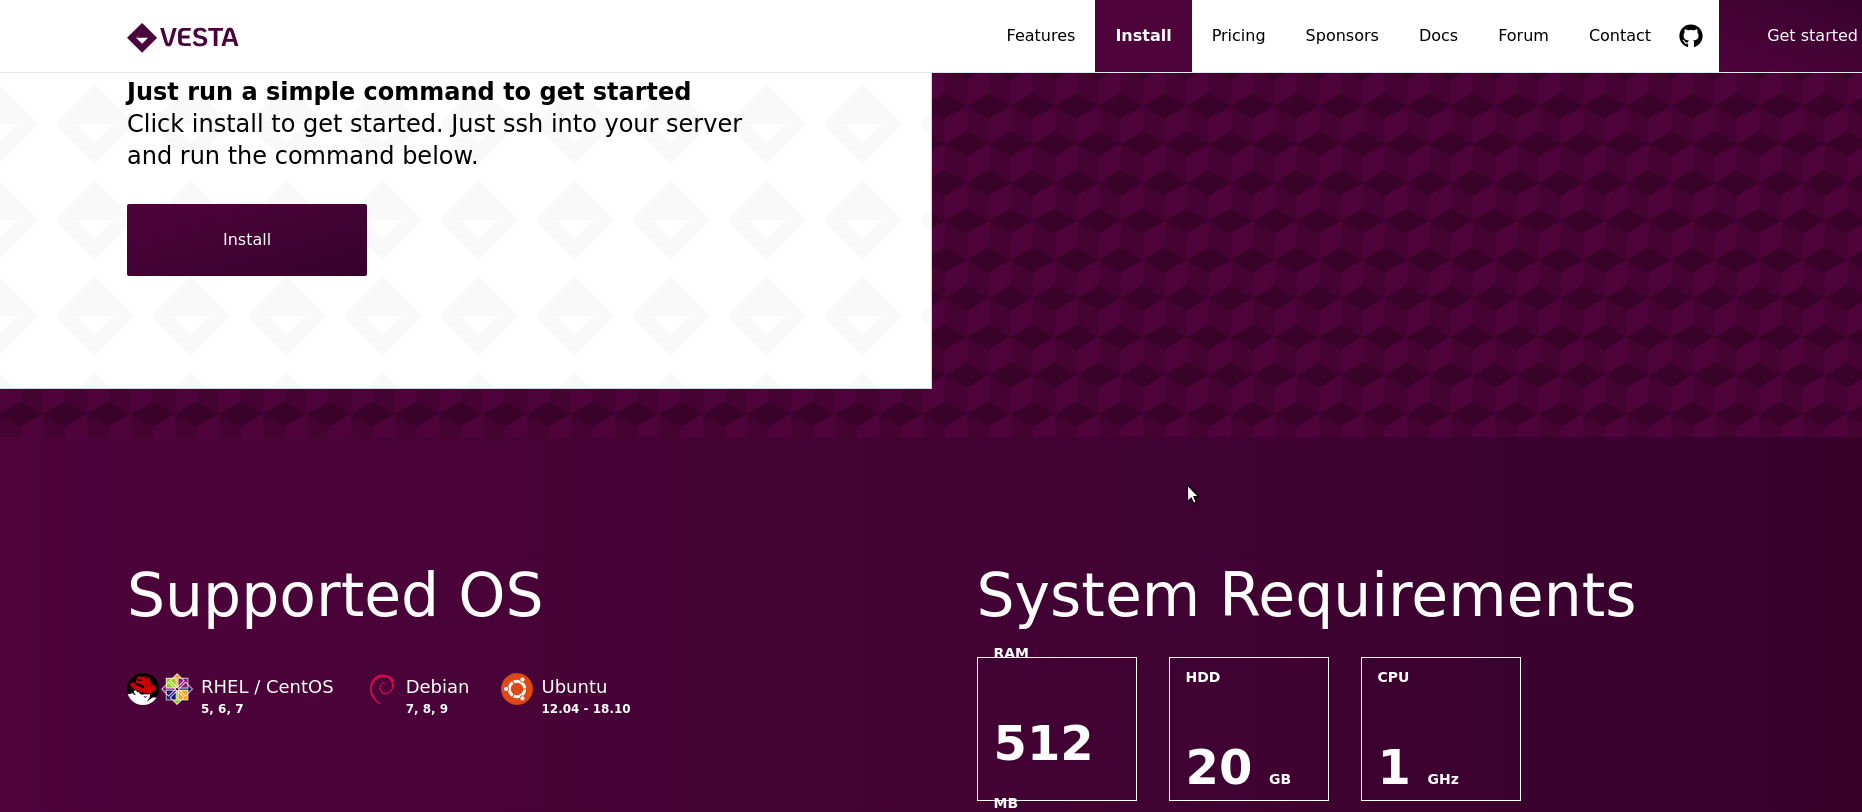
Step 2: Generate Installation Command
Visit the official VestaCP installation page at https://vestacp.com/install/ and select your preferred options:
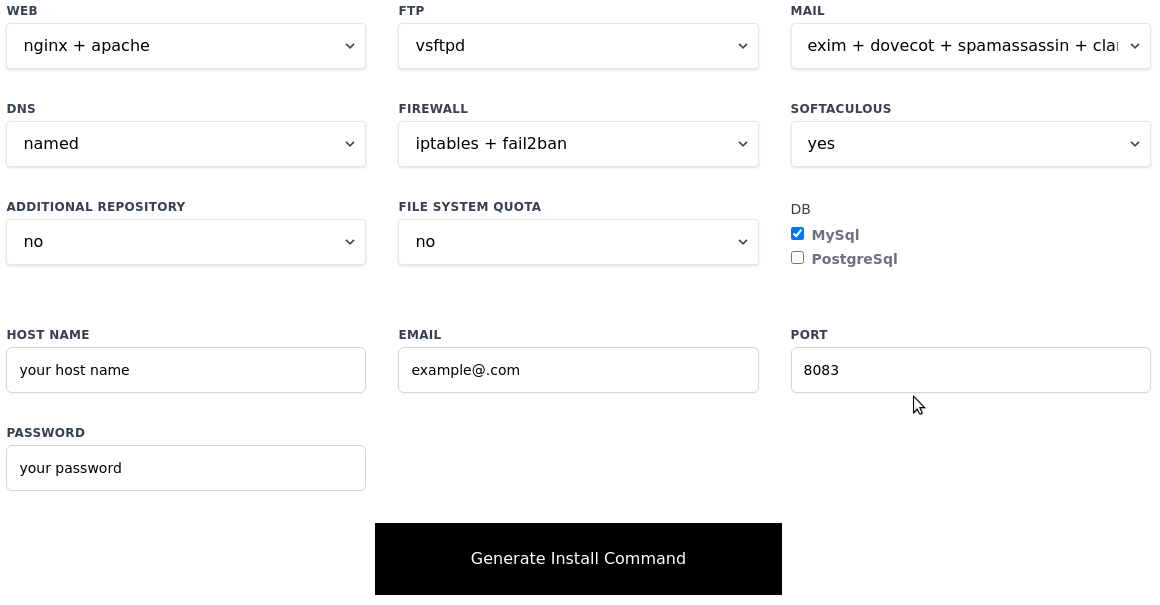
- Select the packages you need (Web Server, DNS Server, Mail Server, etc.)
- Set an admin password (avoid special characters during installation)
- Keep the PORT to 8083 (default VestaCP Port).
- Click On Generate Install Command.
Remember to replace your hostname, email, and password with your credentials.
The website will generate installation commands tailored to your selections.
Step 3: Install VestaCP
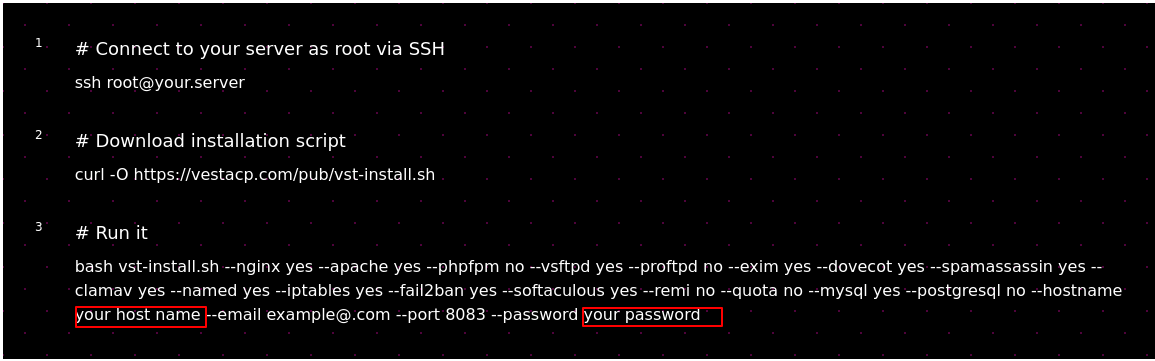
Step 3.1: Copy and run the installation command generated from the VestaCP website. It typically looks like this:
curl -O http://vestacp.com/pub/vst-install.sh
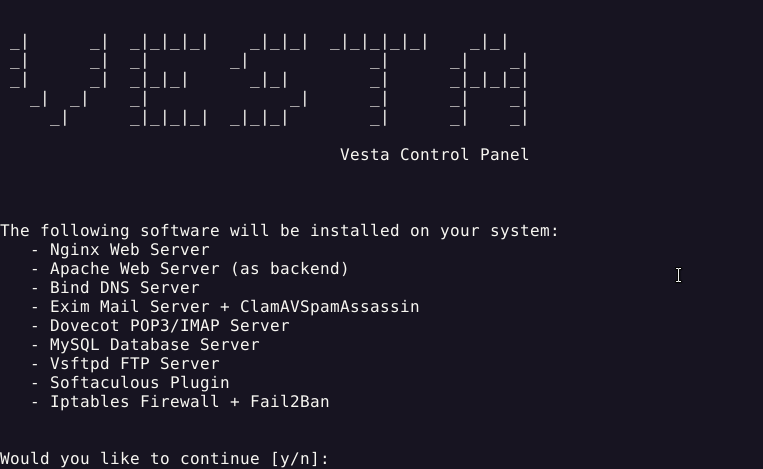
Step 3.2: Type this command for a custom installation based on the packages you selected on the official website.
bash vst-install.sh --nginx yes --apache yes --phpfpm no --vsftpd yes --proftpd no --exim yes --dovecot yes --spamassassin yes --clamav yes --named yes --iptables yes --fail2ban yes --softaculous yes --remi no --quota no --mysql yes --postgresql no --hostname *your host name* --email example@.com --port 8083 --password *your password*
When prompted to confirm the installation options, type "y" and press Enter.
After completion, you'll see a welcome screen displaying:
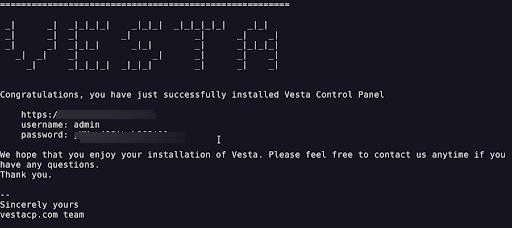
- Control panel URL (https://your_server_IP:8083/)
- Admin username (admin)
- Password (the one you set during generation or a system-generated one)
Save this information securely.
Step 4: Access the Control Panel
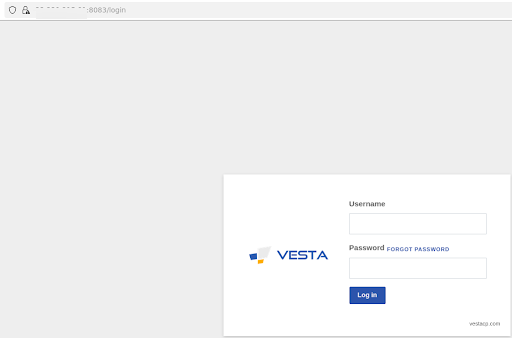
Open a web browser and navigate to:
https://your_server_IP:8083
You'll receive a security warning about the self-signed SSL certificate—this is normal. Proceed to the website and log in using the credentials from the welcome screen.
Step 5: Add Your Domain
Adding your domain to VestaCP creates the necessary directory structure and server configurations to host your website. Without this step, your Ubuntu VPS won't know which files to serve when visitors request your domain name. This step also enables the creation of virtual hosts in Apache/Nginx and establishes the foundation for DNS management.
After logging in:

1. Click on the "Web" tab in the top navigation menu
2. Click the "+ Add" button to create a new web domain
3. Enter your domain name without "www" and your SSH i[(e.g., yourdomain.com)
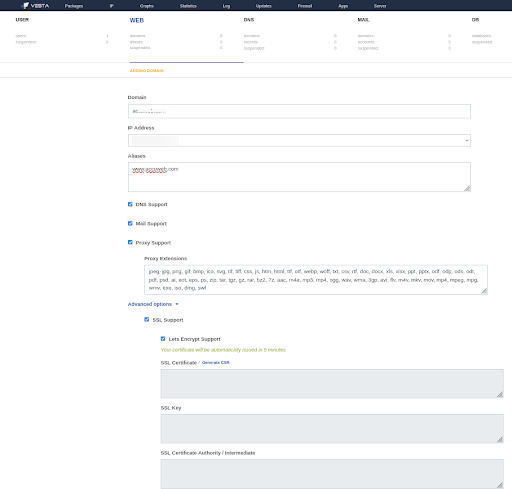
4. Ensure "DNS Support" is enabled to use custom nameservers
5. Optionally, expand "Advanced Options" and enable SSL Support
Click "Add" to create the domain.
Step 6: Configure Personal Nameservers
Setting up personal nameservers on your Ubuntu VPS provides full control over DNS records for your domain. You get to handle everything related to domain resolution from your VestaCP control panel instead of depending on third-party DNS providers. Personal nameservers are also flexible so that you can update DNS records in a hurry and minimize dependence on third parties, allowing you more independence with your web hosting platform.
1. Navigate to the "DNS" tab
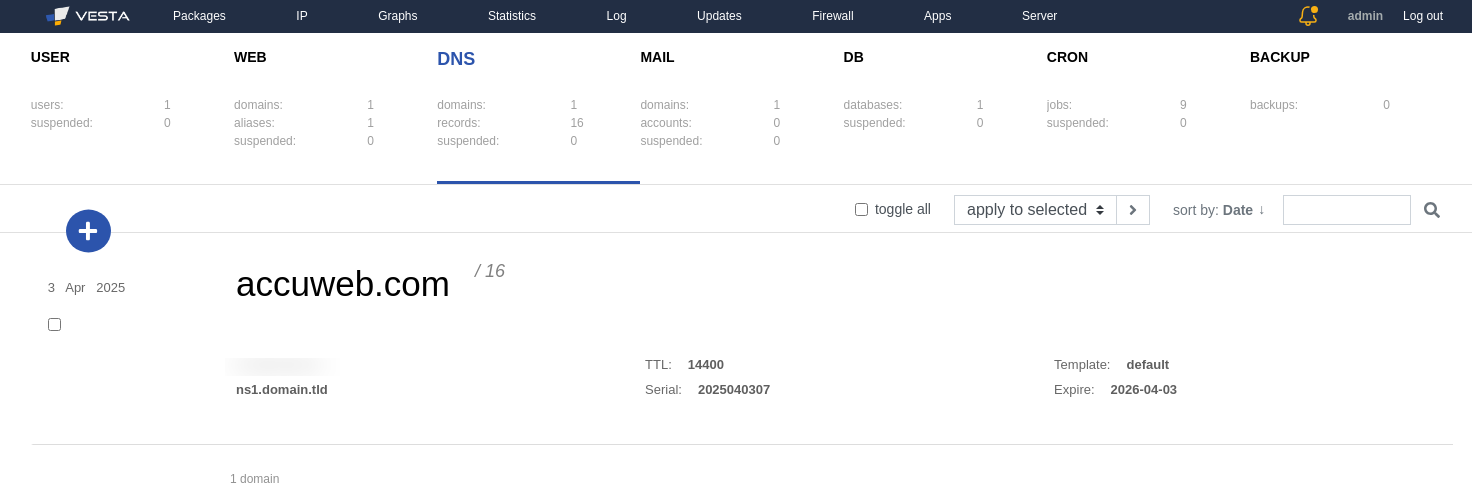
2. Click "+ Add Record" to create two "A" records for your nameservers in the DNS tab:

- Name: dns1 (for the first record)
- Name: dns2 (for the second record)
- IP Address: Your server's IP address
- Click "Add" for each record.
3. Click "List Records" next to your domain in the DNS tab:
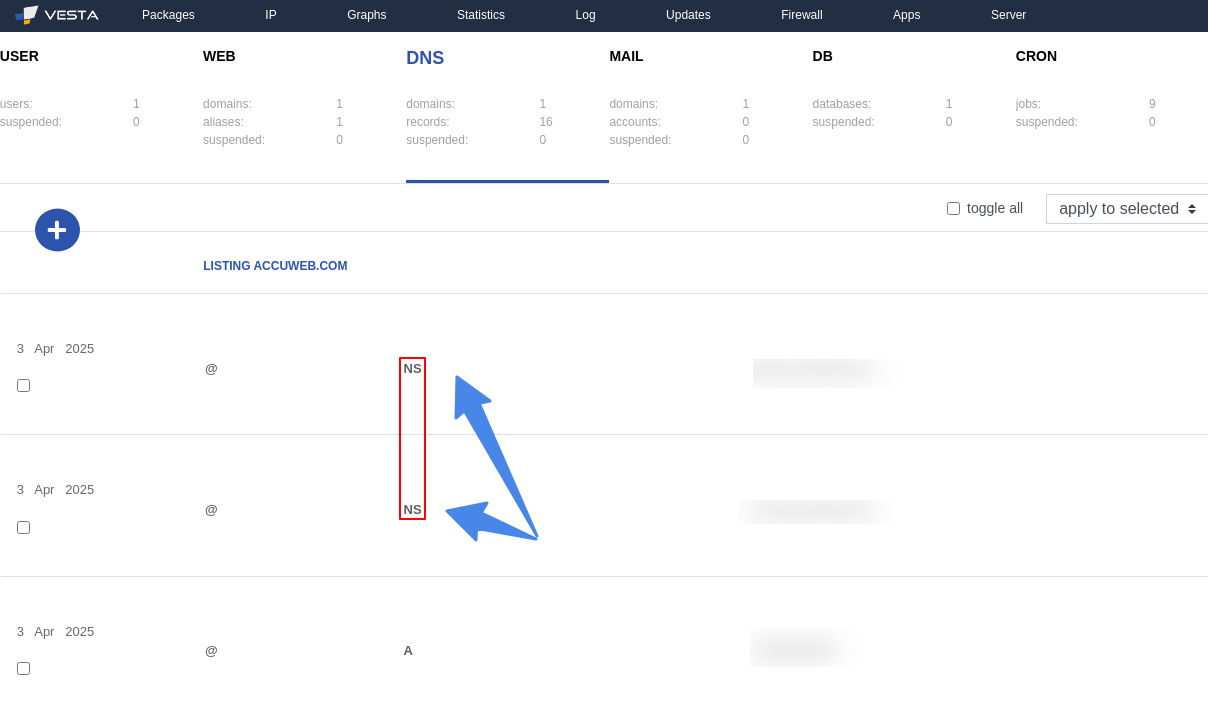
4. Find the NS-type records and edit them:
- Change their values to dns1.yourdomain.com and dns2.yourdomain.com
- Click "Save" after each change
5. Click "Edit" next to your domain name and update the SOA record:
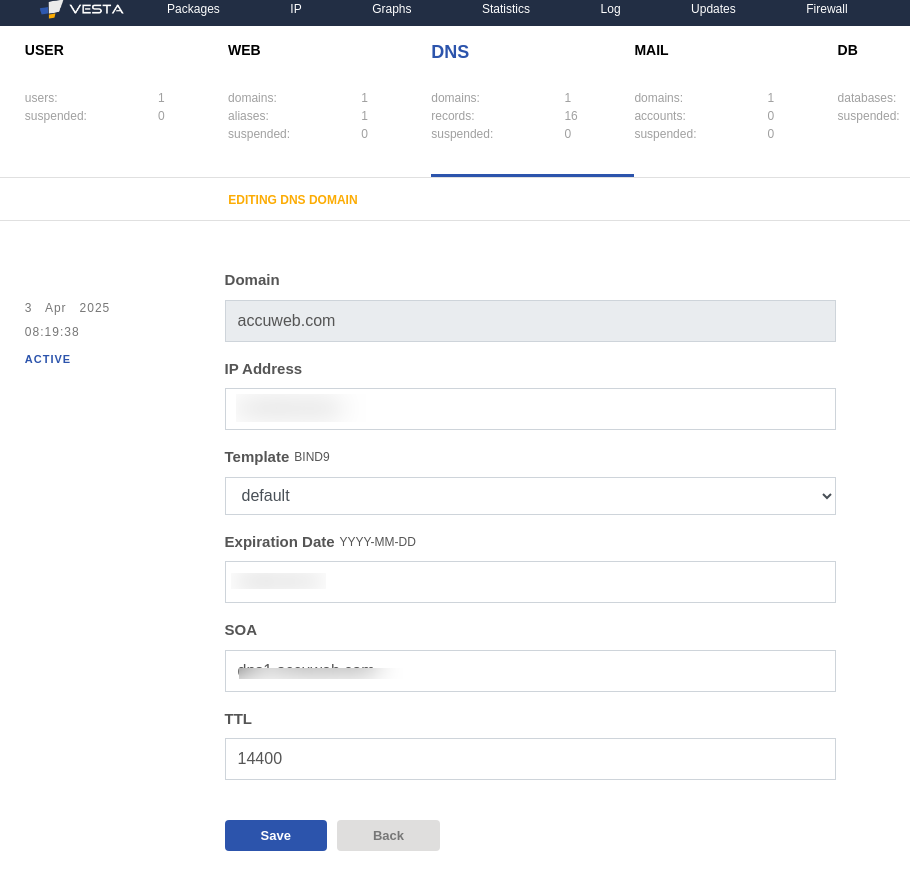
- Primary NS: dns1.yourdomain.com
- Click "Save"
Step 7: Register Your Nameservers with Your Domain Registrar
Why this step is necessary: Without completing this registration, internet users won't be able to reach your website when they type your domain name, as there would be no path for DNS resolution from domain name to server IP address.
Sign in to your domain registrar:
1. Register your personal nameservers (dns1.yourdomain.com and dns2.yourdomain.com)
2. Point both nameservers to your Ubuntu VPS server's IP address
3. Change your domain's DNS settings to use these custom nameservers
Step 8: Upload Your Website Content
Your Ubuntu VPS now has the server software and domain configurations in place, but it needs actual website files to display to visitors. Uploading your website content provides the HTML, CSS, JavaScript, images, and other files that constitute your actual website. Without this step, visitors would see only a default page or error when visiting your domain. This step transforms your configured server into a functional website.
You can now upload your website files using FTP:
1. Use an FTP client like FileZilla
2. Connect using these details:
- Host: Your server's IP address
- Port: 21
- Username: admin
- Password: Your admin password
3. Navigate to /web/yourdomain.com/public_html to upload your website files.
Conclusion
You've completed installing and setting up VestaCP on your Ubuntu 18.04 VPS server. This powerful control panel makes web hosting management easy and offers essential tools for running your sites smoothly. For detailed configurations or debugs, refer to the official VestaCP documentation or forums at https://vestacp.com/.
Don't forget to update your Ubuntu VPS and VestaCP regularly for security and stability.