MySQL user management is important for maintaining database security and performance. Whether you are looking to add a MySQL user for an application or restrict access to some tables, MySQL has powerful commands to add new users and assign permissions.
Here, we will walk you through creating a new MySQL user, assigning necessary privileges, and establishing secure access control.
If you need help with MySQL, explore our knowledgebase for detailed guides and solutions.
Prerequisites:
Before moving to the next step, make sure that MySQL is installed on your system. If not, follow our article for the installation guide.
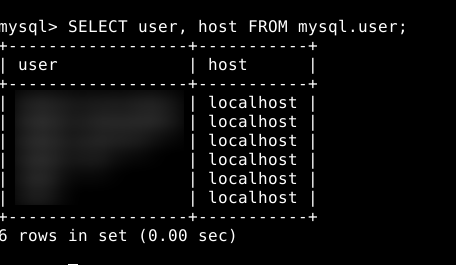
Step 1. Checking Existing Users
- Before creating a new user, you can verify the current users to prevent conflicts:
SELECT user, host FROM mysql.user;
Step 2. Login to MySQL
- On Ubuntu with MySQL 5.7 and later, the root user usually uses the auth_socket plugin rather than a password.
The auth_socket plugin allows MySQL to verify users based on their OS username rather than on a password. This adds security, makes access easier for system admins, and keeps unwanted logins at bay by limiting access to authorized OS users.
- To log in, use the following command:
sudo MySQL
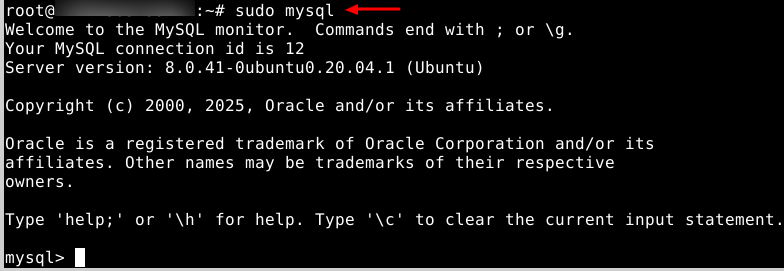
- The Above command will return this result, confirming that you're connecting to a MySQL server.
- Alternative Login Method: If MySQL prompts for a password, it indicates that your setup is configured to use password authentication instead of auth_socket. In this case, use:
mysql -u root -p
Step 3. Create a New User
- Run the following command to create a new user. Replace the new user with the desired username and password with a strong password. For example, we have used “test” as the new username.
CREATE USER 'new_user'@'localhost' IDENTIFIED BY 'password';

Generate a strong and secure password instantly with our Password Generator Tool – try it now!
Step 4. Grant Permissions to the User
- If you want to grant privileges to users with a specific database, use:
- Replace your_database with your actual database name and replace the new user with the one created in the step above.
GRANT ALL PRIVILEGES ON your_database.* TO 'newuser'@'localhost';

- If you want to grant privileges on all databases, use:
GRANT ALL PRIVILEGES ON *.* TO 'newuser'@'localhost';
Step 5. Apply Privileges
- Refresh MySQL privileges to apply the changes:
FLUSH PRIVILEGES;
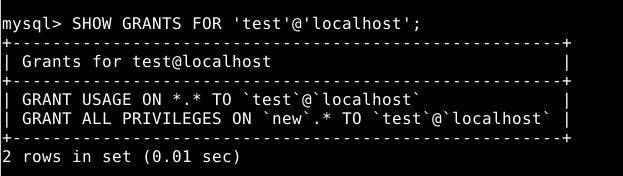
Step 6. Checking Assigned Privileges
- You can verify a user's current privileges by executing the SHOW GRANTS command:
- Replace the new user with the name created in the 3rd step.
SHOW GRANTS FOR 'new_user'@'localhost';
Step 7: Revoking Privileges
- Sometimes, you will have to take away a user's privileges. You can do this by entering:
REVOKE SELECT, INSERT ON your_database.* FROM 'new_user'@'localhost';

- To revoke all privileges:
REVOKE ALL PRIVILEGES, GRANT OPTION FROM 'new_user'@'localhost';
- Replace your_database with your actual database name and replace the new user with the name created in the 3rd step.
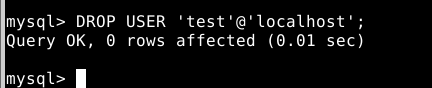
Step 8: Deleting a MySQL User
- Lastly, you can completely remove a current user account using the command below:
DROP USER 'new_user'@'localhost';
With this tutorial, you will understand how to create a MySQL user, assign permissions as required, and make changes accordingly. Proper user management strengthens security with controlled access to your databases.


