Overview:
IP Address and Domain Restrictions in IIS 10 is a useful built-in feature.
It helps make your server more secure by allowing the website administrator to control access to the web server, websites, folders, or files.
This can be done by permitting or denying access based on specific IP addresses or the frequency of requests from a particular IP over time.
By default, all clients requesting the website are given access unless explicitly rejected.
Background:
In earlier versions of IIS, blocking specific IPs or IP ranges was possible. However, a drawback was that you had to identify suspicious activity by using tools like Log Parser to check site logs.
After identifying the problematic IP, you could then block it using Deny Rules. The challenge was that professional attackers often used various IPs from proxy servers.
Blocking a few IPs might not be effective, as new ranges could be used, making it harder to prevent unauthorized access.
First, verify whether the Server Role is already installed on your server.
Step 1. Search Internet Information Service (IIS) Manager.

Step 2. Select your server name from the right-hand panel to access all available features.
Step 3. Search for a module named "IP and Domain Restrictions." If it is already installed, move on to the next section on how to add and edit IP and domain restrictions.
Step 4. If the IP and Domain Restrictions module is not visible, install it by following these steps:
Installation steps for IP and Domain Restrictions:
- Ensure you have administrator permissions.
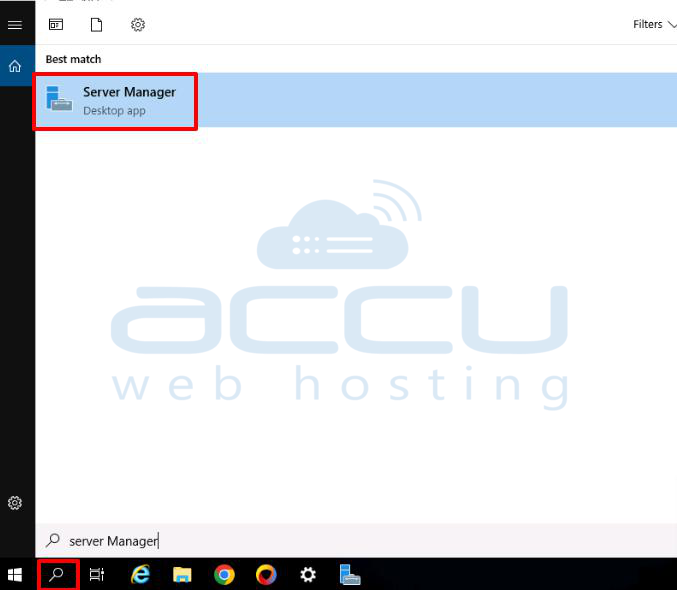
- Open Server Manager by clicking on the search icon in the taskbar.
- Choose "Manage" and then opt for "Add Roles and Features."
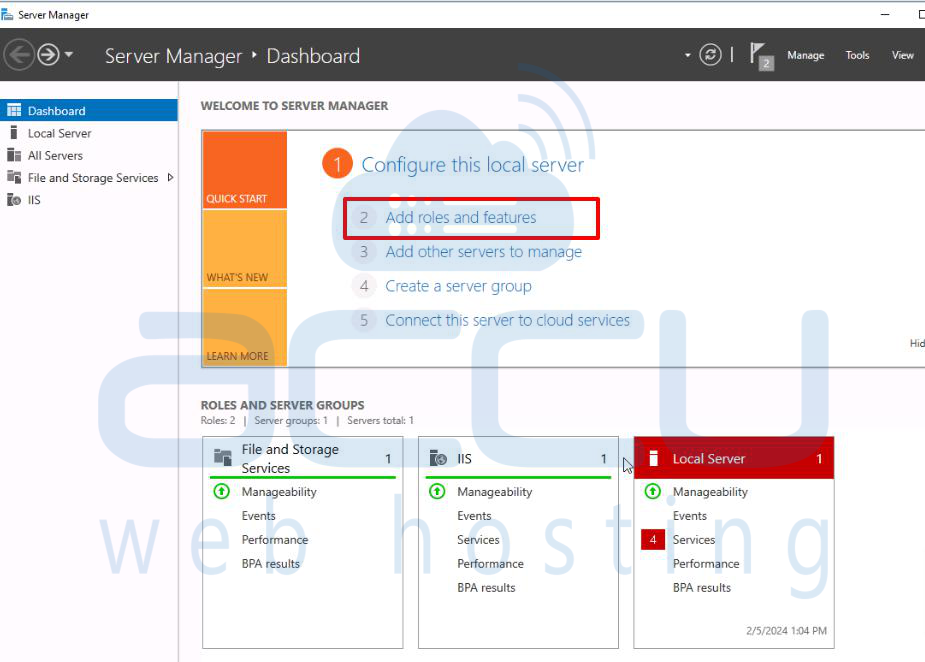
- Proceed by clicking "Next" until you reach the Server Roles section.
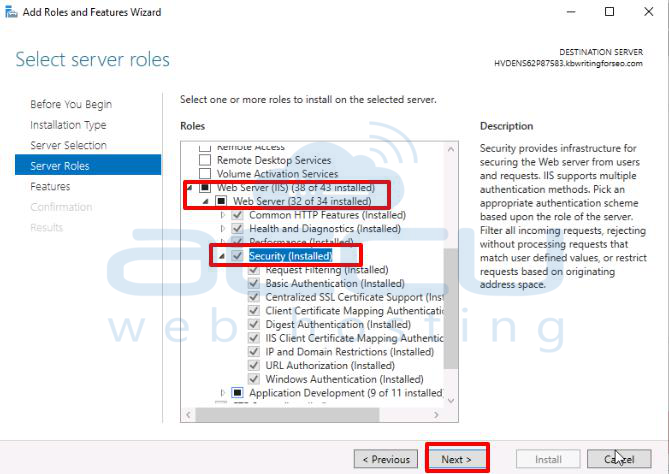
- Navigate through the given options:
- Web Server (IIS)
- Web Server
- Security
- IP and Domain Restrictions
- Click Next and Finish the installation.
5. Now, you will get the IP and Domain Restrictions option.
Before installation,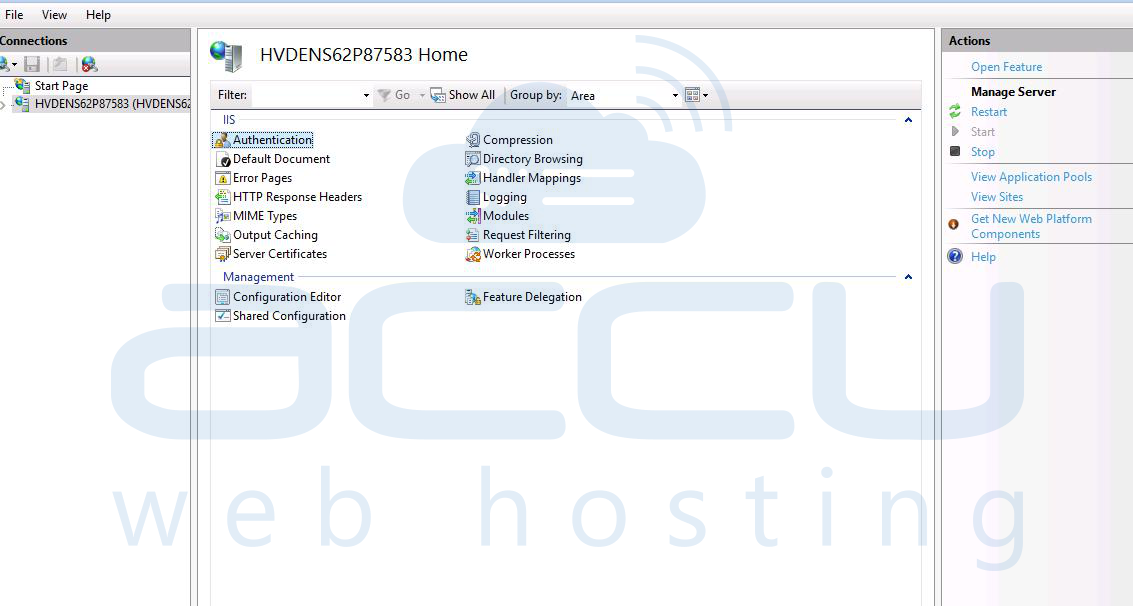
After installation,
How to Set Up IP Address and Domain Restrictions in IIS Manager:
Step 1: Open IIS Manager by pressing WIN+R, entering "inetmgr," and clicking OK. Alternatively, find IIS Manager in the Start menu.
Step 2: Go to the "Sites" option and select the domain you want to block.
Step 3: On the new filter page, choose "IP Address and Domain Restriction."
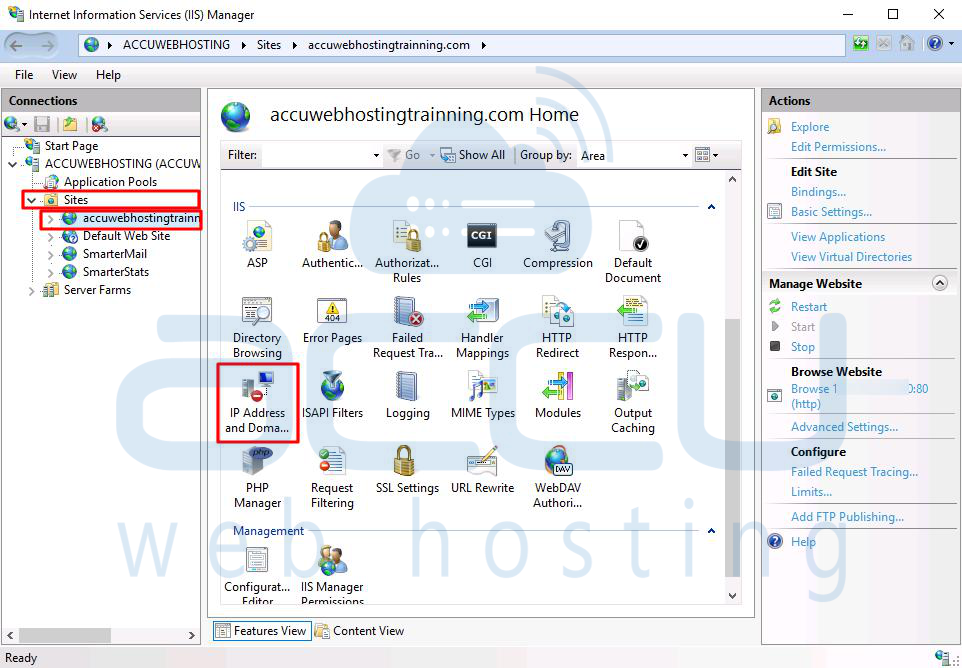
Step 4: Click on "IP Address and Domain Restrictions" in the IIS section.
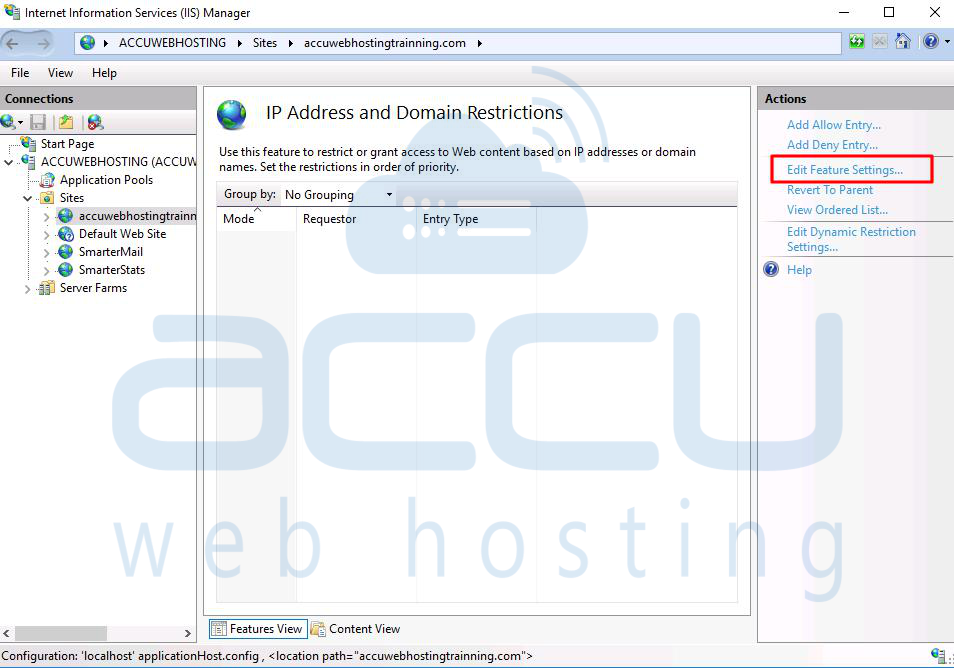
Step 5: In the opened feature, you'll see a window with various settings.
Step 6: Use the "Edit Feature Settings" option to define rules for allowing or denying specific IP addresses.
-> Choose "Deny" in the field Access for unspecified clients.
-> Enable Domain Name Restrictions if you want to configure rules based on the client's DNS name.
-> Optionally, enable Proxy Mode if requests come through a proxy server.
-> Choose the Default Deny Action Type for denied requests (Unauthorized, Forbidden, Not Found, or Abort).
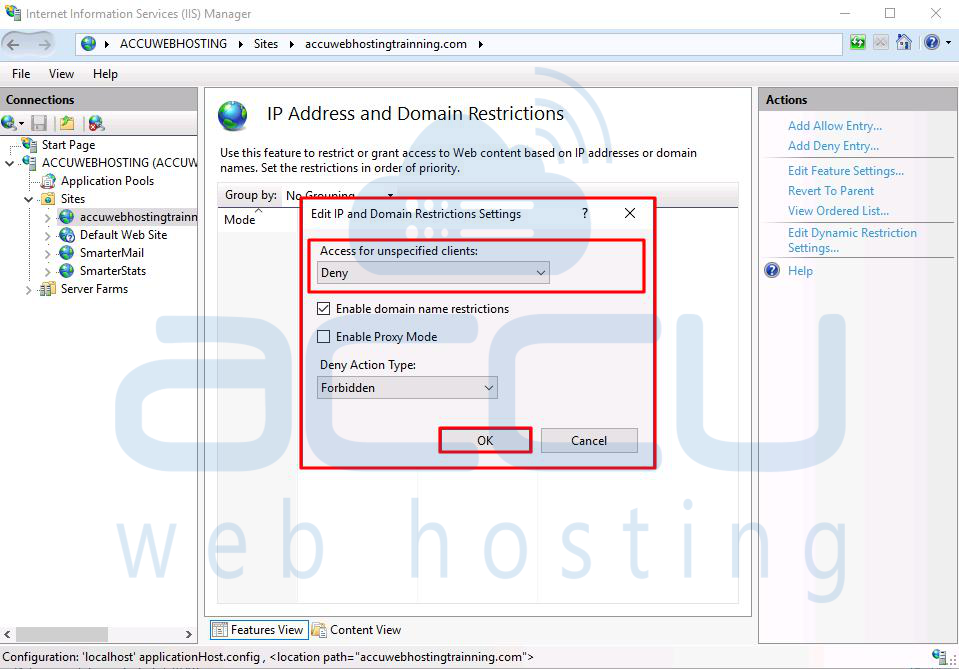
Step 7: Click OK to save the settings.
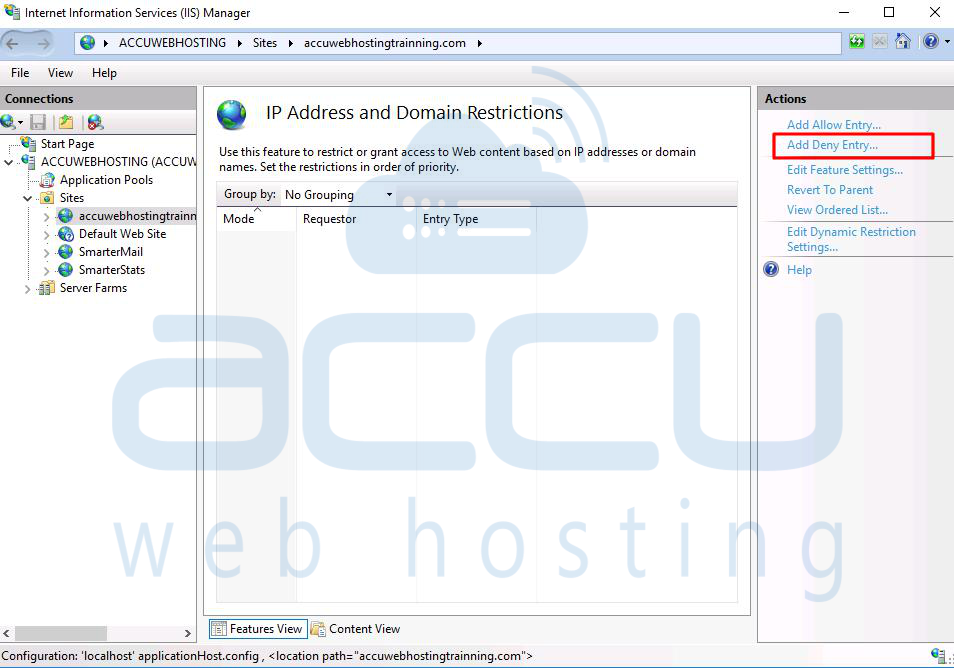
Step 8: Click on "Add Deny Entry" to create a rule.
Step 9: Select the third option Domain name in the "Add Deny Restriction Rule" window.
Step 10: Enter the domain name you want to block (e.g., accuwebtraining.com).
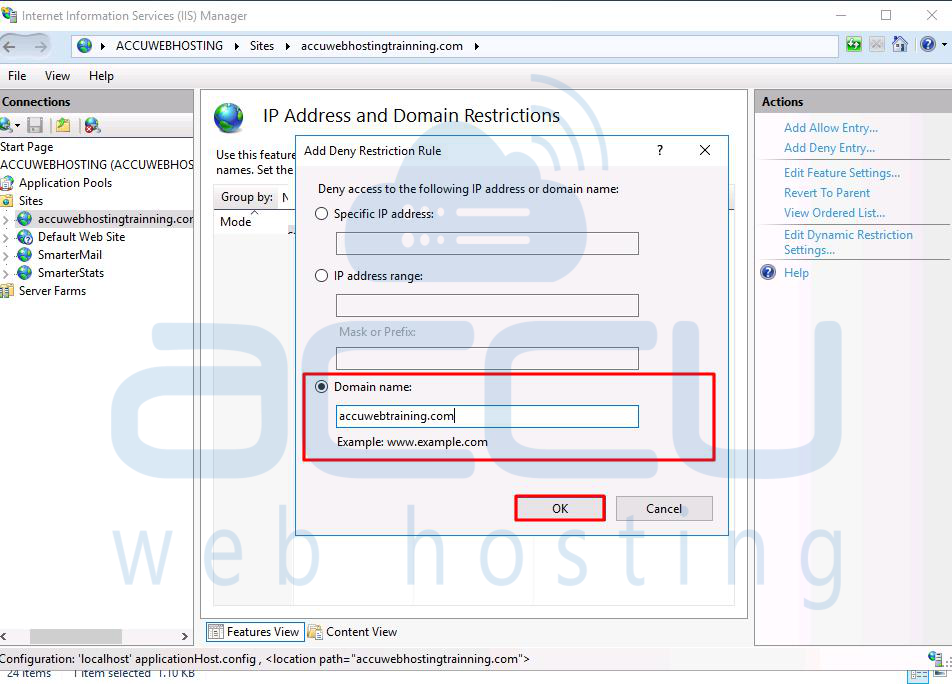
Step 11: Click OK to add the rule.
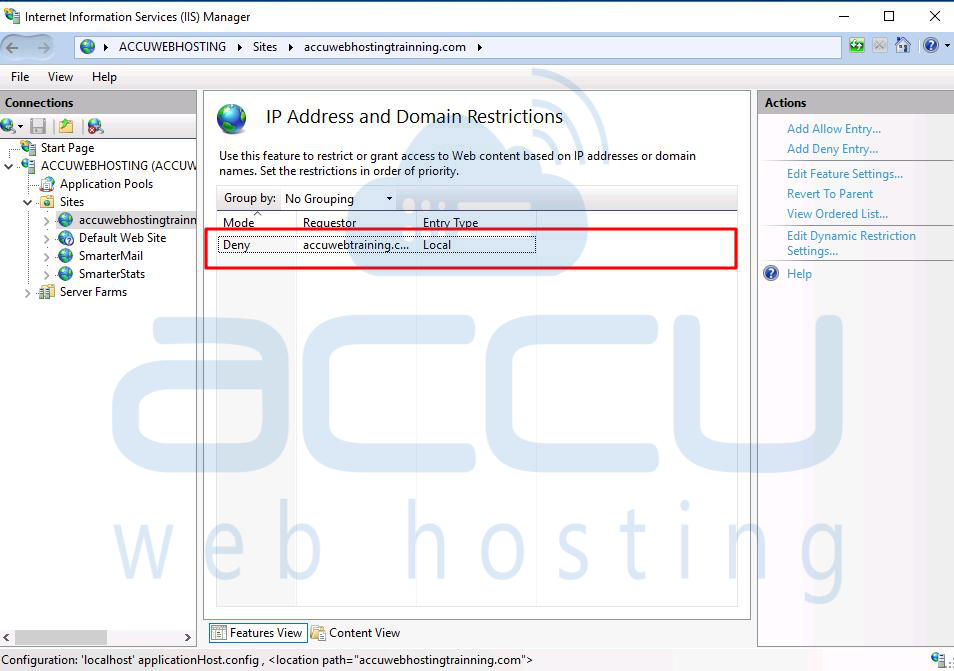
Step 12: The added rule will be listed under IP Address and Domain Restrictions.
That's it!
Conclusion:
In conclusion, IP Address and Domain Restrictions in IIS offer a robust security feature for web servers. It enables administrators to control access selectively based on specific IP addresses or request frequencies, enhancing the overall security of the server.
This feature provides a valuable tool for preventing unauthorized access and mitigating potential risks to websites hosted on IIS.
