Google Chrome is a free web browser that many people around the world use. It's popular because it's fast and easy to use. Most people prefer it on Windows and Mac computers. Installing Chrome is easy, just like using it.
If you want to install Google Chrome on your computer, especially if you don't like the default Edge browser on Windows or if you just got a new Windows computer without a browser, you can use PowerShell. This article will teach you how to do it. Instead of using another browser, let's try using CMD this time.
What is PowerShell?
PowerShell is a special tool made by Microsoft. It's like the Command Prompt but more advanced. It's for people who want to control and automate tasks on their computer. It's great for system administrators and those who really know their way around a computer.
Why use CMD or PowerShell instead of a browser?
Sometimes, on certain versions of Windows servers or Windows like Windows Server 2019 or Windows 11, there's no regular browser included. Or maybe you don't want to use a browser to install another browser. In such cases, you can use PowerShell. This method is also handy if you like using PowerShell for automating tasks or writing scripts.
How to Install Google Chrome on Windows Server 2019 or Windows 11 Using PowerShell?
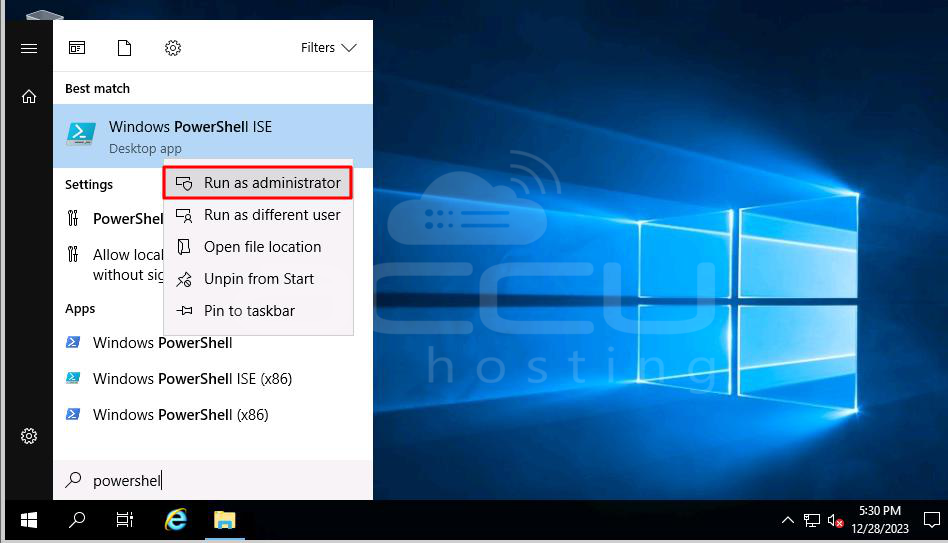
Step 1: Open PowerShell as administrator
To open PowerShell, find the "Search" icon on your taskbar or press Windows+S on your keyboard. Search for "PowerShell" and click "Run as Administrator."
Running as Administrator gives PowerShell the highest level of permission on your computer. If you're prompted with a question like "Do you want to allow this app to make changes to your device?" respond by selecting "Yes"
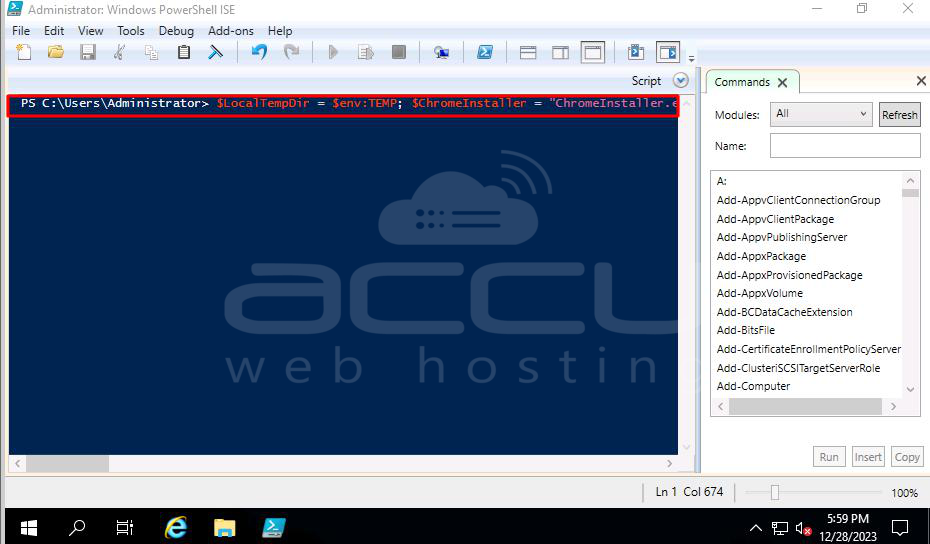
Step 2: Copy the following command.
$LocalTempDir = $env:TEMP; $ChromeInstaller = "ChromeInstaller.exe"; (new-object System.Net.WebClient).DownloadFile('http://dl.google.com/chrome/install/375.126/chrome_installer.exe', "$LocalTempDir\$ChromeInstaller"); & "$LocalTempDir\$ChromeInstaller" /silent /install; $Process2Monitor = "ChromeInstaller"; Do { $ProcessesFound = Get-Process | ?{$Process2Monitor -contains $_.Name} | Select-Object -ExpandProperty Name; If ($ProcessesFound) { "Still running: $($ProcessesFound -join ', ')" | Write-Host; Start-Sleep -Seconds 2 } else { rm "$LocalTempDir\$ChromeInstaller" -ErrorAction SilentlyContinue -Verbose } } Until (!$ProcessesFound)
Step 3: Go to the Powershell window and paste it using Ctrl+V or right-clicking on the empty space.
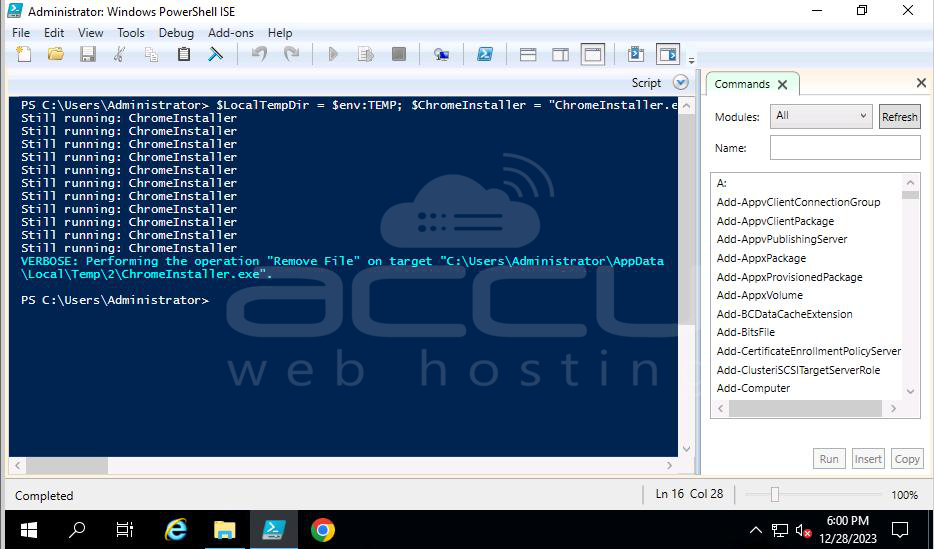
The PowerShell Script will do:
-> Get the Google Chrome package from a URL.
-> Download the package and save it in a temporary folder.
-> Install Google Chrome quietly on a Windows computer.
Step 4: Press Enter to start the download and installation. Please wait until it finishes.
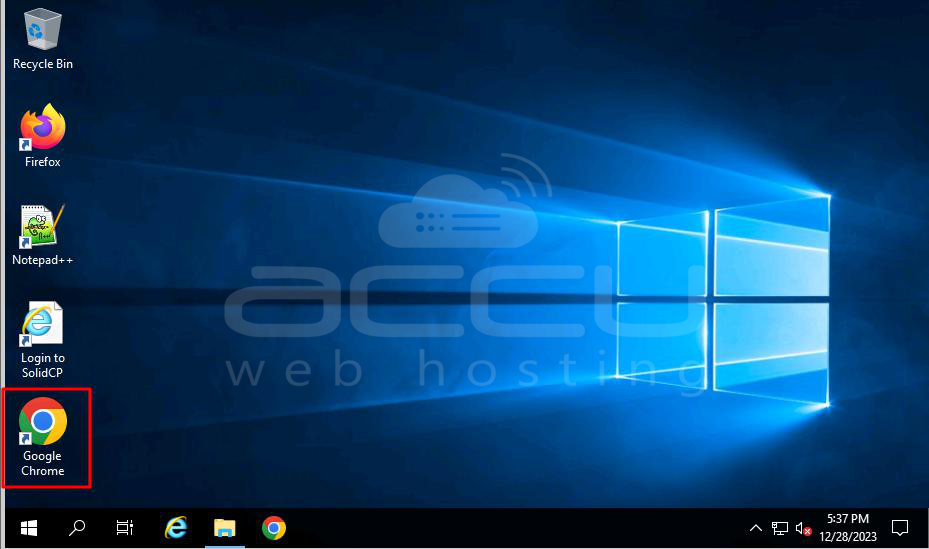
Step 5: Google Chrome should appear on your desktop. That's it! You've installed Google Chrome without using a browser.
Conclusion:
In conclusion, using PowerShell to install Google Chrome is a quick and efficient way. It helps download Chrome, sets it up silently, and makes it ready to use on your Windows computer. This method is handy and saves time, making it a good choice for installing or updating Google Chrome.
