Redirecting is the best way to use devices and services connected to your computer on a remote desktop server. You can also set up webcam redirection to use your local webcam on a remote Windows server. Here’s how to configure remote desktop webcam redirection.
Regular Webcam Redirection
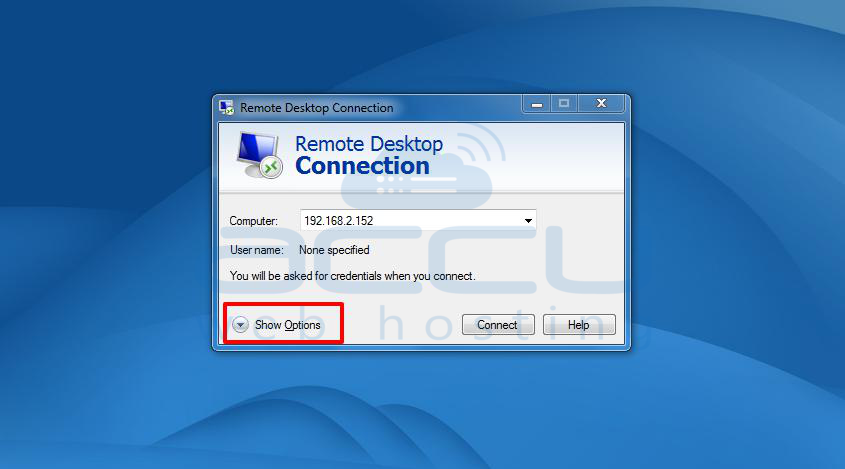
Step 1: Search for "Remote Desktop Connection" or "mstsc" on your computer.
Step 2: Click "Show Settings" at the bottom of the connection window.
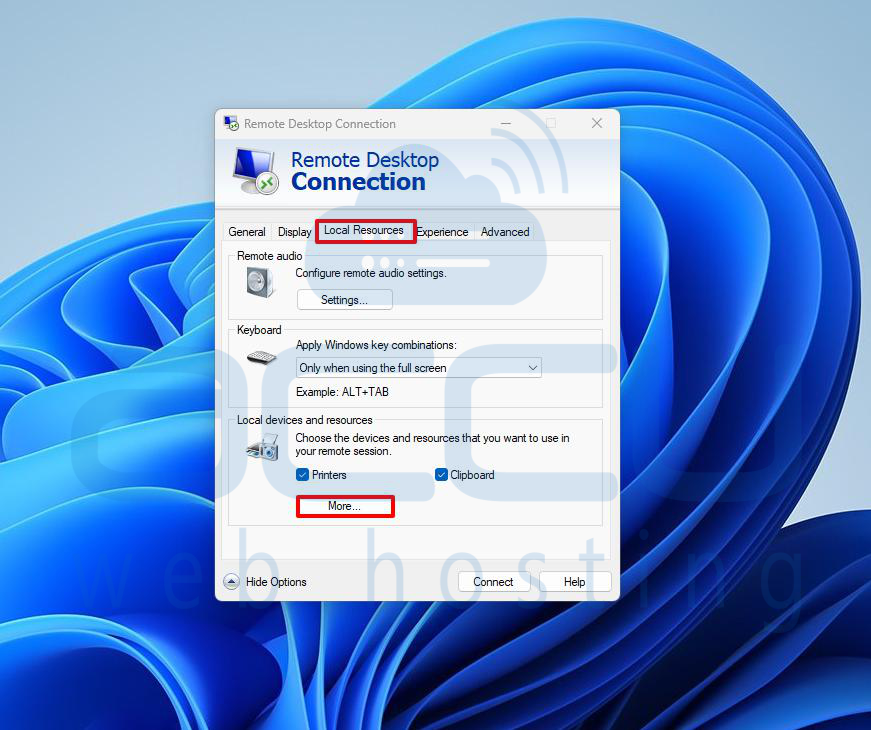
Step 3: Go to the "Local Resources" tab in the window that appears.
Step 4: At the bottom, under "Local Devices and Resources," click "More."
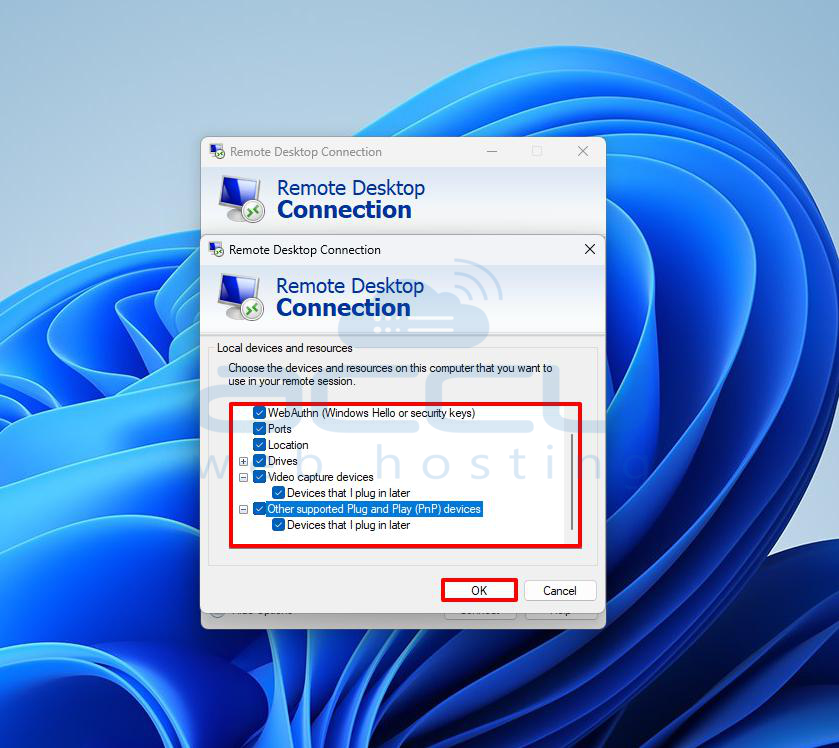
Step 5: Select "Video capture devices" and click "OK."
Step 6: Enter the server credentials and connect to the remote desktop.
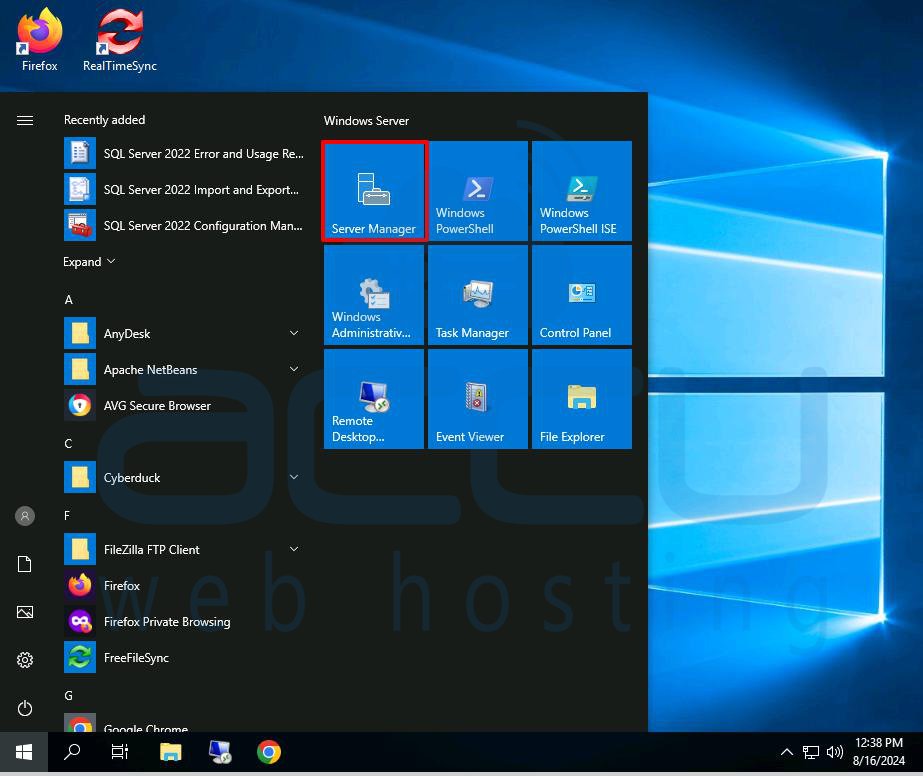
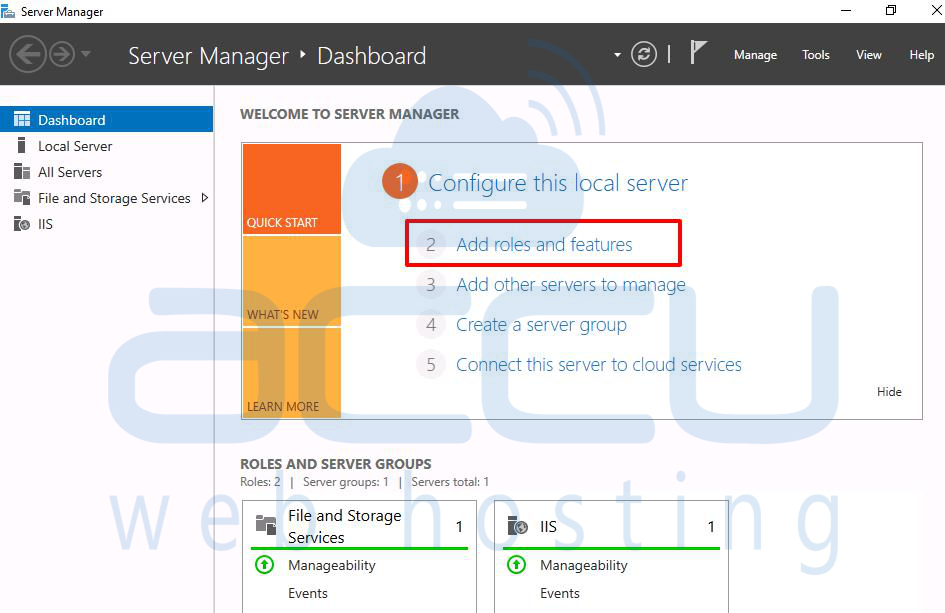
Step 7: Once logged in, open "Server Manager."
Step 8: In "Server Manager," click "Add Roles and Features."
Step 9: Start the "Add Roles and Features Wizard" by clicking "Next."
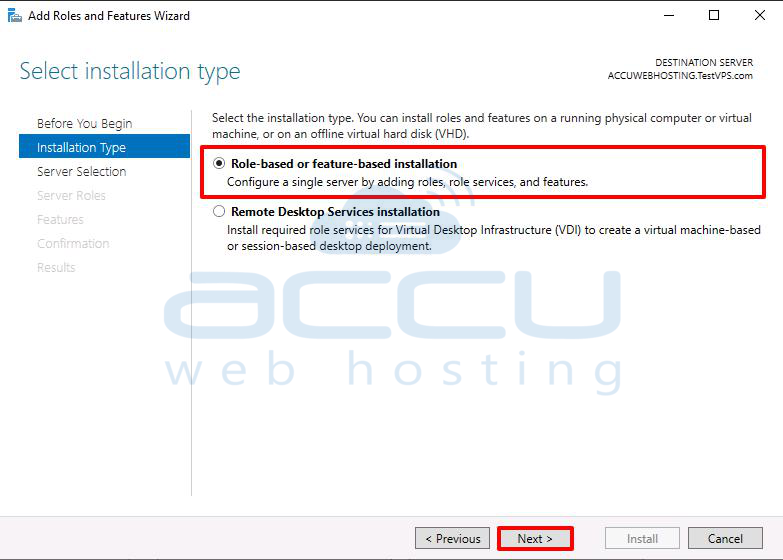
Step 10: Choose "Role-based or feature-based installation" and click "Next."
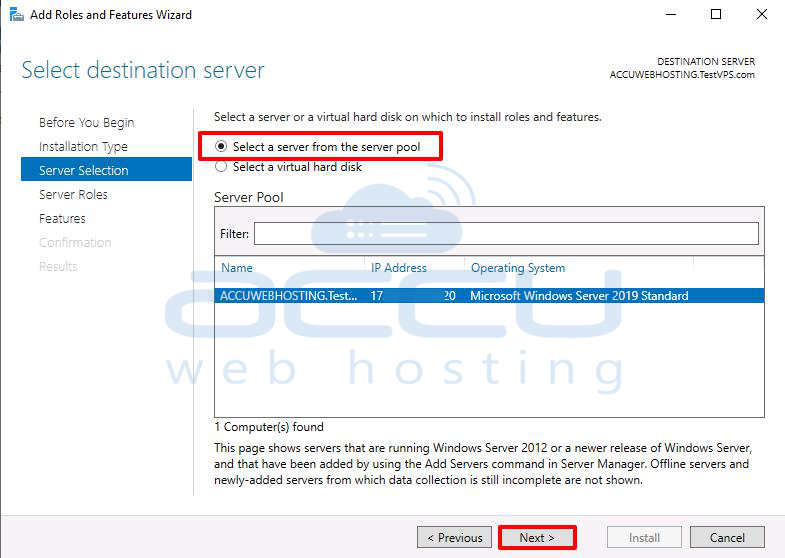
Step 11: Select a server from the list and click "Next."
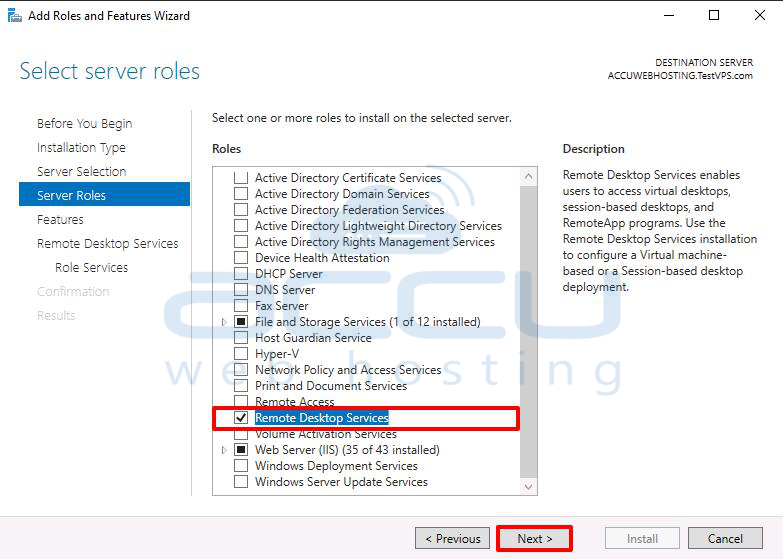
Step 12: Check the box for "Remote Desktop Services" and click "Next."
Step 13: Skip the components section by clicking "Next."
Step 14: Read the service description and click "Next."
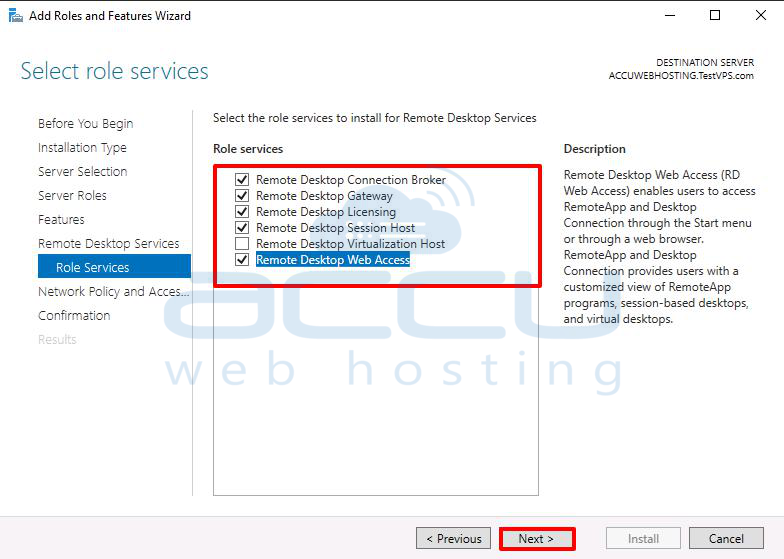
Step 15: Choose the roles to install, selecting all except "Remote Desktop Virtualization Host."
Step 16: Agree to install the components by clicking "Add Features."
Step 17: Also, add the "Remote Desktop Session Host" role by clicking "Add Features," then click "Next."
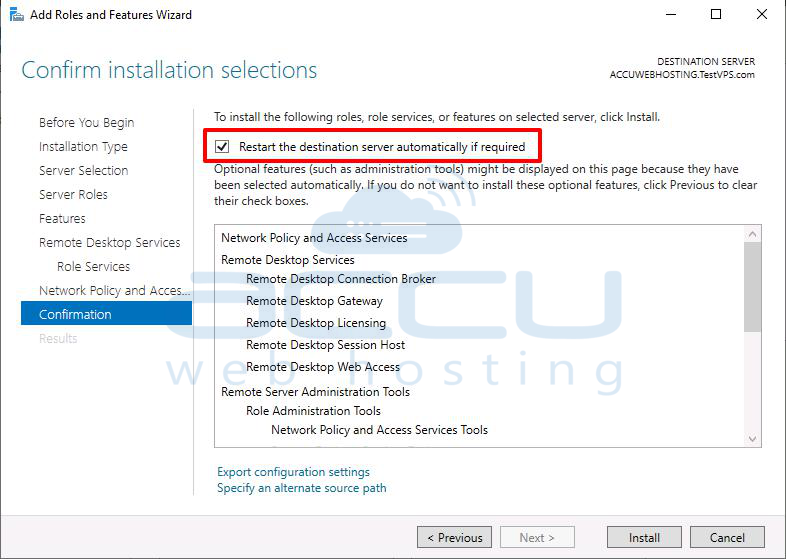
Step 18: On the final page, check "Restart the destination server automatically if required," confirm by clicking "Yes," and then click "Install."
After the installation and restart, log back into your server, and you’ll be able to use your local webcam on the remote server.
RemoteFX USB Webcam Redirection
USB webcams don’t usually work as smoothly on a remote desktop as you might expect. To fix this reliability issue, you can enable RemoteFX on your local computer to redirect the USB webcam to the remote desktop server.
Allow RemoteFX USB Redirection
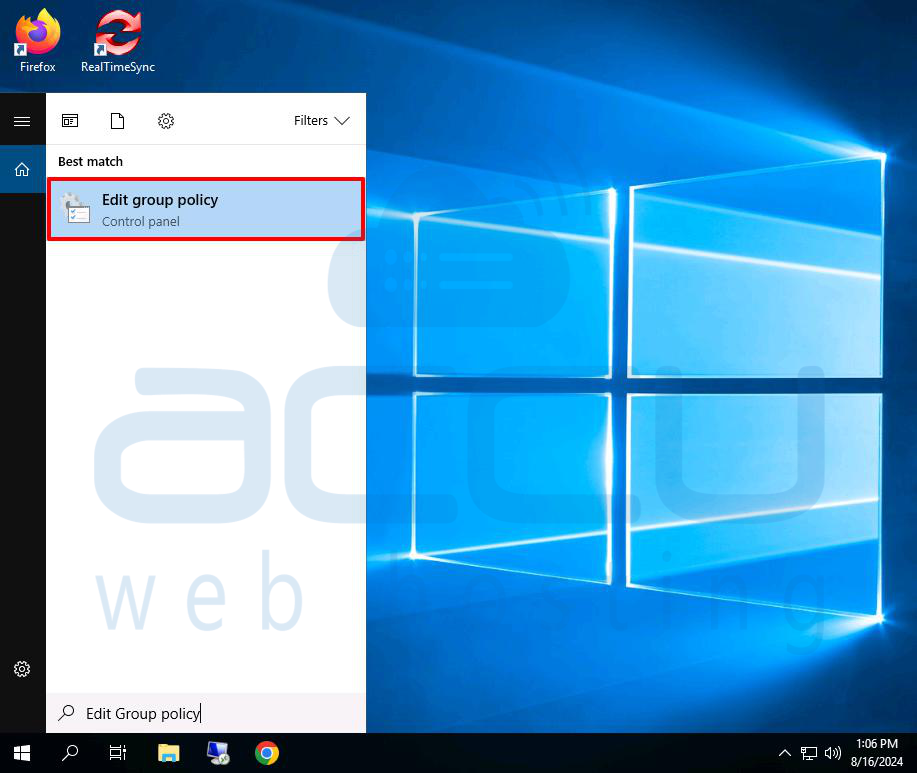
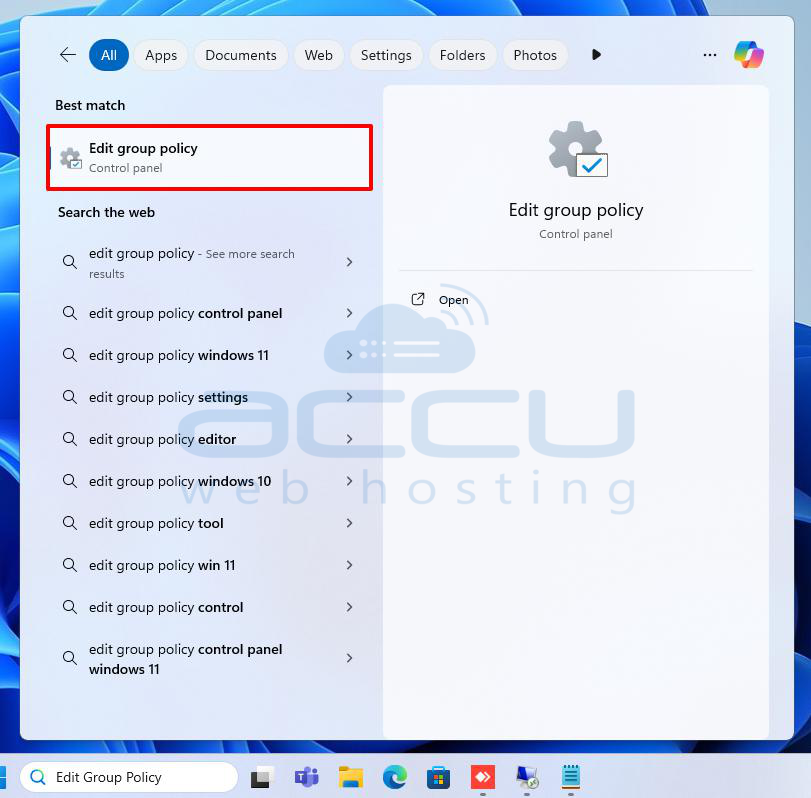
Step 1: Log in to the Windows Server, search for, and open “Edit Group Policy.”
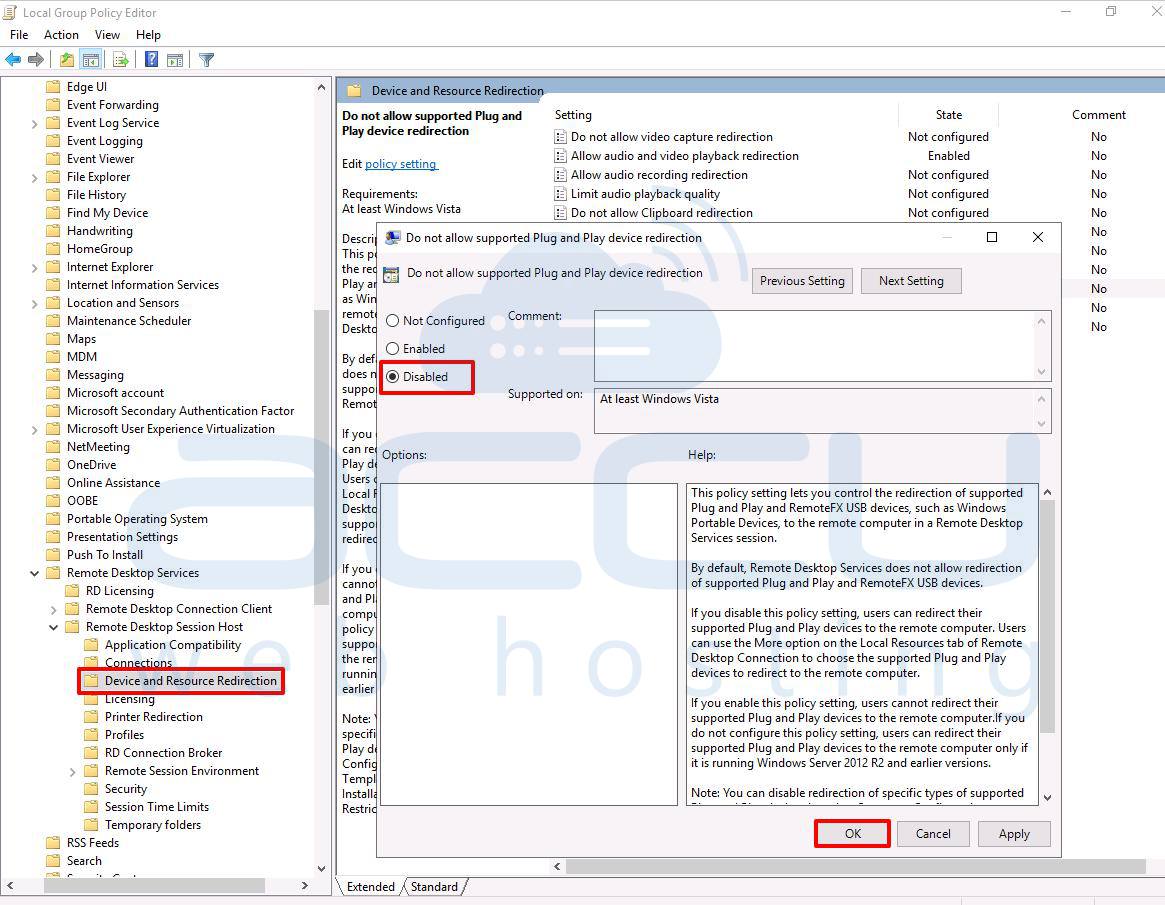
Step 2: Go to Computer Configuration -> Administrative Templates -> Windows Components -> Remote Desktop Services -> Remote Desktop Session Host -> Device and Resource Redirection. Disable the “Do Not Allow Supported Plug And Play Device Redirection” setting.
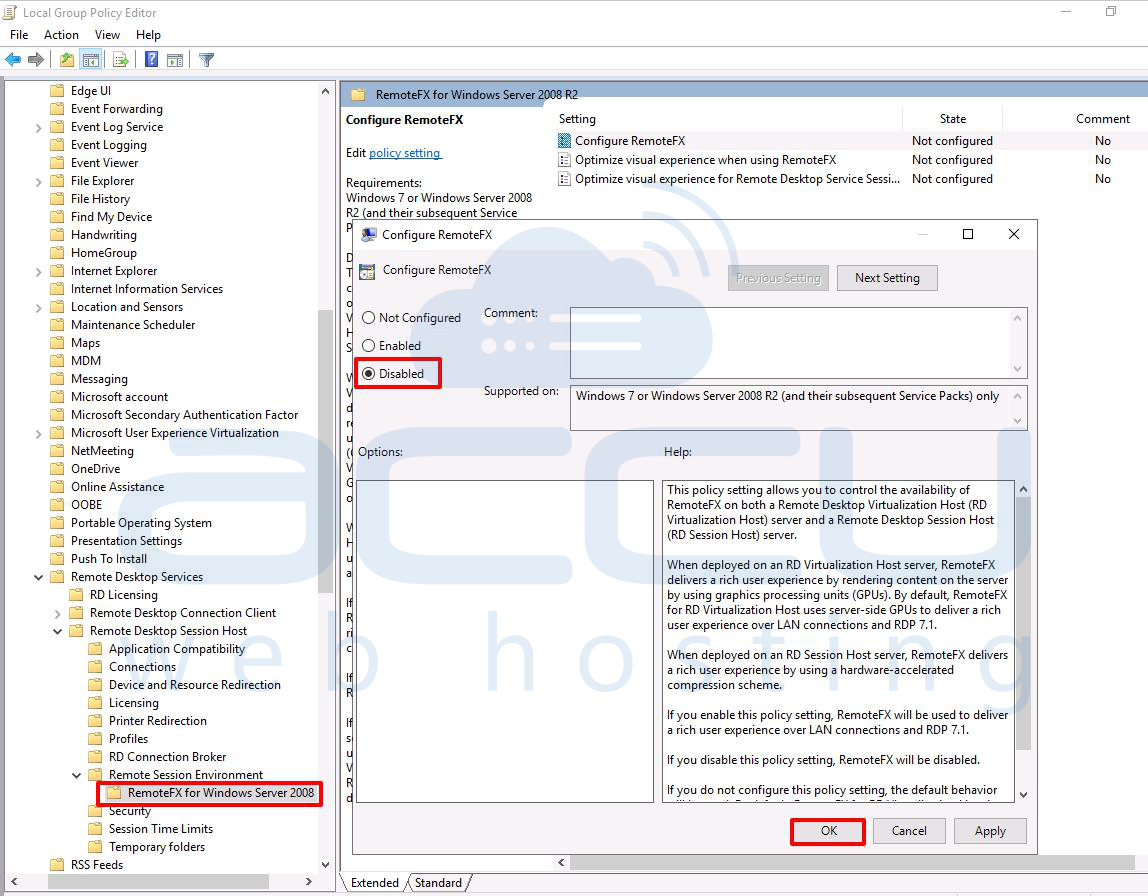
Step 3: Then navigate to Computer Configuration -> Administrative Templates -> Windows Components -> Remote Desktop Services -> Remote Desktop Session Host -> Remote Session Environment -> RemoteFX for Windows Server 2008 R2. Enable “Configure RemoteFX”.
Ensure you disable Computer Configuration -> Administrative Templates -> Windows Components -> Remote Desktop Services -> Remote Desktop Connection Client -> “Allow RDP Redirection of Other Supported RemoteFX USB Devices from This Computer.”
Enable RemoteFX USB Redirection
Step 1: Log in to your local Windows system (client), search for, and open “Edit Group Policy.”
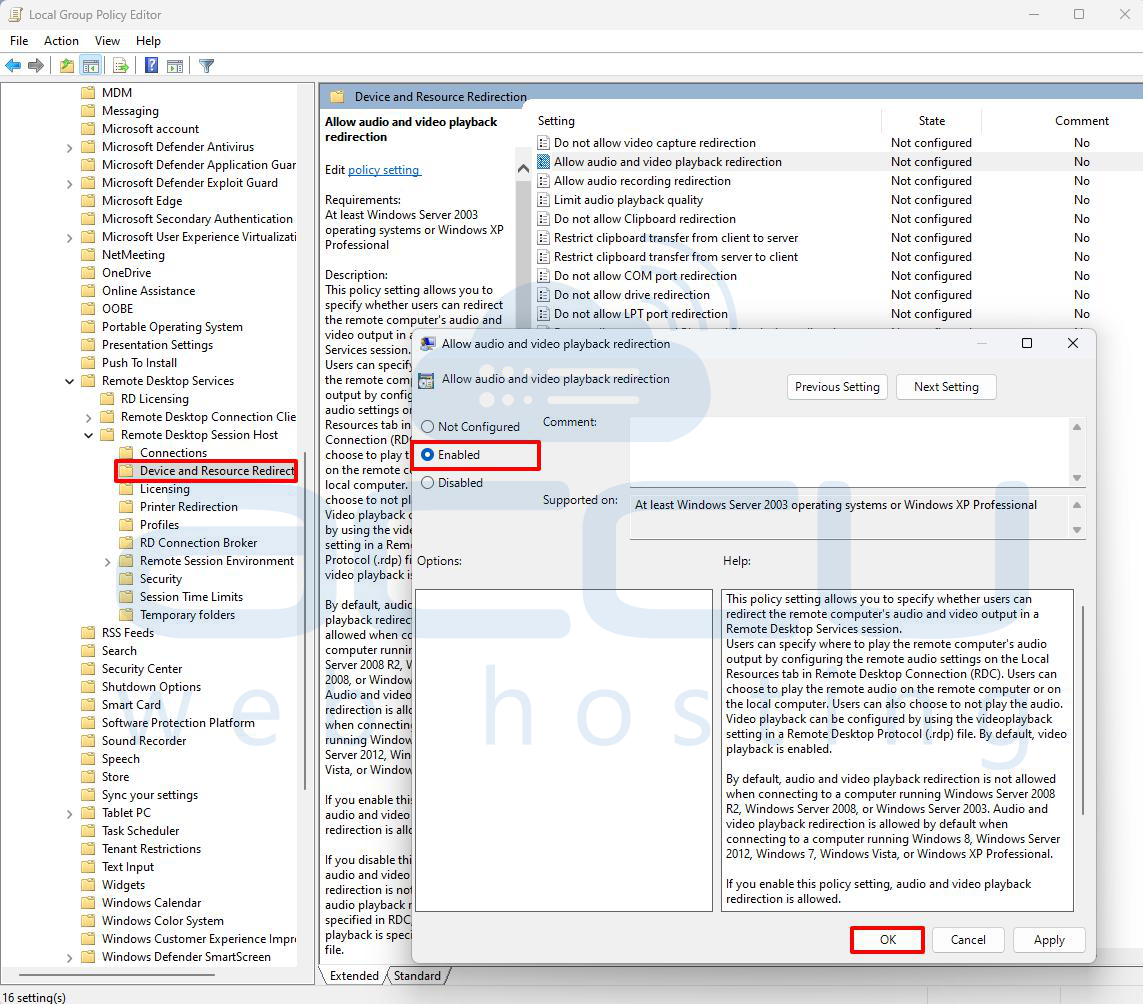
Step 2: Go to: Computer Configuration -> Administrative Templates -> Windows Components -> Remote Desktop Services -> Remote Desktop Session Host -> Device and Resource Redirection. Enable “Allow audio and video playback redirection.”
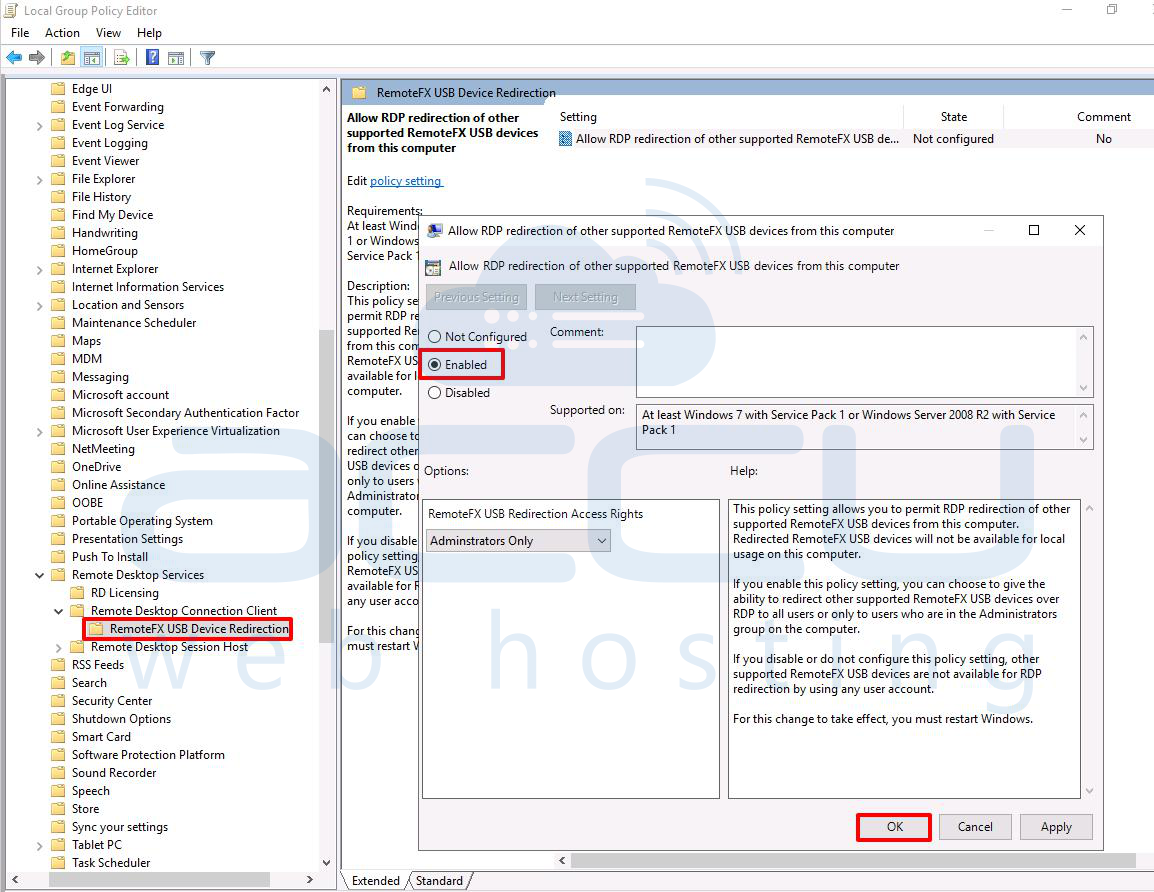
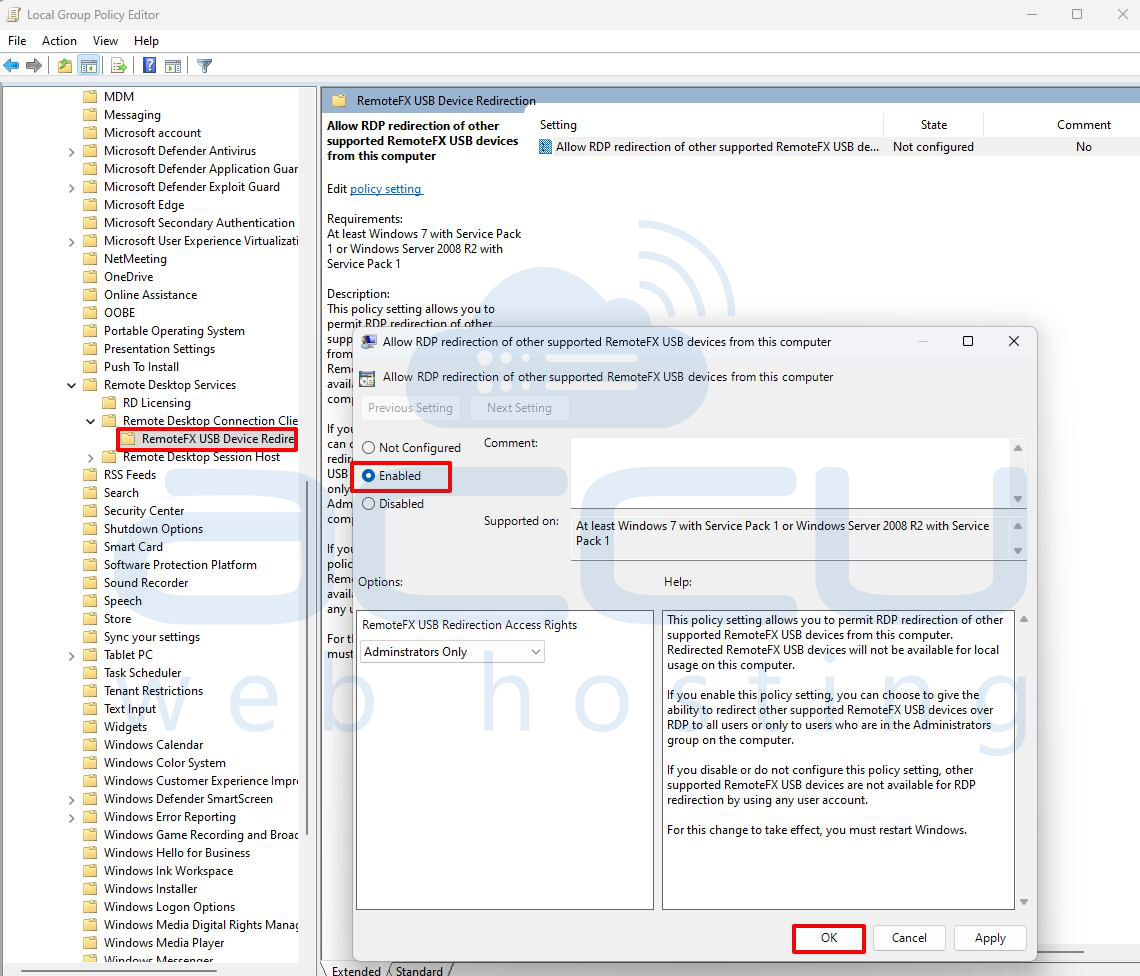
Step 3: Then navigate to: Computer Configuration -> Administrative Templates -> Windows Components -> Remote Desktop Services -> Remote Desktop Connection Client. Enable “Allow RDP Redirection of Other Supported RemoteFX USB Devices From This Computer.”
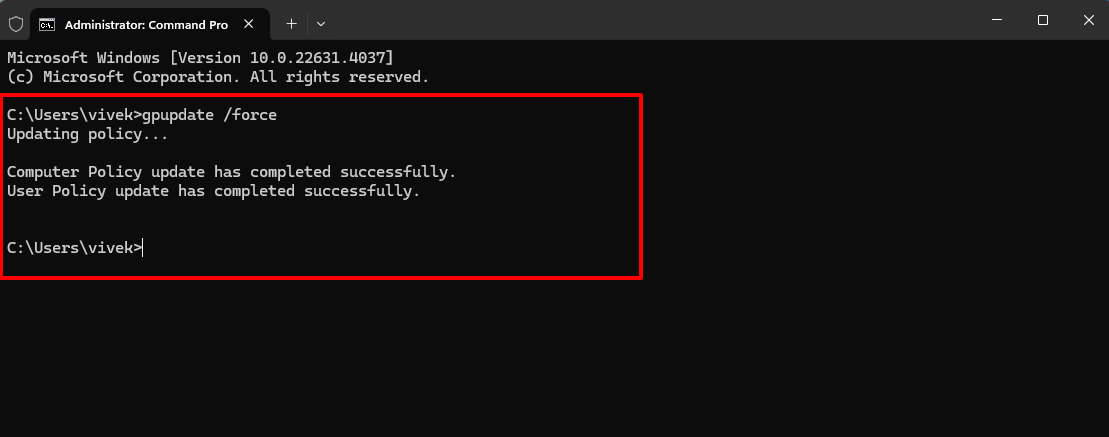
Step 4: Open Command Prompt (CMD) and run the command “gpupdate /force.”
Step 5: Search for “Remote Desktop Connection” or “mstsc” on your computer.
Step 6: Click on “Show Options” and go to the “Local Resources” tab.
Step 7: Click on “More.”
Step 8: Select all the options available under “Local devices and resources.”

Finally, enter the server credentials to proceed with the RDP connection.
Step 9: Once logged in, open "Server Manager."
Step 10: In "Server Manager," click "Add Roles and Features."
Step 11: Start the "Add Roles and Features Wizard" by clicking "Next."
Step 12: Choose "Role-based or feature-based installation" and click "Next."
Step 13: Select a server from the list and click "Next."
Step 14: Check the box for "Remote Desktop Services" and click "Next."
Step 15: Skip the components section by clicking "Next."
Step 16: Read the service description and click "Next."
Step 17: Choose the roles to install, selecting all except "Remote Desktop Virtualization Host."
Step 18: Agree to install the components by clicking "Add Features."
Step 19: Also, add the "Remote Desktop Session Host" role by clicking "Add Features," then click "Next."
Step 20: On the final page, check "Restart the destination server automatically if required," confirm by clicking "Yes," and then click "Install."
After the installation and restart, log back into your server, and you’ll be able to use your local webcam on the remote server.
Verifying Privacy Settings
If you still can’t access the webcam on Remote Desktop, the issue might be with your Windows system’s privacy settings. Follow these steps to check your privacy settings:
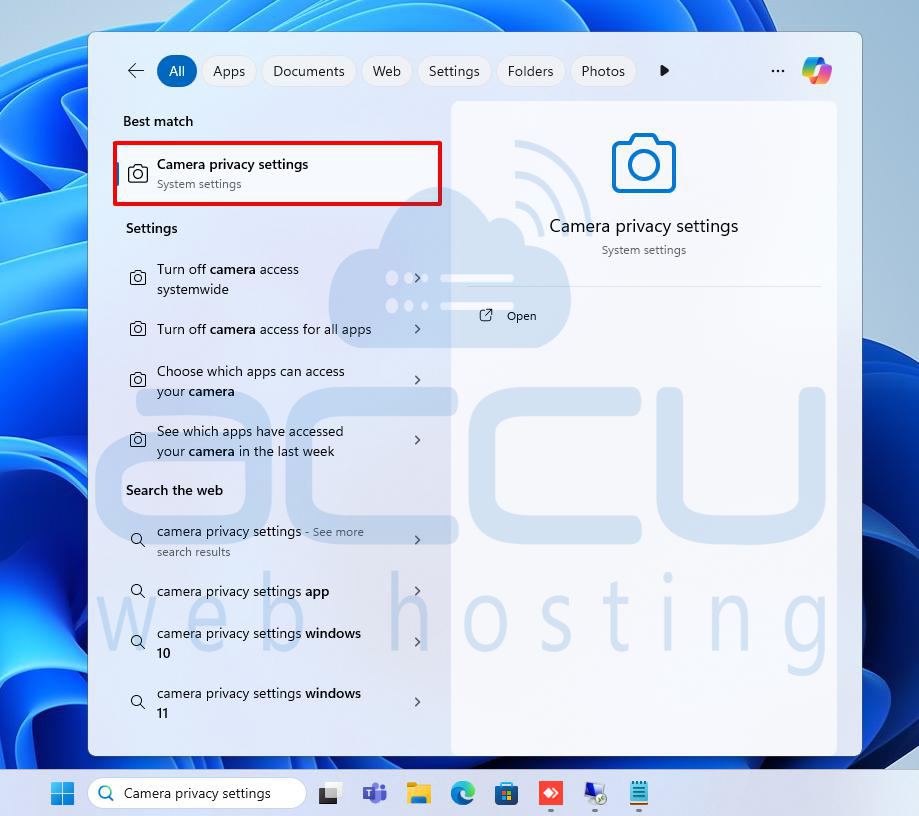
Step 1: Search for and open Camera privacy settings.
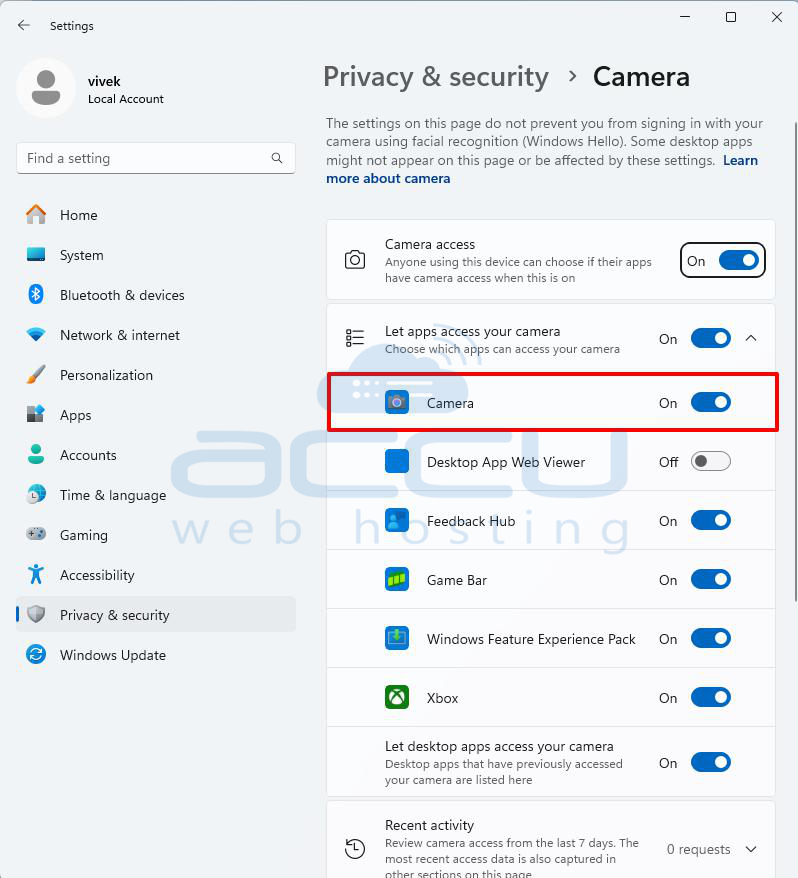
Step 2: Enable the option that allows apps to access your camera.
Conclusion
In this article, we discussed how to configure Remote Desktop webcam redirection. We covered both the regular HD webcam method and RemoteFX USB webcam redirection. You can access your local webcam during an RDP session with the right configurations and permissions. Alternatively, you can use the webcam on the remote desktop machine.
