You can use Windows' built-in Remote Desktop Connection application to save Remote Desktop Connection settings to an RDP file. You can export all the settings you made for the remote session to a file. You can quickly restore your preferences and options by double-clicking the RDP file you created the next time you need it.
Kindly follow the steps below to save the Remote Desktop Connection settings to the RDP file.
Step 1: Open the Remote Desktop Connection application by searching for Remote Desktop Connection in the Start menu or by running "mstsc" from the Command Prompt.

Step 2: Click on the Show Options button at the bottom of the window.

Step 3: Configure the desired options, including the remote address, username, display options, and other settings(You can set the other options like resolution, color depth, local resources, and so on.) you want to customize.
Go to the General tab, and click the Save As button to save the connection settings to an RDP file.

Step 4: Navigate to the location on your local drive where you want to save the RDP file. Enter the name of the file you wish to save and click on Save.
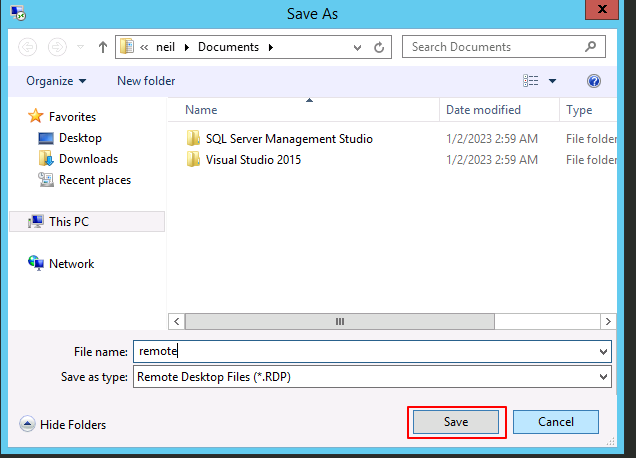
The selected connection settings will be saved to the specified RDP file.
Open the Saved RDP File
Step 1: Open File Explorer and navigate to the folder where you stored your RDP file. To establish the connection, double-click the RDP file.

Step 2: Enter the credentials to connect remotely to the computer, and click on the OK button.
Note: Credentials will not be saved with Remote Desktop settings.
Conclusion:
Saving your Remote Desktop settings into an RDP file is a simple yet powerful way to streamline remote connections. It ensures that your preferred configurations are retained, reduces setup time, and allows you to connect to your systems more efficiently. Whether for personal use or business needs, this method keeps your remote access smooth, consistent, and hassle-free.
