Installation Part:
While installing the MailEnable in the VPS or Dedicated server, you need to consider the following settings.
In the Domain Name field, you can enter the client's domain, company domain, or hostname on the product page.
In the DNS Hosts field, if the client has selected the Denver location for the VPS, you need to enter DNS IP addresses 72.18.139.226 and 72.18.139.227. If the client has selected other than the Denver location, such as London, Mumbai, Singapore, etc., you need to enter the DNS Server IP address 8.8.8.8, 8.8.4.4

Important Note:
8.8.8.8 is the Primary Google Public DNS Server, and 8.8.4.4 is the secondary Google Public DNS server. It makes the internet and DNS server speedily, safer, secure, and more reliable.
In the port field, you need to enter 25. 25 is the default SMTP Port.
Configuration Part:
It would be best if you considered the following mentioned setting while configuring the MailEnabled in the VPS or dedicated server.
There should be a correct binding for MailEnable WebAdmin and Webmail in the IIS. Below are steps on how to set the correct binding for MailEnable WebAdmin and WebMail from the IIS.
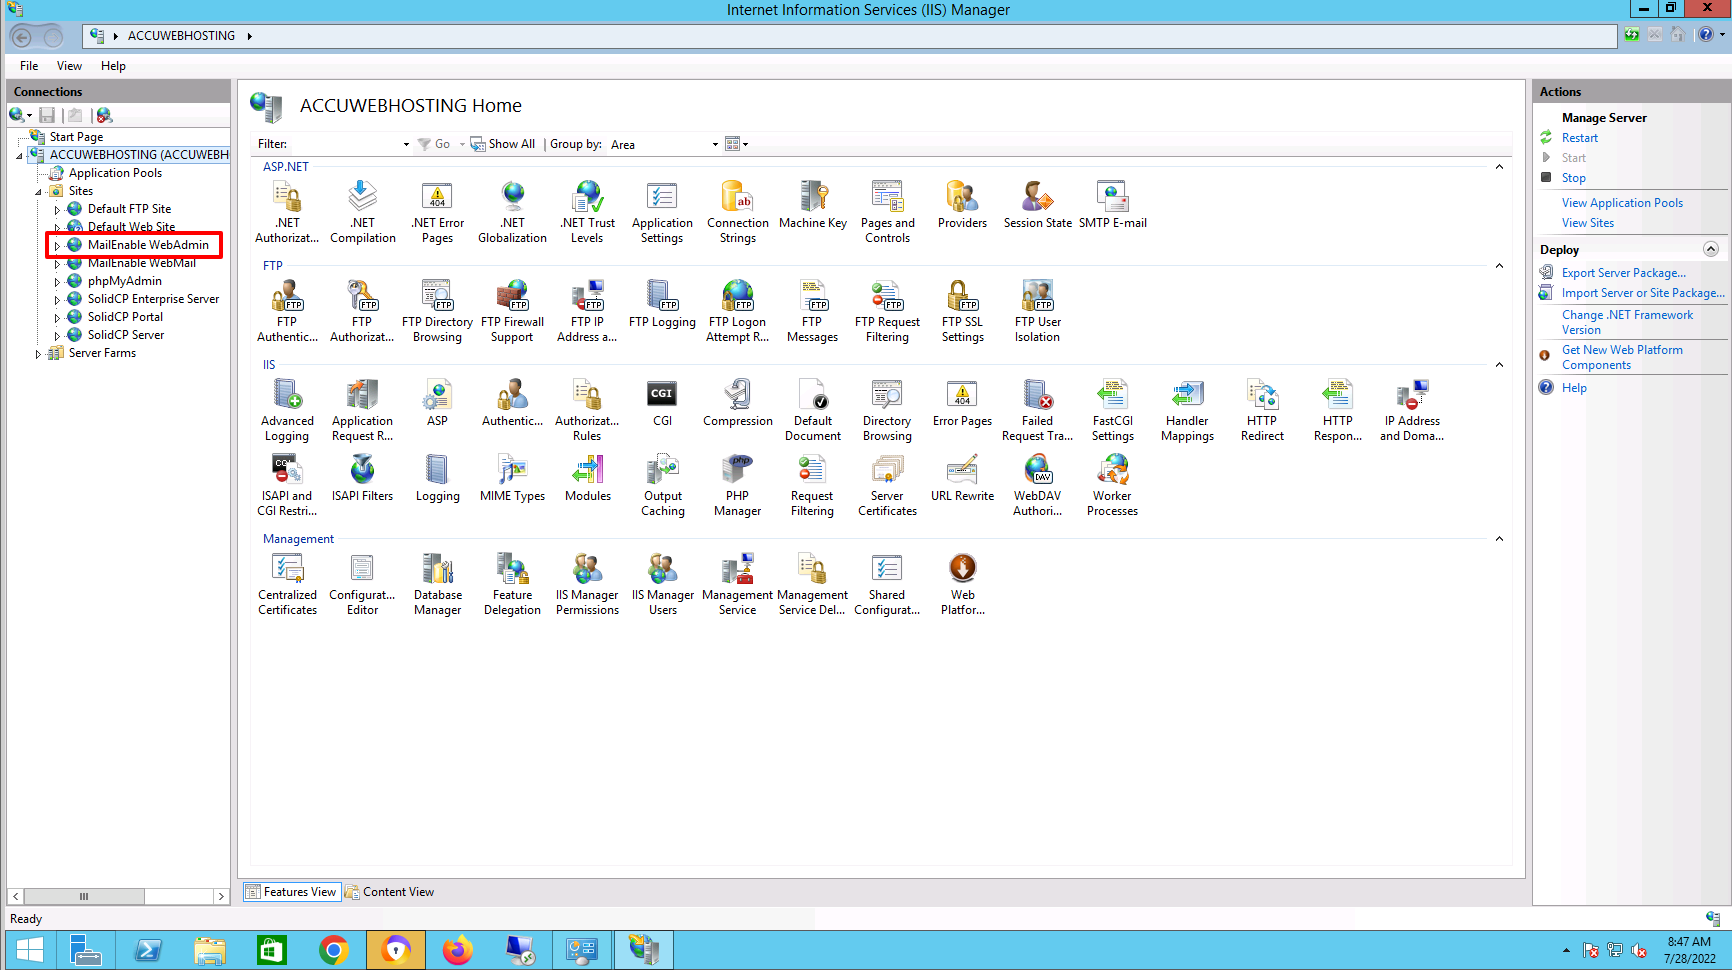
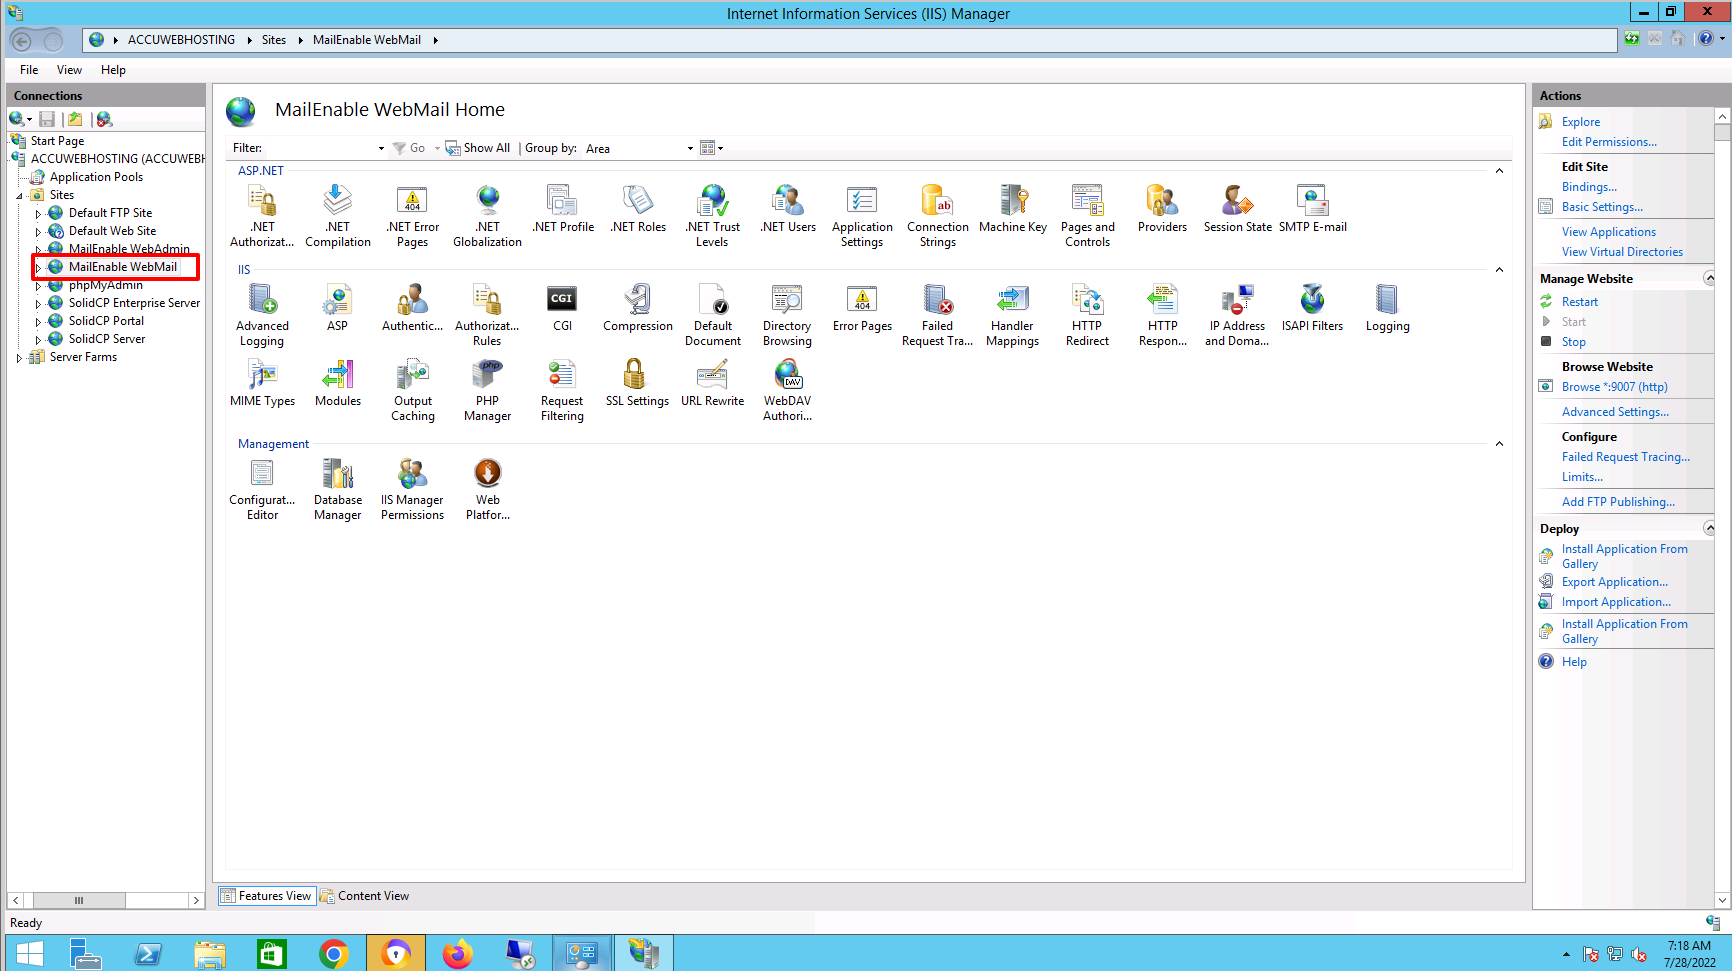
Step 1: Go to the Start button -> Administrative Tools -> Internet Information Services (IIS) Manager.
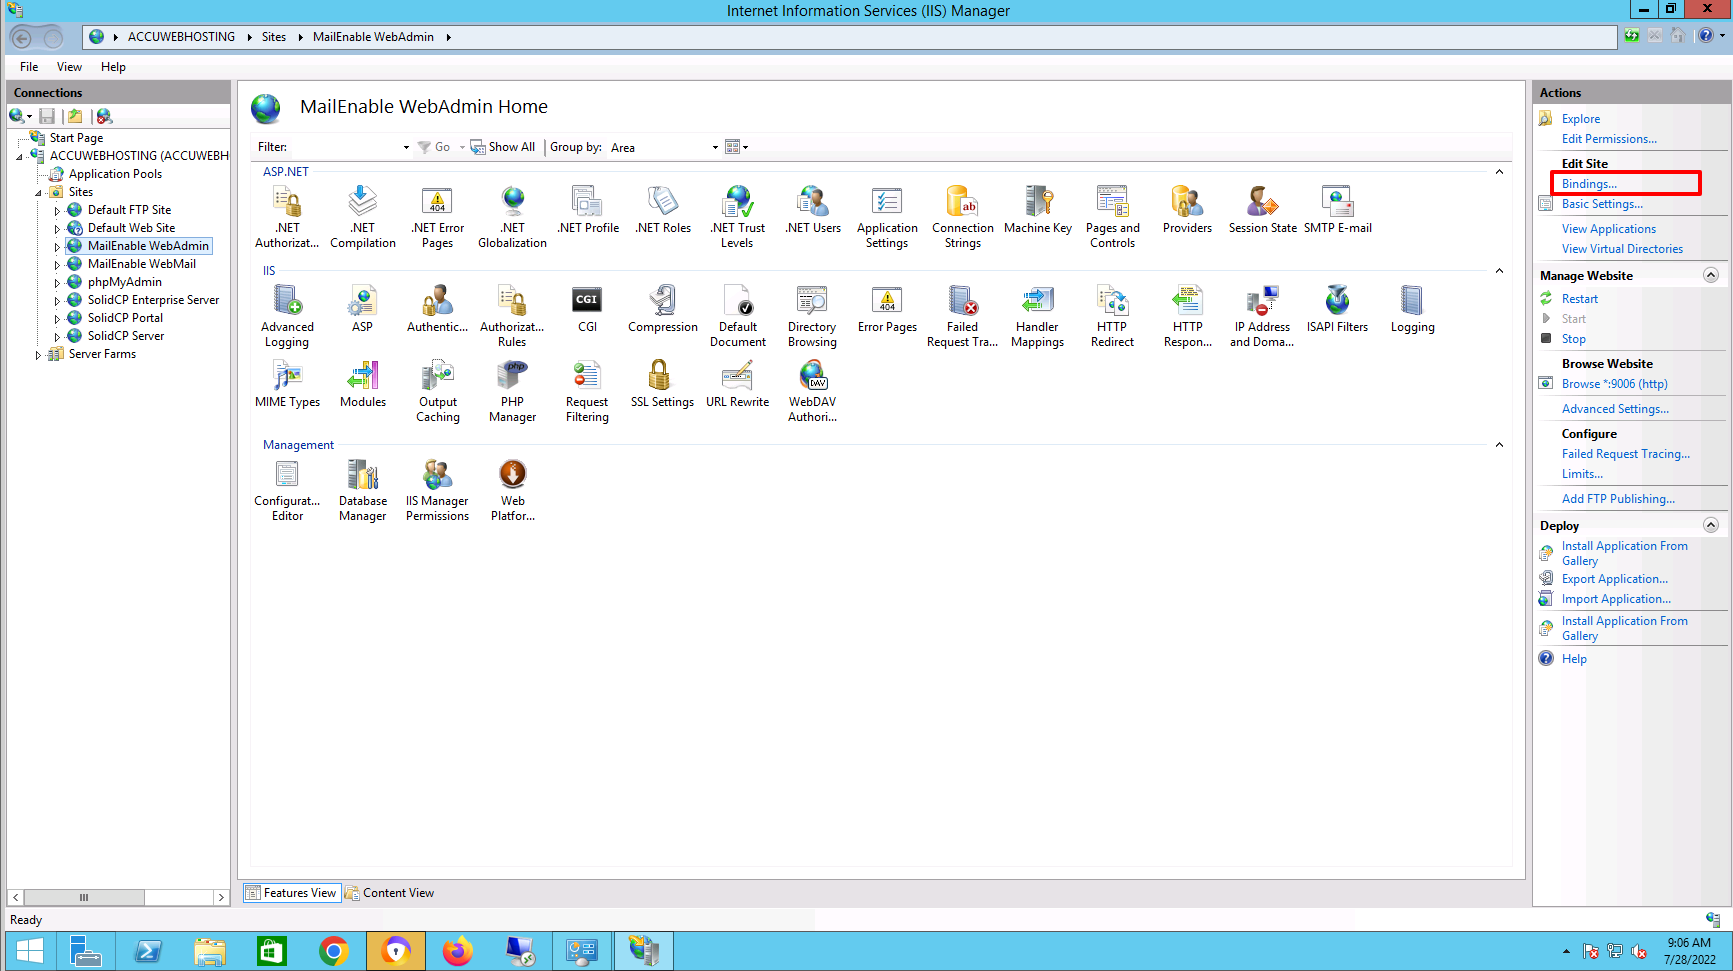
Step 2: Select the MailEnable WebAdmin site and go to the right side of the window.
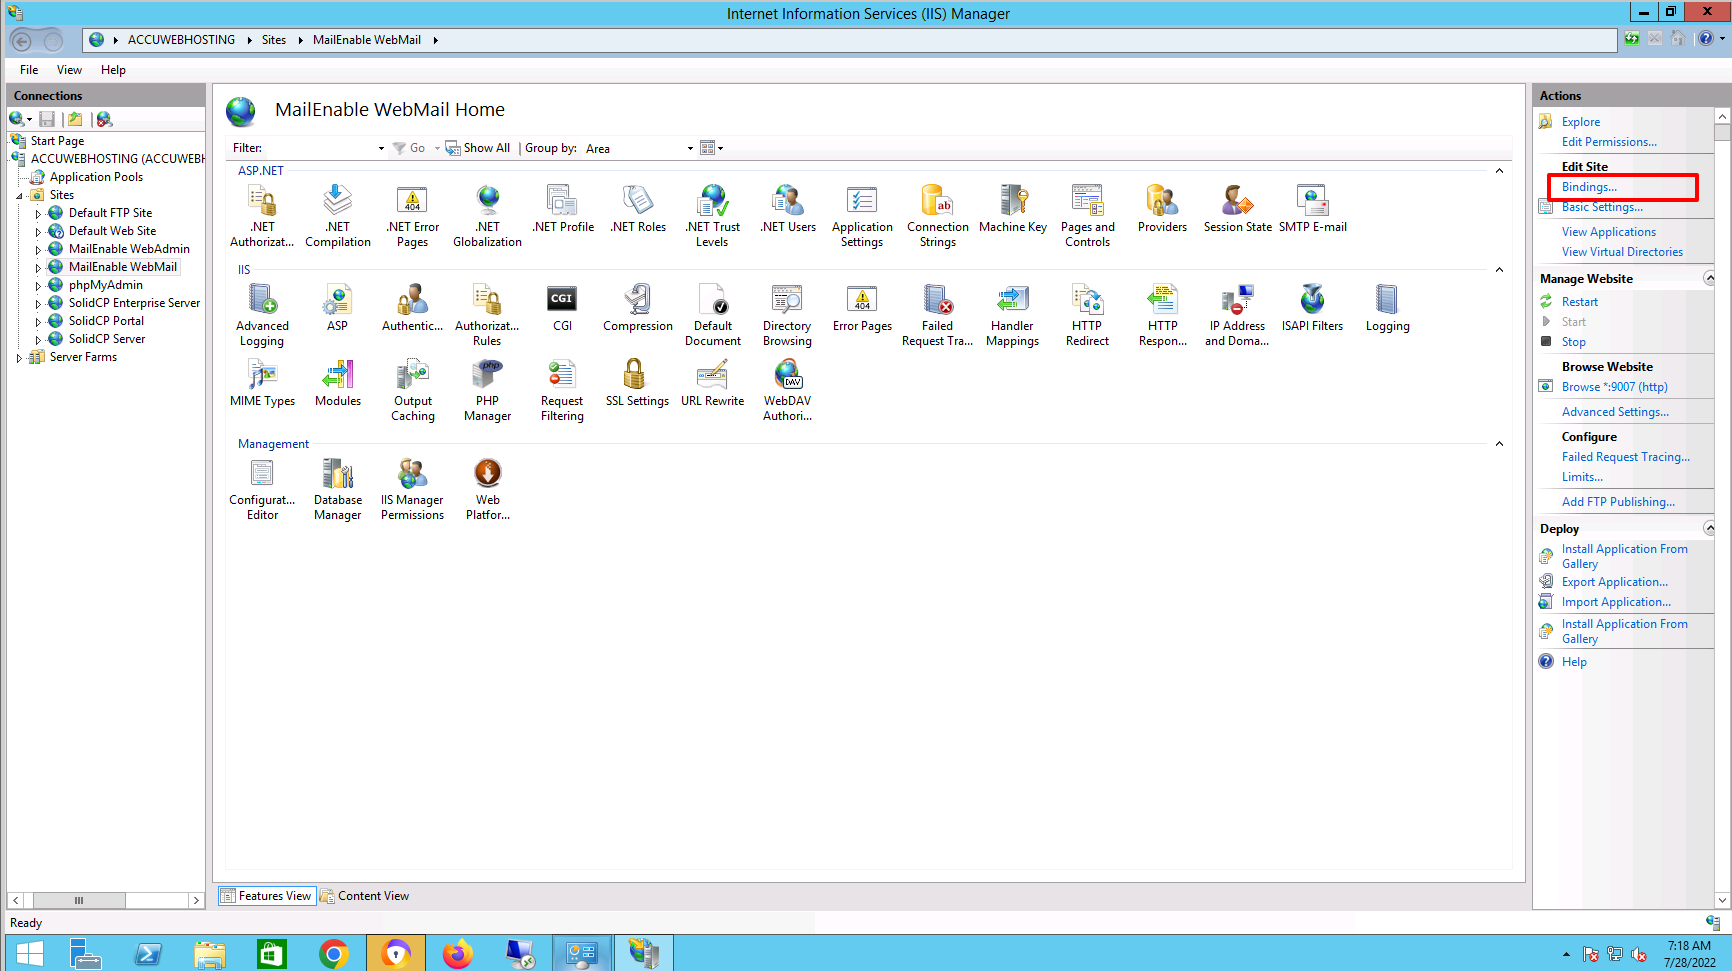
Step 3: Click on the Binding option just below of Edit Site option.
Step 4: Select the binding in the Site Bindings window and click on the Edit button.
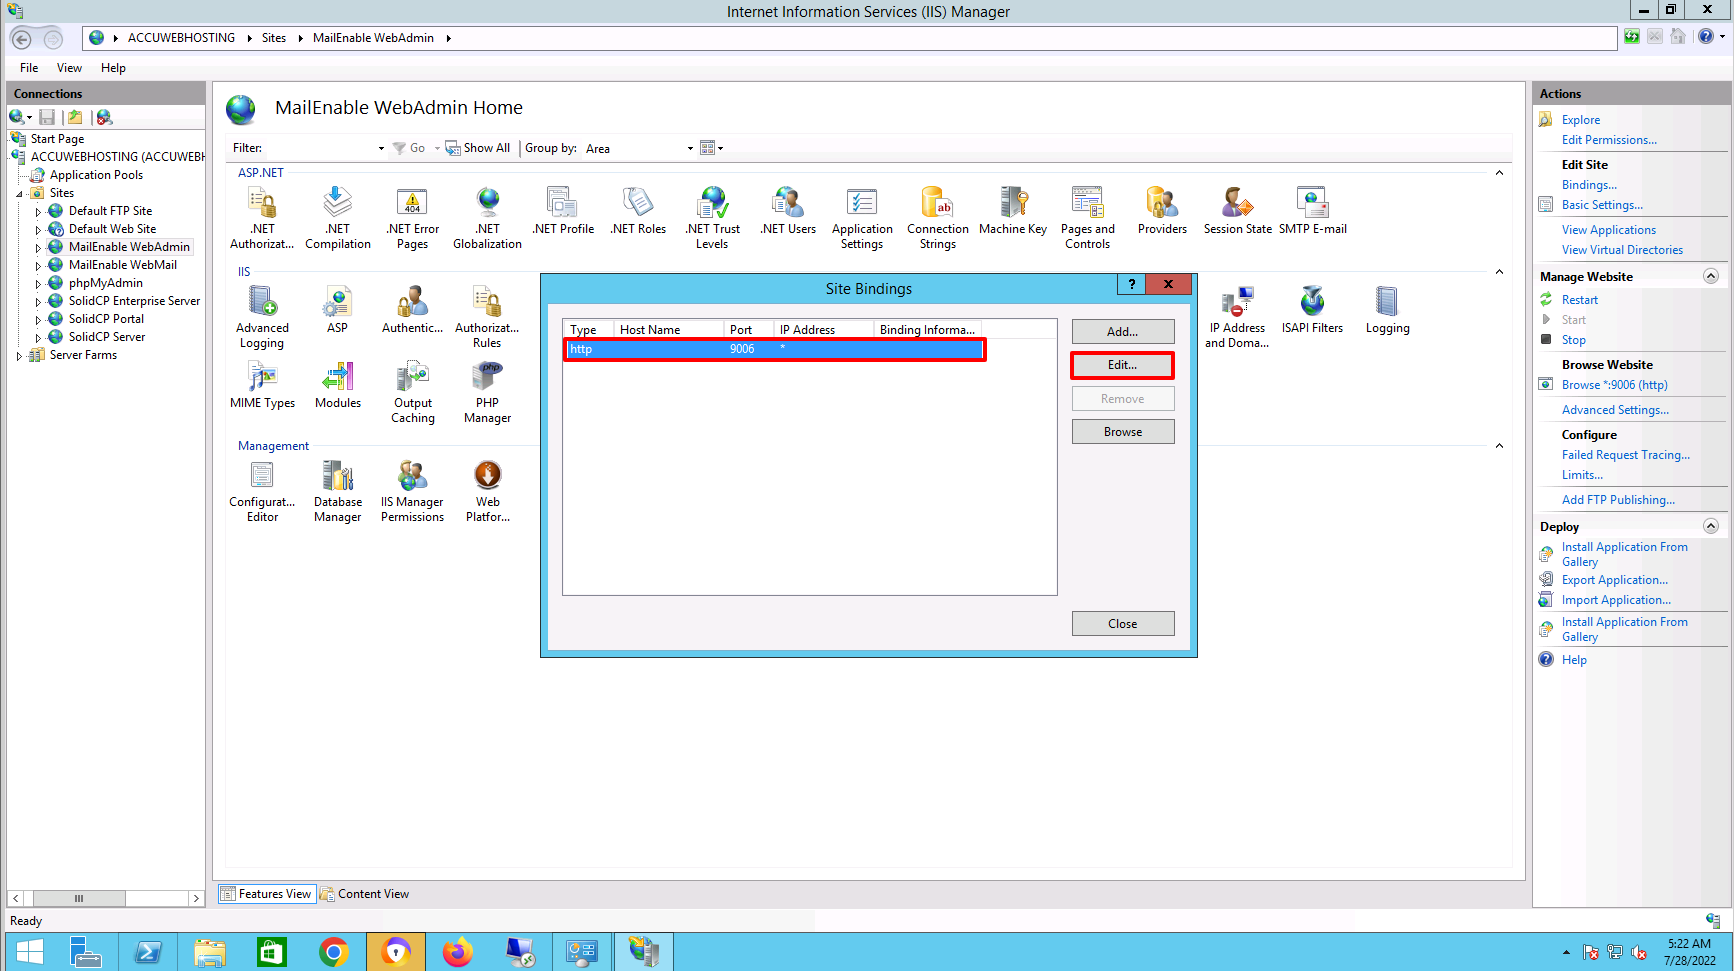
Step 5: Once you click on the Edit button, a new window will be opened with the name Edit Site Binding.
Step 6: In the IP address field, you need to select the IP address on which you want to bind the MailEnable Webadmin site.
Note: If your VPS has assigned 1 IP address, then you will get only one IP address in the IP address field.
Step 7: In the Port field, ensure that you have entered port number 9006.
Step 8: In the hostname field, if your domain name is live/active and you want to access the WebAdmin through the hostname such as webadmin.domainname.com, then you need to enter that hostname in the hostname field. Also, you need to enter the value 80 in the port field.
For example, suppose you have a domain name demovpstest.com and want to access the WebAdmin through a hostname such as webadmin.demovpstest.com, then you need to enter webadmin.demovpstest.com in the hostname field. Then, in the port field, you need to enter 80.
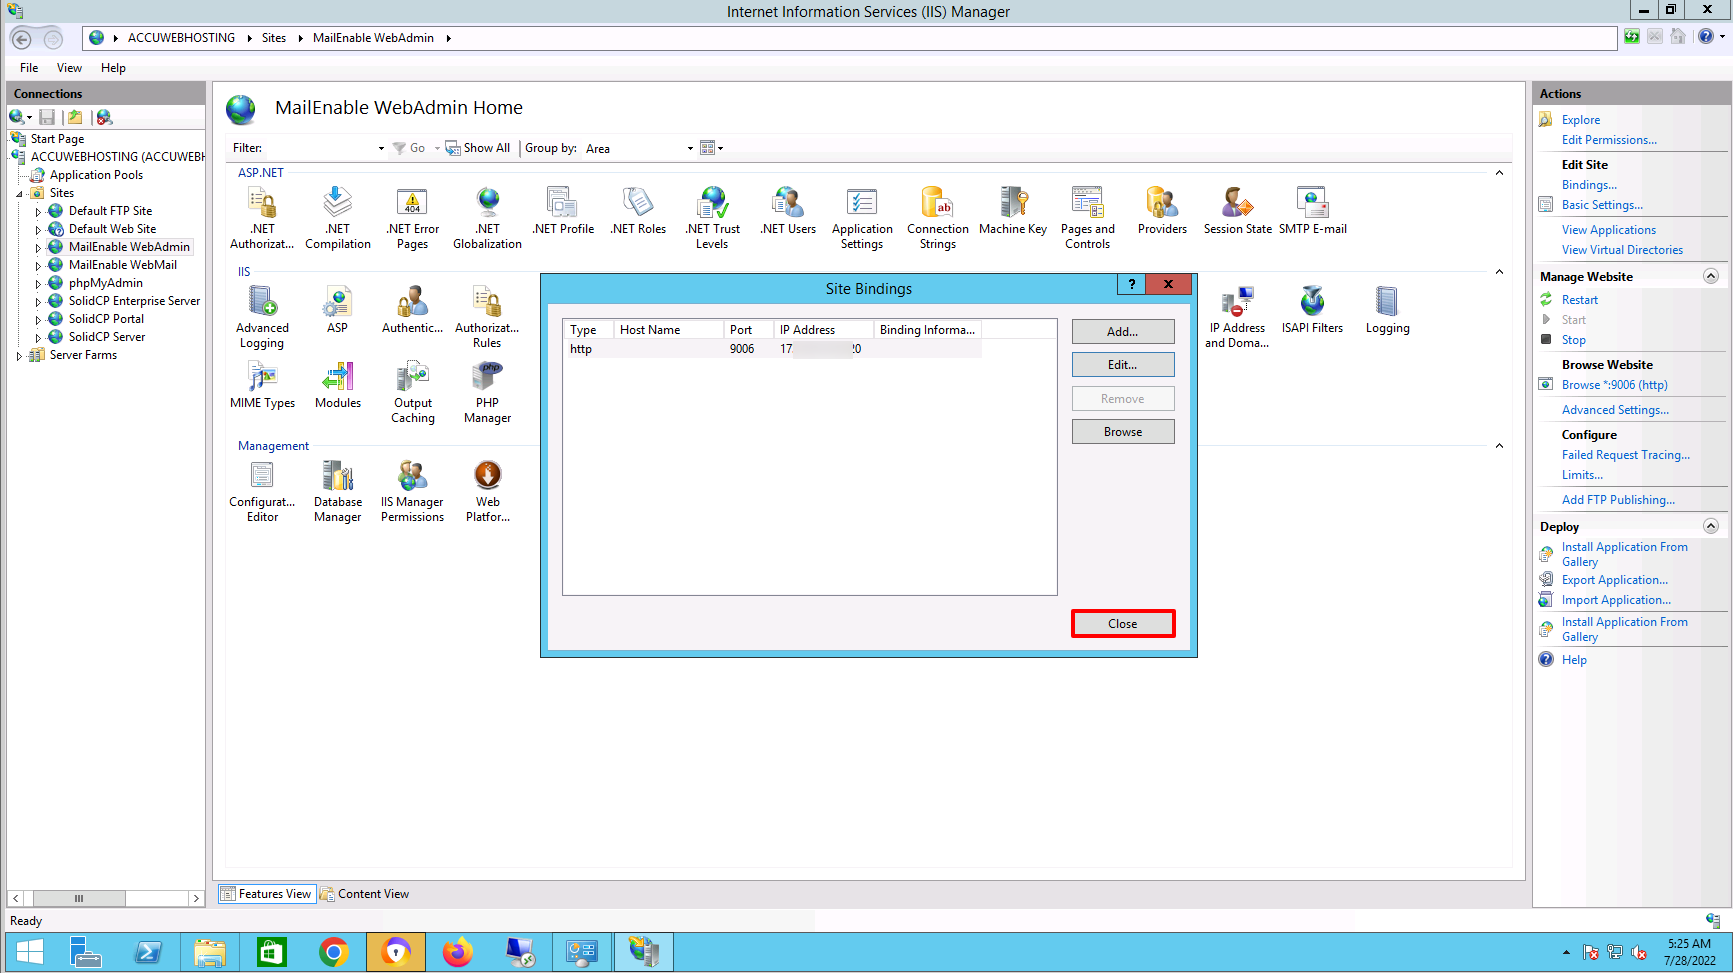
If you do not have any live domain name and want to open the webadmin through an IP address, then you need to keep the hostname field empty. Here, we have kept the hostname field as blank.
Step 9: Click on the Okay button to save the settings.

Step 10: Click on the Close button to close the Site Bindings window.
Step 11: Again, go to the left side of the window and click on the website MailEnable WebMail.
Step 12: Go to the right side of the window and click on the Binding option just below of Edit Site option.
Step 13: Select the binding in the Site Bindings window and click on the Edit button.

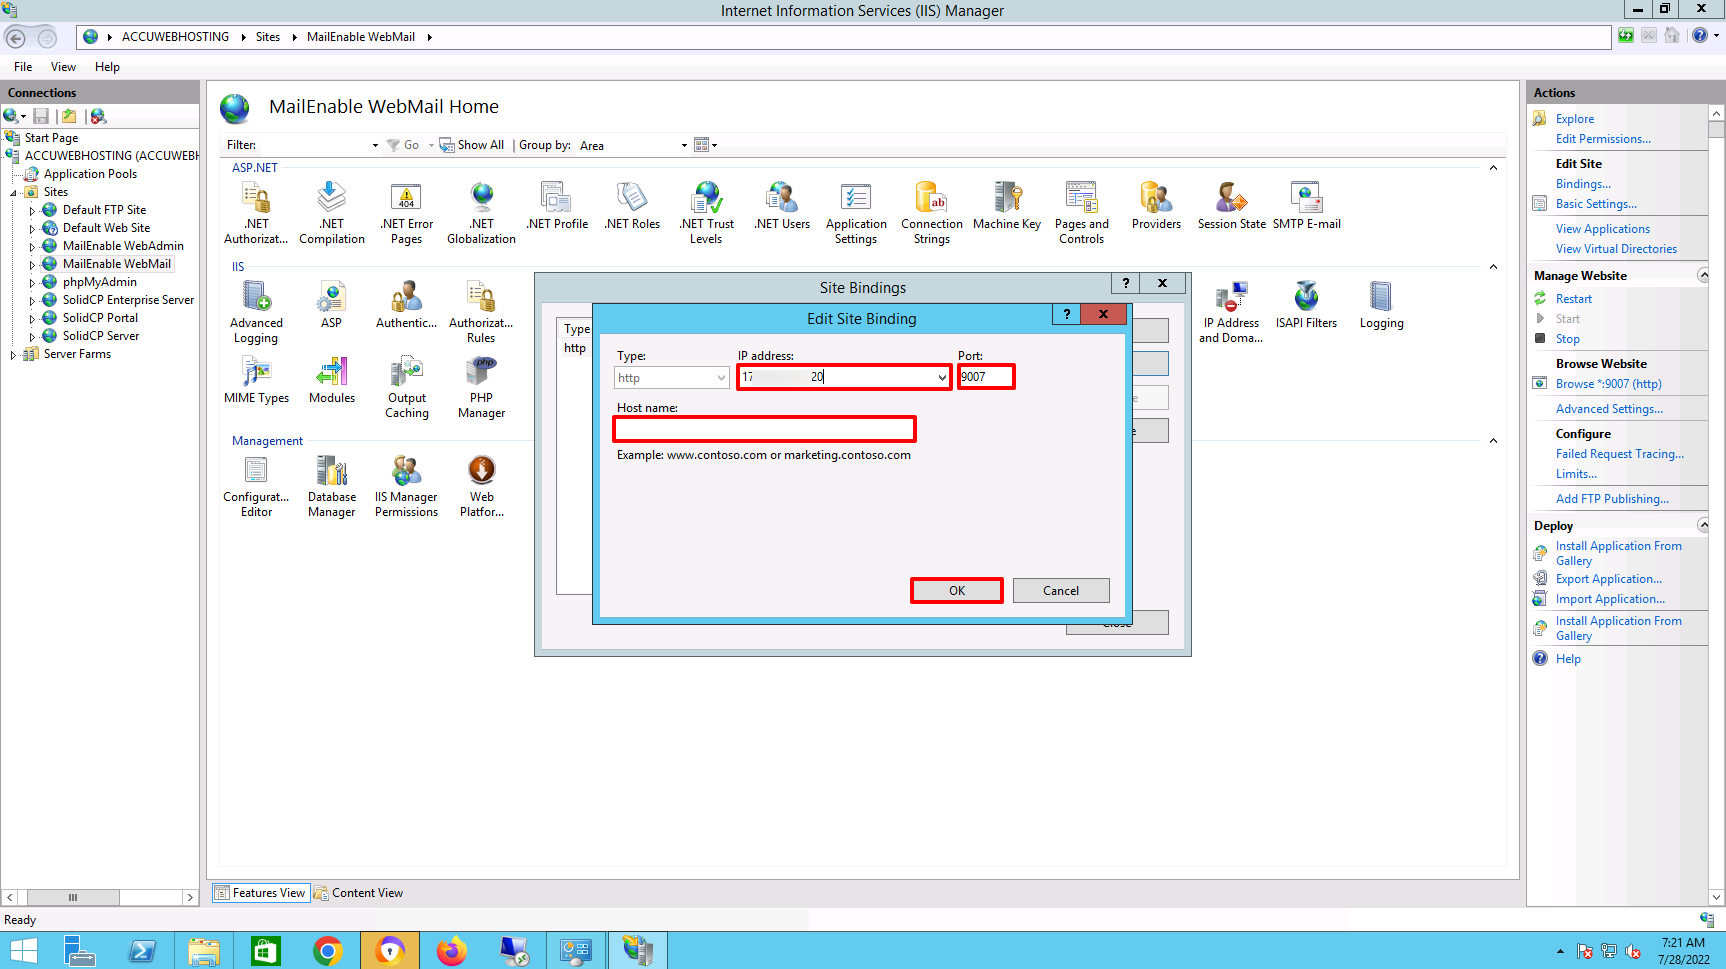
Step 14: Once you click on the Edit button, a new window will be opened with the name Edit Site Binding.
Step 15: In the IP address field, you need to select the IP address on which you want to bind the MailEnable Webadmin site.
Note: If your VPS has assigned 1 IP address, then you will get only one IP address in the IP address field.
Step 16: In the Port field, make sure that you have entered port number 9007.
Step 17: In the Hostname field, if your domain name is live/active and you want to access the WebMail through hostname such as webmail.domainname.com, then you need to enter that hostname in the hostname field. Also, you need to enter the value 80 in the port field.
For example, suppose you have domain name demovpstest.com and you want to access the WebMail through hostname such as webmail.demovpstest.com then you need to enter webmail.demovpstest.com in the hostname field. In the port field, you need to enter 80.
If you do not have any live domain name and want to open the webmail through IP address, then you need to keep the hostname field empty.
Here, we have kept the hostname field as empty.
Step 18: Click on the Okay button to save the settings.
Step 19: Click on the Close button to close the Site Bindings window.

If you want to access the WebMail and WebAdmin of MailEnable through an IP address from outside of the VPS or dedicated server, then you need to allow their port number in the VPS or dedicated server's firewall.
How to access WebMail and WebAdmin of MailEnable?
WebMail Access
You can access the webmail of MailEnable from the IP address and hostname. To access the WebMail through hostname, make sure that you have a live domain and have added the binding in the IIS. Also, ensure you have added the hostname record to the DNS server.
Access through IP address:
http://IP_Address:9007/
Access through hostname:
http://webmail.domainname.com
WebAdmin Access
You can access the web admin of MailEnable from the IP address and hostname. To access the WebAdmin through hostname, confirm that you have a live domain and have added the binding in the IIS. Also, verify that you have added the hostname record to the DNS server.
Access through IP address:
http://IP_Address:9006/
Access through hostname:
http://webadmin.domainname.com
Which port do we need to bind in IIS for the WebMail and WebAdmin?
For WebMail, we need to bind the port number 9007 in the IIS, and for webadmin, we need to bind the port number 9006 in the IIS.
